Latest Posts

Pickle That Herring!

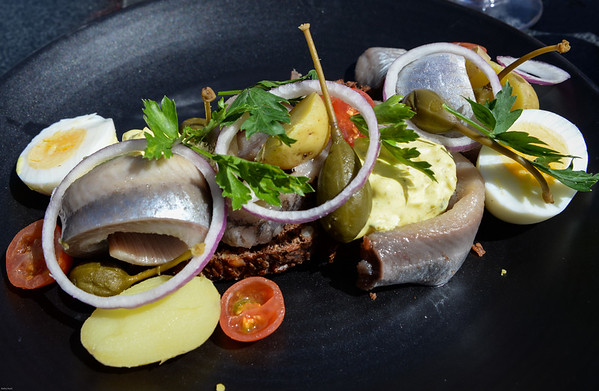
pickled herring platter

Pickled herring platter in Skagen, DK

Over the years of cooking, eating and writing about seafood I’ve developed a fascination with herring. Rich in flavor and high in omega-3 fatty acids, this ancient creature has sustained mankind for thousands of years. Small but mighty, it has been the foundation of such major cities as Amsterdam and also the root of such battles as the Anglo-Dutch Wars. Yet, in America most people don’t give this silvery fish a second glance. However, if you’re in Denmark, where I recently spent the past few weeks, you’ll get to know herring quite well.


It’s been said that the Danes have more pickling cures for herring than they do days of the year. I can believe this for, during three trips that I’ve made to Denmark, I’ve sampled at least two dozen types of tart and velvety pickled herring. Curried herring. Herring with dill and capers. Herring in cream sauce. Herring marinated in wine. Herring marinated in sherry. The list goes on and on.
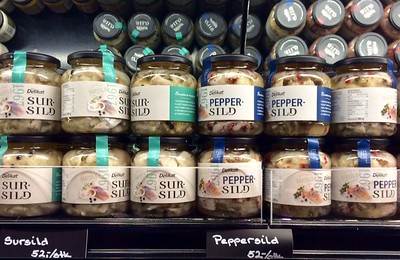
pickled herring

Market selection of pickled herring

With so much pickled herring being commercially produced, people tend to buy rather than preserve their own fish. You can, however, make this delicacy at home. All that you need are herring fillets, vinegar and spices, herbs or other flavoriing. If you’d like to try your hand at pickling, click on this link for a recipe for Branteviks Herring at Zester Daily.
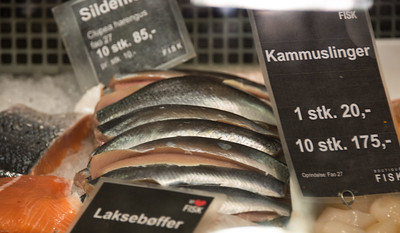
fresh herring

Silde, or herring, fillets in Copenhagen, DK

Why such an obsession with herring? During the Middle Ages freshly caught herring from the Baltic and North Seas became a driving force of Denmark’s, and much of Northern Europe’s, economy. Today, the country’s northernmost city, Skagen, remains a major presence in this industry.

Danish fishing boat

Fishing boat, with nets, in Skagen, DK

What do people do with all that pickled fish? Serve it on a mixed greens salad, on brown bread or crackers, as a smørrebrød, with hardboiled eggs, chopped and tossed with beets or alongside potato salad. The pairings are almost as unlimited as the cures.
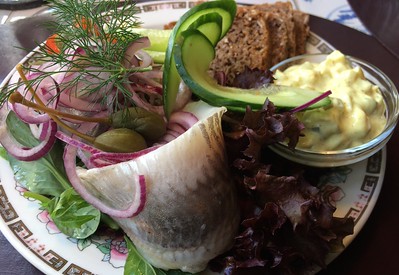
pickled herring platter

Pickled herring platter in Ribe, DK

OPEN-FACE PICKLED HERRING SANDWICHES
1 teaspoon capers, drained and rinsed
1 teaspoon freshly squeezed lemon juice
2 tablespoons fresh dill
1/4 teaspoon freshly ground black pepper
1/2 teaspoon Kosher salt
1/2 cup sour cream
4 slices multi-grain, rye, Danish brown or other hearty bread
4 leaves Bibb lettuce, cut to fit the bread
4 fillets of pickled herring
1/2 small red onion, thinly sliced
2 hard cooked eggs, sliced
4 to 6 cherry tomatoes, sliced

Place the capers, lemon juice, dill, salt, pepper, and sour cream in the bowl of a food processor or blender and pulse until well combined.

Spread the sour cream dressing over a slice of bread. Place the lettuce, herring, and equal amounts of onion and egg and tomato slices on top of the bread. Consume using a knife and fork as the Danes do.
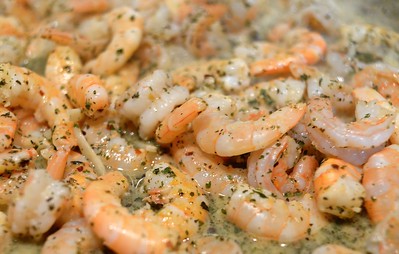
Spicy Shrimp Scampi

shrimp scampi

SPICY SHRIMP SCAMPI

Shrimp. It’s America’s favorite shellfish and, by some accounts, the country’s best selling seafood. Most Americans can rattle off at least one beloved shrimp recipe. Along with shrimp cocktail, the dish most often mentioned to me is shrimp scampi.

By definition scampi is not a culinary preparation but instead a small lobster—about 10 inches in length—found from Iceland to Morocco. In French it’s known as langoustine. The Italians refer to it as scampi. Others call it a Norway lobster or Dublin prawn. Yet, in North America, scampi has come to mean sautéing medium- to large-sized shrimp alongside garlic, butter and white wine and then serving the resulting dish over pasta. Go figure!
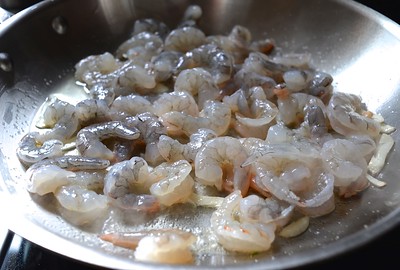
cooking shrimp

SAUTÉING THE SHRIMP

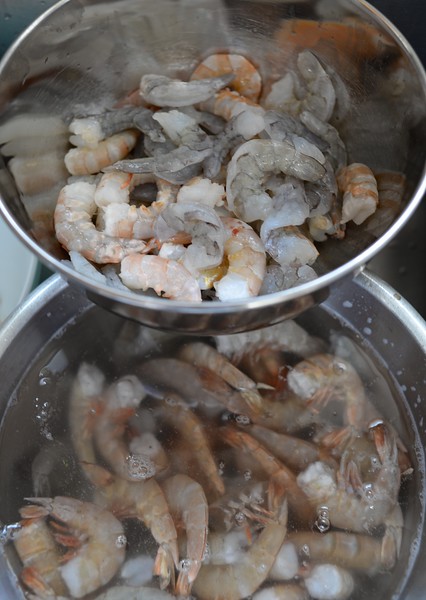
I’ve mentioned previously how you should purchase frozen shrimp and defrost the shellfish shortly before cooking. That way, you’re not buying already-defrosted-and-languishing-in-a-supermarket-seafood-case shrimp that you’re forced to cook right away. To defrost the shrimp, place the frozen bag in your refrigerator and allow the contents to thaw overnight. If you’re pressed for time, you can place the shrimp in a bowl filled with cold water and allow them to sit for 20 to 30 minutes. Whatever you do, don’t pop them into the microwave and hit the “defrost” button. You’ll end up with rubbery, singed shrimp.

When buying shrimp, I look at the size count. The smaller the count (i.e.16-20, 21-25, etc.), the larger the shrimp. I also get shell-on shrimp. The shells protect the shrimp, add flavor and can be used to make a delicious seafood stock. I likewise try to buy deveined shrimp. Although it’s not necessary to devein small shrimp, which are those falling into the 51-60 count and higher, keep in mind that, when you devein, you’re actually removing the shrimp’s intestinal track. Aesthetics aside, the vein does make some diners a bit squeamish.

defrosting shrimp

DEFROSTING FROZEN SHRIMP

This brings me to Spicy Shrimp Scampi. My version of the American favorite includes a touch of heat, courtesy of red pepper flakes, and, thanks to dried herbs, a bit of complexity. I also replace the butter with extra virgin olive oil.

SPICY SHRIMP SCAMPI
Serves 4

1/4 cup extra virgin olive oil, divided
2 pounds (26-30 count) frozen shrimp, defrosted and peeled
4 cloves garlic, peeled and sliced
2 teaspoons dried marjoram
1 1/2 teaspoons dried parsley
1 teaspoon dried oregano
1 teaspoon red pepper flakes or to taste
1/4 teaspoon dried basil
1/2 cup dry white wine
1 pound cooked linguine or fettucine, optional, for serving

Place 2 tablespoons extra virgin olive oil in a large sauté pan and heat on medium-high. Once the oil is shimmering and hot, add the shrimp and garlic. Reduce the heat to medium.

Cook the shrimp for 2 minutes before turning them over and allowing them to cook on the other side for another minute.

Add the dried herbs, red pepper flakes, remaining olive oil and wine and toss to combine. Simmer the ingredients together until all the shrimp have curled slightly and turned coral in color, 1 to 3 minutes. Remove the pan from the heat. Pour the scampi into a large bowl or toss it together with the pre-cooked linguine. Serve hot.

Toasted Almond Aquavit

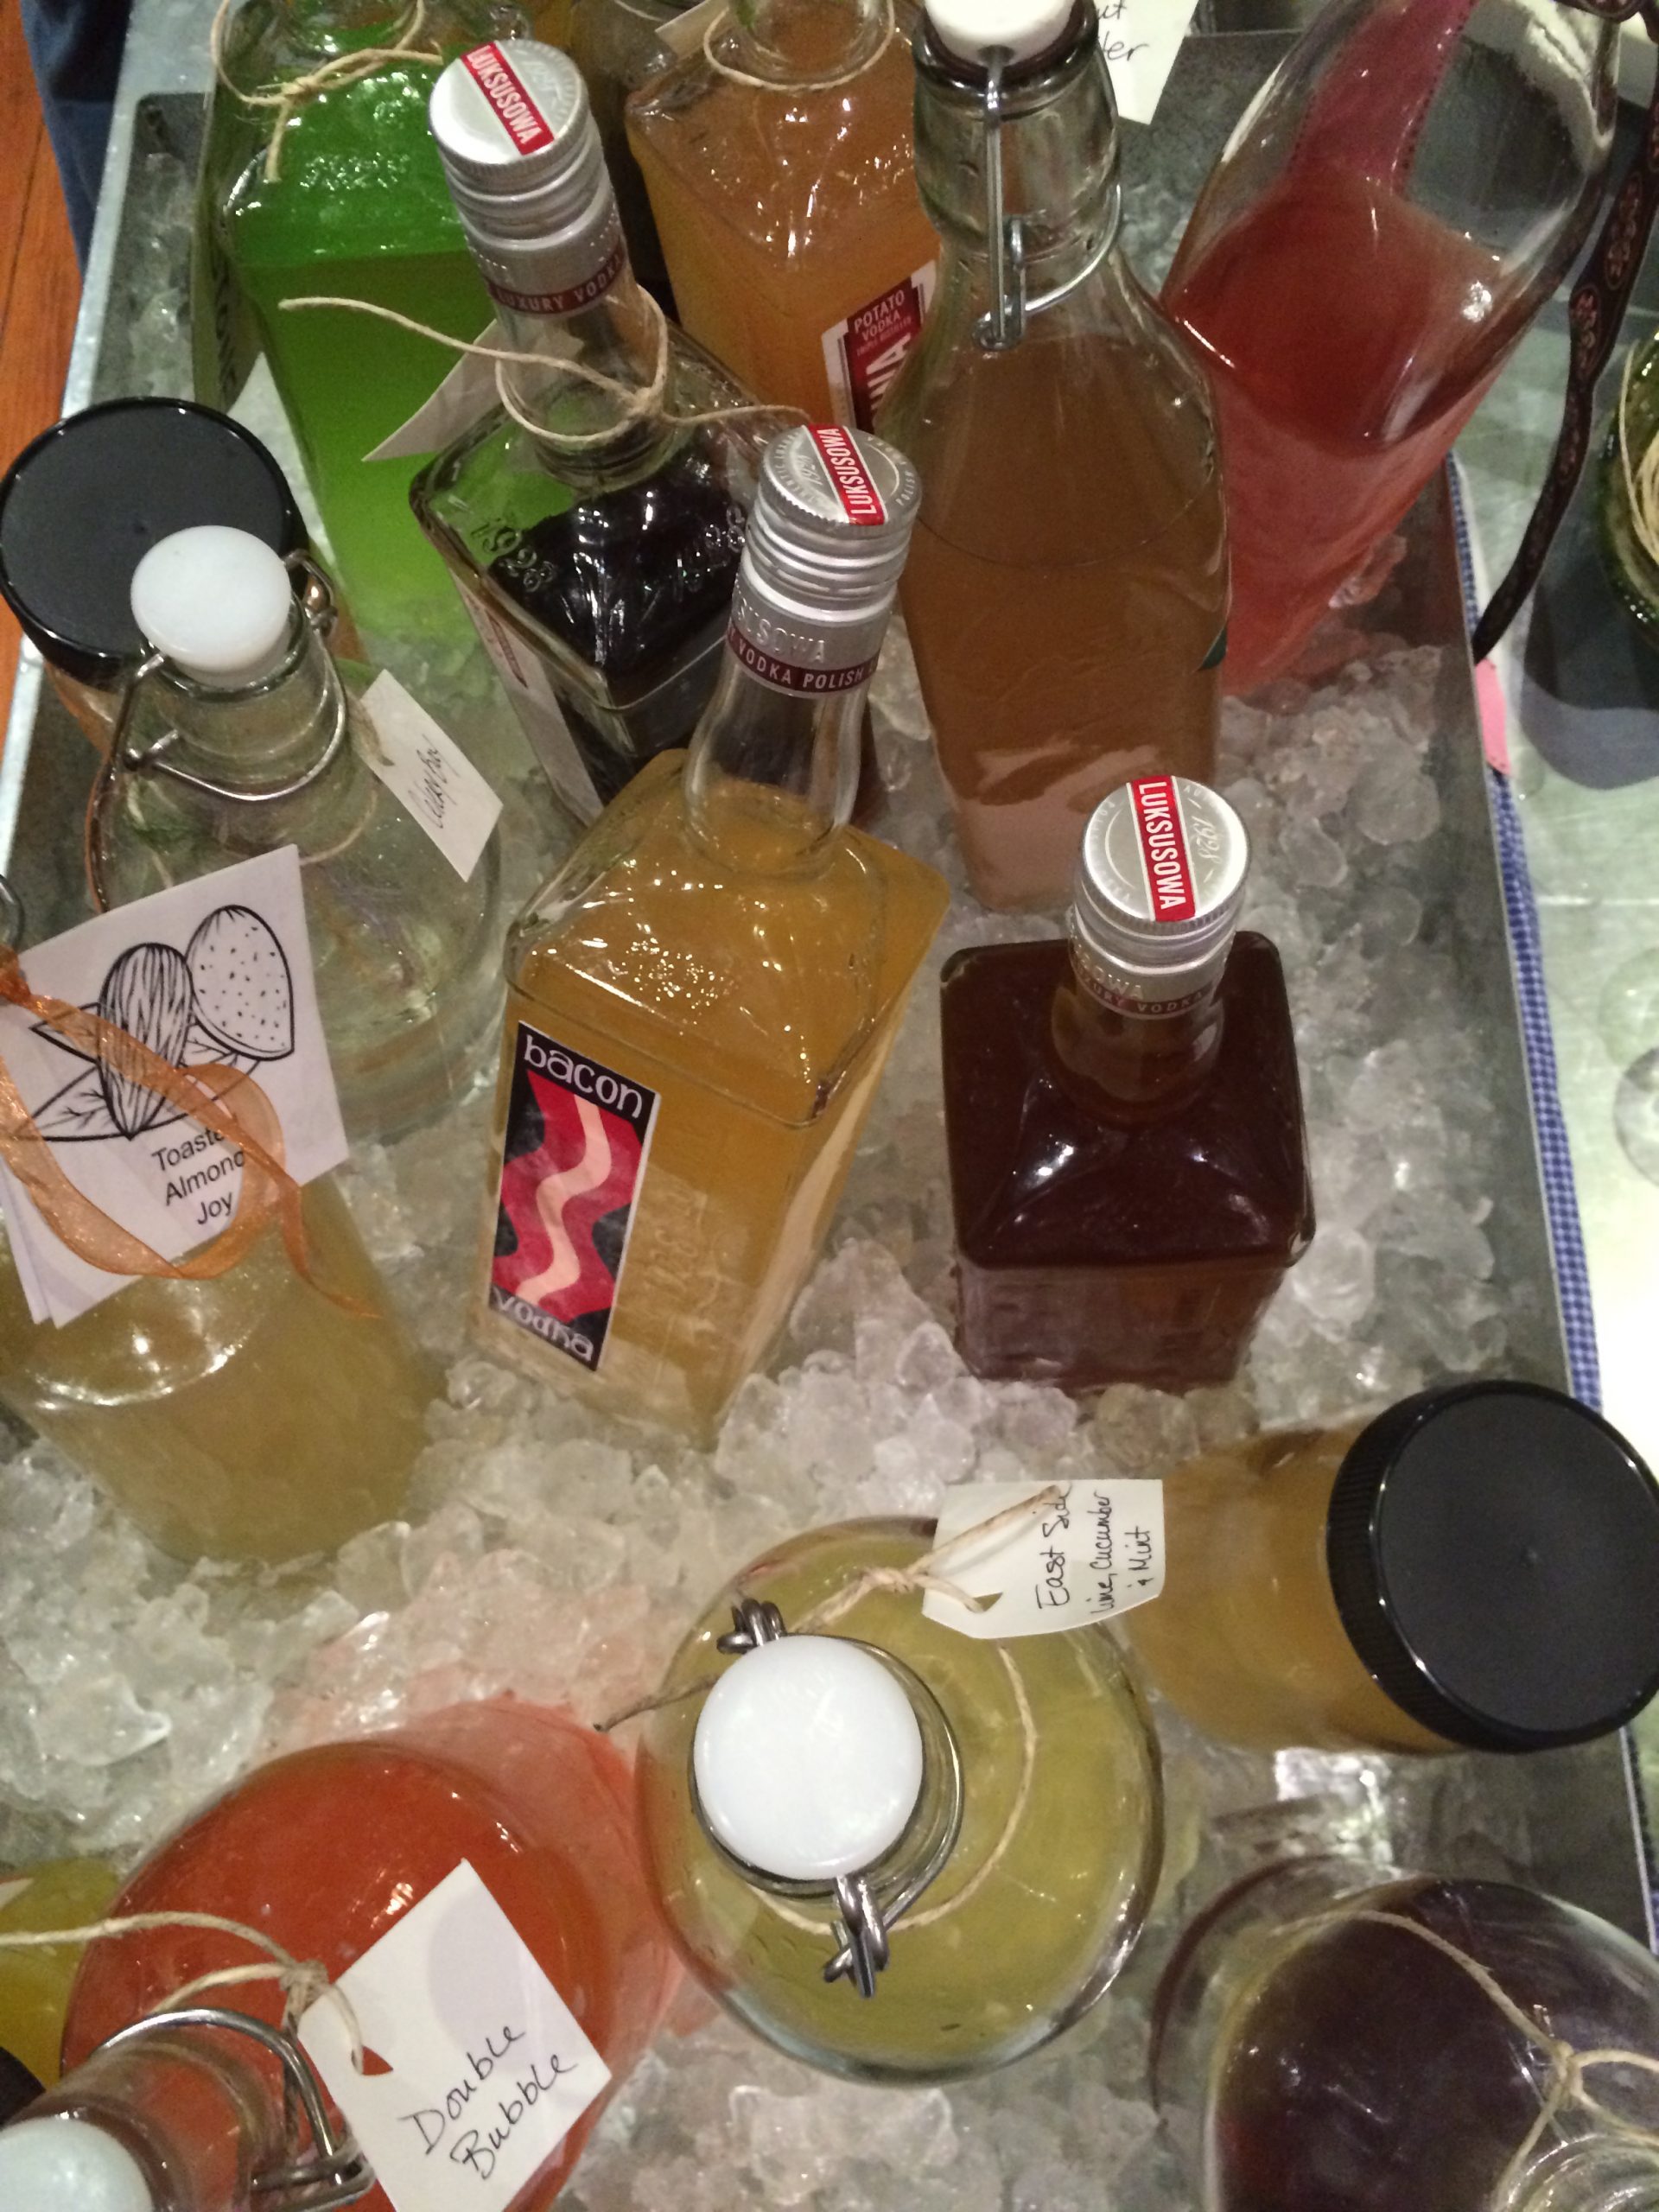
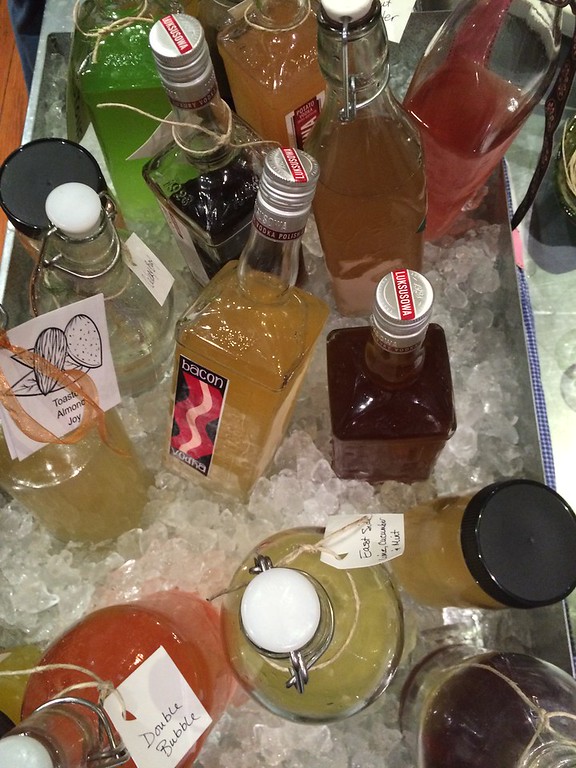
lots of aquavit
It has become a beloved, albeit unusual, Easter tradition. For the past few years on Easter eve my husband and I have gathered together with friends to nosh on such Scandinavian specialities as gravlax, pickled herring, rye crisps and pickled beets and sample each other’s take on infused vodka or, as we like to call our creations, homemade aquavit.

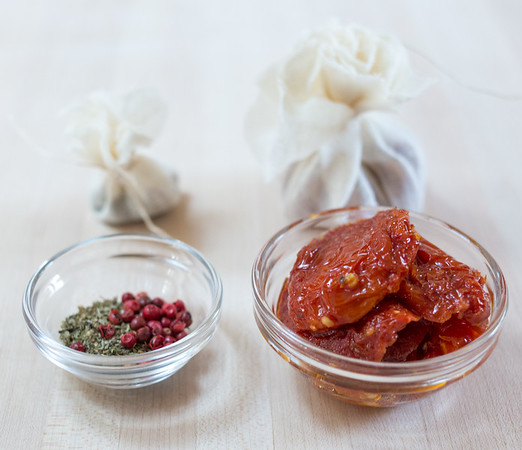
In the past I’ve made sweet concoctions such as raspberry and apple pie aquavits. This time around I decided to take a savory approach and steep bouquets garnis of chopped sun-dried tomatoes, marjoram and crushed red peppercorns. I assumed that the resulting liquor would go well in Bloody Marys or on its own as a Mediterranean-inspired libation. Unfortunately, my pairing resulted in a decent drain cleaner but an atrocious smelling and tasting drink.

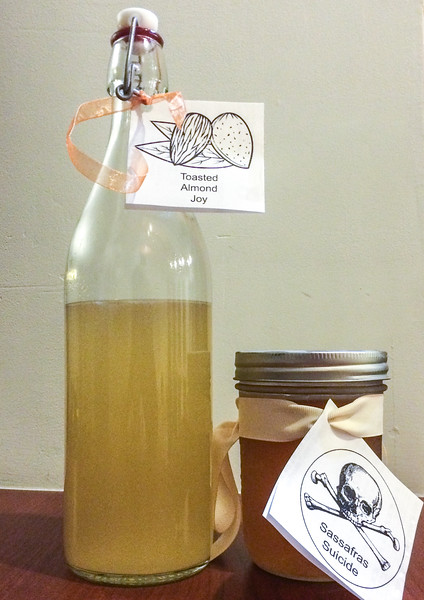
Luckily, we had a Plan B and Plan C in place. A few weekends before the fete my husband drove to our old neighbors Frank and Jane’s farm and dug up some roots from a sassafras tree. Ever hear of sassafras? It’s the stuff from which our ancestors brewed root beer and sassafras tea. Our goal was to clean, chop and add the roots to vodka for a fabulous sassafras liquor. Great booze we did get but we also crafted something that, according to our friend Jane, could poison everyone. The FDA and online sources such as WebMD state that sassasfras contains the chemical safrole, which, in large amounts, can be toxic to consume. Since no one wants to inspire a Jonestown kind of night, I dug out the ingredients for Plan C, Toasted Almond Aquavit. Made from toasted blanched almonds, vanilla bean pod, simple syrup and vodka, it offered a safe, albeit, sweet alternative to “Sassafras Suicide.”

As with any infused liquor, the longer that you allow the nuts and vanilla to steep in the alcohol, the stronger the resulting flavor will be. If you are extremely time-pressed, you can add a smidgen of almond extract to the mixture to boost the flavor of the Toasted Almond Aquavit. Even then, you should allow at least a week or more for the ingredients to meld together.

TOASTED ALMOND AQUAVIT
Makes 4 cups
Note: Takes a minimum of 2 weeks to infuse

for the liqueur:
1 cup blanched almonds, toasted and roughly chopped
2-inch vanilla bean, split
3 1/2 cups potato vodka
1/4 to 1/3 cup simple syrup (see below for recipe)
1/2 to 1 teaspoon almond extract, optional and to taste

for the simple syrup:
1/2 cup granulated sugar
1/2 cup water

Place the almonds, vanilla bean and vodka in a large, lidded jar. Stir the ingredients together, put on the lid and place the jar in a cool spot. For the next two to four weeks shake the jar at least once/day to stir the ingredients together. As time passes, the vodka will change from transparent to a murky golden yellow.

When you are ready to decant the liquor, you will need to make the simple syrup. To do this, place 1/2 cup sugar and 1/2 cup water in a small saucepan and bring to a boil over medium-high heat. Stirring frequently, allow the sugar to dissolve and the liquid to reduce slightly, 1 to 3 minutes. The liquid should remain clear and not begin to color. Remove the pan from the heat and cool the syrup to room temperature.

Once the liquid has cooled, add 1/4 to 1/3 cup simple syrup to the vodka mixture and stir vigorously to combine. Taste and add more simple syrup if desired. If you are adding the optional almond extract to the liquor, do so at this time, tasting and adding more as needed.

Line a funnel-shaped strainer or colander with a folded piece of cheesecloth. Placing the strainer over another large jar or container, pour the aquavit through the strainer and into the new jar. Discard the cheesecloth containing the nuts and vanilla bean.

Using a funnel, pour the strained aquavit into a bottle or another lidded jar. Seal and refrigerate the Toasted Almond Aquavit until cold.

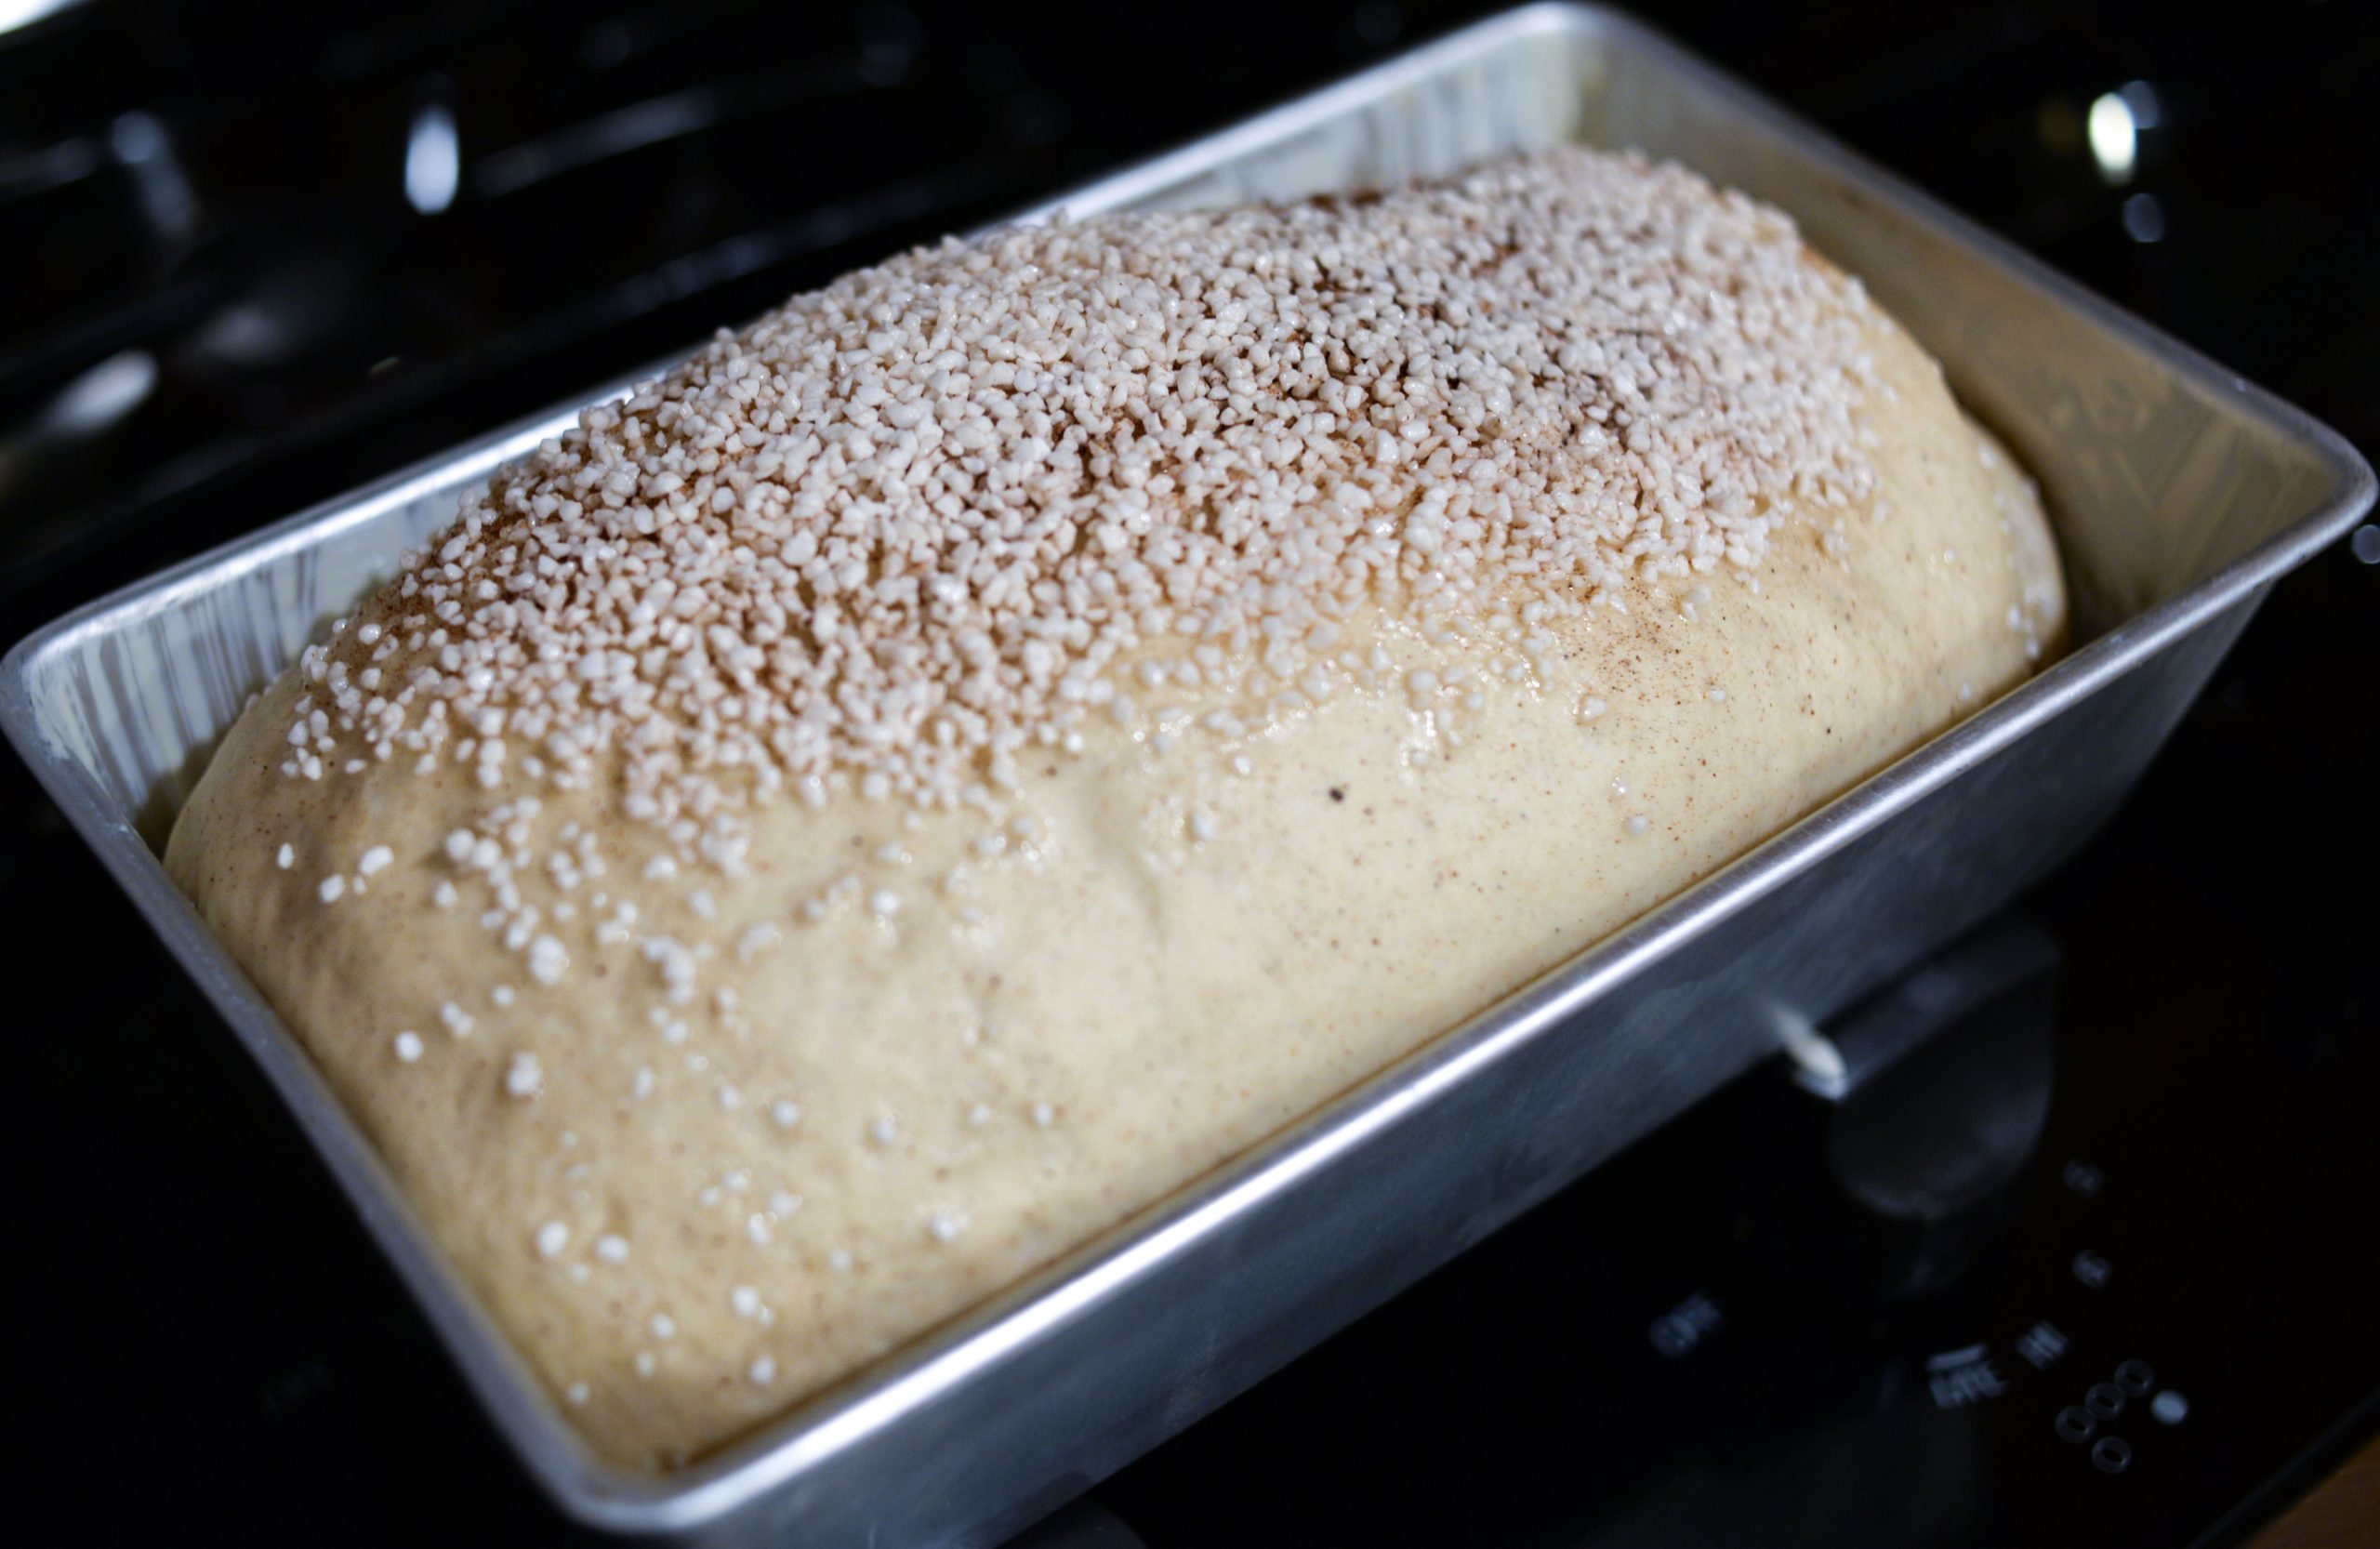
unbaked loaf of sugar bread

Frisian Sugar Bread for Easter & Beyond!

Easter bread

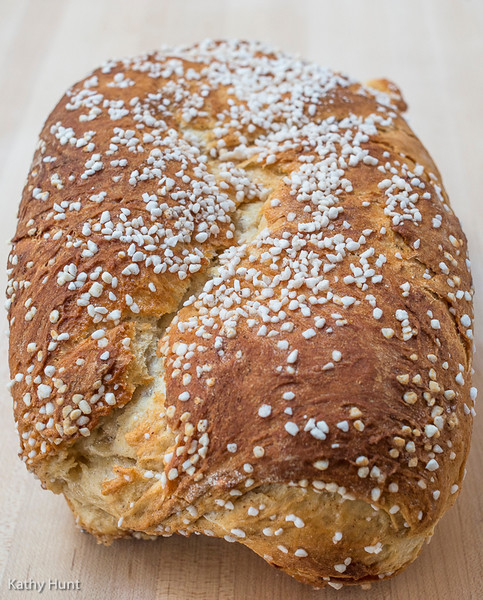
A FINISHED LOAF OF FRISIAN SUGAR BREAD

I may have visited the Netherlands twice, roamed around the Dutch-influenced areas of Belgium as many times and even have Dutch friends but, until recently, I’d never tried Dutch Frisian sugar bread. A specialty of the northern Dutch province of Friesland, suikerbrood or sugarbread features spices and a generous amount of the large, coarse, stark white sugar known as pearl sugar.

As you might expect from a food with “sugar” in its name, this is a sweet bread. Yet, I wouldn’t call it overly saccharine. Eaten at breakfast in the Netherlands, it has a warm, honeyed flavor on par with Danish pastries and cinnamon rolls. When I compare it to such cloying breakfast staples as syrup-soaked pancakes, waffles and French toast, I find this bread to be mild and pleasantly sweet.

Easter bread

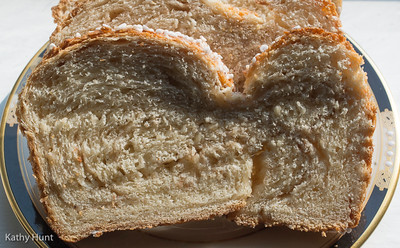
SLICES OF FRISIAN SUGAR BREAD

Although not part of the pantheon of European Easter breads, Frisian sugar bread would be a fitting addition to any Easter brunch. For those abstaining from sweets or baked goods during Lent, it will be a delicious way to break these fasts. For everyone else it’ll be a scrumptious addition to the holiday feast.
FRISIAN SUGAR BREAD
Makes 2 loaves

2 packets dry active yeast
1 3/4 cups milk, warmed
1/4 cup plus 1 teaspoon granulated sugar
5 cups all-purpose flour, sifted
1 1/2 teaspoons ground cinnamon
1/2 teaspoon ground nutmeg
1/4 teaspoon ground cardamom
1 teaspoon salt
1 large egg
4 tablespoons unsalted butter, melted and cooled
8 ounces pearl sugar

Grease a large bowl with canola oil.

Place the yeast and warm milk in a small bowl and allow the yeast to dissolve, about 3 minutes. As the yeast is dissolving, stir the flour, 1 teaspoon cinnamon, nutmeg, cardamom and salt together in a large mixing bowl. In a separate bowl whisk together the sugar, egg and melted butter and set aside.

Make a well in the center of the flour and pour the milk into it. Stir the flour and milk together until roughly mixed. Add the butter mixture and stir again until combined.

Using either your hands or an electric stand mixer fitted with a dough hook, knead the dough for 10 to 15 minutes, until a soft, warm dough forms.

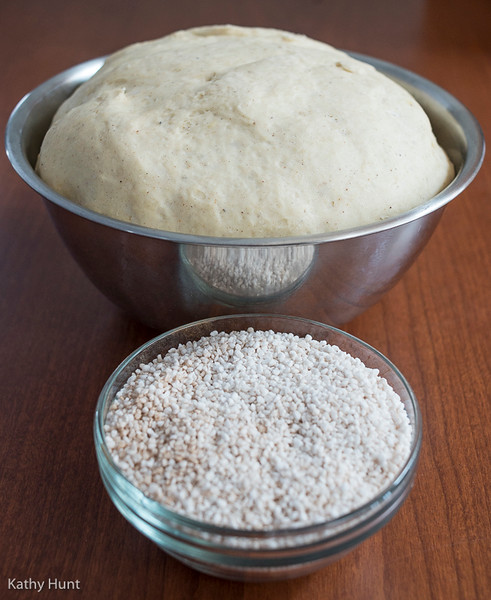
Form the dough into a ball and place it in the greased bowl. Cover the bowl with a clean, damp dishcloth, put it in a warm spot and allow the dough to rise until double in size, about 1 hour.

Toss together the pearl sugar and 1/2 teaspoon cinnamon. Using either your hands or your mixer’s dough hook, knead the pearl sugar into the dough. (I find that hands usually work better than a dough hook here but the choice is yours.)

bread dough

THE DOUGH HAS RISEN!

Butter the bottom and sides of 2 9″ x 5″ loaf pans. Lightly flour a clean work surface. Preheat the oven to 400 degrees F.

Divide the sugar-dotted dough in half and, using your hands, shape into two balls. Place the balls on the floured surface and press each out into a large (about 12 inches in length) rectangle. Taking one of the long ends, roll up the dough into a fat rectangle. Repeat with the remaining dough.

unbaked loaf of sugar bread

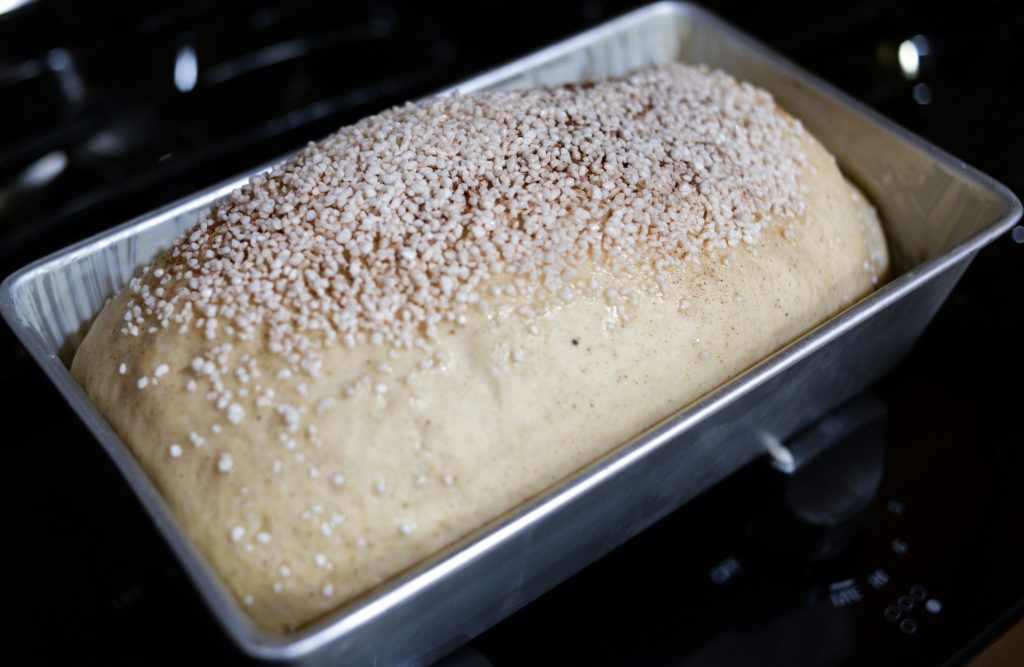
All ready to be baked!

Place the dough rolls into the buttered pans. Place the pans in a warm spot, cover them with a damp, clean dishcloth and allow them to rise for 1 hour.

Place the pans in the preheated oven and bake the bread for 30 minutes, checking after 20 minutes to ensure that the tops aren’t browning too quickly. If the tops look dark, cover them with aluminum foil for the final 10 minutes of baking.

Remove the loaves from the oven and allow them to cool for 5 minutes in the pans. Remove them from the pans and cool the loaves completely on wire racks. Slice and serve with butter and coffee.

Double Chocolate S’mores Cookies

double chocolate s'mores cookies

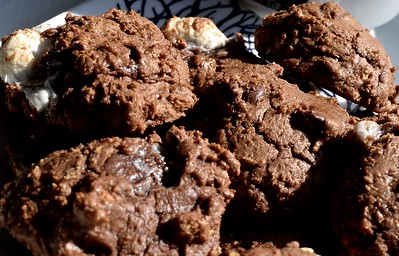
A BIG PLATE OF DOUBLE CHOCOLATE S’MORES COOKIES

On the whole I don’t find supermarket baked goods all that enticing. The breads usually seem too airy, the cookies too bland, the cakes too slathered with artificially flavored frosting. However, last week, before the most recent, and hopefully last, snow of the season, I grabbed a cookie from my local market’s bakery section. Rather than satisfy my ever-present craving for sweets, it drove me to dig out my measuring cups, electric mixer, pen and notebook and create my own take on a s’more cookie.

What made this particular cookie so special, so inspiring? Sweet without being cloying, chocolaty without being too rich, it struck the perfect flavor balance. Dotted with chunks of graham cracker, chocolate and marshmallow, the cocoa-enriched dough was far more complex and appealing than the usual double chocolate chip cookie. As with its campfire namesake, this cookie was so good that it left me hankering for “some more.” (Yep, that’s how s’mores got their name. You can’t just eat one graham cracker-chocolate bar-toasted marshmallow combo. You always want “s’more.”)

As the first snowflakes began to fall, I darted back out to the grocery store for a bag of mini marshmallows, box of graham crackers and tin of unsweetened cocoa. Back at home, flakes swirling outside the kitchen window, I started working on a recipe for these cookies. With a nod to Westside Market for the inspiration, below is my version of Double Chocolate S’mores Cookies.

chocolate s'mores cookies
DOUBLE CHOCOLATE S’MORES COOKIES
Makes 4 1/2 dozen cookies

3 cups semi-sweet chocolate chips, divided
1 stick (8 tablespoons) unsalted butter
1 1/2 cups plus 1 tablespoon all-purpose flour
3 tablespoons unsweetened cocoa
1 1/2 teaspoon baking powder
1/2 teaspoon salt
3 eggs
3/4 cup firmly packed light brown sugar
1/2 cup granulated sugar
1 teaspoon vanilla extract
2/3 cup (3 to 4 sheets) crumbled graham crackers (pieces should be bite-sized)
3/4 cup mini marshmallows

Preheat the oven to 350 degrees F. Line two baking sheets with parchment paper and set aside.

In a double boiler on the stove or in a glass bowl in the microwave, melt the half the chocolate chips and the butter, stirring together periodically until the chocolate has fully melted. Set aside to cool.

In a large bowl sift together flour, unsweetened cocoa, baking powder and salt.

Using either an electric stand or hand mixer, beat together the eggs, sugars and vanilla until light in color, 1 to 2 minutes. Scrape down the sides of the bowl and then add the cooled melted chocolate, beating until well-combined.

Scrape down the sides of the bowl again and add half the flour mixture. Beat until the flour is incorporated, scrape down the sides of the bowl and add the remaining flour. Beat until a soft dough has formed.

Add the remaining chocolate chips, crumbled graham crackers and mini marshmallows and stir to combine.

chocolate s'mores cookies

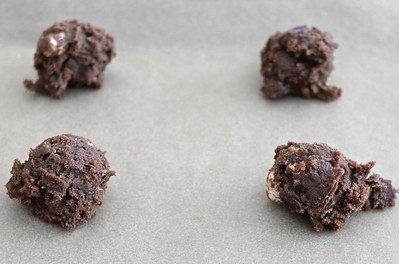
UNBAKED COOKIES SPACED OUT ON PARCHMENT PAPER

Shape the dough into 1-inch balls and place the balls on the parchment paper-lined baking sheets, leaving an inch or so between each cookie. Bake for 10 to 12 minutes, until cookies are firm. Remove the pans from the oven and allow the cookies to cool for 2 to 3 minutes before removing them from the pan and cooling them completely on a wire rack. Repeat until all the cookies have been baked.

Snegl, Kannelbullar, Schnecken: Amazing Cinnamon Rolls

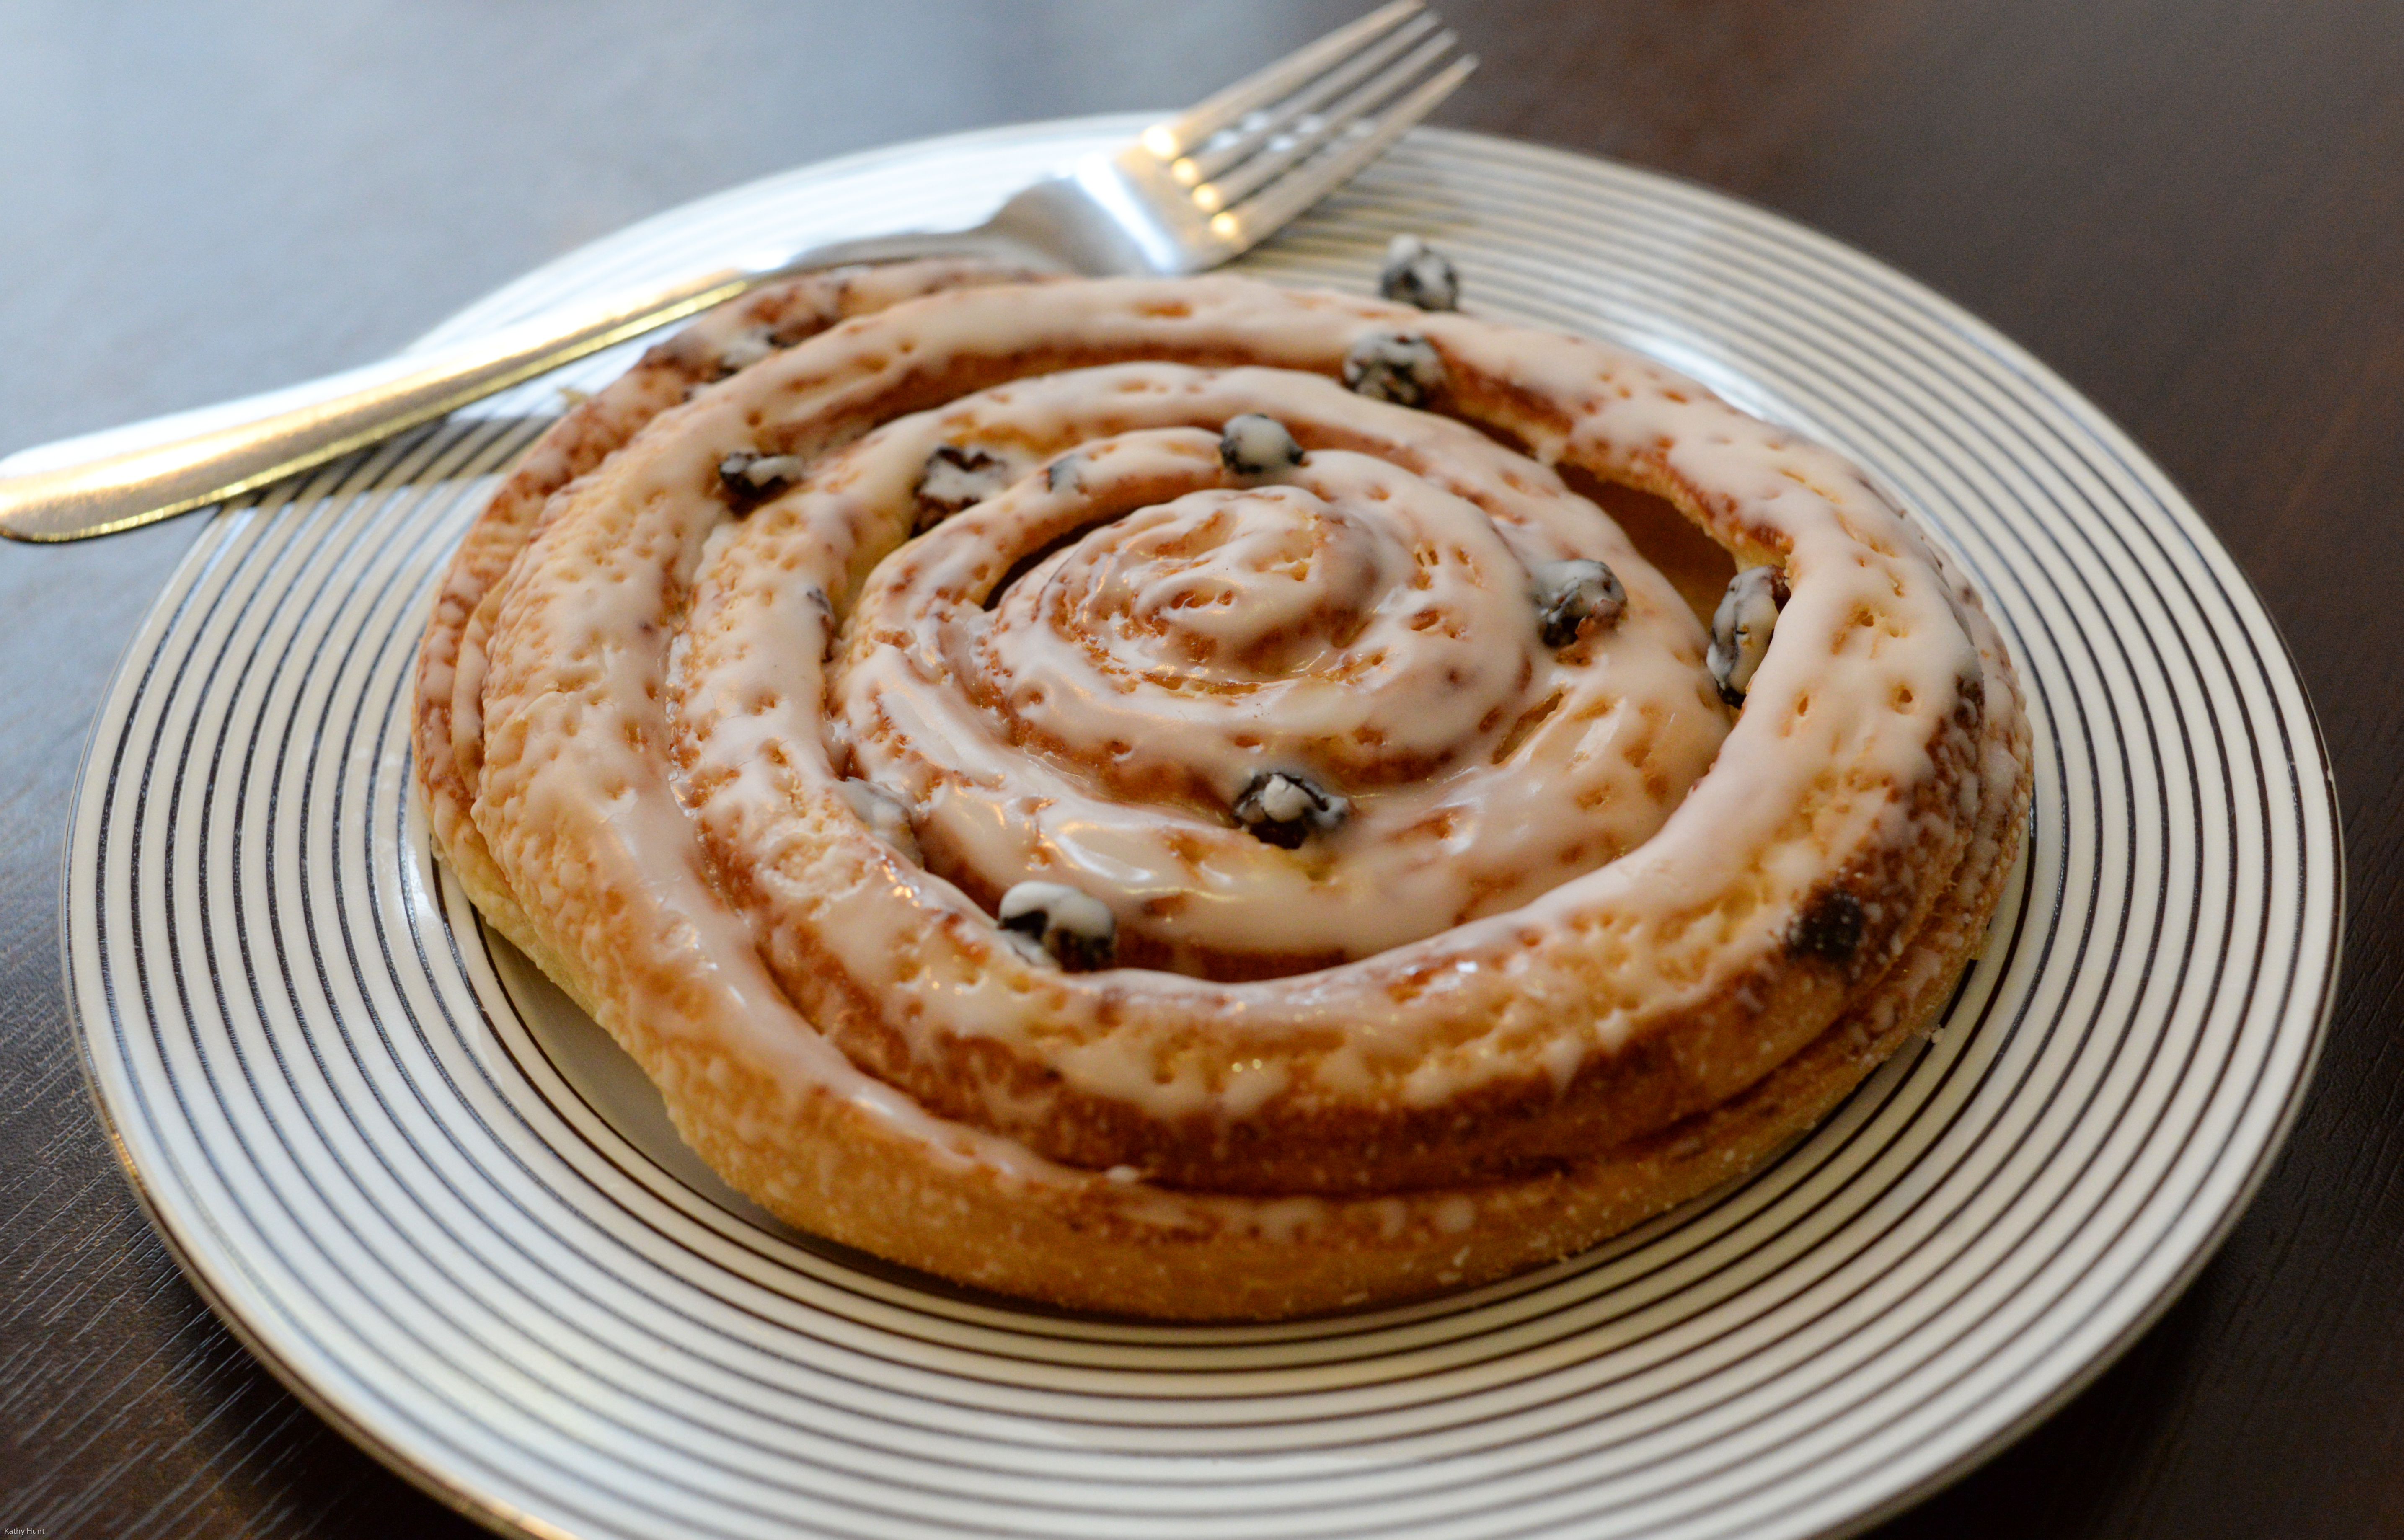
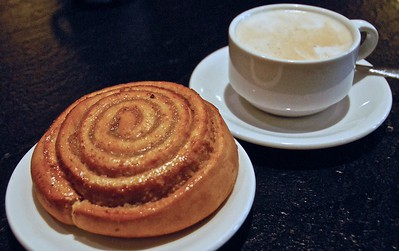
Cinnamon roll, with raisins, in Berlin, Germany


Snegl, kannelbullar, schnecken, skillingsboller or just plain old cinnamon roll. Almost every country has its own take on this pastry and it seems to have become my mission in life to sample each one. Yeah, it’s one tough mission.

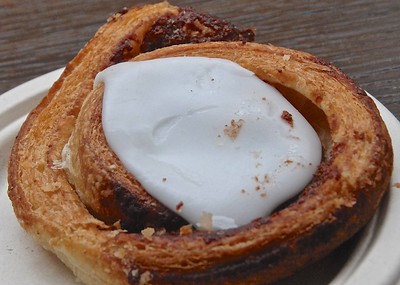
The variations are small but compelling. Denmark tops its snegl, which means “snail” and is an apt description of this swirled roll, with a thick layer of icing. Made from confectioner’s sugar, its sweetness balances out the heady cinnamon and adds beauty and succulence to the bun.

Snegl from Copenhagen, Denmark

Norway’s skillingsboller bears a strong resemblance to the Danish snegl. Most Norwegian bakers use a little less icing than their Danish counterparts. However, the result is just as delightful.

Skillingsboller in Oslo, Norway

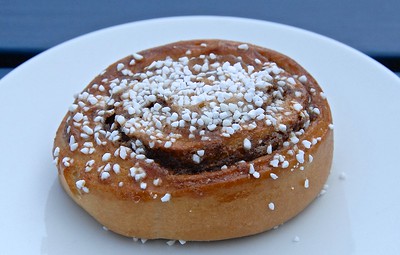
Cardamom transforms the Swedish kannelbullar from a standard cinnamon roll to something far more complex and ethereal. Capped off with a sprinkling of pearl sugar, it, too, is a delight to see and eat.

Kannelbullar from Stockholm, Sweden

Some countries add raisins to their rolls. In fact, that’s how my mission got started; I thought that I’d purchased a pain au raisin for breakfast in Cologne, Germany and instead ended up with a raisin-studded cinnamon bun. Not what I’d expected but still tasty nonetheless. Then there is the inclusion of nuts, which I found most often in the German schnecken.

Others opt to glaze their buns with a sugar syrup. This makes the buns stickier than I like. If I’m eating something gooey and chewy, then it should be a good old sticky bun.

Cinnamon roll in Bern, Switzerland

I still have many, many countries to visit and cinnamon rolls to try. Until I have passport stamps from all 189 to 196 countries and the same number of cinnamon rolls under my expanding waistline, I’ll share a recipe for Scandinavian cinnamon buns. This takes the best that I’ve experienced in Scandinavia and puts it all in one delicious little pastry.

SCANDINAVIAN CINNAMON ROLLS

Makes 12 rolls

for the dough:
1 packet active dry yeast
1/4 cup warm water
1/8 teaspoon salt
1 tablespoon sugar
1 tablespoon unsalted butter, melted
6 tablespoons warm milk
1 large egg
1/2 teaspoon vanilla extract
1 3/4 cup all-purpose flour
1/4 cup unsalted butter, divided, at room temperature

for the filling:
3 tablespoons granulated sugar
1 teaspoon ground cinnamon
Pinch ground nutmeg

for the icing:
1/2 cup confectioner’s sugar
1/4 teaspoon vanilla extract
1 to 2 teaspoons warm water

Place the yeast and water in a small bowl and allow the yeast to dissolve. In large bowl mix together the salt, sugar, melted butter and milk. Pour in the yeast mixture, add the egg and vanilla and stir together until combined.

Using either a wooden spoon or flat beater of a stand mixer, mix in the flour, beating until the dough is smooth and soft. Scrape down the sides of the bowl, form the dough into a ball, cover the bowl and place the dough in a warm spot to rise for 1 hour.

Grease a large baking sheet. Dust a clean work surface with flour.

Place the dough in the center and roll out a large rectangle.

Spread half of the butter along half of the long half of the dough. Fold the unbuttered side over the buttered side and press together. Place the dough on the greased baking sheet, cover and refrigerate for 1 hour.

Leaving the dough on the baking sheet, press it out into a rectangle double in size. Spread the remaining butter over the center third of the dough. Fold one unbuttered side to the middle and then fold the remaining unbuttered side over it to make three layers of dough that are roughly square in shape. Cover and refrigerate again for 1 hour.

To make the filling, mix together the sugar, cinnamon and nutmeg. Dust the clean work surface with flour. Grease a 12-cup muffin tin or a large baking dish and set aside.

Roll out the dough into a large square and sprinkle the cinnamon sugar over it. Roll up the dough into a cylinder and, using a sharp knife, cut it into 12 equally sized pieces. Place the rolls, cut side up, into each cup. If you’re using a baking dish, place the rolls in the dish, leaving about an inch of space between each. Cover and allow them to rise for 35 to 45 minutes.

As the rolls are rising, preheat the oven to 375 degrees F.

Bake the rolls for 15 to 20 minutes, until golden brown. Remove from the oven, place on wire rack and cool slightly, about 15 minutes, before removing the rolls from the pan to cool completely on the rack.

Whisk together the confectioner’s sugar, vanilla and 1 teaspoon water; if you prefer a runnier icing, add the 2nd teaspoon of water. Using a knife or spoon, spread or drizzle the icing over the rolls. Enjoy!

Bavaria-Inspired Cinnamon Sugar Pretzels

pretzel seller

PRETZEL SELLER IN COLOGNE, GERMANY

Thanks to this winter’s intense cold and frequent snows, I’ve been doing a fair amount of armchair traveling, looking at trip photos, thumbing through travel books and imagining slightly warmer times. One book that’s especially piqued my interest is a biergarten cookbook. Picked up on a recent trip to Germany, it includes a recipe for something that I’ve long enjoyed but never made at home, soft pretzels.

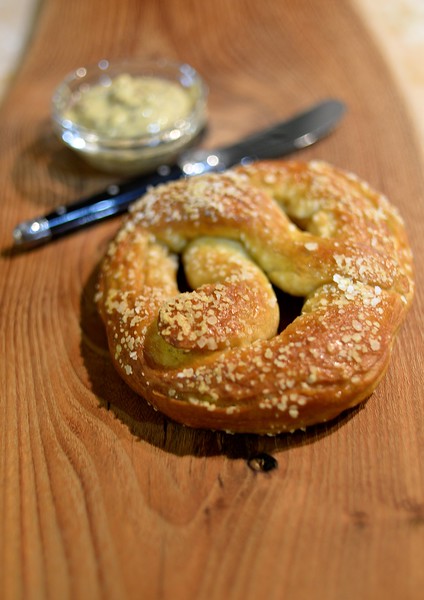
homemade pretzel

HOMEMADE PRETZEL AND DIPPING SAUCE

I cannot recall the first time that I ate a pretzel. I can, however, remember my initial bite of German brezel. Purchased at a jam-packed Christmas market in Cologne, it was softer and more bread-like than what I habitually bought at home. Unlike the dry, chewy pretzels consumed at my office desk, this didn’t leave me parched or with an indigestible ball of dough in my stomach.

Unfortunately, the cookbook that I carted across the Atlantic does not contain a reliable pretzel recipe. What it offers contains too little liquid, too much flour and too few directions.

Starting from scratch, I came up with the following Bavaria-inspired recipe. Because I’m a sucker for sweets, I topped my soft pretzels with cinnamon sugar. If you prefer savory foods, replace the cinnamon sugar with either kosher or pretzel salt.

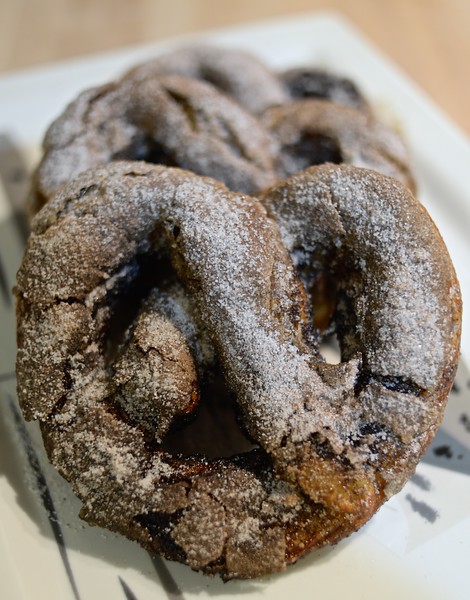
cinnamon sugar pretzels

HOMEMADE CINNAMON SUGAR PRETZELS

CINNAMON SUGAR PRETZELS
Makes 5 to 6 medium-sized pretzels

for the dough:
1 teaspoon dry active yeast
1/2 cup lukewarm water, plus more if needed
Pinch sugar
9 ounces (scant 1 3/4 cups) all-purpose flour, sifted
1/8 teaspoon salt
2 1/2 tablespoons olive oil

for boiling:
10 cups water
2/3 cup baking soda

for the topping
1/2 cup granulated sugar
1 1/2 teaspoons ground cinnamon
1 egg yolk
2 teaspoons water

Put the yeast in a small bowl, pour the water over it and sprinkle over a pinch of sugar. Allow the mixture to sit for 5 minutes or until the yeast has dissolved.

Place the flour and salt in a large mixing bowl and, forming a well in the center, add the yeasty water and olive oil. Stir together until combined.

Using either your hands or a stand mixer with a dough hook, knead the dough until soft and elastic, 3 to 5 minutes. Form the dough into a ball, place in a lightly oiled bowl, cover with a dish towel or plastic wrap and allow it to rise in a warm place for 60 minutes.

Punch down the dough and knead lightly for 1 minute. Separate the dough into 5 or 6 equally sized portions and form these into balls. Place one ball in the palms of your hands and roll it out into a 16-inch long strip, leaving a little extra dough in the middle of the strip.

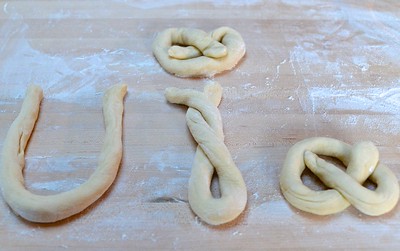
shaping pretzels

SHAPING THE PRETZELS

Bringing the two ends of the dough together to form a U, twirl the dough so that it twists around itself twice. Still holding onto the ends, lay the twisted dough onto a lightly floured work surface. Press the ends into the bottom loop of the twist, making a pretzel. See the photo below for clarification.

Cover the pretzels with a dish towel and allow them to rise for another 30 to 40 minutes. As the dough is rising, preheat the oven to 400 degrees F. Bring 10 cups of water and 2/3 cup baking soda to a boil in a large stockpot. Line a baking sheet with parchment paper and lightly oil the paper. Mix together the sugar and cinnamon. In a small bowl whisk together the egg yolk and water.

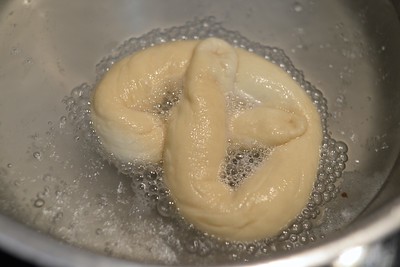
boiling pretzel

BOILING THE PRETZELS

Using a slotted spoon, gently lower a pretzel into the boiling water. Cook for 1 to 2 minutes, turning over once during the cooking time.

Slide the spoon under the pretzel, remove it from the pot, shaking off any excess water, and place the pretzel on the oiled parchment paper. Repeat with the remaining pretzels.

Brush the tops of the pretzels with the egg wash. Generously sprinkle the cinnamon sugar over the pretzels. Bake for 12 to 15 minutes or until golden in color and firm to the touch. Remove and cool on a wire rack. For the freshest pretzels, consume these within a day of baking them.

Check out Czech Trdelnik

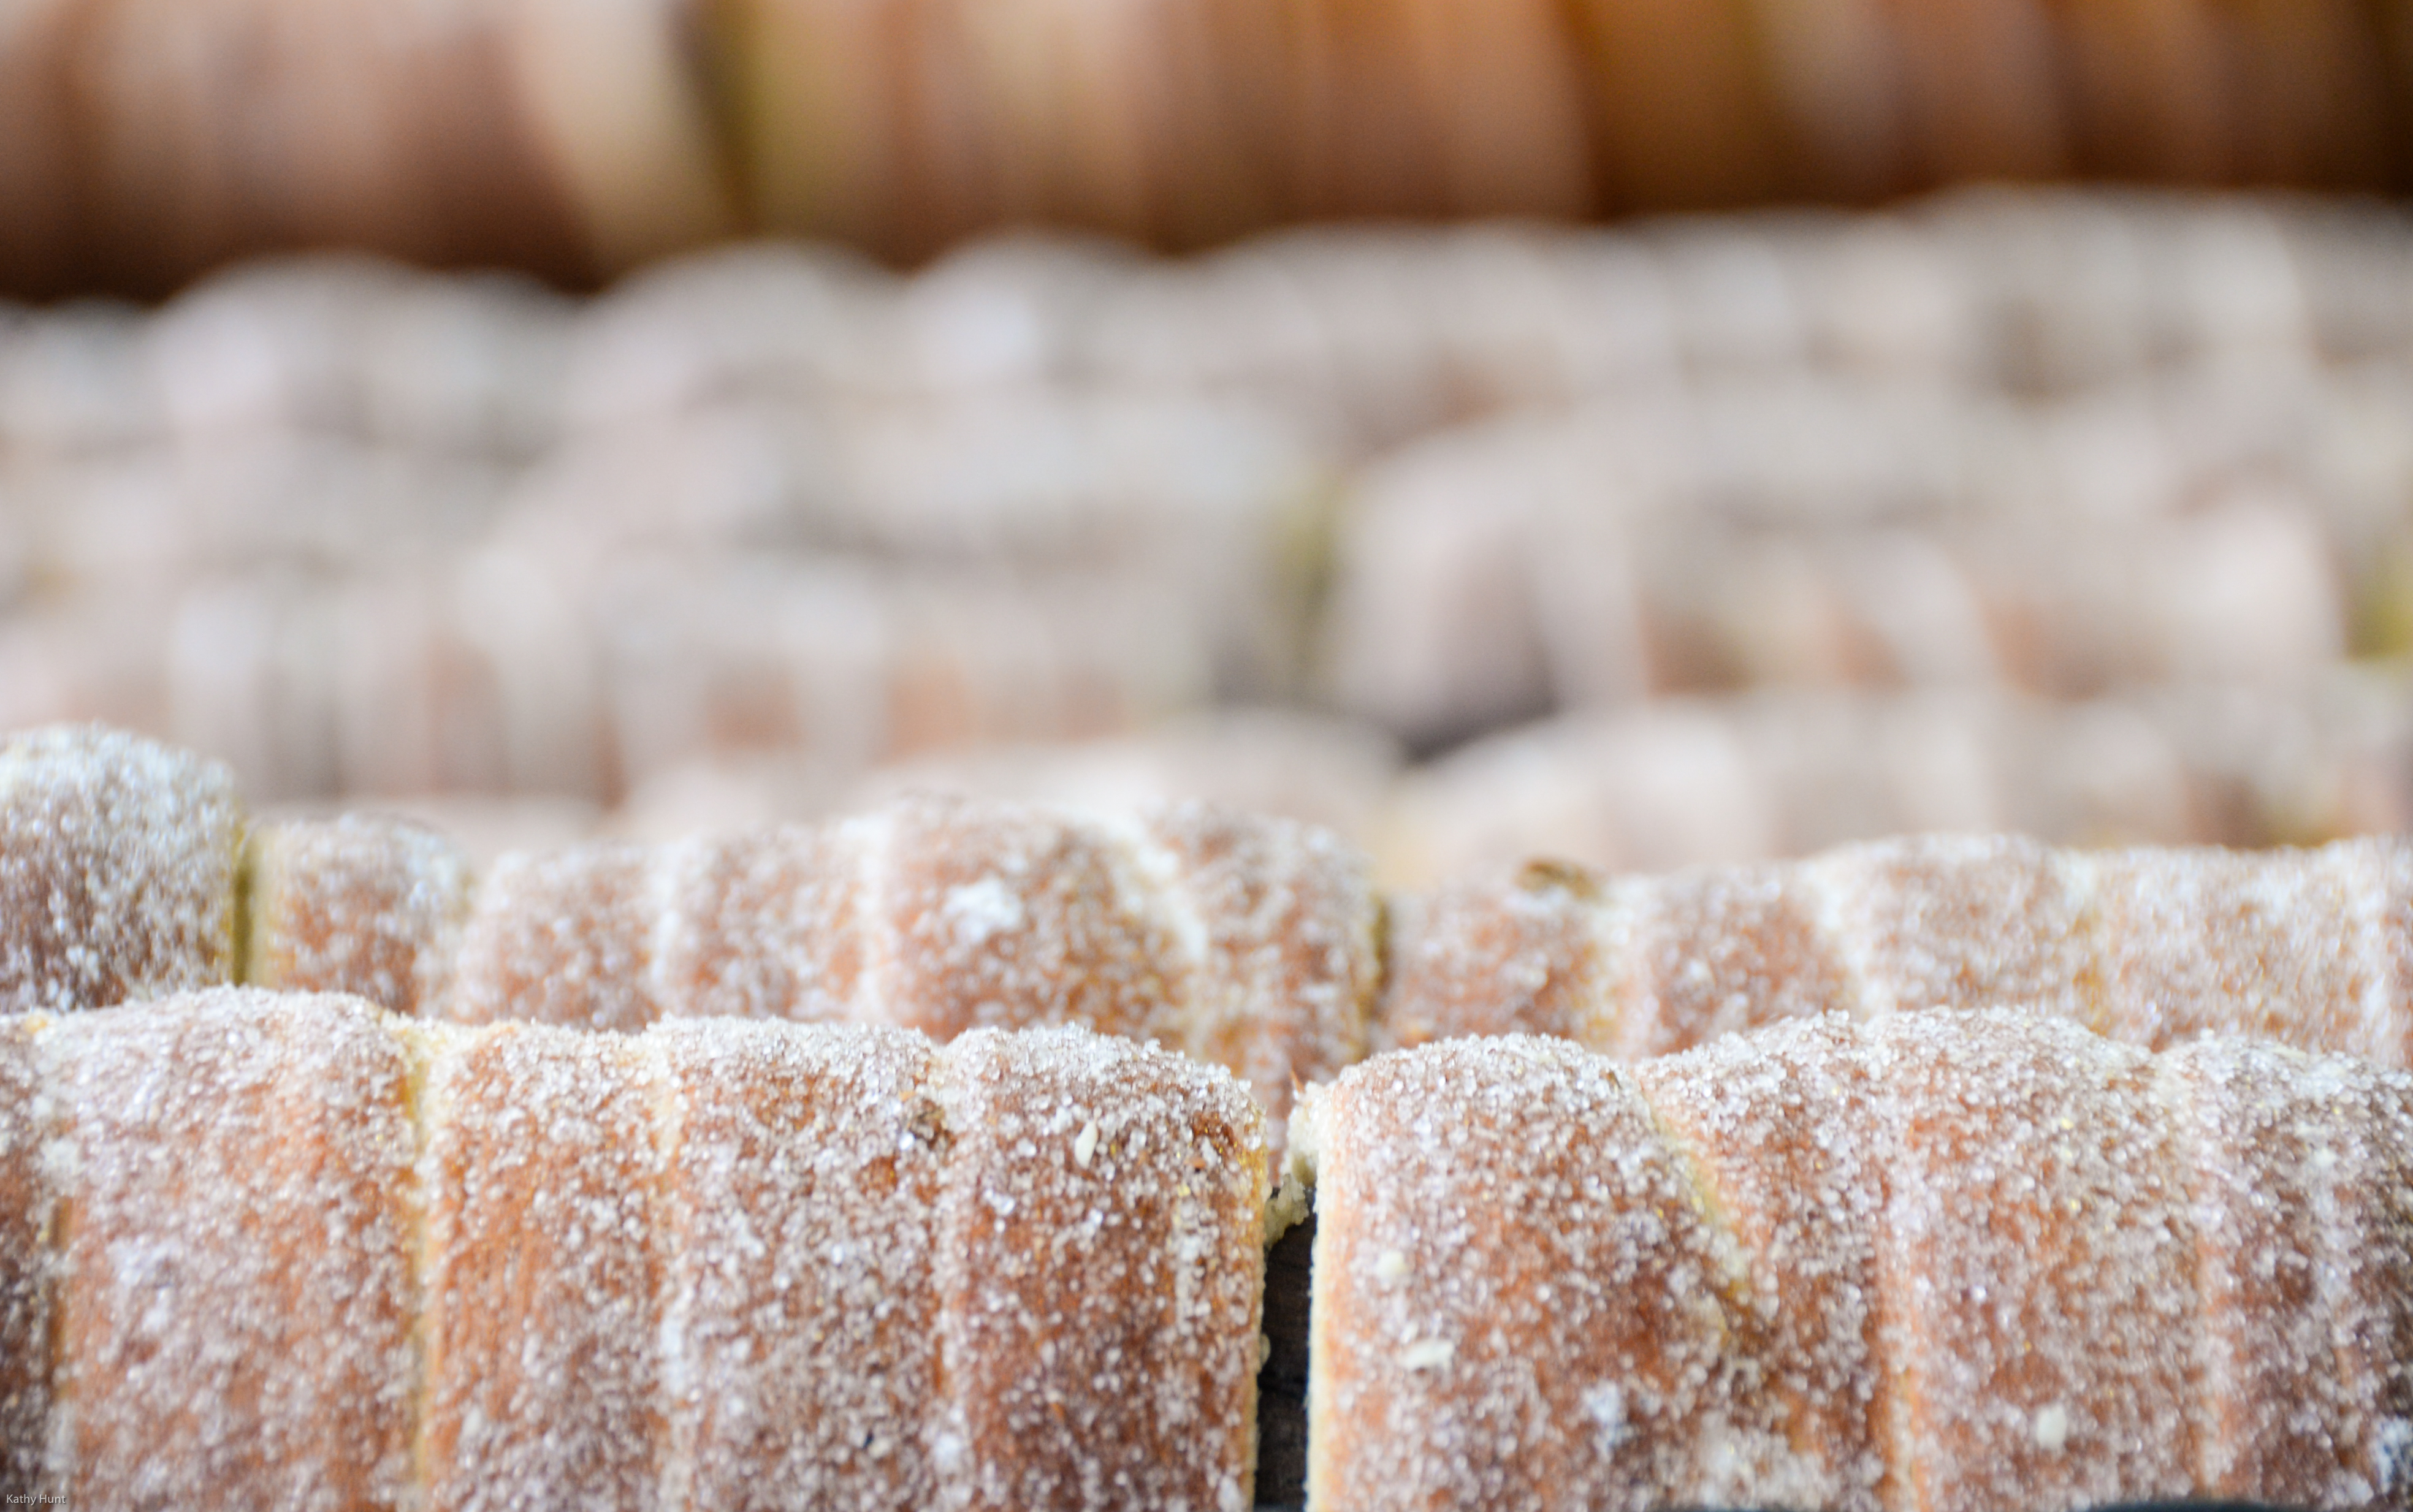
trdelnik

Rows and rows of trdelnik

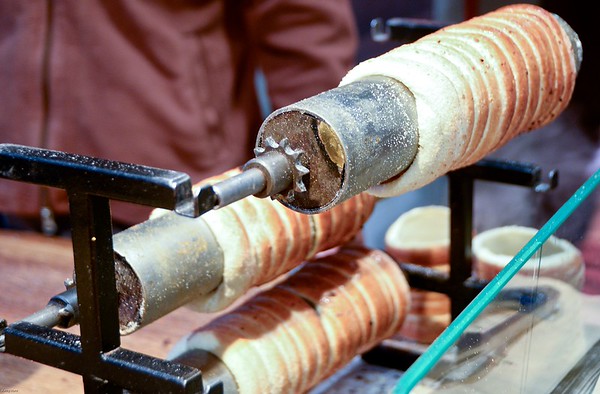
Imagine a golden, cylindrical pastry reminiscent of a cinnamon roll, one that had been roasted on a spit over an open flame and then twirled through a mixture of sugar, cinnamon or ground nuts. This unusual sweet is a trdelnik.

A specialty of the Czech Republic and Slovakia, this yeasted dough treat can be found in bakeries, at food stalls and street carts. In Prague no outdoor market is complete without at least one trdelnik stand.

Hearty yet surprisingly light in consistency, trdelnik makes for a delightful breakfast, afternoon snack or dessert. A longtime fan, I’ve eaten it for lunch and, on one desperate night, as dinner.

Because I don’t own an outdoor spit or tabletop rotisserie, my first stab at trdelnik was with my kitchen range. Since I didn’t think to buy a trdelnik form in the Czech Republic, I had to figure out a way to help the pastry keep its round shape. I couldn’t wrap the dough around water glasses, place them upright on a baking sheet and then slide them into a hot oven. The glasses would shatter, ruining the dough and my oven.

baking trdelnik

Roasting trdelnik on a spit

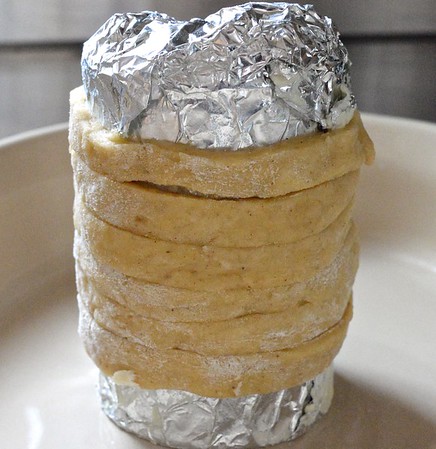
I considered pressing strips of dough onto a rolling pin and suspending that over a shallow baking dish. However, my rolling pins are wooden and would likely scorch, if not catch on fire. Aluminum soup cans covered in aluminum foil and sitting upright in a baking dish? That I did try, with mixed results. If I didn’t make the dough strips long enough, so that the ends overlapped, the trdelnik unraveled as it baked.

Ultimately, I found that an outdoor grill, coupled with the foil wrapped cans and long, metal kebob skewers, provided the most authentic and consistent means of creating trdelnik. So, unless someone gives me with a rotisserie or, at the very least, a proper trdelnik form, I’ll be firing up the grill for my next batch of this sweet.

freshly baked trdelnik

Hot trdelnik in hand

TRDELNIK
NOTE: In the following recipe, I provide instructions for both baking and grilling/roasting this Czech sweet.
Makes 6

1 packet active dry yeast
1/4 cup milk, warmed
1 pound (approximately 3 3/4 cups) all-purpose flour
1/2 cup plus 1 tablespoon confectioner’s sugar
1/2 teaspoon ground cinnamon
1/4 teaspoon nutmeg
1/8 teaspoon salt
1 teaspoon vanilla extract
3 large eggs
2 egg whites, divided
4 tablespoons unsalted butter, melted and cooled to room temperature
1/3 cup granulated sugar
3 tablespoons blanched almonds, finely chopped
1 teaspoon water

Put the yeast in a small bowl and pour the warm milk over it. Set aside.

In large bowl mix together the flour, 1/2 cup confectioner’s sugar (reserve the tablespoon for the topping), cinnamon, nutmeg and salt. Make a well in the center of the dry ingredients and then set aside.

In a separate bowl whisk together the eggs and 1 egg white, butter and vanilla extract.

Pour the proofed yeast and egg mixture into the well and stir together. Using your hands or a stand mixer’s dough hook, knead the dough for 1 to 2 minutes, until soft and well-combined. Cover the bowl with a damp cloth and allow it to rest for 20 to 30 minutes.

Preheat the oven to 375 degrees F. If you’re using a gas or charcoal grill, remove the metal grates and preheat the grill on medium-high.

Cover 2 to 6 empty, clean aluminum cans with tin foil and then grease the foil with butter. (NOTE: If you’re making your trdelnik on a grill, you’ll need to punch out a hole in the center of each can so that you can thread the kebob skewer through there. Once you’ve done that, cover the cans with foil.)

In a small bowl mix together the remaining egg white and 1 teaspoon water.

On a plate mix together the 1 tablespoon confectioner’s sugar, granulated sugar and chopped almonds.

dough wrapped around can

WRAPPING THE DOUGH AROUND A FOIL-COVERED CAN

Uncover the dough and separate it into 6 equal-sized balls. Using a rolling pin, roll out and then cut the first dough ball into 1/2-inch wide and at least 6-inch long strips. Wrap these strips around the greased cans, making sure that the ends of the dough overlap each other. The end result should resemble the picture below.

Repeat the rolling, cutting and wrapping with the remaining dough balls. If you don’t have more than 2 cans on hand, you’ll just make one batch of trdelniks and then repeat the above steps.

If you’re baking these in the oven, place the dough-encased cans upright in a shallow baking dish, leaving about 2 inches between each trdelnik. Bake for 10 minutes.

If you’re making these on the grill, thread the kebob skewers through the cans and place the skewers over the charcoal. Cook uncovered, rotating frequently, for 10 minutes.

After 10 minutes remove the trdelnik from the oven or grill, brush the egg wash over each and then roll the trdelnik in the sugar-nut mixture. Return to the oven or grill and cook for another 10 to 15 minutes, until browned. Remember that, if you’re using a grill, keep rotating those skewers so that the trdelnik doesn’t burn. Remove, roll in the sugar mixture again and serve warm.

apple strudel

Two Spoons up for Apple Strudel Light

apple strudel

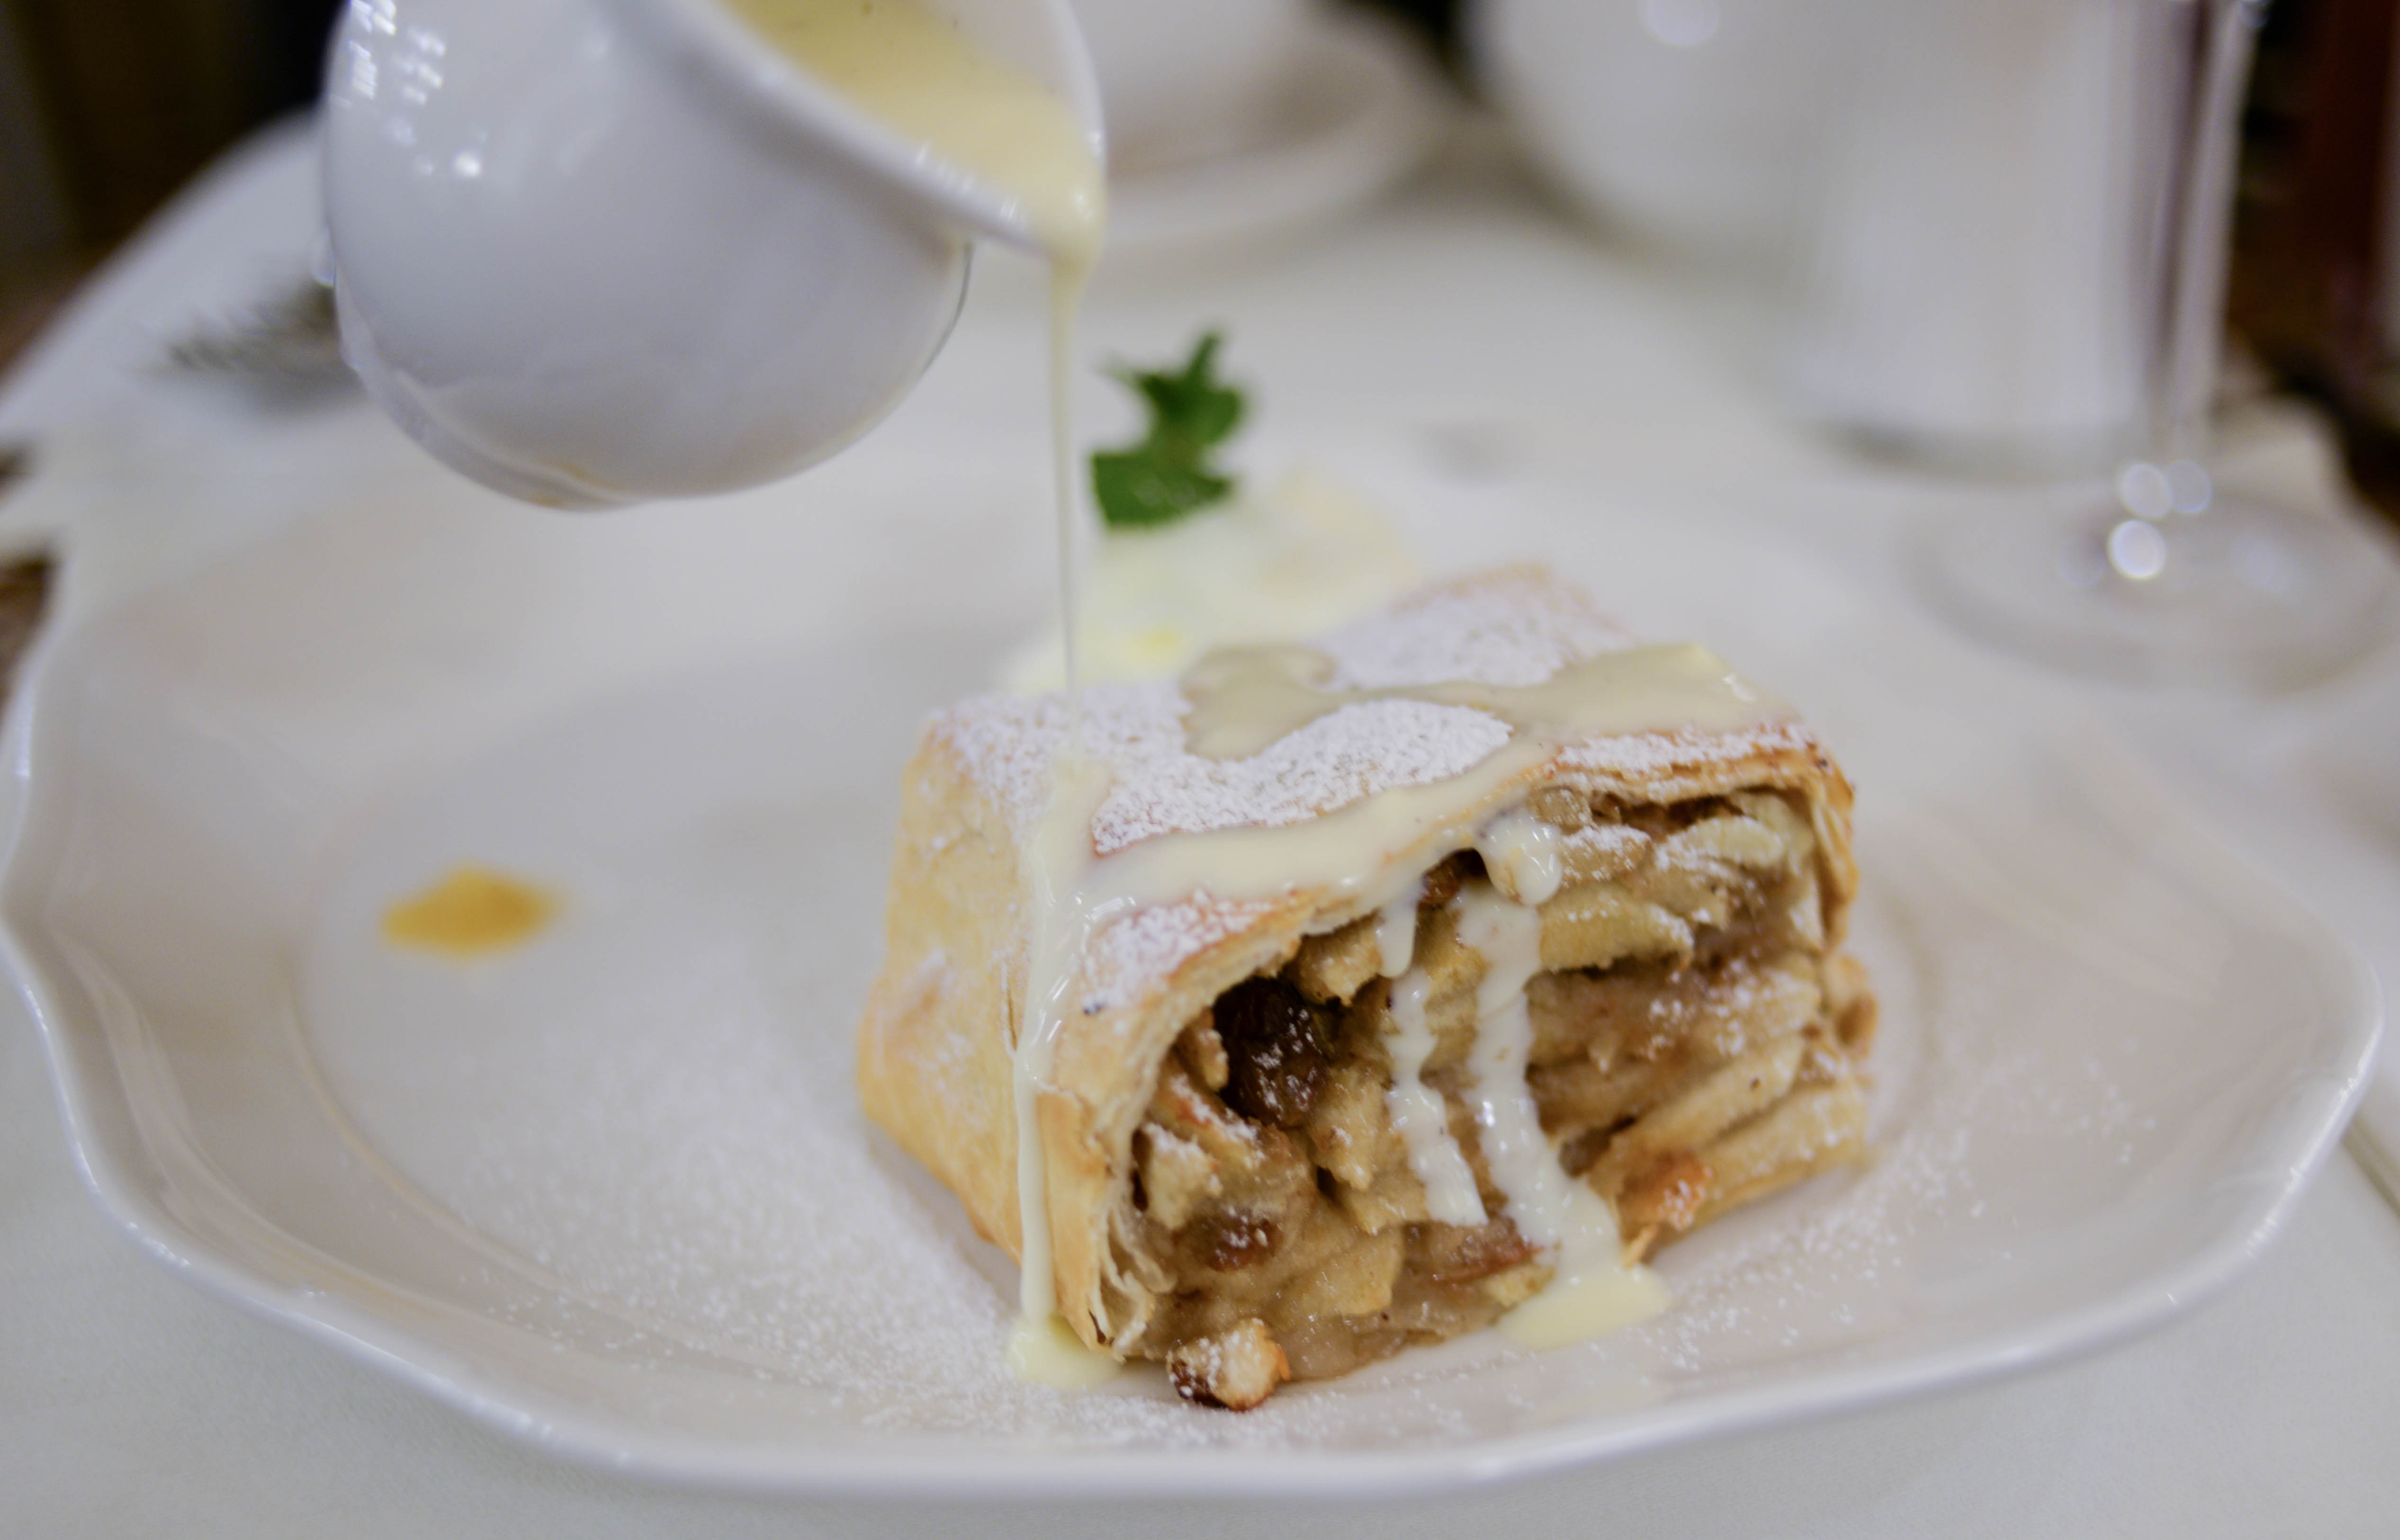
Pouring creme anglaise over apple strudel in Vienna, Austria

What do you do with three unplanned days in Vienna? If you enjoy immersing yourself in a country’s culture and possess a hearty sweet tooth, you might decide to eat your way through your stay. That’s certainly how I spent my time there, sampling variation upon variation of the Austrian national dish apple strudel.

apple strudel with creme anglaise

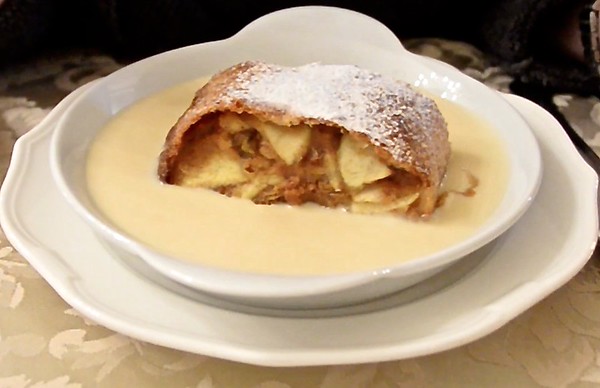
Apple strudel floating in a bowl of creme anglaise

In Austria strudel is often served with a pitcher of vanilla cream, in a pool of crème anglaise or with a side of whipped cream. Contrary to my husband’s fervent hopes, it usually doesn’t come with a scoop of vanilla ice cream. That’s fine with me. When it comes to strudel, I prefer either to eat it with just a dusting of sugar or with whipped cream added to the side. A fair amount of time, effort and space goes into making a traditional apple strudel. It’s the dough, rather than the filling, that requires the work. My short video, taken at the Café Residenz adjacent to Vienna’s Schönbrunn Palace, explains the basics of authentic strudel dough.

If you lack the space or patience to roll out dough until it’s roughly three feet square and transparent enough to read a newspaper through but you still like the idea of homemade strudel, I have an utterly acceptable compromise. To save time and countertops, use commercially-prepared phyllo dough. Granted, you won’t have the most traditional strudel but you will still have a wonderful, Viennese-inspired dessert. Just think of it as strudel for time-pressed bakers or “apple strudel light.”

APPLE STRUDEL LIGHT
Makes 12 to 14 slices

for the filling:
3 1/4 pounds (6-7) apples
Grated zest of 1 lemon
Juice of 1/2 lemon
3/4 cup granulated sugar
3/4 cup Panko breadcrumbs, divided
1/2 cup golden raisins
1/3 cup finely chopped almonds
1/8 teaspoon ground nutmeg
1 teaspoon vanilla extract

for the pastry:
6 sheets phyllo dough, defrosted
6 tablespoons unsalted butter, melted, plus more as needed
Confectioner’s sugar, for serving
Whipped cream, optional, for serving

Preheat the oven to 350 degrees Fahrenheit. Grease a large baking sheet and set aside.

Peel and cut the apples into matchsticks and place in a large bowl. Sprinkle the zest and juice of the lemon over the top of the apples, toss to coat and set aside.

Stir together the sugar, half of the breadcrumbs, all of the raisins, almonds and nutmeg. Set aside

Cover a flat work surface with parchment paper. Gently remove 2 sheets of phyllo dough and place this on the parchment paper. Brush the top of phyllo with melted butter and then lay 2 more sheets of phyllo on top of buttered dough. Brush melted butter over the next 2 sheets, lay 2 additional sheets on top and brush butter over them.

Sprinkle the remaining breadcrumbs over the buttered dough, leaving a 1-inch border without breadcrumbs.

Add the sugar mixture to apples, stir to combine and then sprinkle the vanilla extract over the filling. Stir until well-combined.

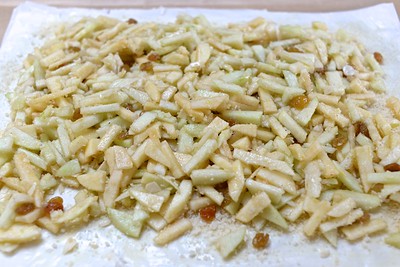
sliced apples and raisins

APPLE AND RAISIN FILLING SPREAD OVER THE DOUGH

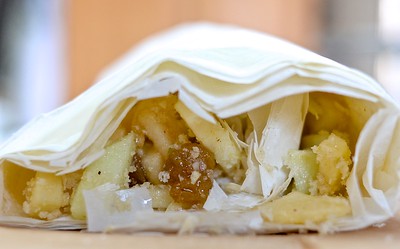
Leaving the 1-inch border intact, evenly spread the apple filling over the phyllo. Taking the long end of the dough and using the parchment paper to assist you, gently roll up the dough until you’ve formed a log. Using the remaining melted butter, seal up the ends and coat the top of the dough. Once again, using the parchment paper as an aid, slide the strudel onto the greased baking sheet.

apple strudel

THE ROLLED UP, PRE-BAKED STRUDEL

Bake for 50 minutes or until golden. Remove from the oven and cool on the baking sheet. Before slicing and serving, dust the top with confectioner’s sugar. Serve with optional whipped cream.

Ingredients for a Happy Holiday Feast

Right now I have a story running at Zester Daily and MSN about what it takes to throw a fantastic holiday party. After writing that piece, I started thinking about the ingredients that I keep on hand to ensure that, no matter who or when someone drops by, there will be something warm and tasty on the table to eat. Bread, eggs, milk and butter are givens. With these I can fry up French toast, egg-in-a-hole and egg sandwiches or make scrambled eggs and toast. I also like to keep the following items around, things that I dub the ingredients for a happy holiday feast. With them I can pull together a nice meal, one that looks as though I’ve spent hours hovering over a hot stove when, in fact, I’ve thrown the dish together in 30 minutes or less.

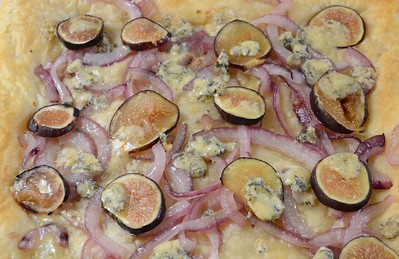
PUFF PASTRY: Defrost a sheet or two of puff pastry and in 30 minutes I have everything from breakfast to dessert. I’ve used puff pastry to make a simple pizza— partially bake the pastry, remove and top with tomatoes and cheese, return to the oven and bake until the pastry has browned and cheese has melted. If I have onions and sardines or figs, I make an onion-sardine pissaladière, which I feature in Fish Market, or a figgy pizza.

If I have apples, I slice and sauté them with butter and sugar. I lay a sheet of puff pastry over the apples, pop the duo in the oven and bake until golden on top. Invert this onto a platter and I’ve got a simple apple tart. With cinnamon, sugar and a sharp knife I can also make the French cookies palmiers. These offerings look fancy. They make my guests feel special. Yet, they took very little time to make.


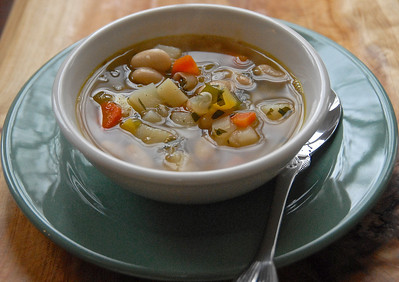
VEGETABLE STOCK: With an onion or few cloves of garlic, sticks of celery leftover from the previous night’s crudite plate, a cup of frozen corn and/or peas, canned chickpeas, beans or tomatoes (see below) or some rice or small pasta and vegetable stock I have all that I need for a nourishing, vegan-friendly soup. Pre-made stock is perfect for soups and for dressing up leftover poultry, meat, seafood and vegetables. To make a sauce or gravy, boil the stock over medium heat until it’s halved in volume. Add some salt, pepper and herbs or spices. If you desire a thick gravy, leave the heat on and further cook and reduce the sauce. Drizzle it over turkey, chicken or roast beef sandwiches and delight your hungry, unexpected guests.

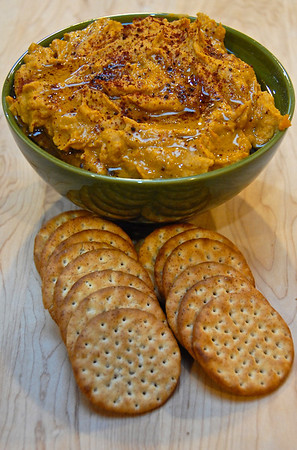
Pumpkin Hummus

CANNED PUMPKIN OR CHICKPEAS: If you have the aforementioned stock, onions and garlic sitting around, then you’re halfway to a velvety pumpkin or hearty chickpea soup. Just add the canned pumpkin or chickpeas, salt, pepper and those random herbs or spices and allow them to simmer together for 20 to 25 minutes. Taste the soup, add more seasonings as needed and serve. If you’re a fan of hummus, you can toss the chickpeas or pumpkin into a blender or food processor. Throw in garlic, olive oil, salt, lemon juice and tahini if you have some. Voila! Homemade hummus for raw veggies, crackers, pretzels, hearty breads or, as tradition dictates, pita. Don’t like hummus? Make a curry with the chickpeas, onions, garlic, canned tomatoes (see below) and spices.


CANNED TOMATOES: Give me a can of tomatoes and I will give you homemade sauce for pasta, a puff pastry pizza, omelettes, a frittata, curry or soup. When friends and family walk into the kitchen, they see those tomatoes bubbling on the stove and think that I’ve been slaving away for hours over my tomato-based creation. You and I, though, know the truth.

SUPER SIMPLE TOMATO SAUCE
Serves 4

2 tablespoons extra virgin olive oil
2 cloves garlic, sliced
1 (28-ounce) can diced organic tomatoes and their juices
1/3 cup water
1 ½ teaspoon dried basil
3/4 teaspoon dried oregano
1/2 teaspoon dried parsley
½ teaspoon salt
¼ teaspoon ground black pepper

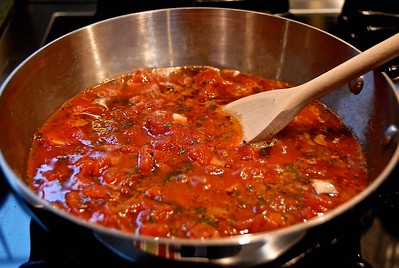
Heat the oil in a medium sauté pan over medium high. Add the garlic and cook for 1 to 2 minutes; you want the garlic to have softened but not browned. Add the tomatoes, water, basil, oregano, parsley, salt and pepper and stir to combine. Reduce the heat to medium-low and allow the ingredients to simmer, uncovered, for 30 minutes, stirring periodically during this time.

Using an immersion or countertop blender, pulse the tomato sauce until you have a moderately chunky sauce. Cover and allow the sauce to simmer for another 5 to 10 minutes. Toss with cooked pasta and serve.