Latest Posts

Revisiting Palmiers – Cinnamon Palmiers

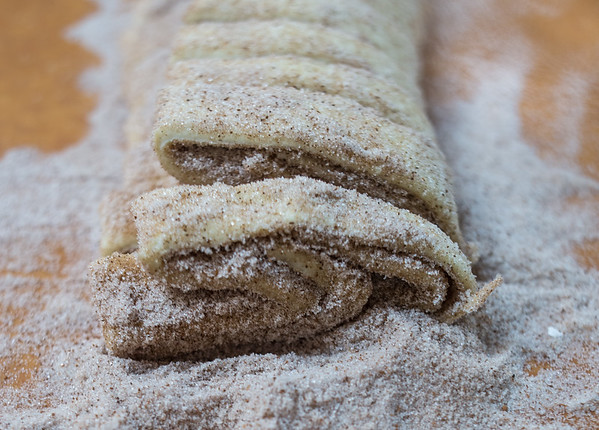
Sliced cinnamon palmier dough

Cinnamon palmiers, sliced and ready to be baked

I spent last week preoccupied with the age-old question of how to pack just enough clothing and books in a carry-on—a carry-on that can only weigh 15 pounds and that will be my only piece of luggage on this trip—for a month of traveling and working on another continent. My fixation meant that I fell a tad behind on sharing a variation on Kitchen Kat’s Lemon Palmiers. Forget what that alternate recipe was? As they say in Australia, which is where I’m headed, “no worries!” It is for cinnamon palmiers.

Think back to July 21st when I posted a scintillating entry on the flaky, caramelized, French cookies known as palmiers. As you might recall, these treats derive their name from their palm-like shape; in French palmier means “palm.” Comprised of folded layers of puff pastry and sugar, which gives them their distinct shape, they’re a light and delicious little sweet.
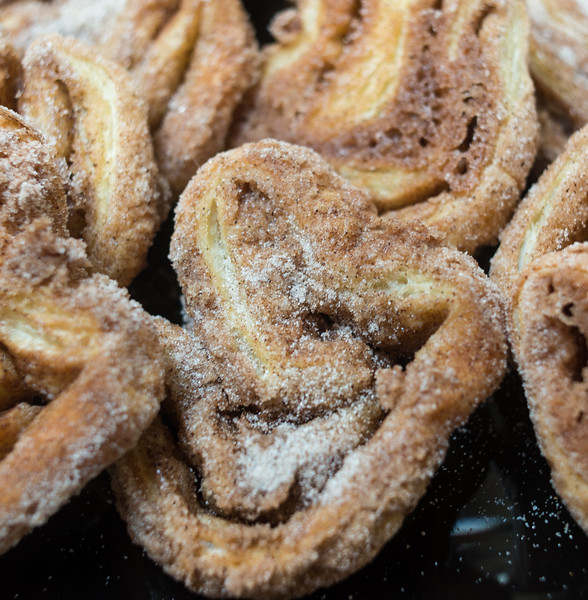
Cinnamon palmiers

Crisp and aromatic cinnamon palmiers

Palmiers traditionally feature just those two ingredients, sugar and puff pastry. However, as indicated in the previous post, you can spice them up with such additions as citrus zest, cocoa powder or ground cinnamon. As much as I adore the sweetly tart lemon palmiers, I find the headiness of cinnamon palmiers equally, if not more, delightful. Why not try them both and let me know which tastes better to you.

CINNAMON PALMIERS
Makes 3 dozen

1 tablespoon ground cinnamon
1 1/3 cups granulated sugar
1 pound (2 sheets) puff pastry, defrosted

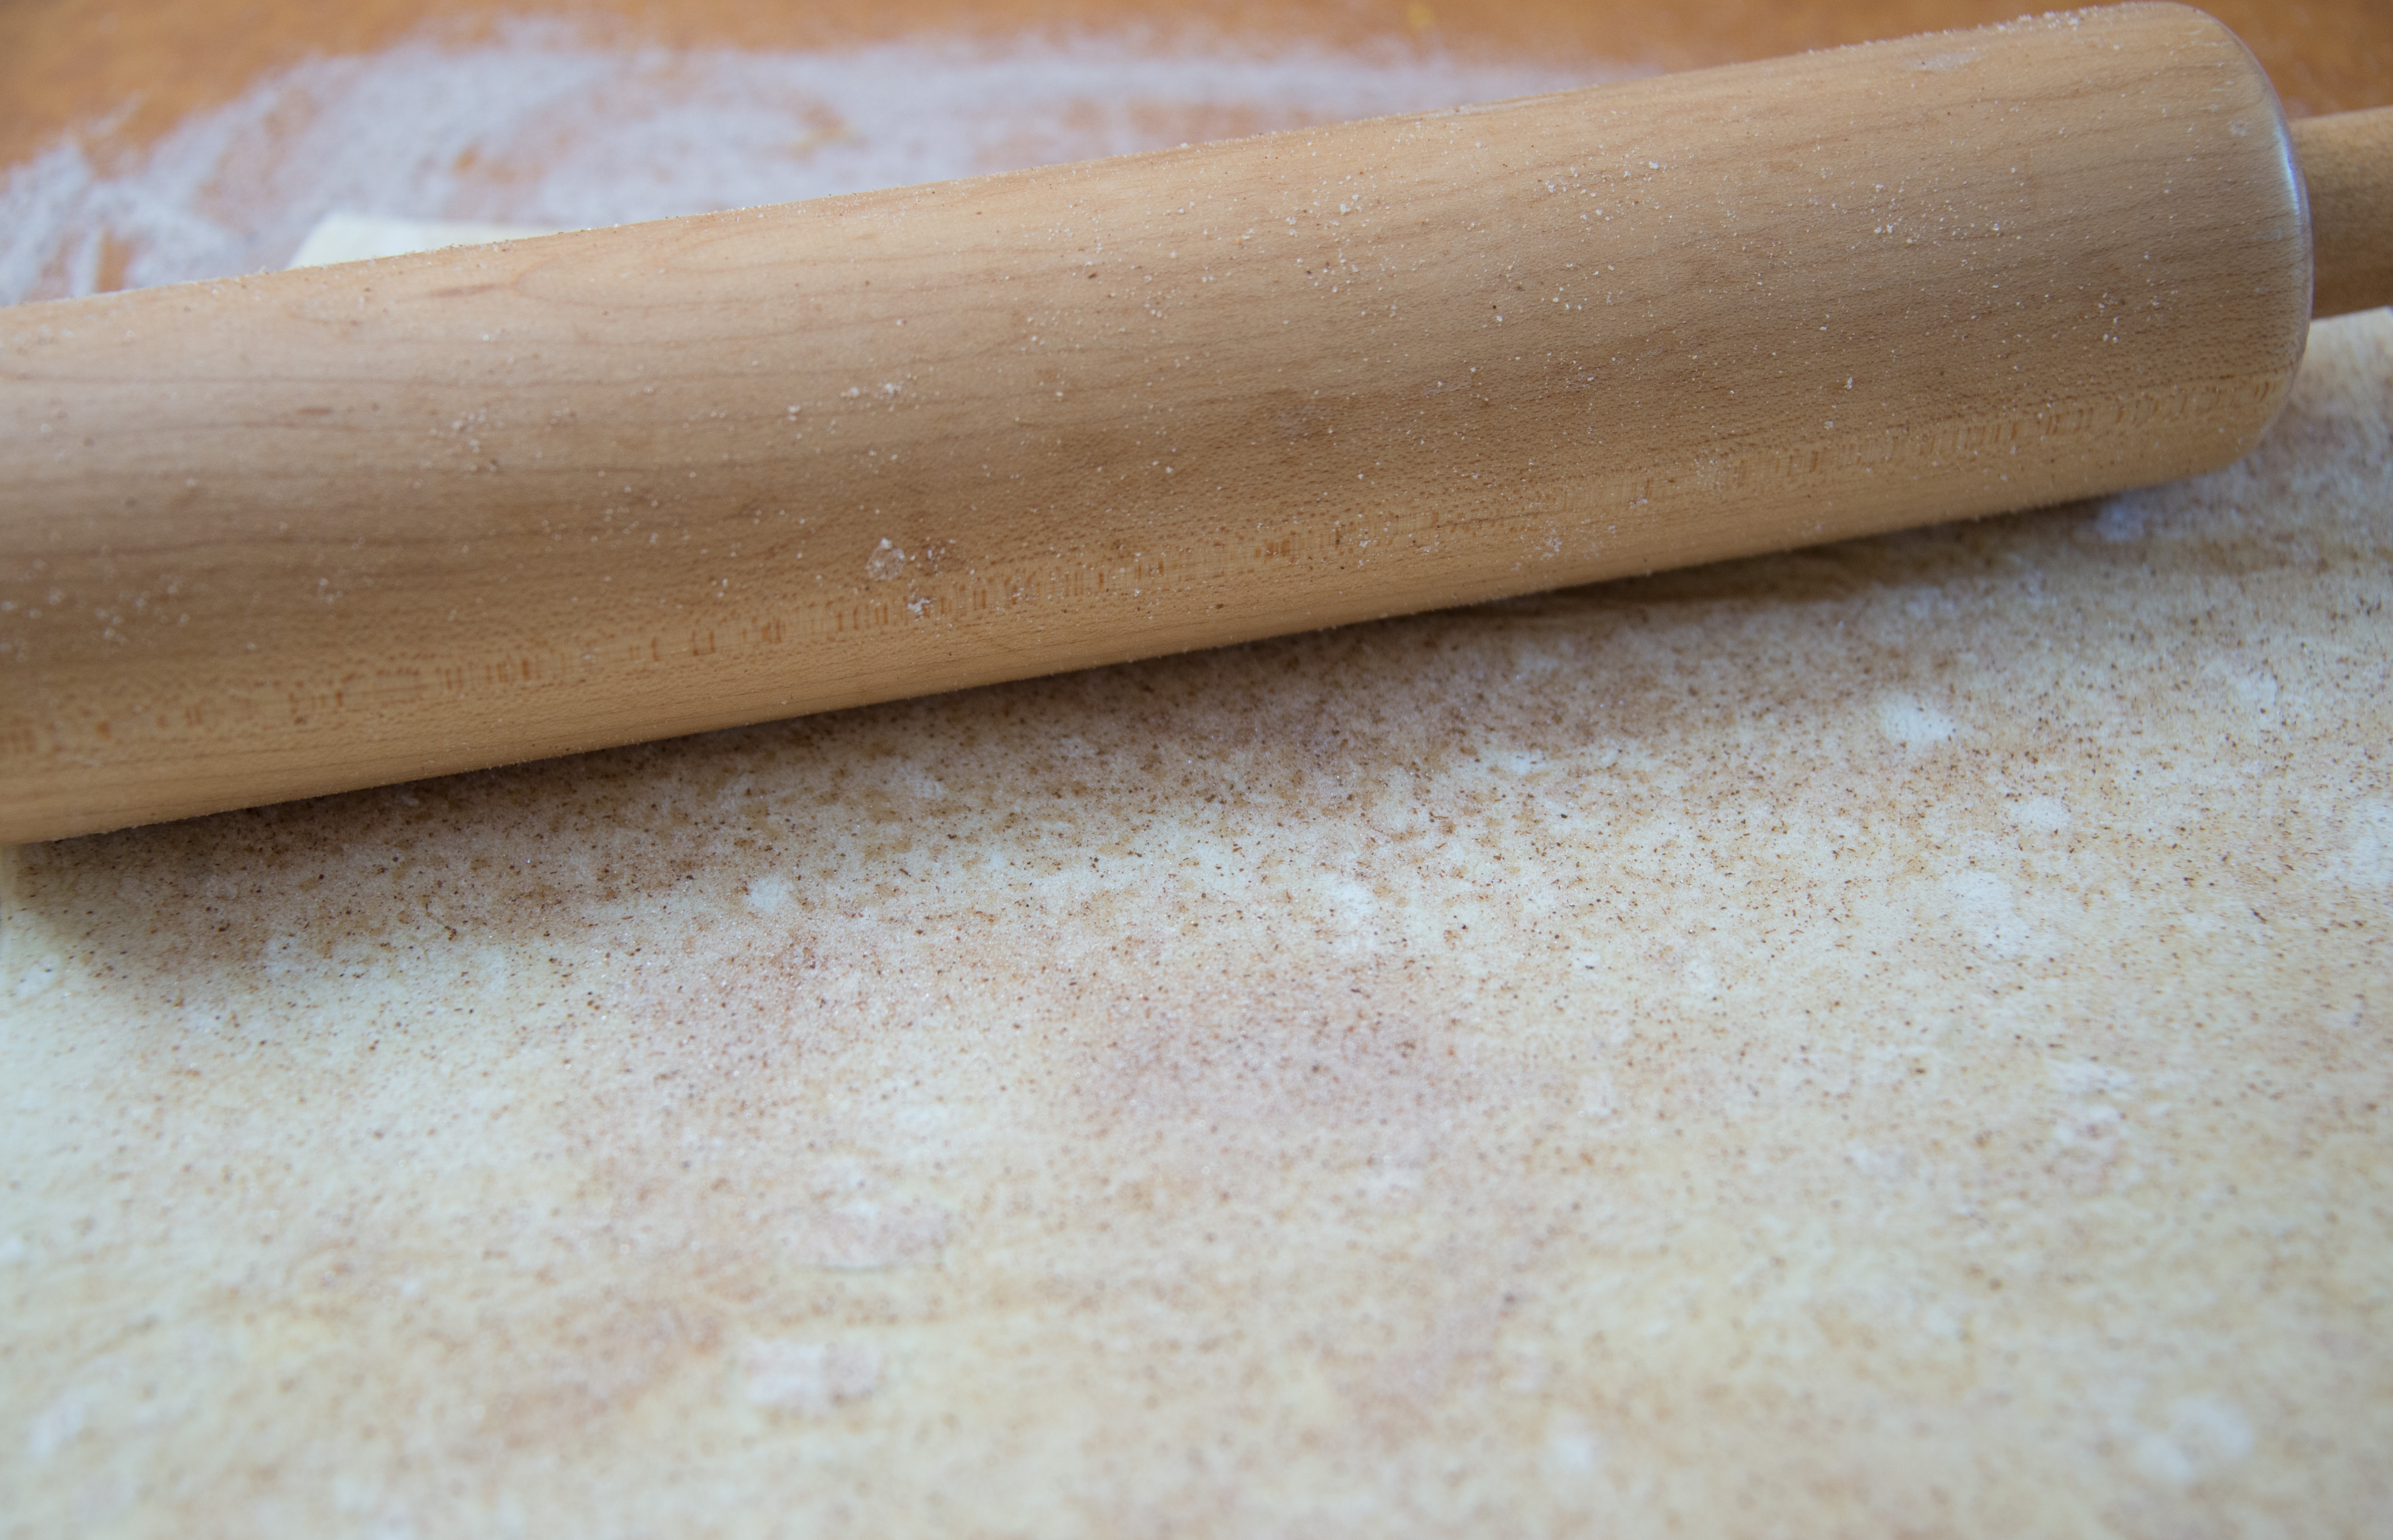
Lightly dust a clean work surface with some of the cinnamon sugar. Place a sheet of puff pastry on top of the sugar and then sprinkle sugar on top of the pastry. Using a rolling pin, roll out the pastry until it’s roughly a 12″ x 24″ rectangle. Sprinkle more sugar on top of the rolled out pastry.
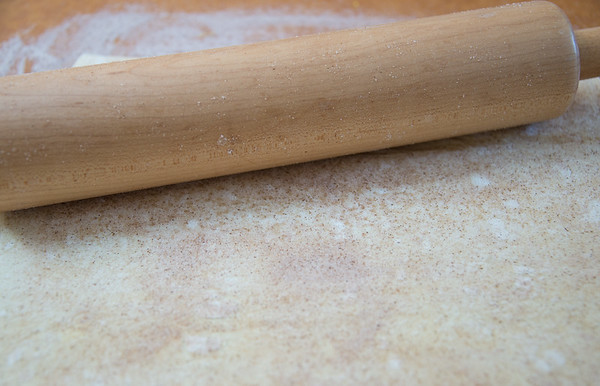
rolling out cinnamon palmier dough

Rolling out the palmier dough

Bring the shorter ends of the pastry to the middle, leaving a half-inch between to two edges. Dust with sugar and then fold each end so that the two edges touch. Dust with sugar again and make one final fold, bringing the one half over the other. Think of this as closing a book and bringing the pages together. Repeat the dusting, rolling, dusting and folding steps with the other sheet of puff pastry.

Refrigerate the palmier dough for 30 to 60 minutes. This will make it easier to slice.

Preheat the oven to 400 degrees Fahrenheit. Line two baking sheets with parchment paper.
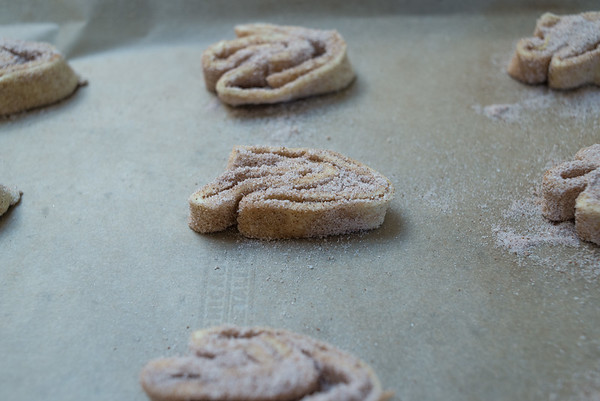
palmiers on parchment paper

Cinnamon palmiers on a parchment-lined baking sheet

Remove the dough from refrigerator. Using a sharp knife, slice the dough into half-inch cookies. Place them 1 inch apart a lined baking sheet. Bake for 10 minutes, until the bottoms have turned golden brown. Turn the cookies over and bake for another 5 to 8 minutes, until crisp and golden. Cool on the baking sheets for 5 minutes before removing and placing in an airtight container. The cookies will keep for up to 3 days.
Ooh la la! Lemon Palmiers!

lemon palmiers

A platter of lemon palmiers

Because I lack the patience to wait in long lines, fight the crowds at historic sites and deal with other cranky, sweaty tourists, while friends are off baking at the beach or exploring national parks, I spend the summer tucked in my kitchen, reliving past vacations through food. Few sweets remind me more of poking around picturesque French villages than palmiers. Originating in Southern France, these flaky, caramelized cookies are a mainstay of patisseries and, in my case, the perfect breakfast-on-the-go. What can I say? Whether at home or on the road, I like my breakfasts small, portable and sweet.

Palmiers get their name from their unmistakable shape. In French palmier means “palm.” Along with being compared to palm leaves, they have been likened to butterflies, eyeglasses, hearts and elephant ears. If I’m baking these cookies, they might resemble a palm tree or, on an especially harried day, a work of modern art.

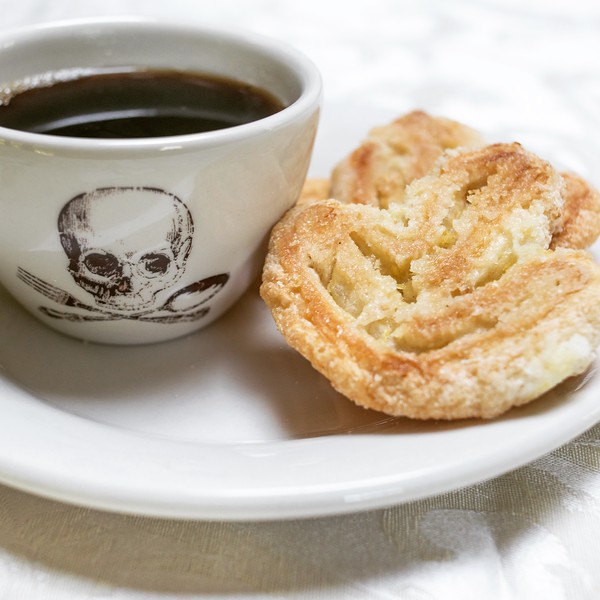
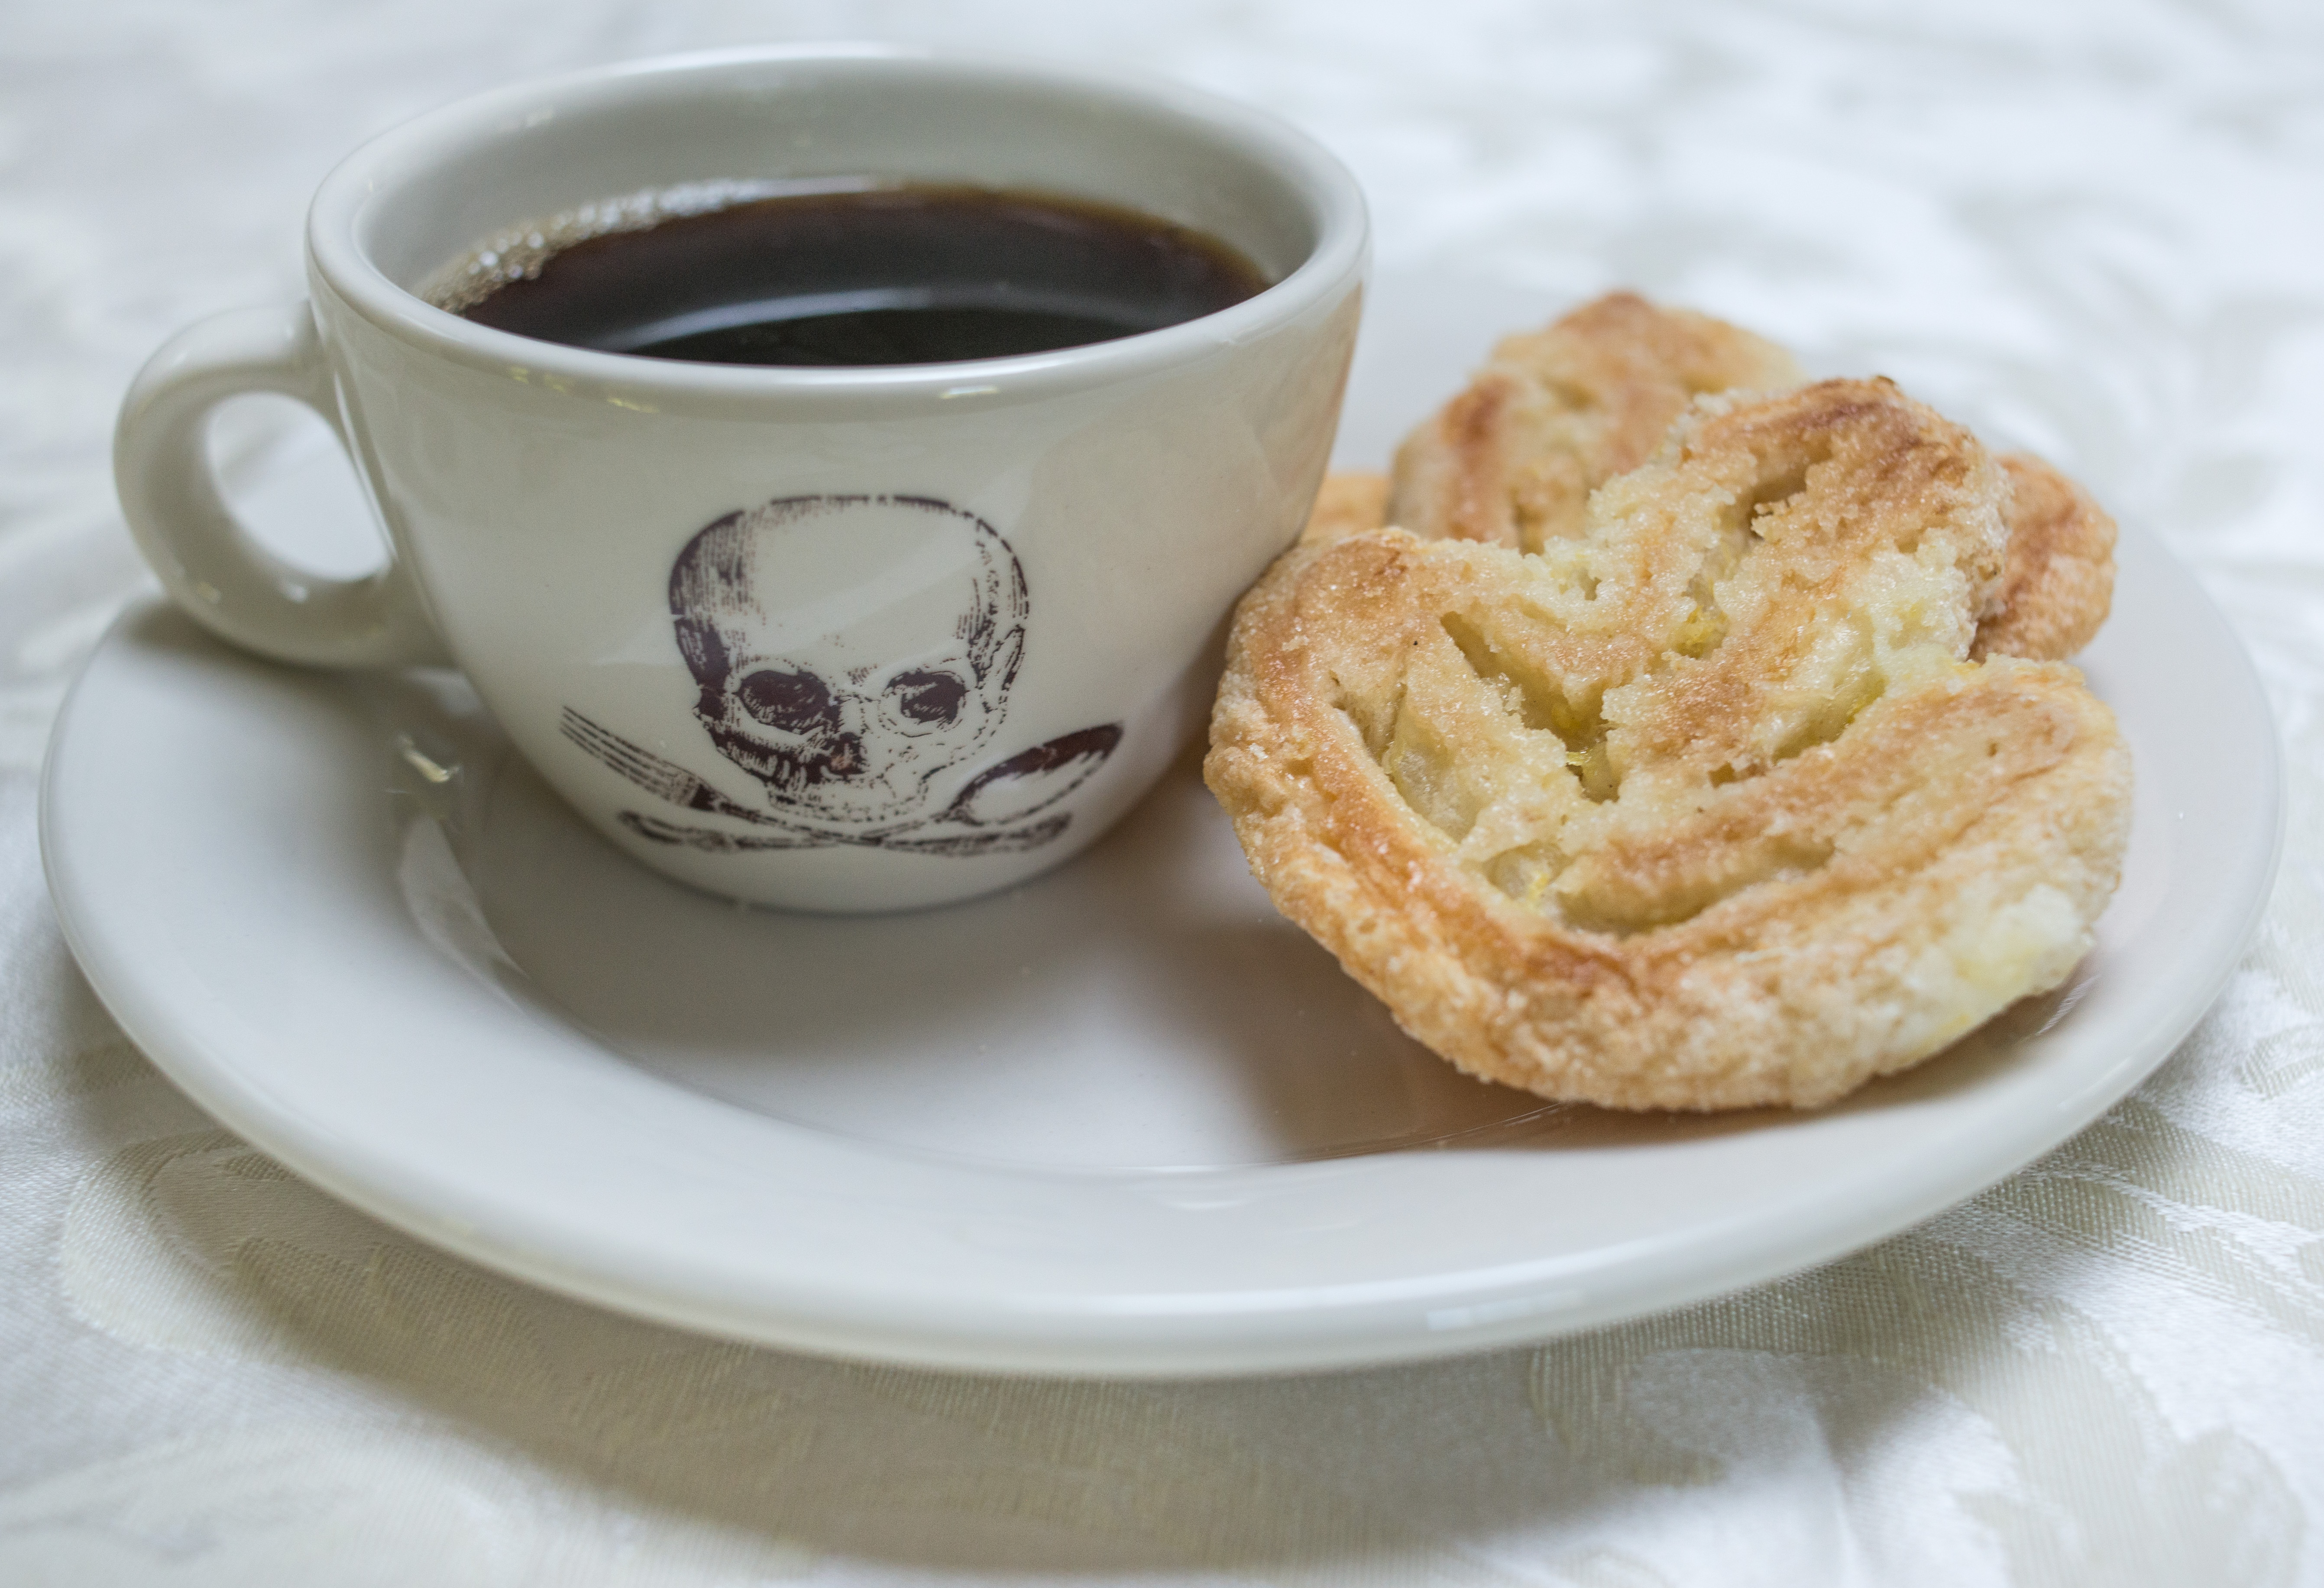
Coffee and lemon palmiers

Perfect start to the day? Drinking coffee from a pirate cup and eating lemon palmiers

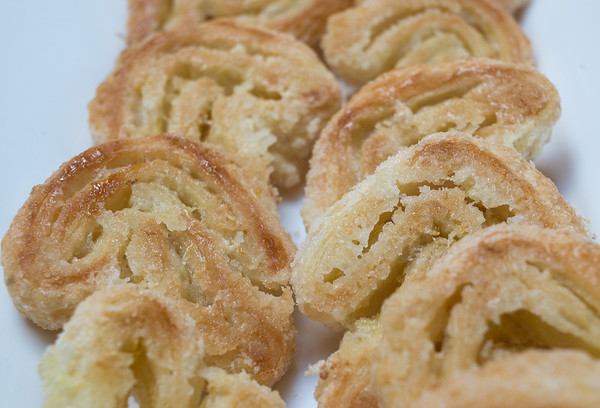
How do these cookies end up looking like palm leaves? Imagine dozens of layers of buttery puff pastry dusted with sugar and folded over and over again until they form a long, plump log. The log is then sliced and the slices are baked. As they bake, each layer of pastry expands and then comes together with the other layers to form a palm-shaped cookie.

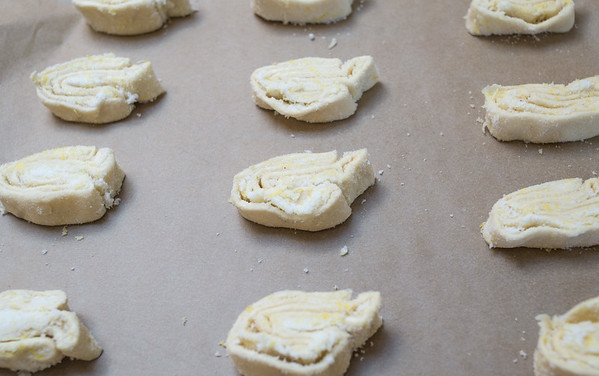
Palmiers sliced and ready to be baked

Palmiers sliced and ready to be baked

Traditionally, palmiers consist of two ingredients—granulated sugar and puff pastry or, to be more precise, laminated dough. A laminated dough consists of alternating layers of paper-thin dough and butter that, when baked, puff up. Although you can make your own puff pastry, I tend to take the quick route and just buy it in the frozen foods section of my local grocery store.

If you’re a purist, omit the grated lemon zest in the following recipe. That’s the original French way to make palmiers. However, if you’re a fan of cinnamon, check back in a few weeks for another delicious take on this classic confection, cinnamon palmiers.

LEMON PALMIERS

Makes 3 dozen

1 1/4 cups granulated sugar
Grated zest of 4 lemons
1 pound (2 sheets) puff pastry, defrosted

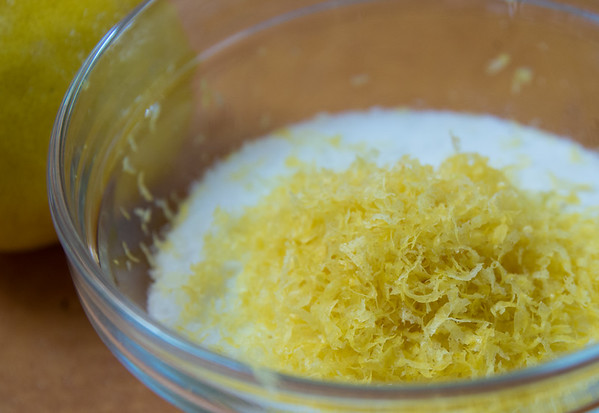
In a small bowl stir together the sugar and grated lemon zest until well combined. If you’re uncertain what grated zest is, see the photo below. You don’t want strips of lemon peel but instead the grated peel or zest of the fruit.

grated lemon zest and sugar

Bowl of grated lemon zest and sugar

Lightly dust a clean work surface with some of the lemon sugar. Place a sheet of puff pastry on top of the sugar and then sprinkle sugar on top of the pastry. Using a rolling pin, roll out the pastry until it’s roughly a 12″ x 24″ rectangle. Sprinkle more sugar on top of the rolled out pastry.

Bring the shorter ends of the pastry to the middle, leaving a half-inch between to two edges. Dust with sugar and then fold each end so that the two edges touch. Dust with sugar again and make one final fold, bringing the one half over the other. Think of this as closing a book and bringing the pages together. Repeat the dusting, rolling, dusting and folding steps with the other sheet of puff pastry.

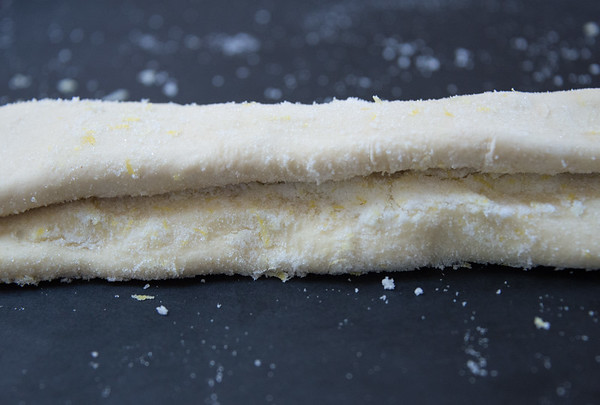
Folded puff pastry

The final final fold of puff pastry should remind you of a closed book.

Refrigerate the palmier dough for 30 to 60 minutes. This will make it easier to slice.

Preheat the oven to 400 degrees Fahrenheit. Line two baking sheets with parchment paper.

Remove the dough from refrigerator. Using a sharp knife, slice the dough into half-inch cookies. Place them 1 inch apart a lined baking sheet. Bake for 10 minutes, until the bottoms have turned golden brown. Turn the cookies over and bake for another 5 to 8 minutes, until crisp and golden. Cool on the baking sheets for 5 minutes before removing and placing in an airtight container. The cookies will keep for up to 3 days.
Thai Sticky Rice with Mango

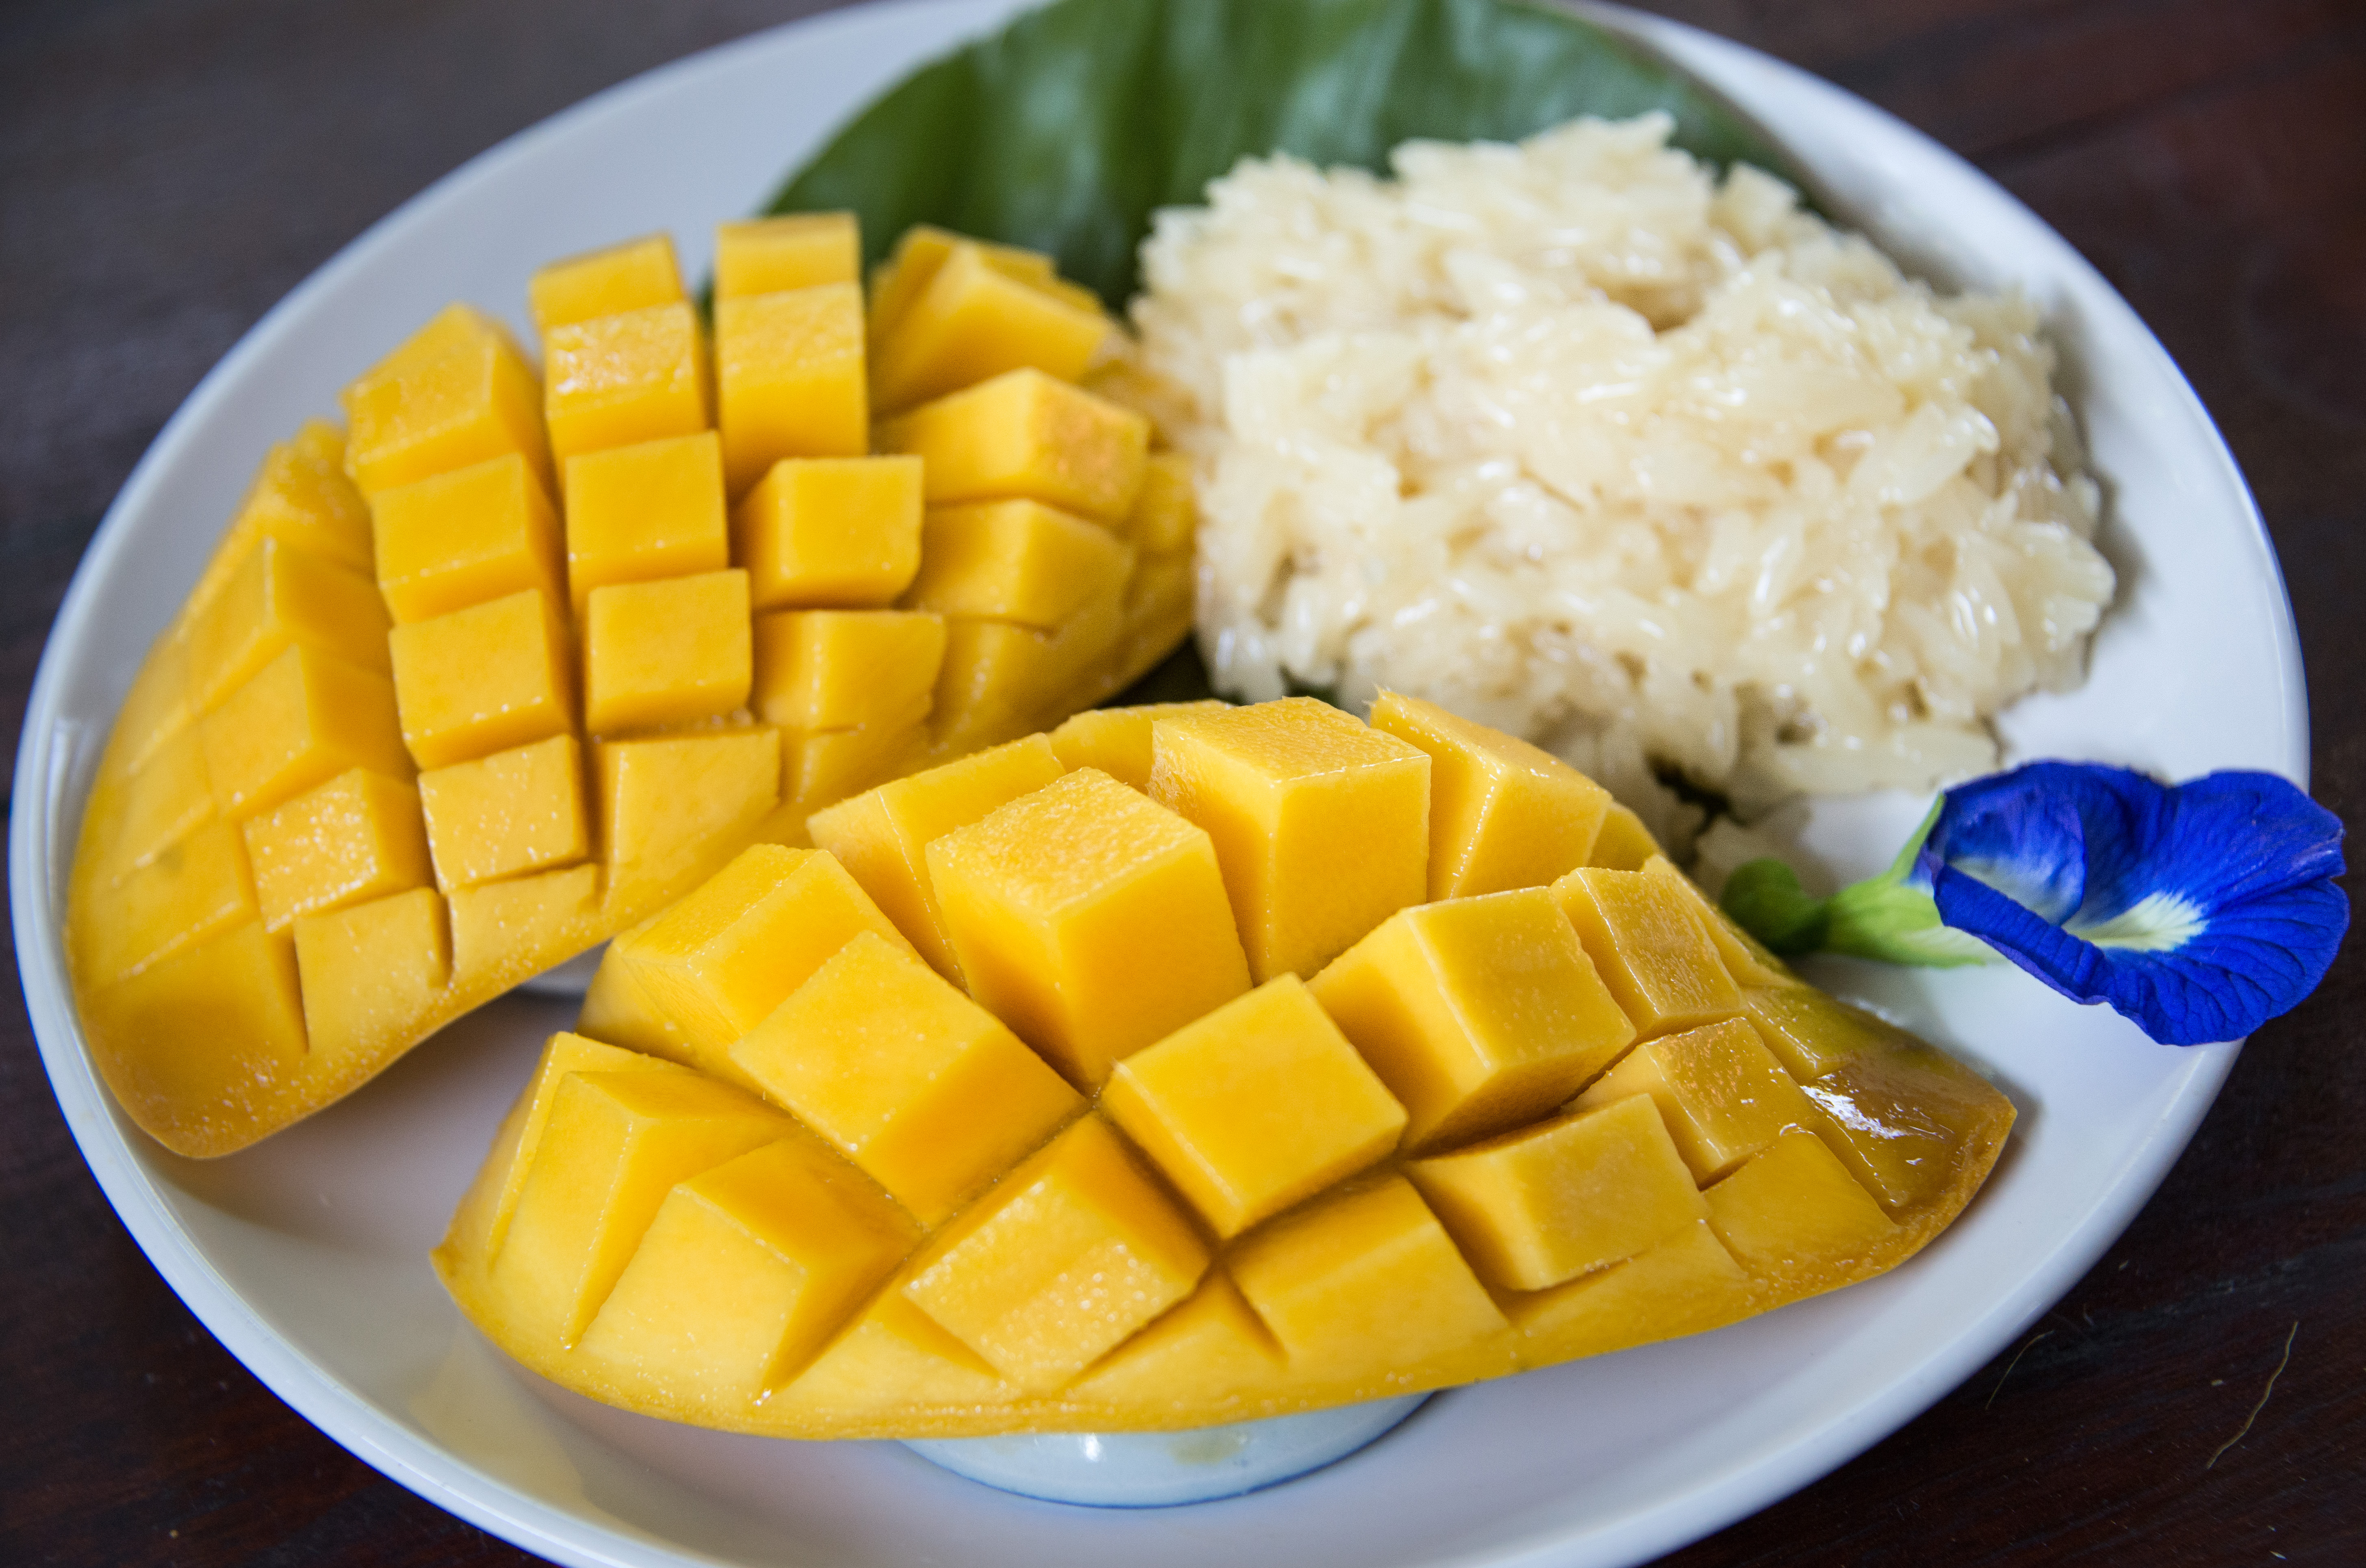
Sticky rice with mango

Sticky rice with mango served on a banana leaf

I promise that Kitchen Kat isn’t evolving into a Southeast Asian food blog. However, I do have one more tantalizing recipe from this part of the world to share. This time it’s an iconic Thai sweet, sticky rice with mango. One of those rare desserts that is as straightforward as it sounds, here steamed sticky rice or khâo niaw gets paired with cut mango.

Sometimes referred to as glutinous rice, sticky rice’s name comes from its texture. When cooked, this short, oval-shaped rice becomes quite gummy. Its color also changes from white to almost translucent, which is the opposite of how white rice looks before and after steaming. Especially popular in Northern Thailand, sticky rice can be eaten by hand.

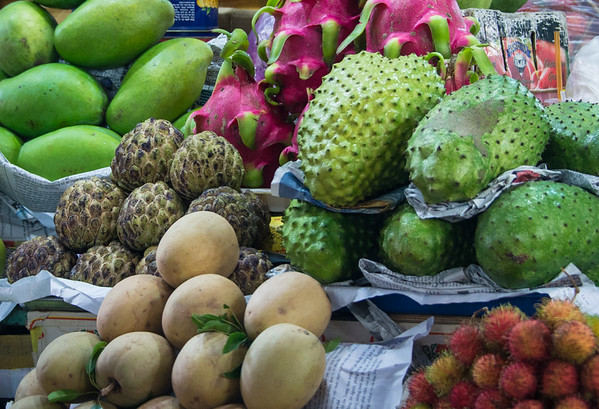
Assortment of tropical fruit

Tropical fruit from top left to right: mangoes, dragon fruit, soursop, rambutan, sapodilla, custard apples

Occasionally sticky rice is consumed on its own. On some rare occasions it is served alongside fresh or dried shrimp, giving diners a sweet-salty-savory experience. Although it usually pairs up with mango, it also goes nicely with such tropical fruits as soursop, pineapple and jackfruit or tart and fruity sorbet. I like it best, though, when it’s featured in the following classic recipe, sticky rice with mango.

Thai sticky rice with cut mango

The finished dish, Thai sticky rice with cut mango

STICKY RICE WITH MANGO
Serves 4

1 cup sticky/glutinous rice, soaked in water overnight
2/3 cup granulated sugar
3/4 cup coconut milk
Pinch salt
2 to 4 ripe mangoes

Drain and rinse the rice and, using either a heavy bottomed pot with a lid or a rice cooker, steam the rice for 20 minutes.
As the rice is steaming, whisk together the sugar, coconut milk and salt. Once the rice has finished cooking, pour the liquid over it and stir to combine. Cover and allow the rice to soak up all the liquid, about 20 minutes.
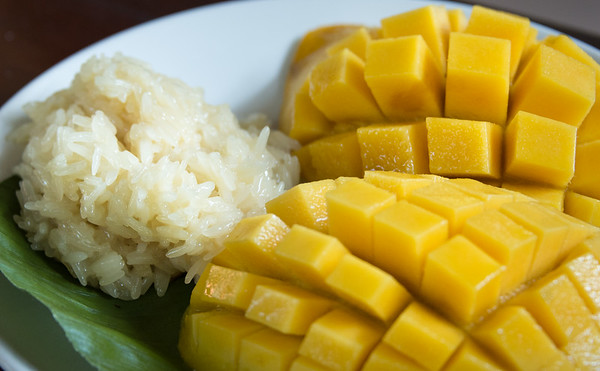
Sliced mango

Prepping the sliced mango

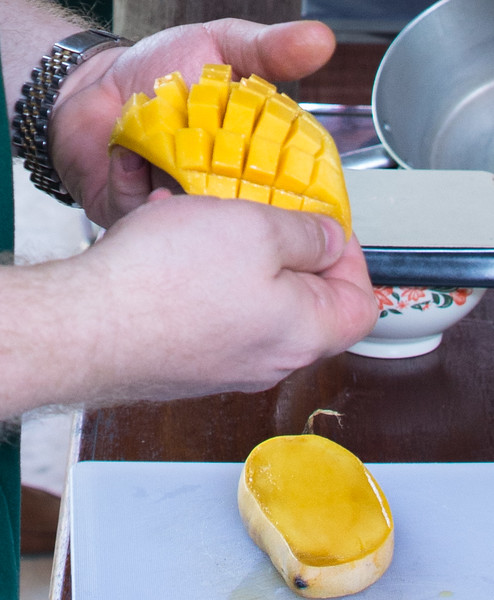
As the rice is steeping, prepare the mangoes. Using a thin, sharp knife, slice a mango in half lengthwise and then cut evenly spaced vertical and horizontal rows into its flesh. (See image above to see how the cut mango should look.) Gently push up on the fruit’s skin so that the sliced squares pop up. Place the cut half on a plate. Repeat these steps with the remaining fruit.

When the rice has finished steeping, spoon equal amounts next to the sliced mango. Serve immediately.

Sizzling Shrimp Spring Rolls

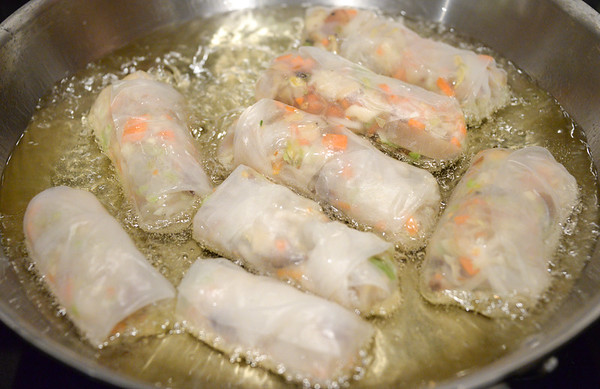
frying shrimp rolls

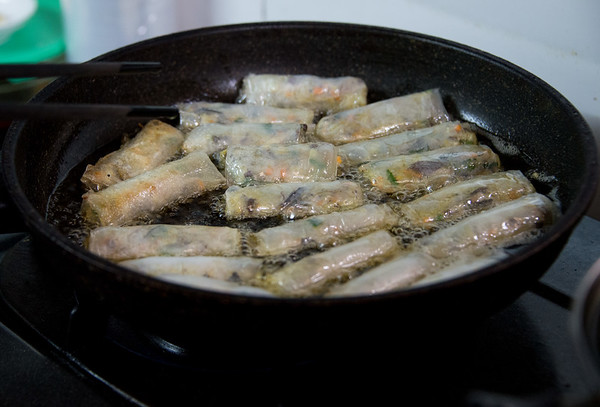
Shrimp rolls sizzling in the pan

Thanks to my step-father-in-law, travel and Asian cooking classes, I’ve unintentionally become a master at making fried shrimp spring rolls or cha giò tôm. Accident or not, I’m thankful for this skill for spring rolls have turned out to be a fun group activity, popular cooking lesson and intriguing hot appetizer at parties. Just imagine your — or my — friends’ faces when offered a warm, crunchy, golden hors d’oeuvre and hearing the words, “Want to try some crunchy shrimp spring rolls? Nope, they’re not from the Chinese restaurant down the street. I made them myself!” Talk about impressing guests!

Although I came to shrimp spring rolls through Vietnamese cuisine, these snacks have their origins in China. During the Tang Dynasty, between the 7th and 10th century, people began serving spring rolls to celebrate the Chinese New Year and the planting of the new season’s crops.

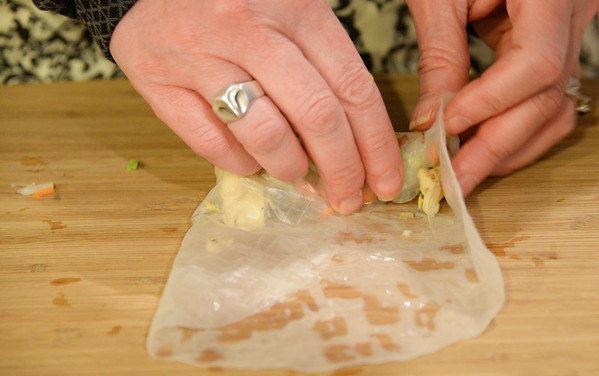
Rolling up a spring roll

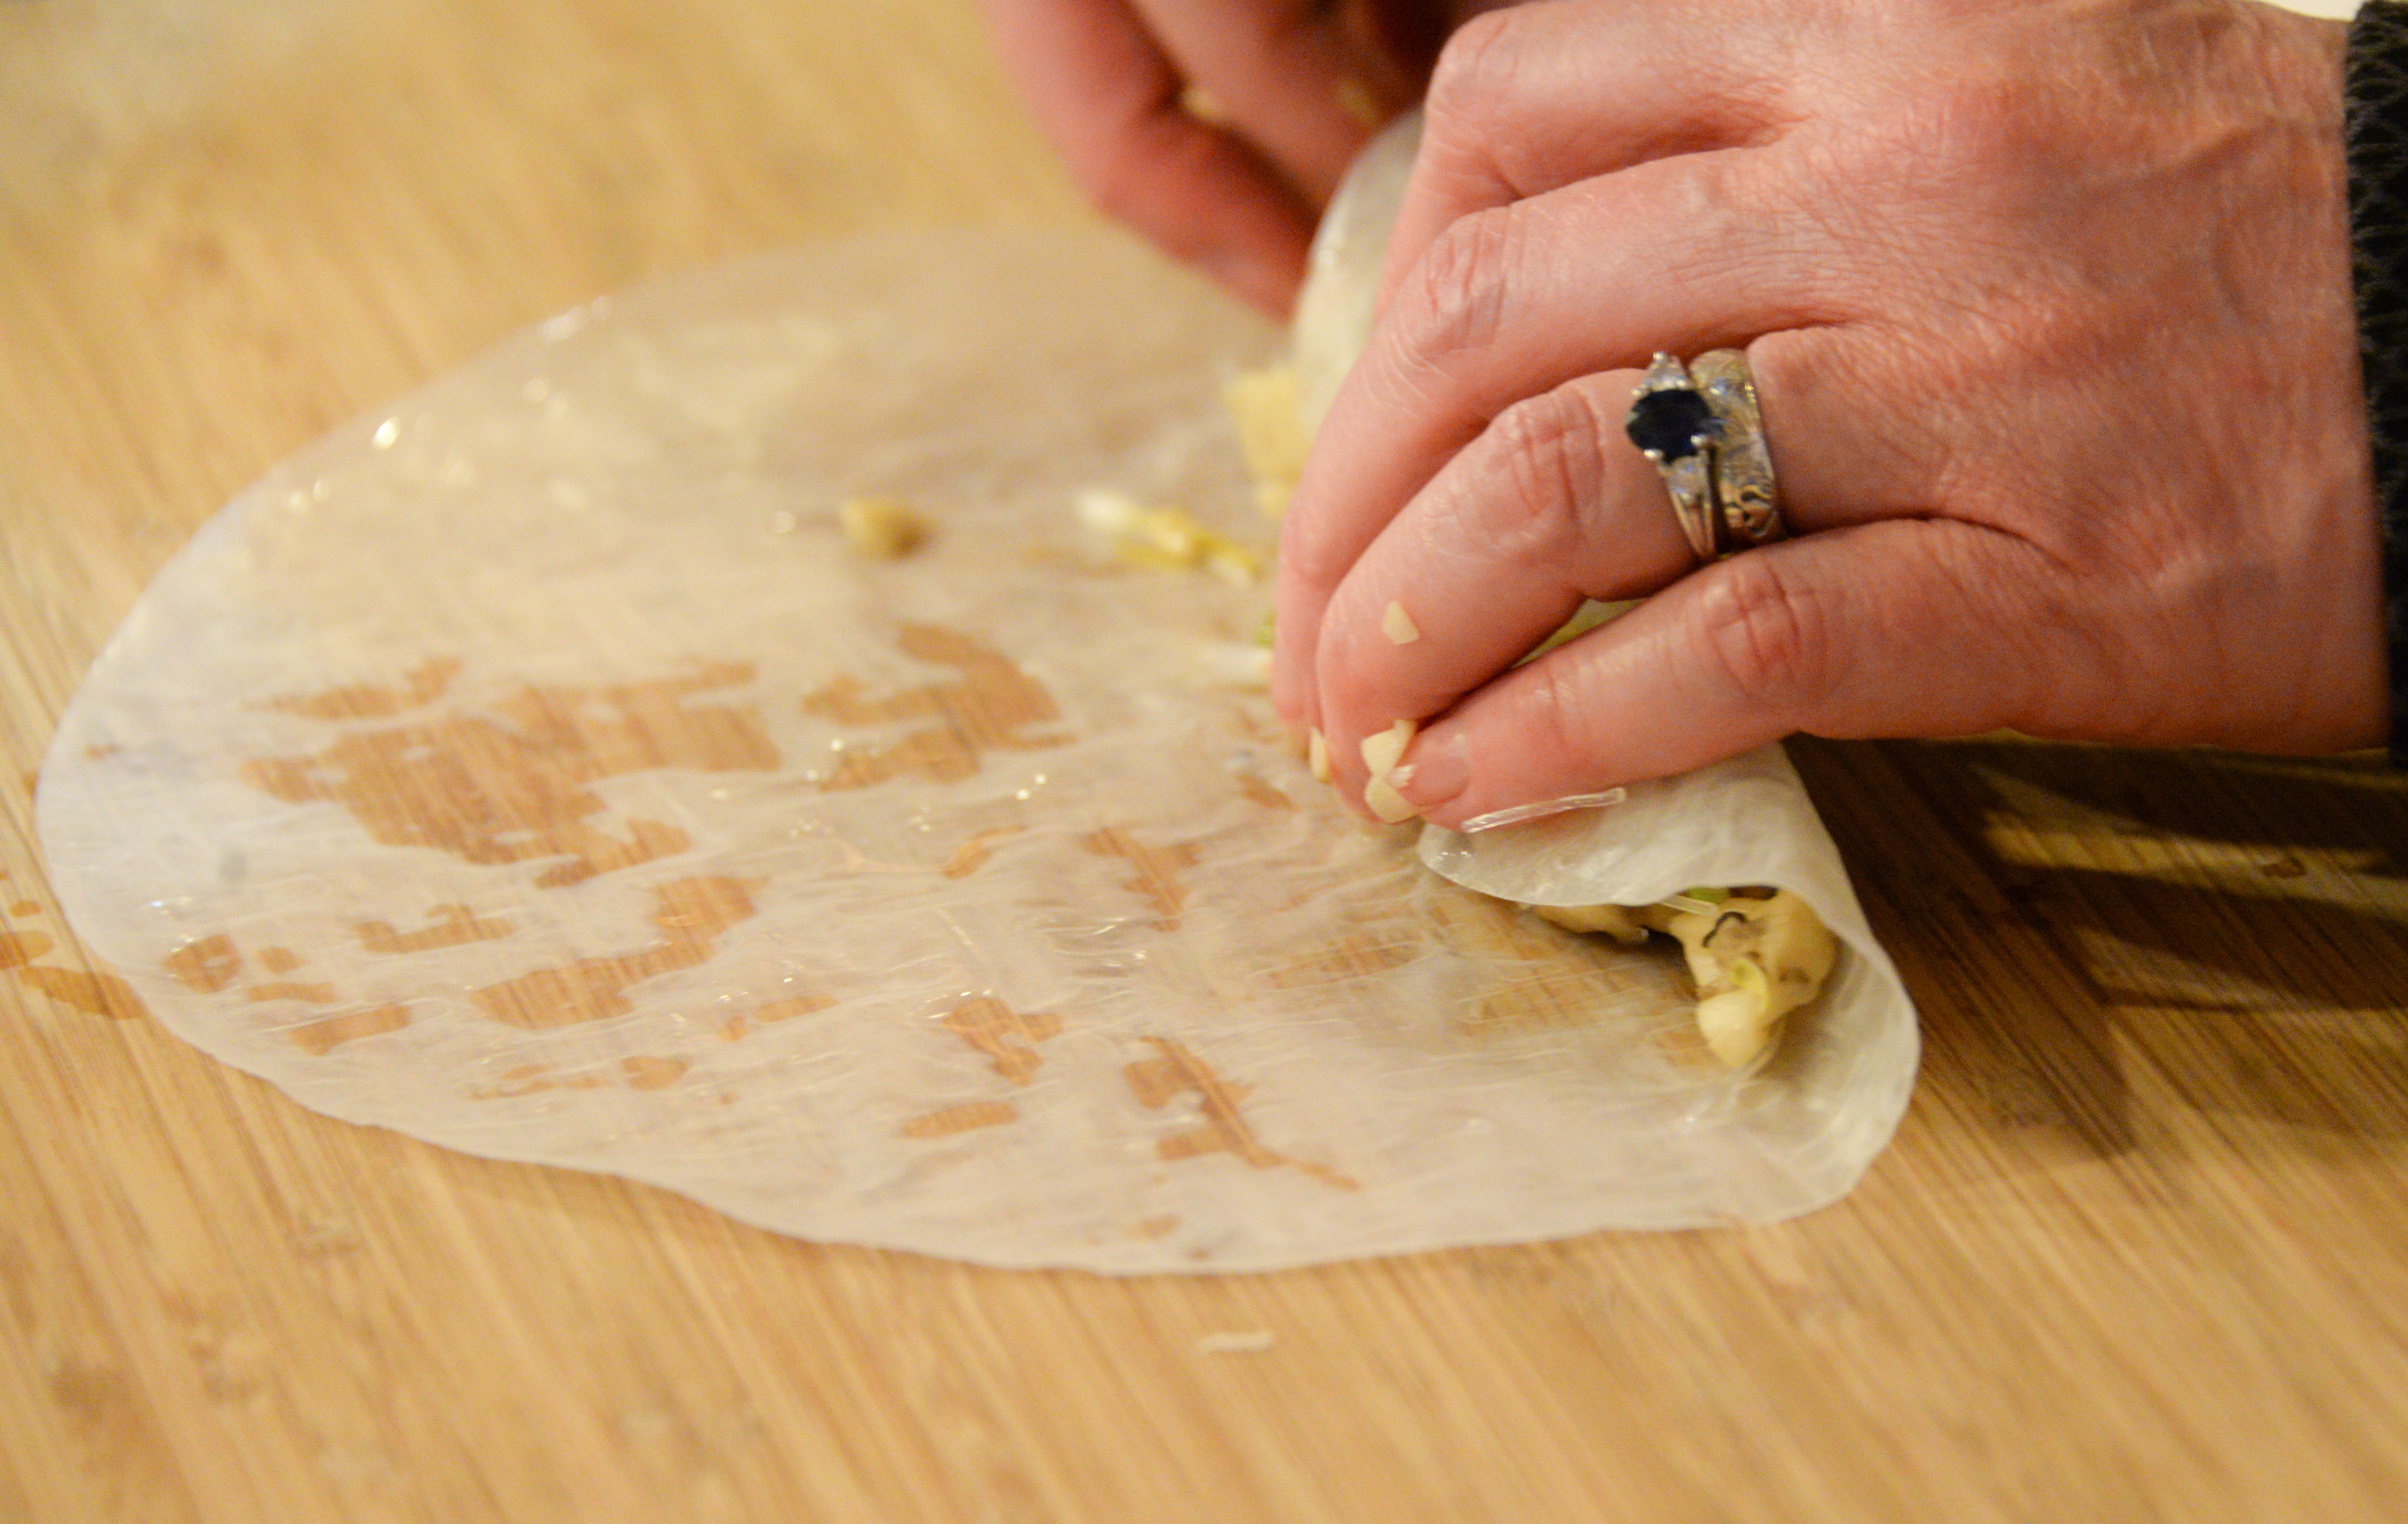
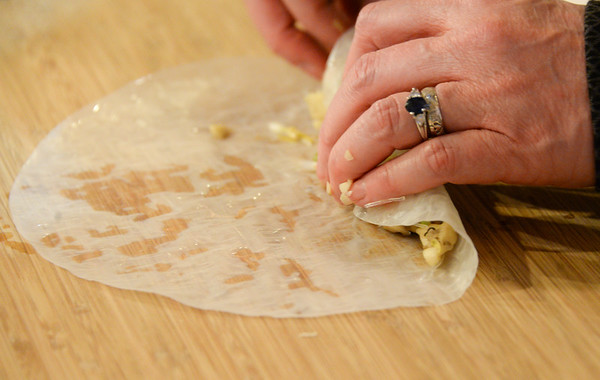
Rolling up the spring roll filling in a rice paper wrapper

The early version of this finger food featured sliced spring vegetables rolled up in a delicate pastry or pancake. Thus how it got the name “spring roll.” Once sealed, the bundles were briefly deep-fried so that the wrappers became crisp while the filling remained soft. Think of this as culinary yin and yang with the two contrasting textures complementing one another.

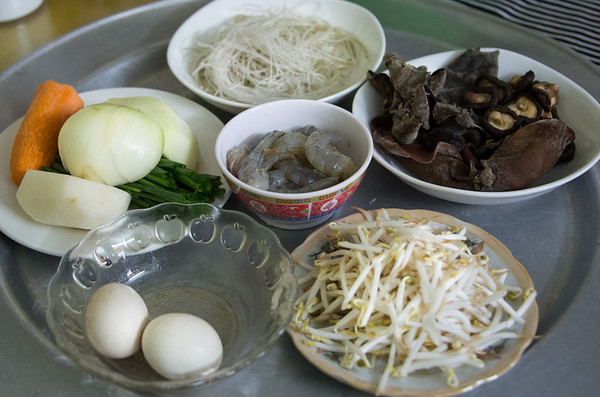
Ingredients for shrimp spring rolls

The ingredients in shrimp spring rolls

Vietnamese spring rolls differ from their Chinese predecessors in that they pair shrimp, pork and vermicelli rice noodles with spring vegetables such as carrots, scallions and mushrooms. They also use herbs such as coriander, mint and chives. Occasionally, one or two eggs are included in the mix. After being tossed together, the ingredients are enfolded in fragile rice paper wrappers and pan-fried.

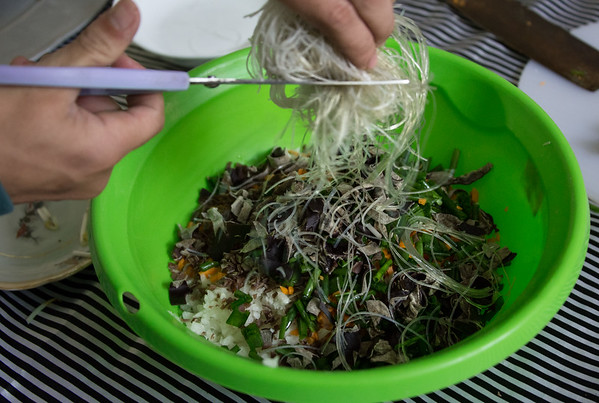
Snipping rice noodles

Snipping vermicelli rice noodles to add to the filling

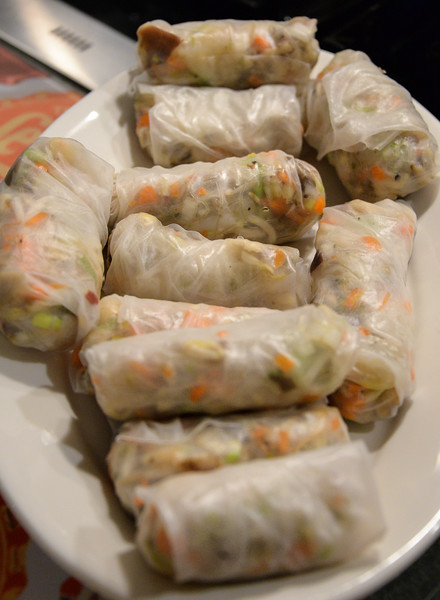
When making spring rolls, be sure not to overstuff the wrappers. If you add too much filling, the wrappers won’t seal tightly and will subsequently pop open in the frying pan. For the proper sized roll, see the first photo at the top of the entry. For rolls bordering on overstuffed, note the plump ones on the edges of the white platter in the image below. To avoid overly fat rolls, use between one and two tablespoons of stuffing.

Uncooked spring rolls

Platter of plump, uncooked spring rolls

Because I am a pescetarian and don’t eat pork, the following recipe does not include meat. If you’re seeking a truly authentic cha giò tôm, replace three-fourths of the shrimp with ground pork.

SHRIMP SPRING ROLLS
Makes approximately 4 dozen spring rolls

for the rolls:
4 ounces vermicelli rice noodles
1 egg, lightly beaten
1 1/2 cups bean sprouts
1 1/2 cups grated carrot
2/3 cup chopped spring onion
2/3 cup cremini or shiitake mushrooms, roughly chopped
1 clove garlic, minced
14 to 16 ounces peeled, defrosted shrimp, roughly chopped
1 tablespoon fish sauce
1 tablespoon granulated sugar
1 tablepoon rice wine vinegar
1 teaspoon ground black pepper
1 teaspoon salt
1 to 2 packages of rice paper wrappers
Grapeseed or canola oil, enough to have a 1-inch deep layer of oil in your frying pan

for the dipping sauce:
3 tablespoons hot water
1 tablespoon granulated sugar
1 tablespoon rice wine vinegar
1 1/2 teaspoons fish sauce
1/2 teaspoon crushed chili pepper
1/2 teaspoon ground black pepper
1 clove garlic, minced

Place the rice noodles in a large bowl and cover with hot water. Allow them to soak for 10 minutes, periodically stirring and pulling the noodles apart. After 10 minutes drain off the water and snip them into 2-inch strips.

In a large bowl mix together the egg, bean sprouts, carrot, onion, mushrooms, garlic, shrimp and noodles. In a smaller bowl stir together the fish sauce, sugar, vinegar, pepper and salt until the sugar and salt have dissolved. Pour the sauce over the filling and stir until well combined.

Folding the spring roll's edges

Folding over the edges of a spring roll wrapper

Place a wrapper on a clean work surface and moisten the wrapper with a clean, damp cloth. Using a measuring spoon, put 1 to 2 tablespoons of filling one inch from the bottom of the wrapper. Fold the bottom edge over the filling and then roll the wrapper over itself once. Fold the sides of the wrapper inward until their ends meet. (See image above for details.)

Roll up the spring roll. If the edge doesn’t seal tightly, lightly wet it with water and press down until sealed. Repeat these steps with the remaining filling, placing the spring rolls on a platter until you’re ready to fry them.

To fry, heat the vegetable oil in a large frying pan over medium-high heat. When the oil is ready, it will read 365 degrees Fahrenheit on a candy or instant-read thermometer. As the oil is heating, whisk together the hot water, sugar, rice wine vinegar, fish sauce, crushed chili pepper, black pepper and garlic. Set the dipping sauce aside.

frying spring rolls

Mixture of over-stuffed and just right spring rolls frying in hot oil

Using heat-proof tongs, place the spring rolls in the pan, making sure that they don’t touch each other. Fry the spring rolls on one side for 2 minutes or until golden brown. Turn them over and fry for another 2 minutes. Remove the rolls from the pan and place on a platter lined with paper towels. Repeat until all the spring rolls have been fried. Serve warm with the dipping sauce.

Czech Strawberry Dumplings

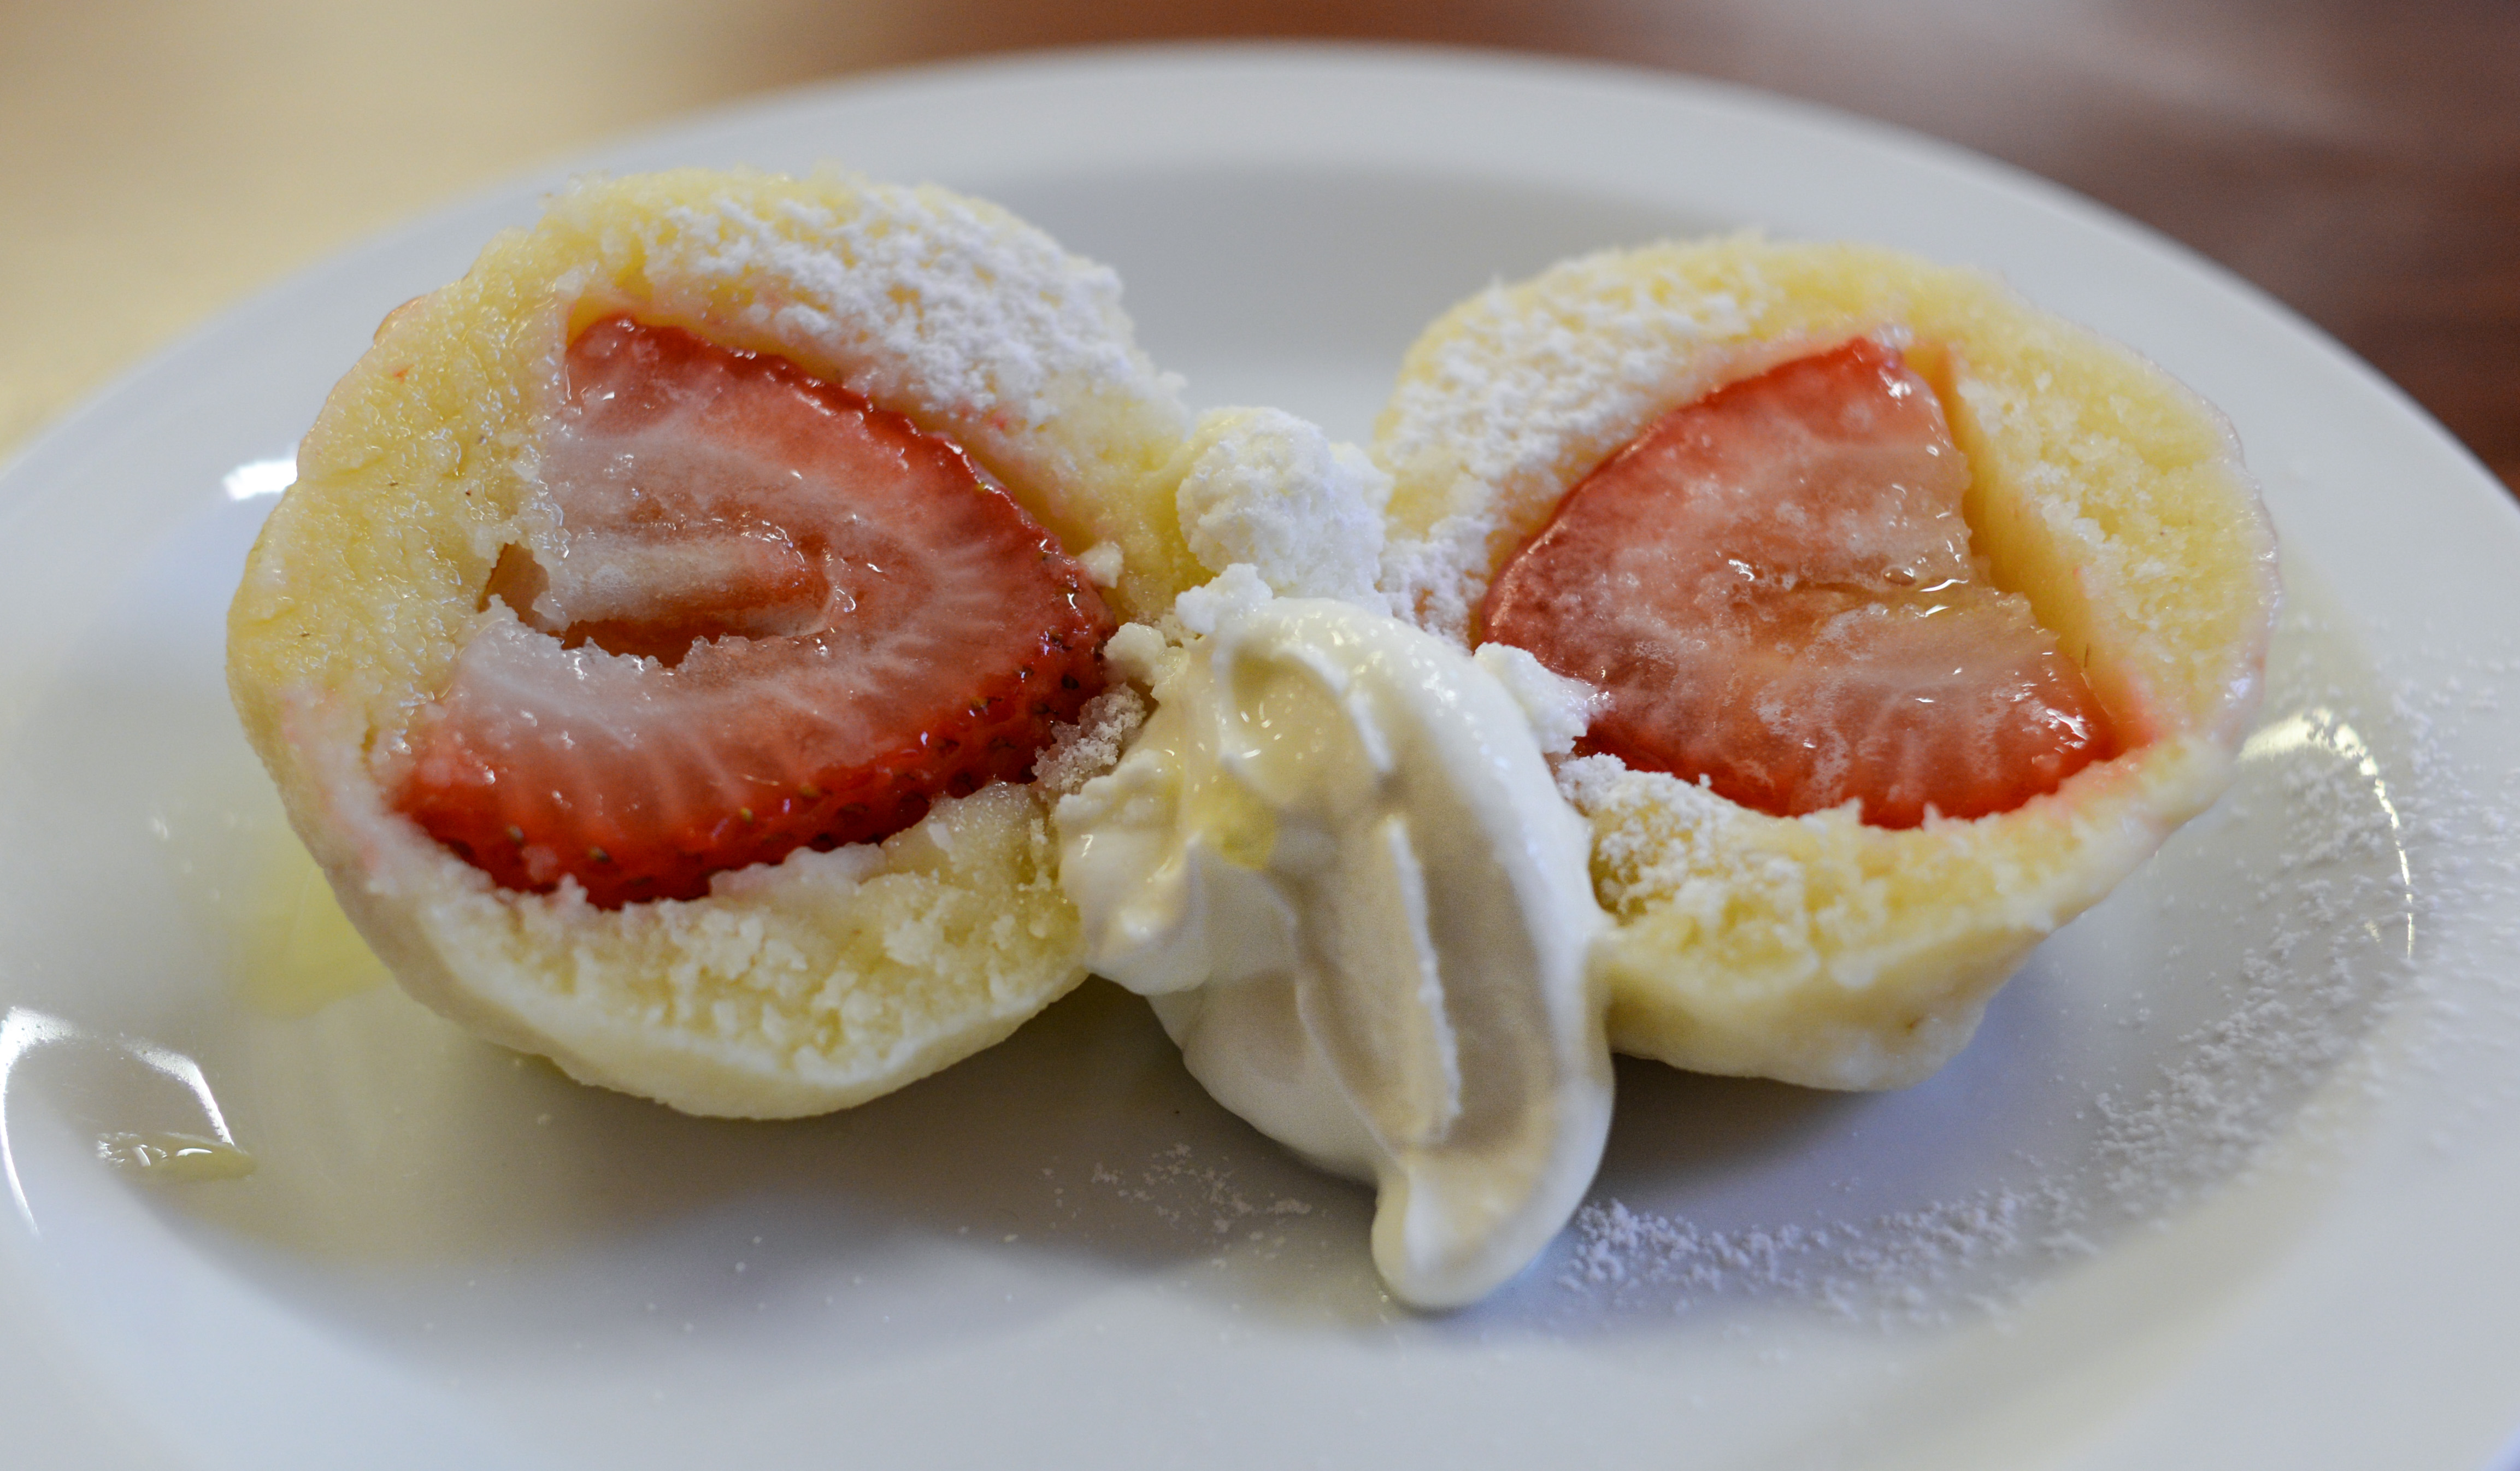
sliced strawberry dumplings

Hot-from-the-pot Czech strawberry dumplings or “jahoda knedlíky”

With strawberry season right around the corner, it seems like a good time to talk about Czech strawberry dumplings. Until two years ago, whenever I heard the phrase “dessert dumpling,” I imagined a cinnamon- and sugar-dusted apple bundled into a buttery pastry and baked until golden brown. The thought of a whole strawberry boiled inside a casing of cheese-laced dough never occurred to me. Then I made several trips to the Czech Republic and learned how to make jahoda knedlíky or strawberry dumplings. After that I forgot all about those apple pie-like treats.

strawberry on dumpling dough

About to encase a ripe strawberry in the dumpling dough

It’s been said that no traditional Czech dinner is complete without the inclusion of a dumpling or two. A staple since the Middle Ages, the plump, round dumpling can be either sweet or savory. The latter tends to use potatoes and potato flour as its base while the former features flour and/or breadcrumbs and a filling of whole, locally grown fruit such as strawberries, plums or cherries. Shaped into balls, both types of dumpling are boiled, drained, sliced in half with a thread and dressed with melted butter. Cooks also top sweet dumplings with a dusting of confectioner’s sugar or grated cheese and a dollop of whipped cream.

dumpling dough

A mound of dough, ready to be cut and shaped into dumplings

Sound easy? It is! To make the dessert dumpling dough, I just stir together quark, eggs, milk and semolina flour until a soft dough forms. From there I plop the dough onto a dusted work surface, pat or roll it out to about 1-inch in thickness and cut it into equal-sized squares. I wrap those squares around fresh, ripe strawberries. From there it’s just a few steps and minutes more until I have a batch of hot, delicious strawberry dumplings.

Since I like saucy dumplings, I usually put few strawberries, a tablespoon of confectioner’s sugar and a squeeze of lime juice in a blender and puree the ingredients together until I have a coulis or sauce. If I’m eating alone, I’ll just dunk bits of the dumpling into the sauce. If sharing with friends, I’ll drizzle the sauce over the sliced sweets. However, you should not feel compelled to make any toppings. Czech strawberry dumplings are delightful as is or with a smidgen of confectioner’s sugar or whipped cream.

CZECH STRAWBERRY DUMPLINGS

Makes 6 to 8 dumplings

500 grams (16 ounces or 2 cups) quark
2/3 cup milk
2 large eggs
500 grams (1 lb. 2 ounces or 2 2/3 cups) semolina flour, plus more if needed
Pinch salt
6 to 8 fresh, ripe, large strawberries, stems removed
Confectioner’s sugar, for dusting
Whipped cream, optional, for serving

Whisk together the quark, milk and eggs. In a separate bowl stir together the flour and salt.

Make a well in the center of the flour and pour the wet ingredients into it. Stir the wet and dry ingredients together until well-combined. If the dough seems too wet and sticky, add up to 1/3 cup flour until a soft, pliable dough is achieved.

Shape the dough into a ball and allow it to rest for 15 minutes.

While the dough is resting, bring a large pot of lightly salted water to a boil over high heat. Spread a thin layer of semolina flour over a clean work surface.

Place the dough on the floured work surface. Using your hands or a rolling pin, flatten the dough until it’s roughly 1/2-inch thick. With a sharp knife cut out a square of dough; you want it to be large enough to cover a whole strawberry. Put the strawberry in the center of the square and fold the dough over the berry, shaping it into a smooth ball. Continue cutting, shaping and wrapping the dough until you have 6 to 8 dumplings.

Dumplings boiling in water

Boiled strawberry dumplings about to be removed from the pot

Drop the dumplings into the boiling water and allow them to cook for 5 to 8 minutes. Once the dumplings have risen to the surface of the water, they are done.

Using a slotted spoon, remove each dumpling and place it on a plate or in a bowl. Allow each to cool slightly before cutting it in half and decorating with confectioner’s sugar and, if desired, whipped cream.

Pad Thai in Thailand

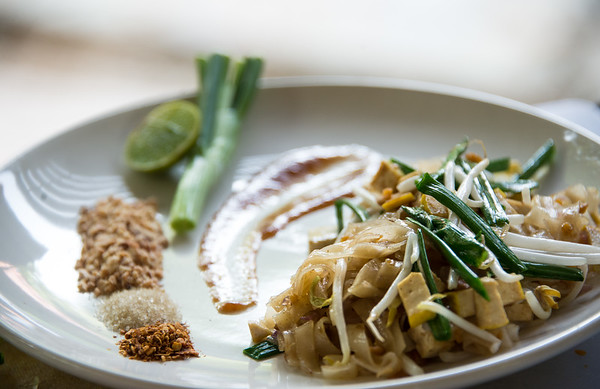
Plate of pad Thai

Simple yet elegant pad Thai

Pad Thai was my gateway into Thai cuisine. In my early 20s and unsure of what to order at a new, neighborhood, Southeast Asian restaurant, I opted for a simple noodle dish that promised complex flavors, interesting textures and a touch of the exotic. With hints of piquant tamarind, crunchy peanuts and salty fish sauce pad Thai delivered on its word. After that first satisfying encounter it became my go-to meal when dining or ordering out.

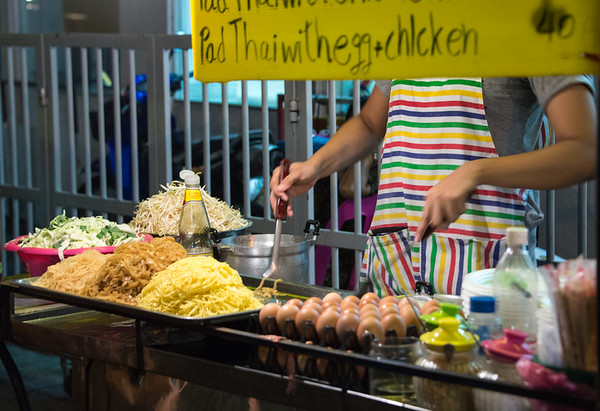
pad Thai from Bangkok street cart

Bangkok street vendor serving made-to-order pad Thai

After 15 years of sampling this specialty on American soil, I wanted it to be the first thing that I ate in Thailand. I’d tried countless Western interpretations of this stir fry. It was time to experience the real deal. This proved surprisingly easy for you can find noodle carts, shops and restaurants serving phàt Thai on almost every street in Bangkok. The same holds true in Northern Thailand.

Popular with locals as well as food-obsessed tourists, this dish has a lot going for it. For starters, it’s inexpensive. Depending on where you buy it in Thailand, you can pay as little as $1 for this filling and wholesome food. Obviously, it’s not difficult to find and, when you do, your repast will be fresh and made-to-order. Whether it’s the abundance of fresh, local ingredients or my overactive imagination, pad Thai does taste markedly brighter and better in Thailand.

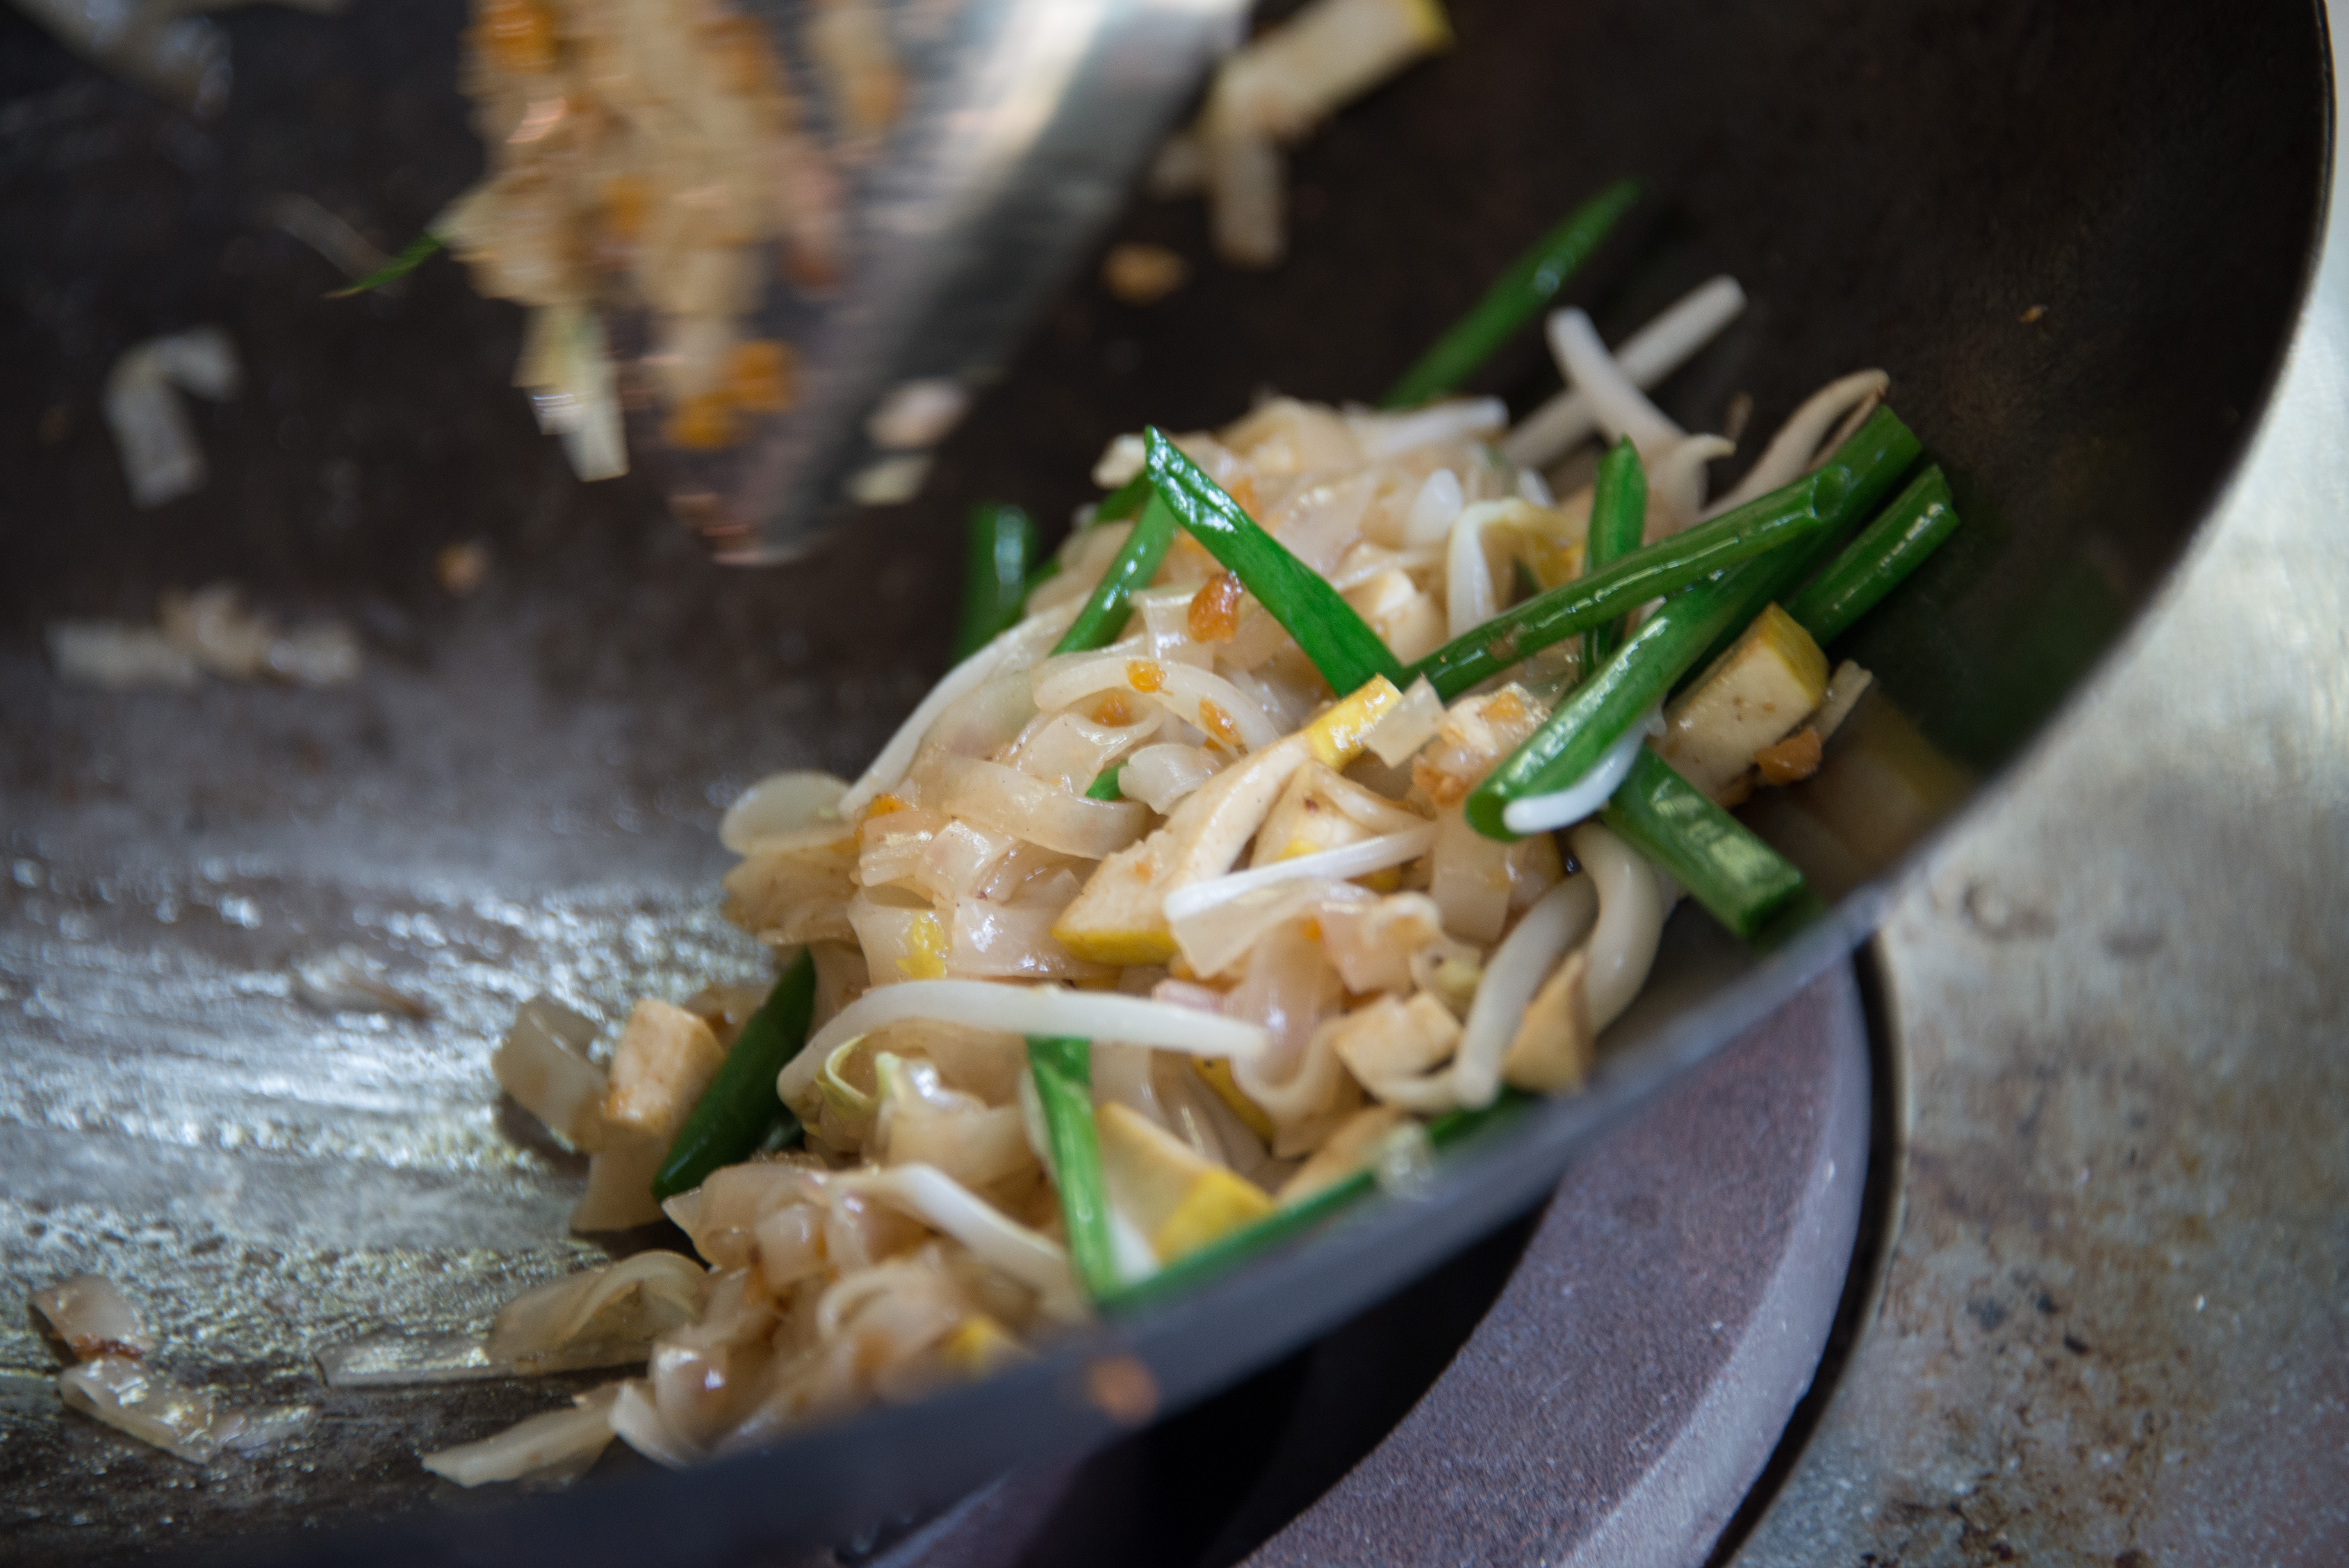
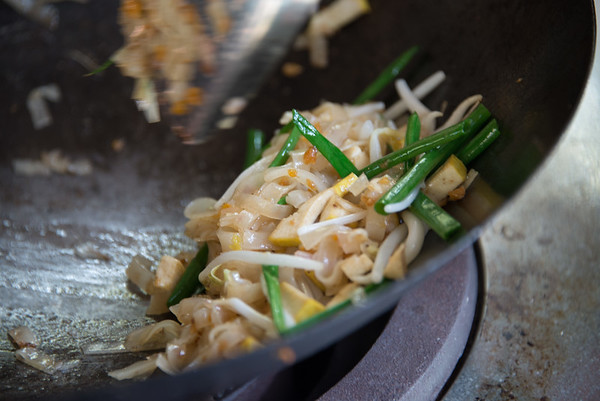
Stir-frying pad Thai

Stir-frying pad Thai

For a dish that packs a tremendous amount of flavor, pad Thai requires few ingredients. Along with the aforementioned tamarind paste, peanuts and fish sauce, it contains rice noodles, bean sprouts, scallions, shallots, preserved turnip and tofu. Occasionally, cooks will scramble a raw egg into the mixture. They may also add dried or fresh shrimp. A few Bangkok street vendors offer chicken, too, but this is less authentic than the inclusion of egg and/or shrimp.

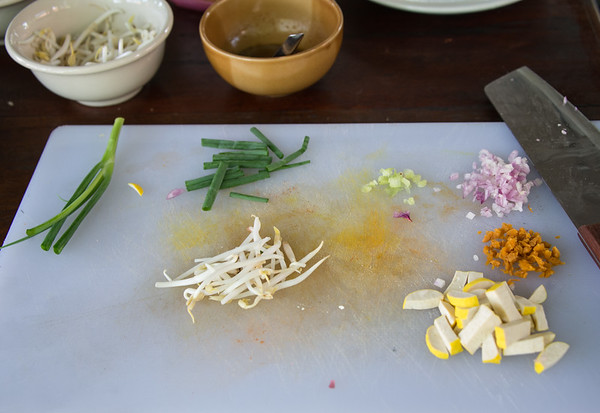
Ingredients in pad Thai

You need just a few ingredients to make pad Thai.

Considering the limited number of ingredients and speed and ease of preparation, I’m surprised that I hadn’t tried making pad Thai at home sooner. After all, I have a wok, rice noodles, tamarind paste, fish sauce, sugar and peanuts. Tofu, scallions, shallots and bean sprouts aren’t tough to track down. Only the preserved sweet radish proved challenging. This I ordered online.

If you leave out the fish sauce, pad Thai is a delightful dish for vegan friends. For those vegans interested in making the following recipe, try this Cook’s Illustrated substitution for fish sauce.

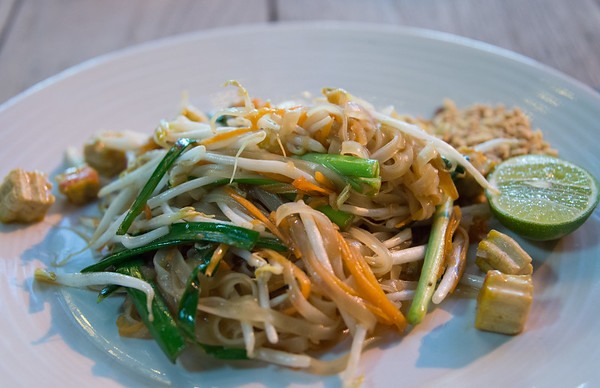
pad Thai

My first pad Thai meal in Thailand

PAD THAI
If you own a wok, use it to stir fry the ingredients. Otherwise, a heavy, well-oiled sauté or frying pan will work.
Serves 2

2 teaspoons grapeseed or canola oil
1 tablespoon tamarind paste
1 tablespoon water
1 1/2 tablespoons fish sauce or vegan “fish sauce”
2 teaspoons granulated sugar
1 large shallot, diced
2 teaspoons preserved sweet radish, rinsed and minced
4 to 5 ounces firm tofu, diced
Generous handful of rice noodles, soaked in warm water for 5 minutes to soften
2 spring onions, whites sliced and greens cut into 2-inch long matchsticks
Handful of bean sprouts
2 tablespoons roasted peanuts, chopped
1 teaspoon chili powder
2 lime wedges

Heat the oil on medium-high until almost smoking. As the oil is heating, whisk together the tamarind paste, water, fish sauce and sugar in a small saucepan over medium heat until the sugar has dissolved, 1 to 2 minutes. Remove the saucepan from the heat and set aside.

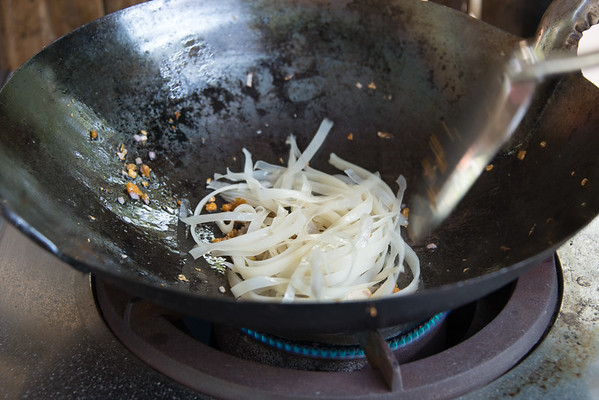
Add the shallot to the wok and stir fry for 1 minute before adding the preserved turnip and tofu. Stir fry for 30 to 60 seconds before adding the rice noodles and a smidgen of water. You want the noodles to be soft but not soggy. Stir fry for 1 minute and then add the tamarind fish sauce.

Stir-frying pad Thai

Stir-frying noodles for pad Thai

Simmer the ingredients for another 1 to 2 minutes before adding the spring onions and most of the bean sprouts. Cook for 30 seconds or until the sprouts and onions look slightly wilted. Remove the pan from the heat.

Place equal amounts of chopped peanuts and chili powder on two plates. Divide the pad Thai evenly between the plates and sprinkle the remaining bean sprouts over each. Place a lime wedge next to the pad Thai and serve hot.

Sweet Steamed Banana Cakes

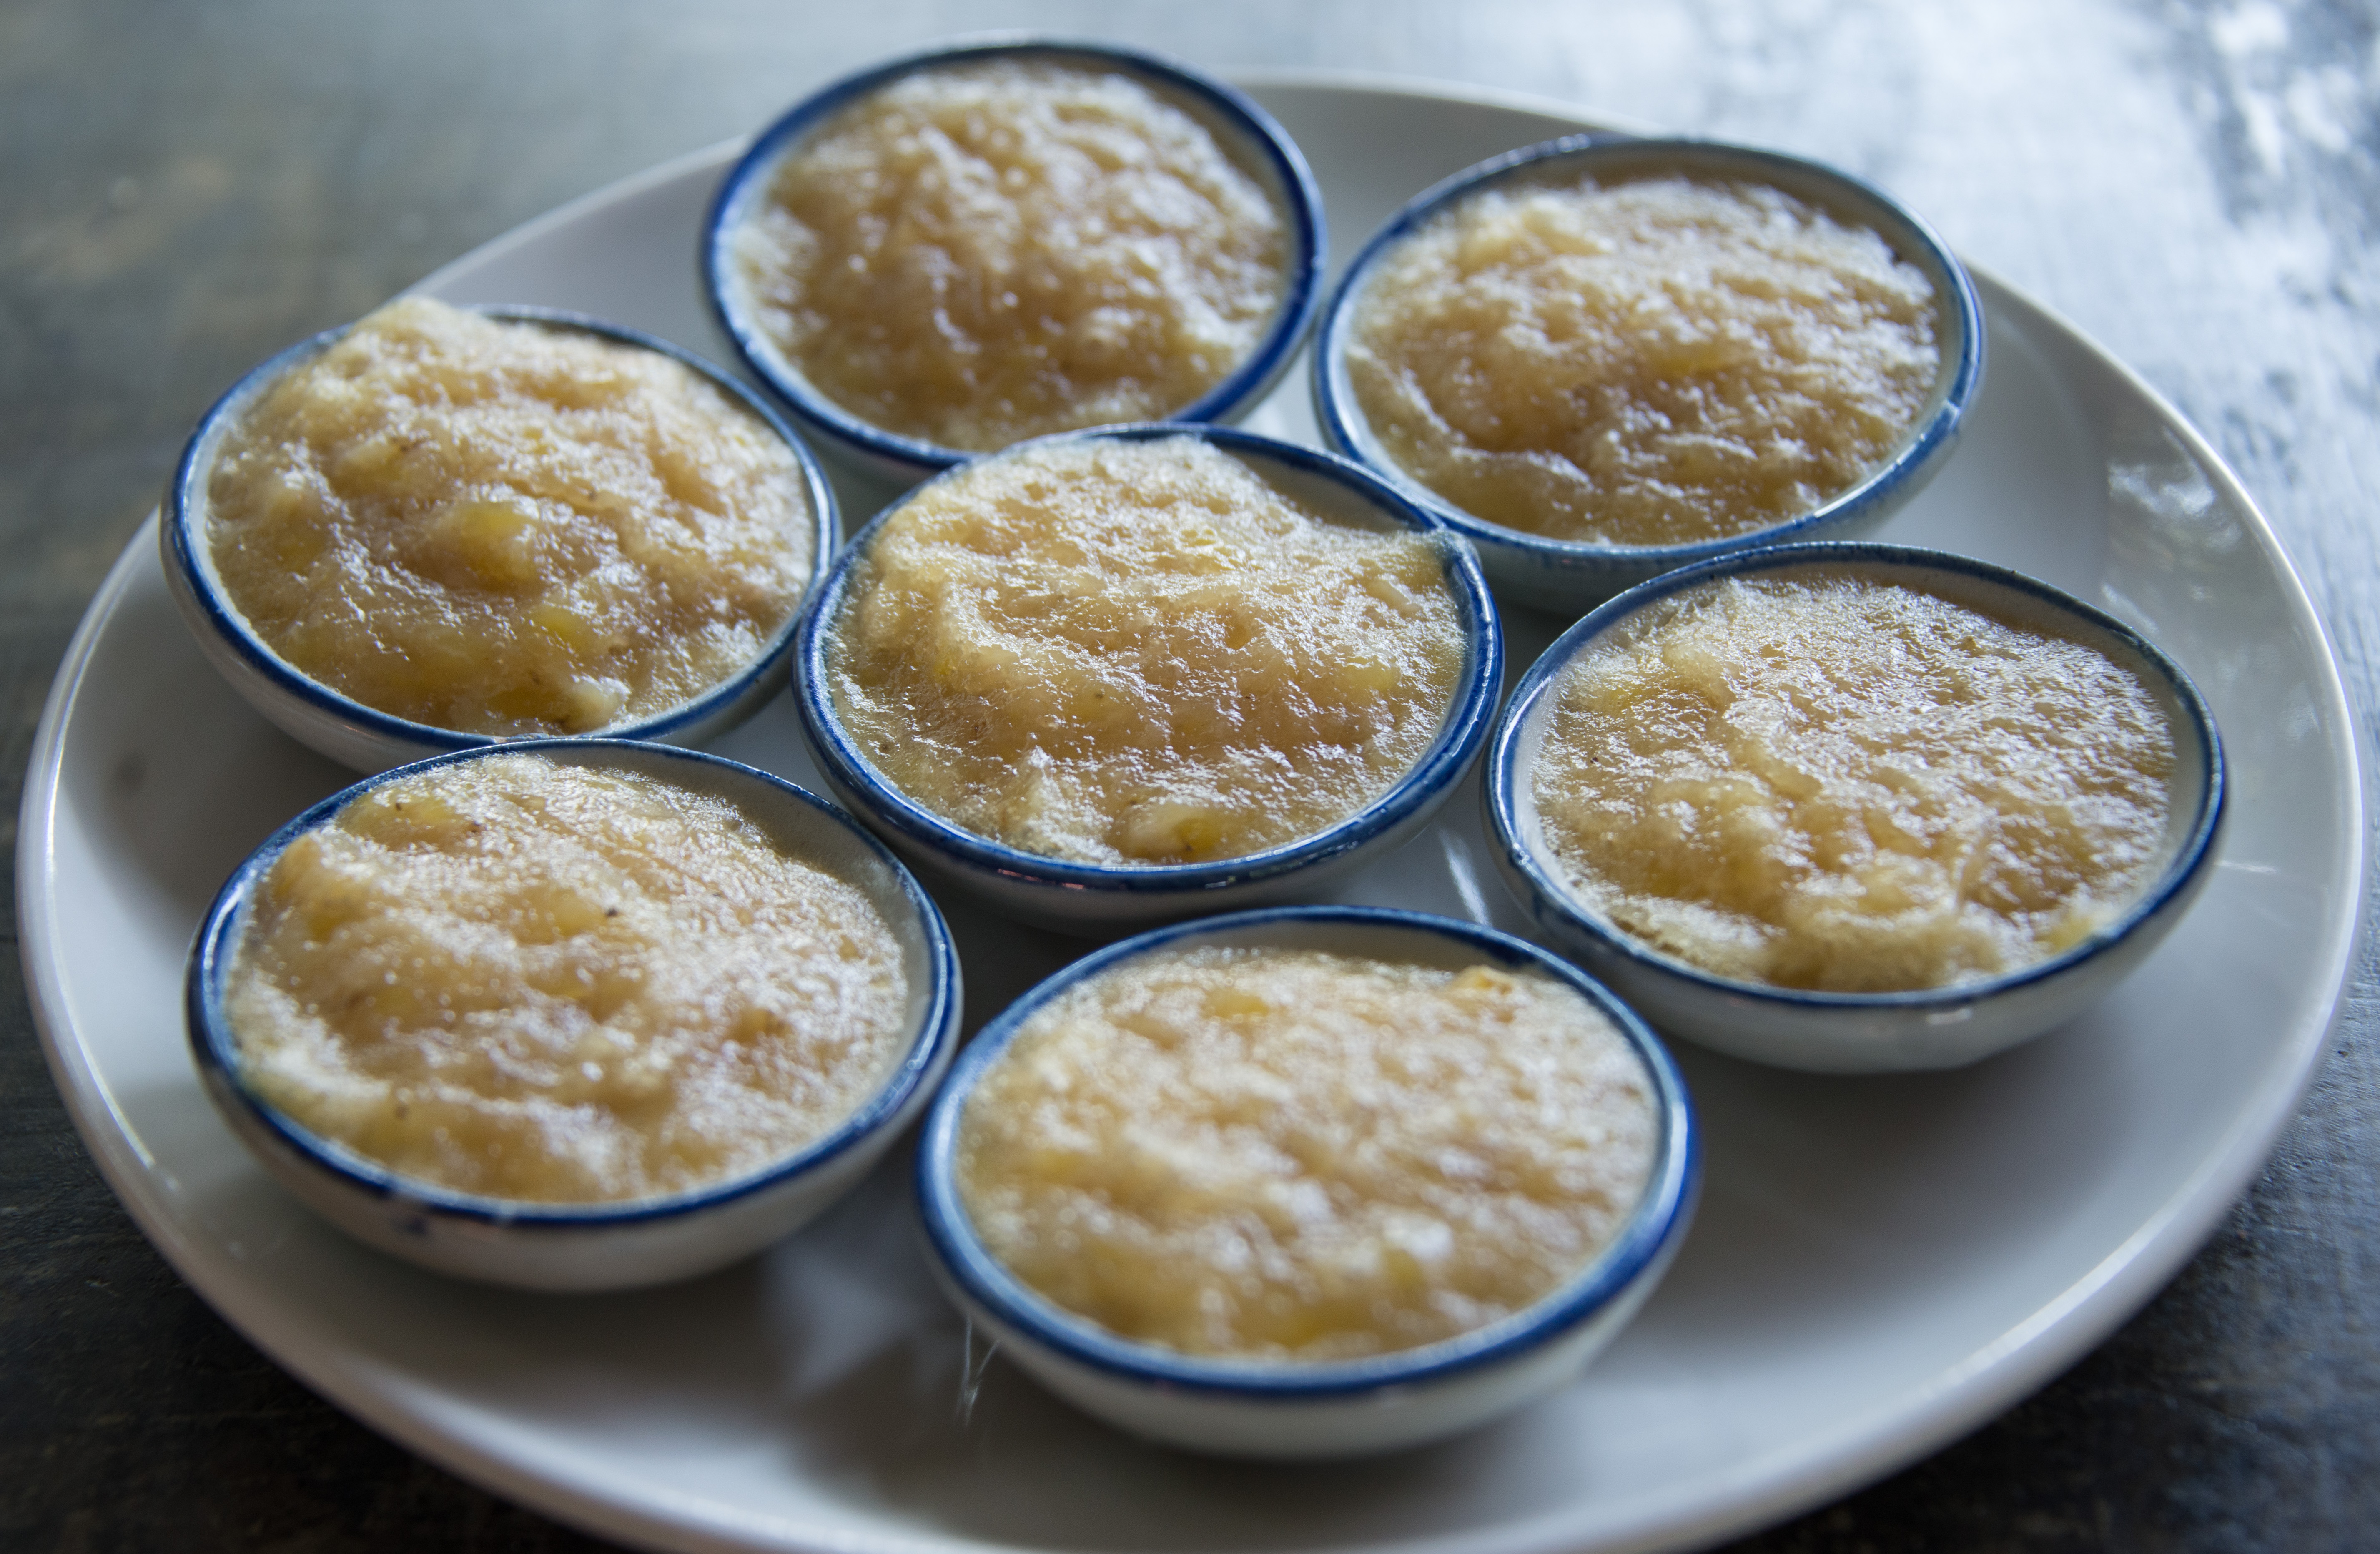
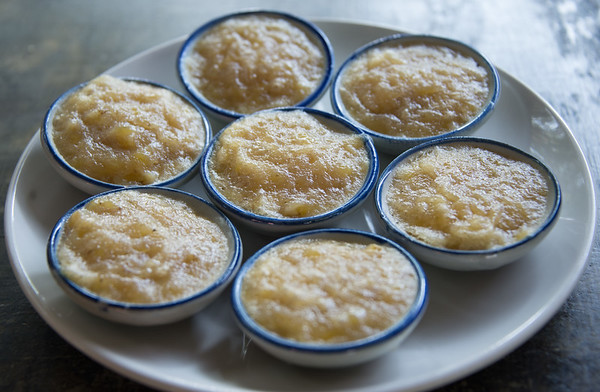
steamed banana cakes

What steamed banana cakes lack in sexiness, they make up for in deliciousness.

Still enamored with the foods that I made and ate in Southeast Asia, I want to share another recipe from Thailand. This time it is a dessert featuring my favorite fruit, bananas.

When I say “dessert,” you might imagine a thick slice of Red Eye Chocolate Cake, a bowl of velvety Pumpkin Ginger Trifle or plate of the elegant, jam-filled cookie hindbærsnitte. In the U.S. we tend to like our desserts bursting with flavor, textures, sugar and fat. However, in terms of dessert, Asia resembles the Mediterranean; both regions end their meals on a lighter note with fruit-based sweets. In Thailand you may cap off the night with pieces of fresh mango or jack fruit, poached custard apples or, as is the case in this post, steamed banana cakes.

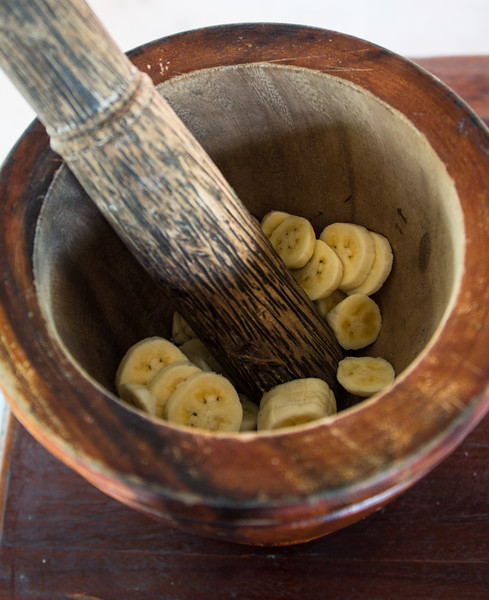
sliced bananas

Bananas before the mashing.

This dish is a straightforward as its name indicates. To make sweet steamed banana cakes, you mash together bananas, flour, sugar and coconut milk until a smooth batter forms. You then spoon the batter into small bowls, place the bowls in a steamer basket, cover and steam the little cakes for roughly 15 minutes or until firm and cake-like. Easy!

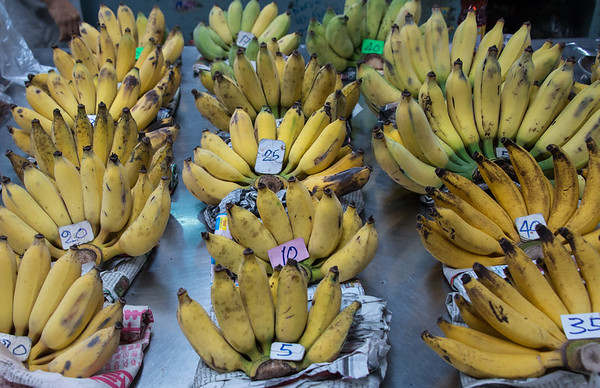
bunches of bananas

A few of the banana varieties available at Thai markets

The only trick to making great steamed banana cakes involves the bananas. In Thailand you have over 30 varieties from which to choose. In the U.S. we have one, the mild tasting Cavendish. Because it is neither as sweet nor as flavorful as its Asian relations, the Cavendish performs best when fully ripe. I wait until my bananas have browned and softened before using them in this recipe. Wanting these truly to be “sweet steamed banana cakes,” I also alter the type of and quantity of sugar added, switching out granulated for light brown sugar and bumping up the amount a smidgen. When serving these to diehard sweets lovers, I might pair the cakes with macerated strawberries, a dusting of confectioner’s sugar or drizzle of chocolate sauce. Otherwise, I just serve them warm.

SWEET STEAMED BANANA CAKES
Makes 8 to 12 small cakes

3 large, extremely ripe bananas, peeled and sliced
1/3 cup rice or coconut flour
2 tablespoons cornstarch
Pinch salt
1/2 firmly packed cup light brown sugar, divided
1/4 cup coconut milk

Place a steamer basket inside a stockpot or steamer filled with 1-2 inches of water. Cover and bring the water to a simmer over medium high heat.

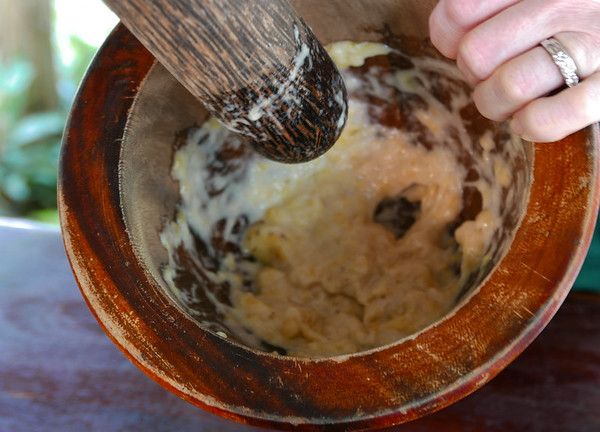
In a large bowl using a heavy spoon, mash the bananas until smooth. Add the flour and cornstarch and mash again until the ingredients are well-combined and no large lumps exist. Add the salt, half of the brown sugar and coconut milk and mash again until a batter forms.

Mashed bananas

Mashing together bananas and flour

Taste and adjust for sweetness, adding up to 1/4 cup (all of the remaining) brown sugar. Note that, if you use coconut flour, you should not need to add the remaining sugar.

Stir the ingredients together until the batter is smooth. Evenly spoon the batter into 8 to 12 small bowls.

Place the bowls on the steamer basket, cover the basket with a lid and steam for up to 15 minutes, checking after 10 minutes to see if the cakes are cooked through. The tops will appear set and be firm yet springy to the touch. The exact timing depends upon the size of bowls that you use. Deep bowls will require longer than shallow ones. Remove the basket from the stockpot or steamer and allow the cakes to cool slightly before serving.

Eating Like the Locals with the Vietnamese Fish Dish Cha Ca

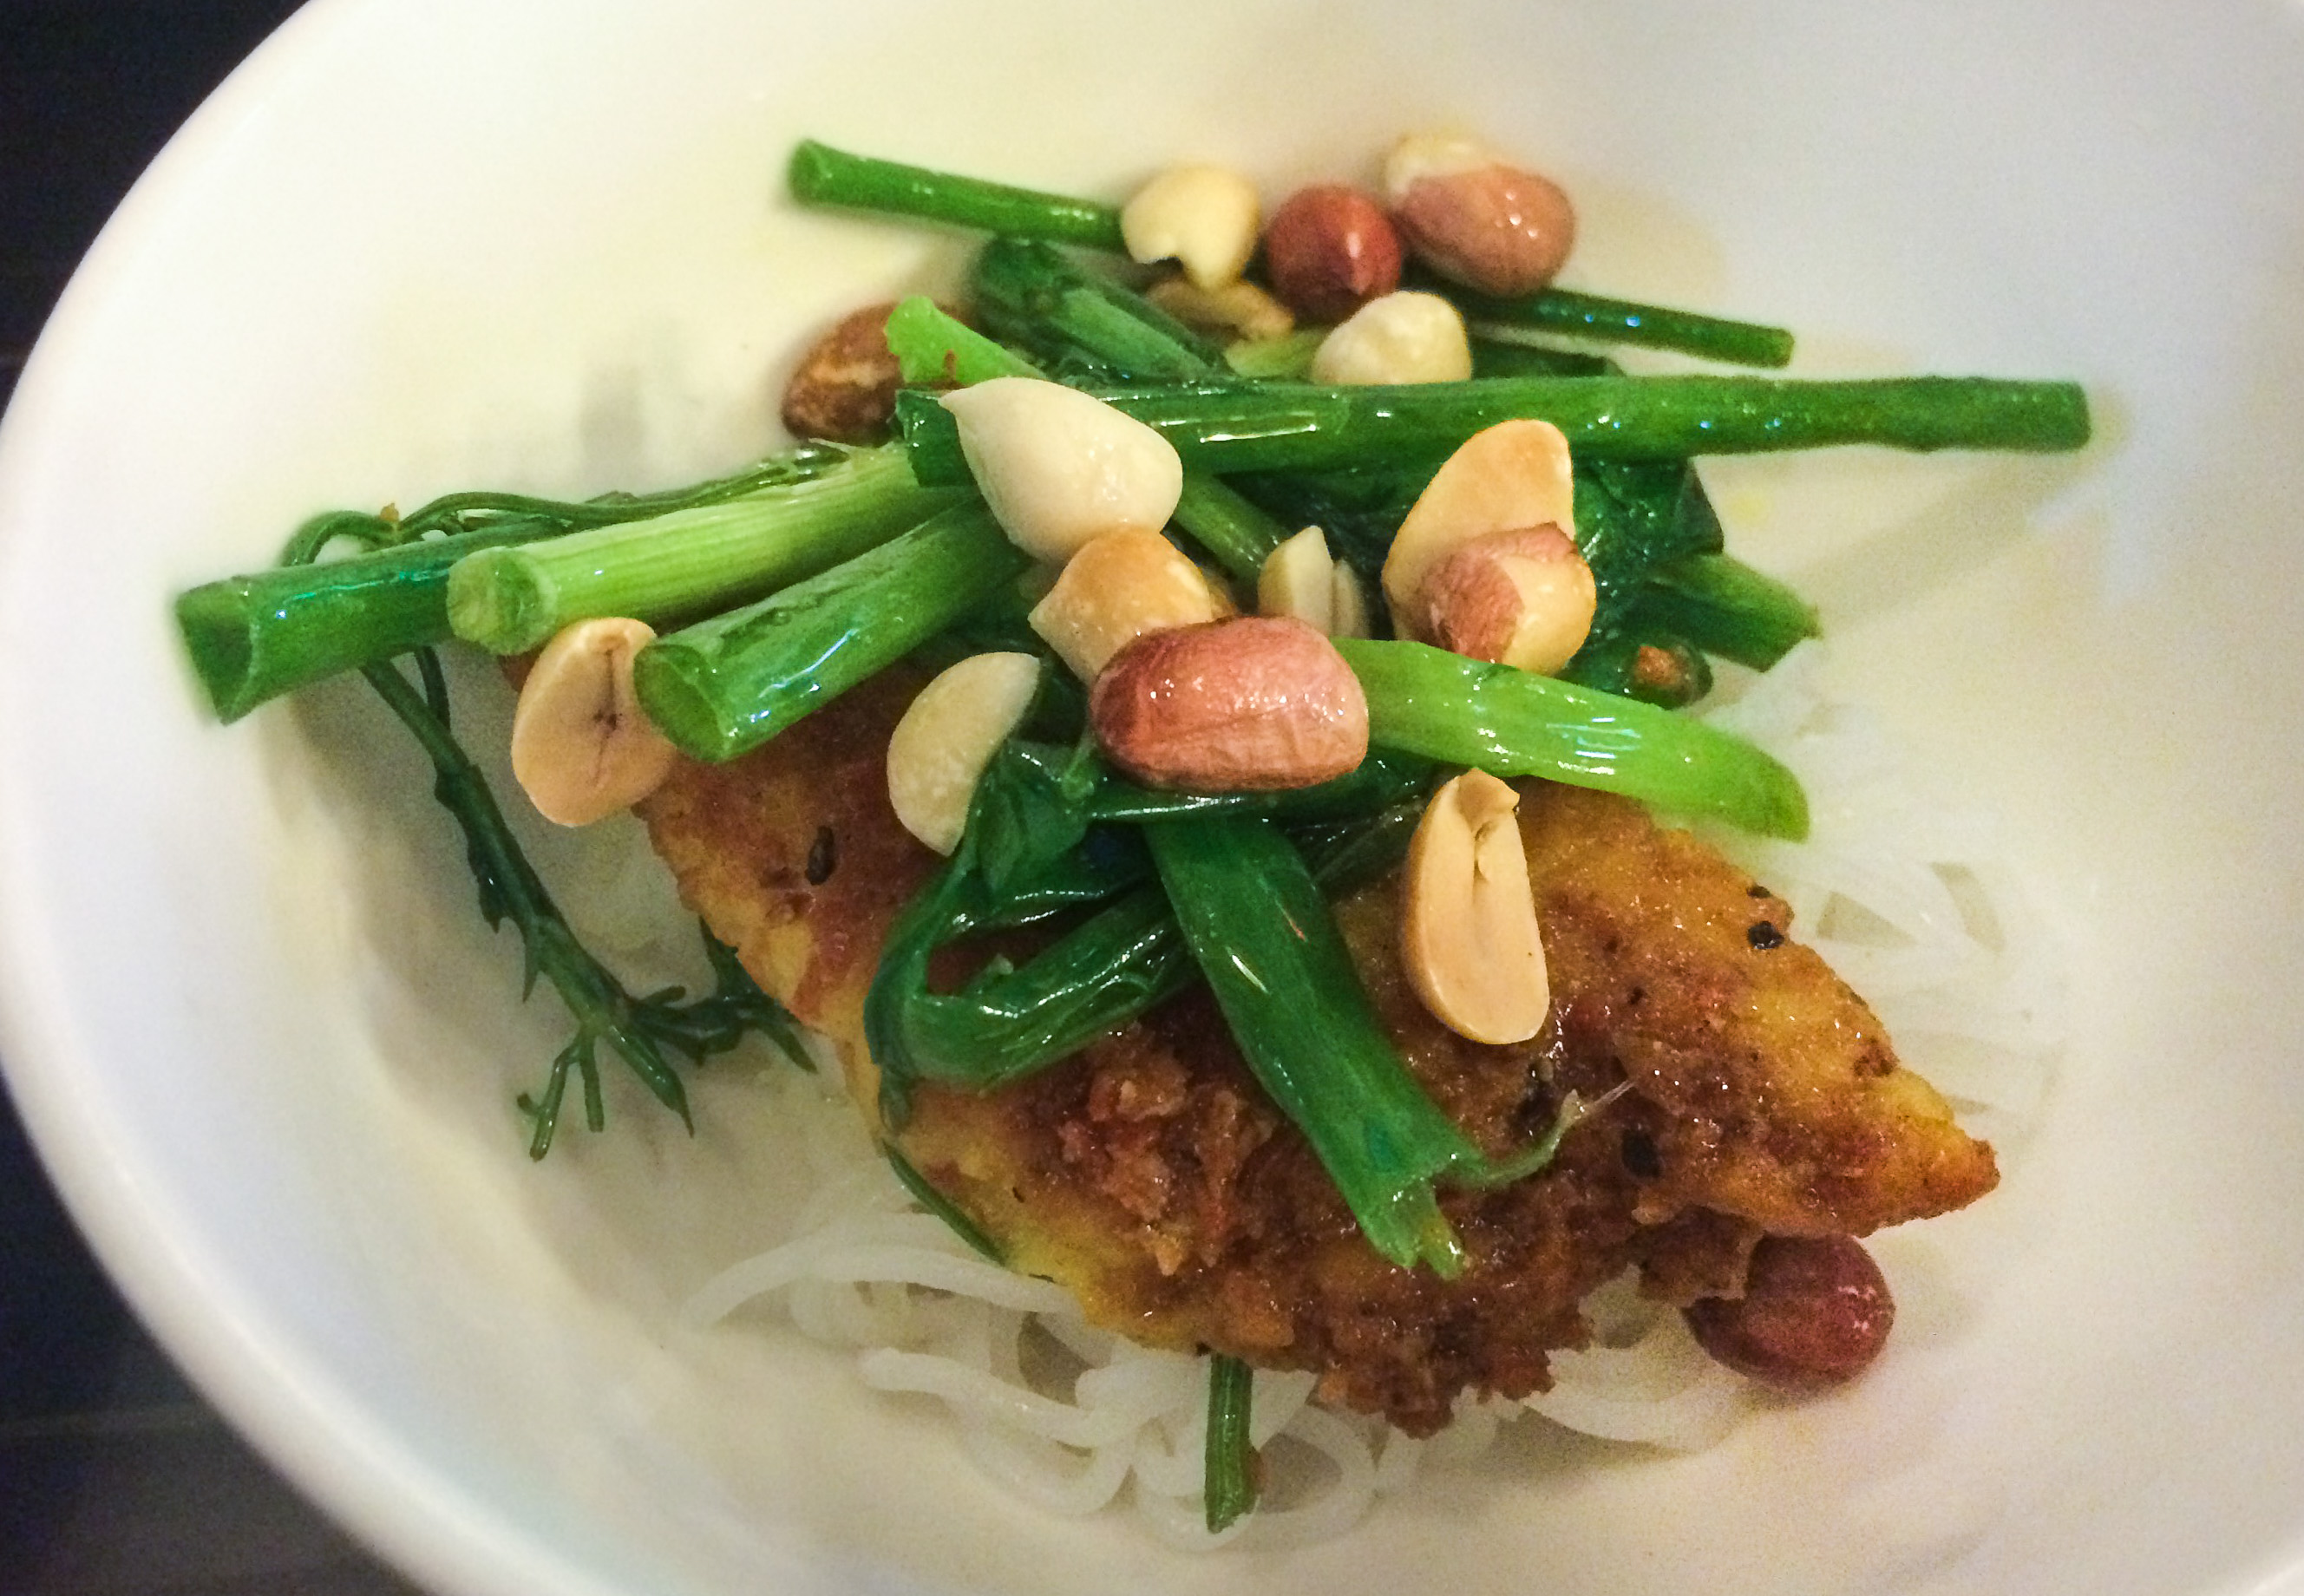
cha ca

The finished dish, cha ca

Thanks to my husband’s stepfather Luong, who was born and raised in Saigon (now Ho Chi Minh City), I know a bit more than the average red-haired, American food writer about Vietnamese home cooking. For starters, in the country you might make your meals on a stove fueled by coconut husks while in the city you probably cook over a gas flame. Your meals may be as simple as noodles, rice or steamed fish or as complicated as spring rolls, hot and sour soups or meat-filled crepes. Whatever you make, it invariably is fresh, seasonal and local.

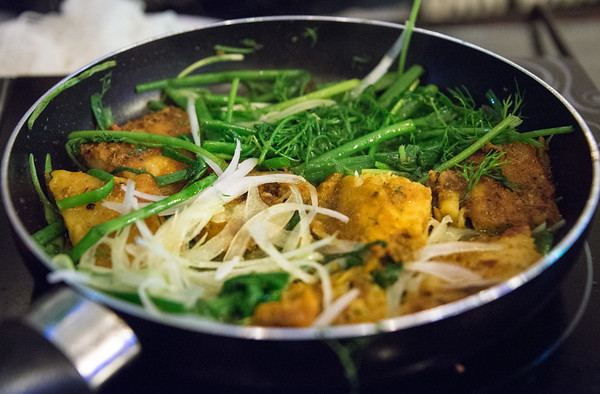
Cha ca simmering in frying pan

Cha ca cooking away in Hanoi

While I understand Vietnamese home cooking, until last month, I didn’t have a good sense of what constituted a traditional restaurant meal. By this I mean something generally eaten outside the home or that bears the signature of one chef or restaurant. That all changed when I traveled to North Vietnam and ate cha ca.

At the beginning of the 20th century, in Hanoi’s old quarter, a shop owned by the Doan family began selling a fish dish known as châ cá; cha ca means “fried fish.” Using white, firm-fleshed fish such as locally caught snakehead or Vietnamese catfish, Mr. Doan marinated slices of fish in a combination of fresh galangal, turmeric, fish sauce and lemon juice. After marinating the fish, he lightly grilled it. He then delivered it, along with bowls of dill, basil, spring onions, peanuts and vermicelli noodles, a frying pan and portable burner, to his customer. In turn, the customer fried the fish, herbs and onions until hot.

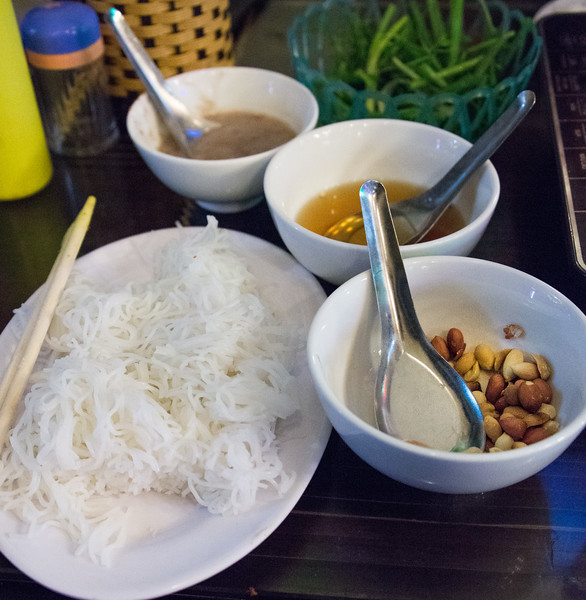
cha ca ingredients

Vermicelli noodles, shrimp paste sauce, scallions, fish sauce & peanuts all go into cha ca.

Once the ingredients had finished cooking, they were piled atop vermicelli noodles. Dressed with fish and shrimp paste sauces, the dish was finished with a smattering of roasted peanuts. With that the diner could dig into his fish dinner at Mr. Doan’s restaurant, Cha Ca La Vong.

Due to exhaustion, traffic and the confusion brought on by both (8 flights in 11 days can be a killer), I didn’t get my first taste of cha ca at its birthplace, Cha Ca La Vong. Instead I ended up across the street at Cha Ca La Luong. Seated outside at a standard, child-sized dining table on equally small stools, we watched as our server sautéed the greens and pre-cooked fish in a steaming hot, non-stick pan. The experience was memorable, the resulting dish was, too. Cha ca is a pleasing combination of textures and savory flavors and, although associated with restaurant cooking, it can be made at home.

CHA CA
Note: If you cannot find fresh galangal, substitute fresh ginger. Likewise, if fresh turmeric is unavailable, increase the amount of ground turmeric to 2 1/2 teaspoons.
Serves 4

2-inch piece fresh galangal, peeled
3-inch piece fresh turmeric, peeled
1 teaspoon ground turmeric
1 clove garlic
1 1/2 pounds Alaskan cod fillets, snakehead fillets or other firm, white-fleshed fish
1 tablespoon sugar
Juice of 1/2 lemon
1/4 cup fish sauce
1/4 teaspoon dried chili flakes
4 ounces rice/vermicelli noodles
3 tablespoons grapeseed or canola oil, divided
1/2 teaspoon salt
2 bunches scallions, trimmed to 4-inch lengths
1 small white onion, sliced
1/2 cup Thai basil leaves
2/3 cup fresh dill
1/3 cup roasted peanuts, roughly chopped
Shrimp paste sauce, optional, to taste

Place the galangal, fresh and ground turmeric and garlic in the bowl of a food processor or blend and pulse into a paste has formed. Scoop the paste from the bowl, spread it over the fish slices, cover and refrigerate for 1 hour.

As the fish is marinating, whisk together the sugar, lemon juice, fish sauce and chili flakes. Set aside.

Bring a small pot of water to a boil. Add the rice/vermicelli noodles and cook for 1 minute. Place the noodles in a colander and set aside.

Remove the fish from the refrigerator. Heat half the oil in a non-stick pan over medium heat. Add the fish and cook for 1 to 2 minutes before flipping over the slices and cooking on the other side for 1 to 2 minutes. Remove the fish from the pan and set it aside on a plate.

Heat the remaining oil in the pan over medium heat. Add half the scallions, the onion, basil and dill and season with salt. Reduce the heat to medium-low and sauté for 2 to 3 minutes, until soft. Add the fish back to the pan and cook for another 1 to 2 minutes, until warmed.

Spoon equal amounts of noodles into 4 bowls. Place the greens and fish in the bowls. Sprinkle the peanuts over top. Serve with the fish sauce and optional shrimp paste sauce.

Shrimp Khao Soi in Chiang Mai, Thailand

Wat in Chiang Mai

Wat Buppharam in Chiang Mai, Thailand, home of khao soi.

Along with talking to locals, visiting historical sites and browsing museums and shops, eating—and cooking—the regional cuisine always helps me to understand a new place. When I don’t have friends to show me the culinary ropes, I turn to hands-on cooking classes. That’s how I ended up at the Green Mango Thai Cookery School in Chiang Mai,Thailand. Situated on a lush, bamboo- and coconut-tree lined property about 20 minutes from the center of Chiang Mai, Green Mango provided a lovely setting, well-stocked cook stations and delicious, classic recipes. Better still, it gave me a chance to learn from a native chef, shop for fresh ingredients and cook like Northern Thais do.

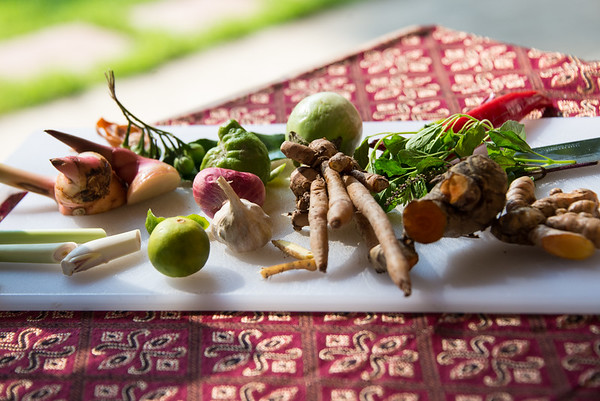
common Thai ingredients

Flavors of Thai cooking (clockwise from top): Thai eggplant, chilies, turmeric, finger root, shallot & garlic, lime, lemongrass, galangal, mace, pea eggplant, kefir lime and lime leaves

Among the traditional dishes made at Green Mango was khao soi (also spelled “kôw soy”). A specialty of Chiang Mai, this spicy curry features red curry paste, wheat- and egg-noodles and beef or chicken. Since I was the lone pescetarian in attendance, I was allowed to make an untraditional version of this culinary icon, shrimp khao soi.

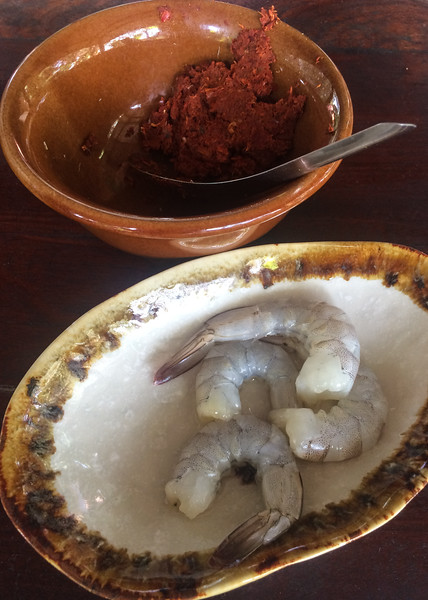
raw shrimp

Two star ingredients in shrimp khao soi, fresh red curry paste and shrimp

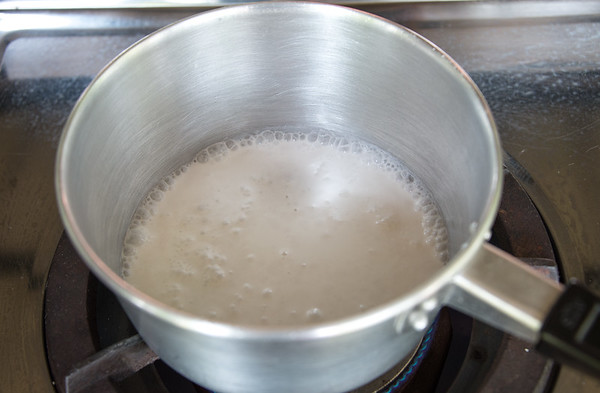
To begin, I pummeled together such Thai favorites as lemongrass, galangal and finger root with a mortar and pestle. Once a smooth, colorful paste had formed, I brought a pan of coconut milk to a boil. A staple of Thai cuisine, coconut milk serves as the base for most curries. It also acted as a garnish for my shrimp khao soi.

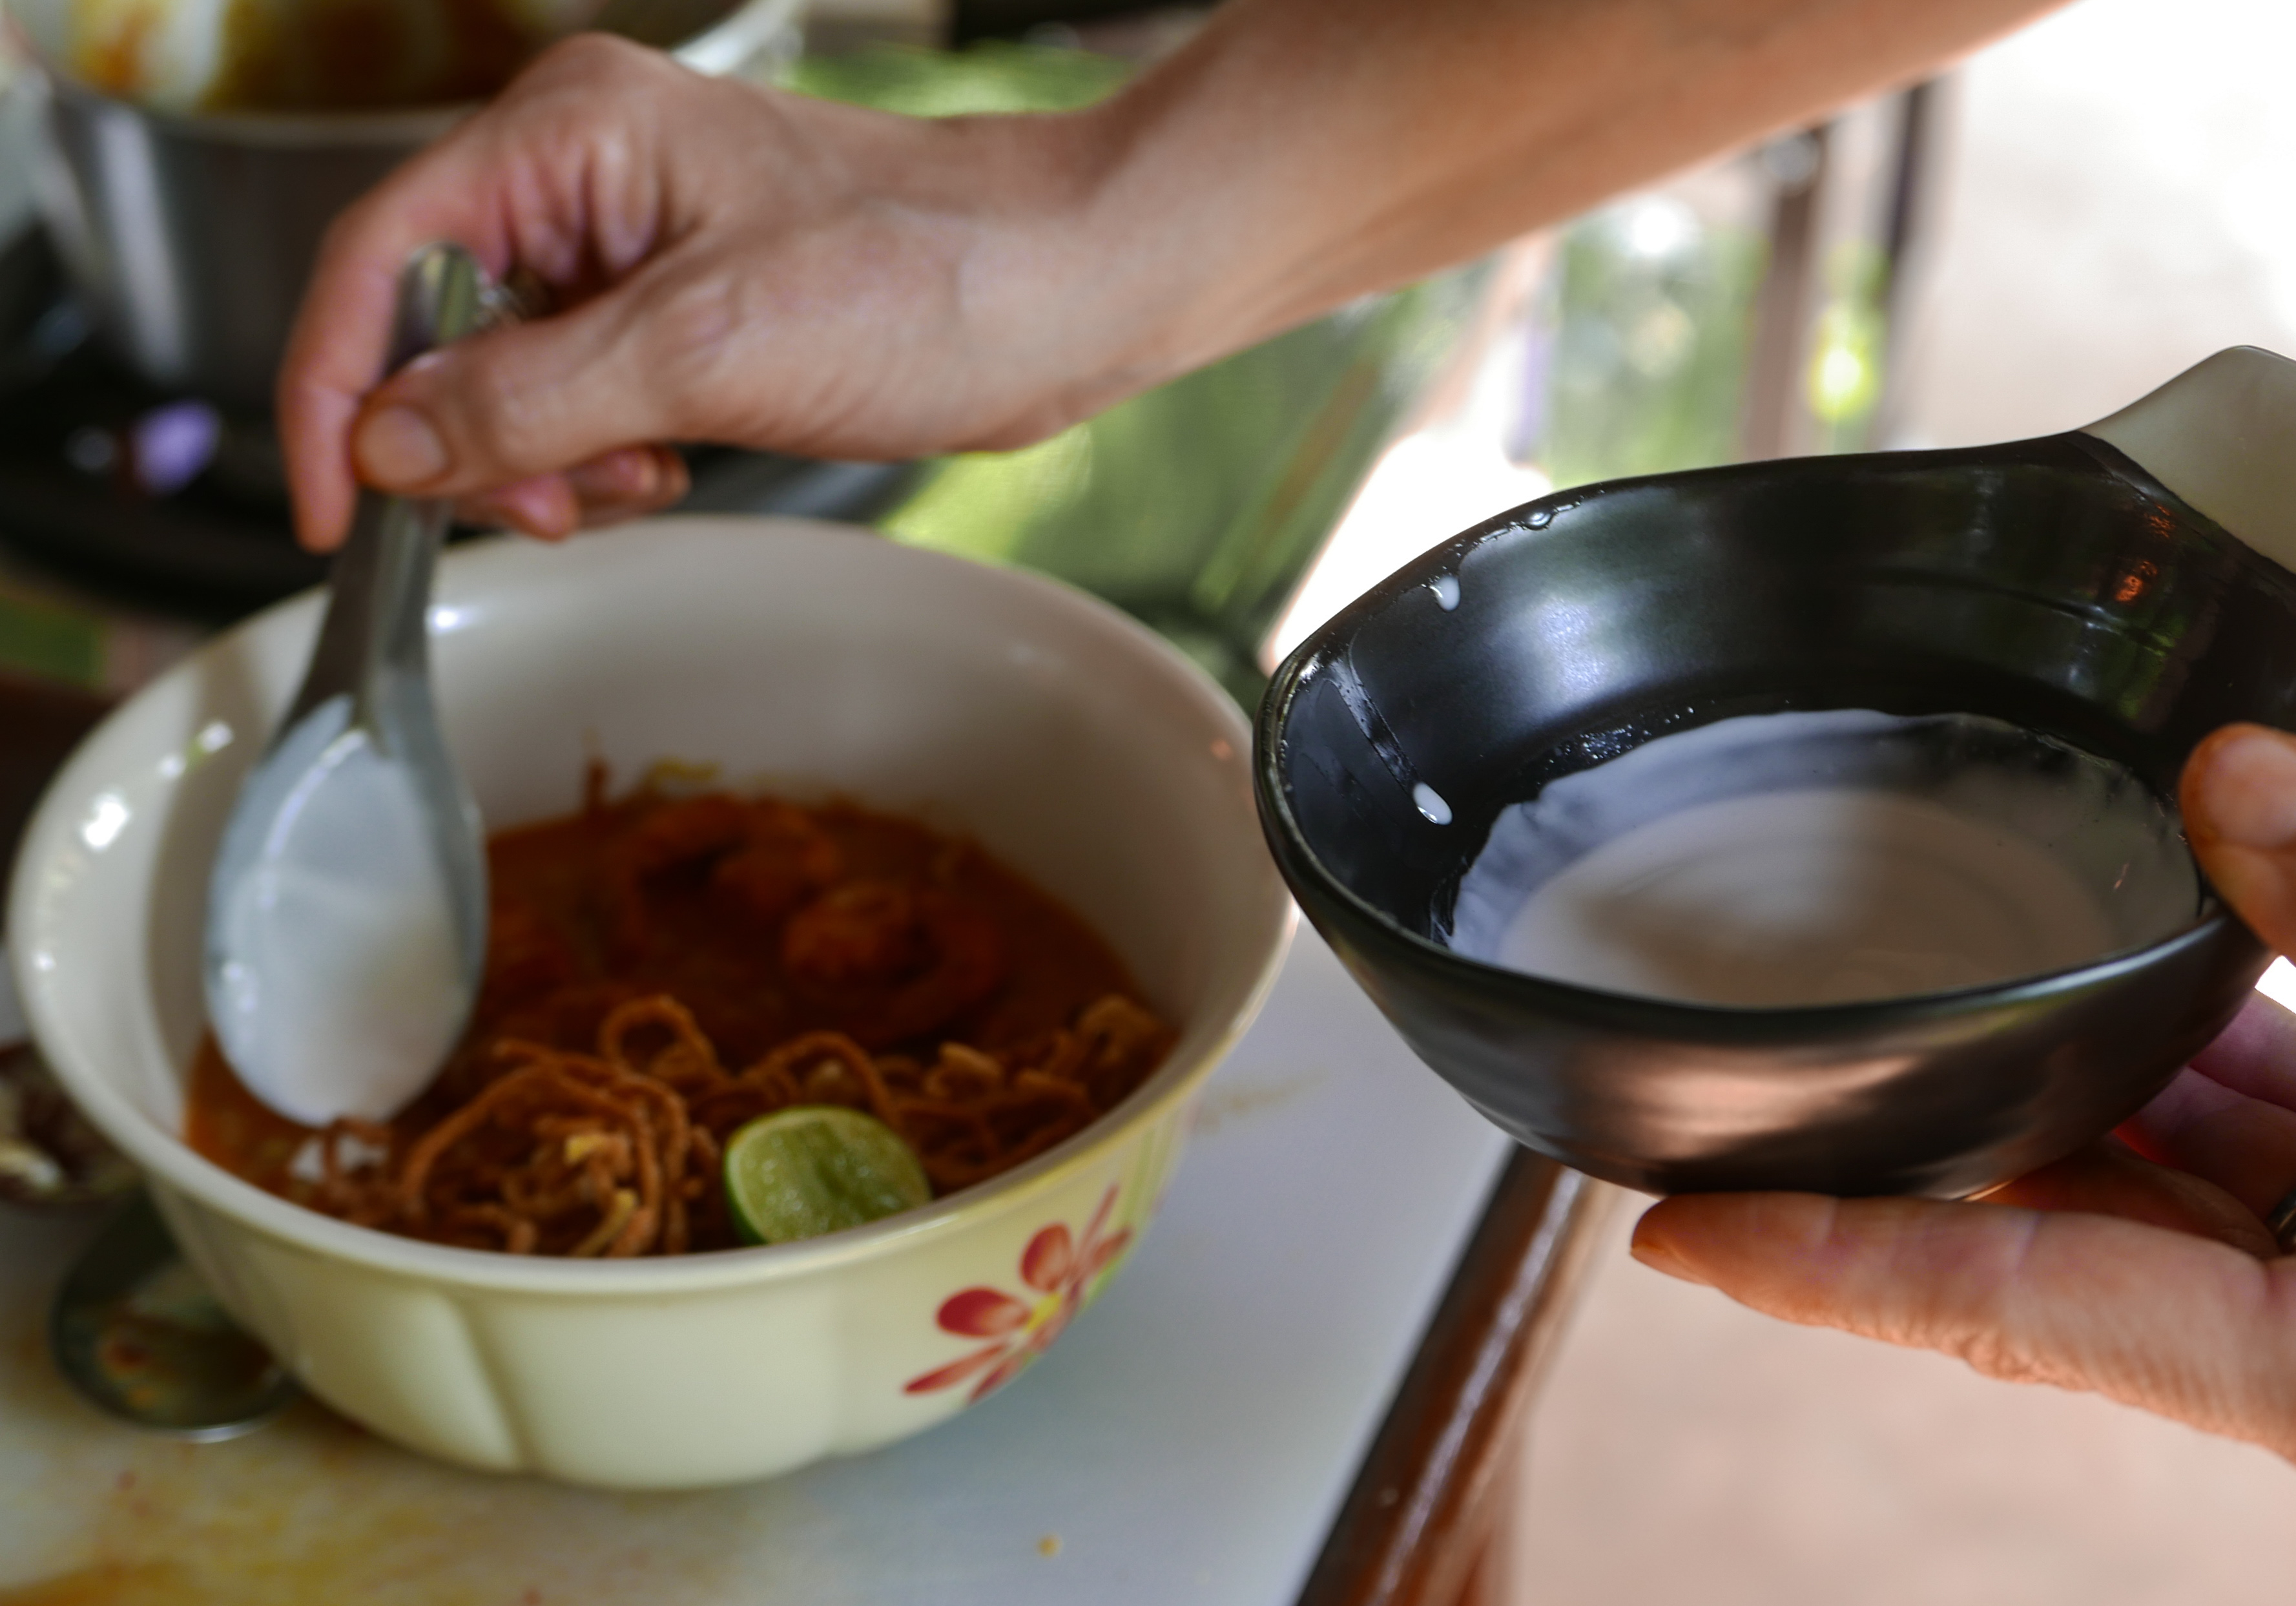
Garnishing shrimp khao soi

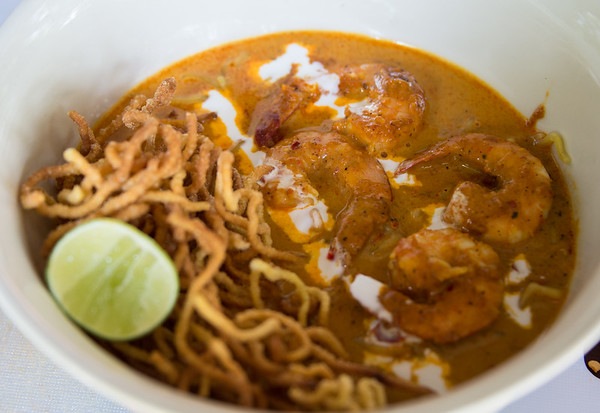
Garnishing my shrimp khao soi with crispy noodles, a slice of lime and coconut milk.

After boiling the milk, I added the curry paste and stirred the ingredients together. Within seconds a rich, spicy scent wafted up from my saucepan. Bold in color and aroma but even more assertive in flavor, this dish set the standard for all other curries. It, like my time at the Green Mango Thai Cookery School, remains a high point of visiting Northern Thailand.

shrimp khao soi

The finished dish, shrimp khao soi

SHRIMP KHAO SOI
Recipe adapted from the Green Mango Thai Cookery School
Serves 1

for the curry paste:
1 tablespoon sliced lemongrass
1 slice of fresh galangal and turmeric
Small piece of finger root
Zest from 1 kefir lime
Mace or grated nutmeg
Pinch of coriander, cumin seeds, garlic, shallot and shrimp paste
3 large dried chili peppers, soaked in water to soften
1 long pepper
1 cardamom pod
Half dried bay leaf
Small piece of cinnamon stick
1/2 star anise
Pinch of fennel

for the khao soi:
1 1/2 cups coconut milk, divided
Curry paste
4 shrimp
1/2 cup water
1 teaspoon curry powder
1 teaspoon masala powder
Stir fried egg noodles, for garnish
Cilantro (coriander leaf), for garnish
Sliced shallot, for garnish
Scant amount of coconut milk
Small lime, quartered, for garnish

for the stir fried egg noodles:
1/2 to 1 tablespoon canola oil
1/3 to 1/2 cup fresh egg noodles

Using a mortar and pestle, mash together the lemongrass, galangal, turmeric and finger root until a soft paste forms. Add the kefir lime zest, strip of mace or grated nutmeg, coriander, cumin seeds, garlic, shallot and shrimp paste and continue pounding with the pestle until the ingredients are well combined. Add the remaining ingredients and crush until a firm, evenly mixed paste forms. Note that you can also make this curry paste by pulsing the ingredients together in a food processor.

Boiling coconut milk

Simmering the coconut milk

In a medium saucepan bring half the coconut milk to a boil and simmer for 3 minutes. Add the curry paste and stir until well combined. Add the shrimp and allow it to cook for 2 to 3 minutes, until the flesh has turned coral in color and the shrimp begins to curl. Remove the shrimp from the saucepan and set aside.

Add the remaining coconut milk, water, curry powder and masala and stir to combine. Allow the ingredients to simmer for 5 to 10 minutes, until the flavors have melded together and the curry has cooked down.

stir frying egg noodles

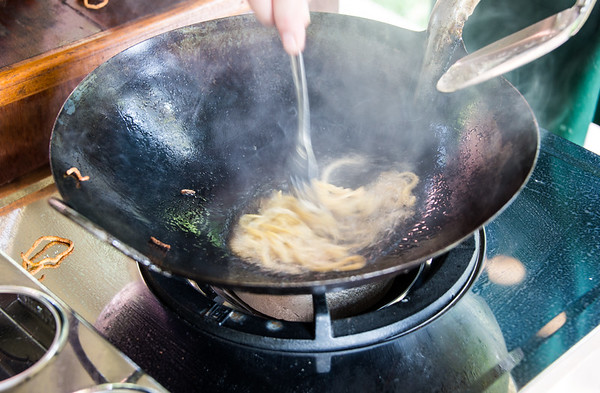
Stir frying the egg noodles

While the curry is simmering, make the stir-fried egg noodles. Heat 1 tablespoon canola oil on high in a wok or sauté pan. Add the egg noodles and toss until browned, about 1 minute total. Remove the noodles from the pan and allow them to drain on a clean, dry cloth.

Add the shrimp back to the pan and toss lightly to reheat. Spoon the curry into a large bowl, sprinkle the noodles, shallots and cilantro over top and drizzle coconut milk over this. Serve shrimp khao soi alongside the quartered lime.

Red Eye Chocolate Cake

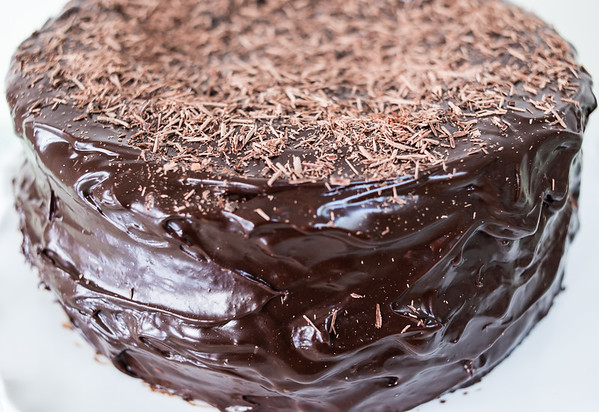
Red Eye Chocolate Cake

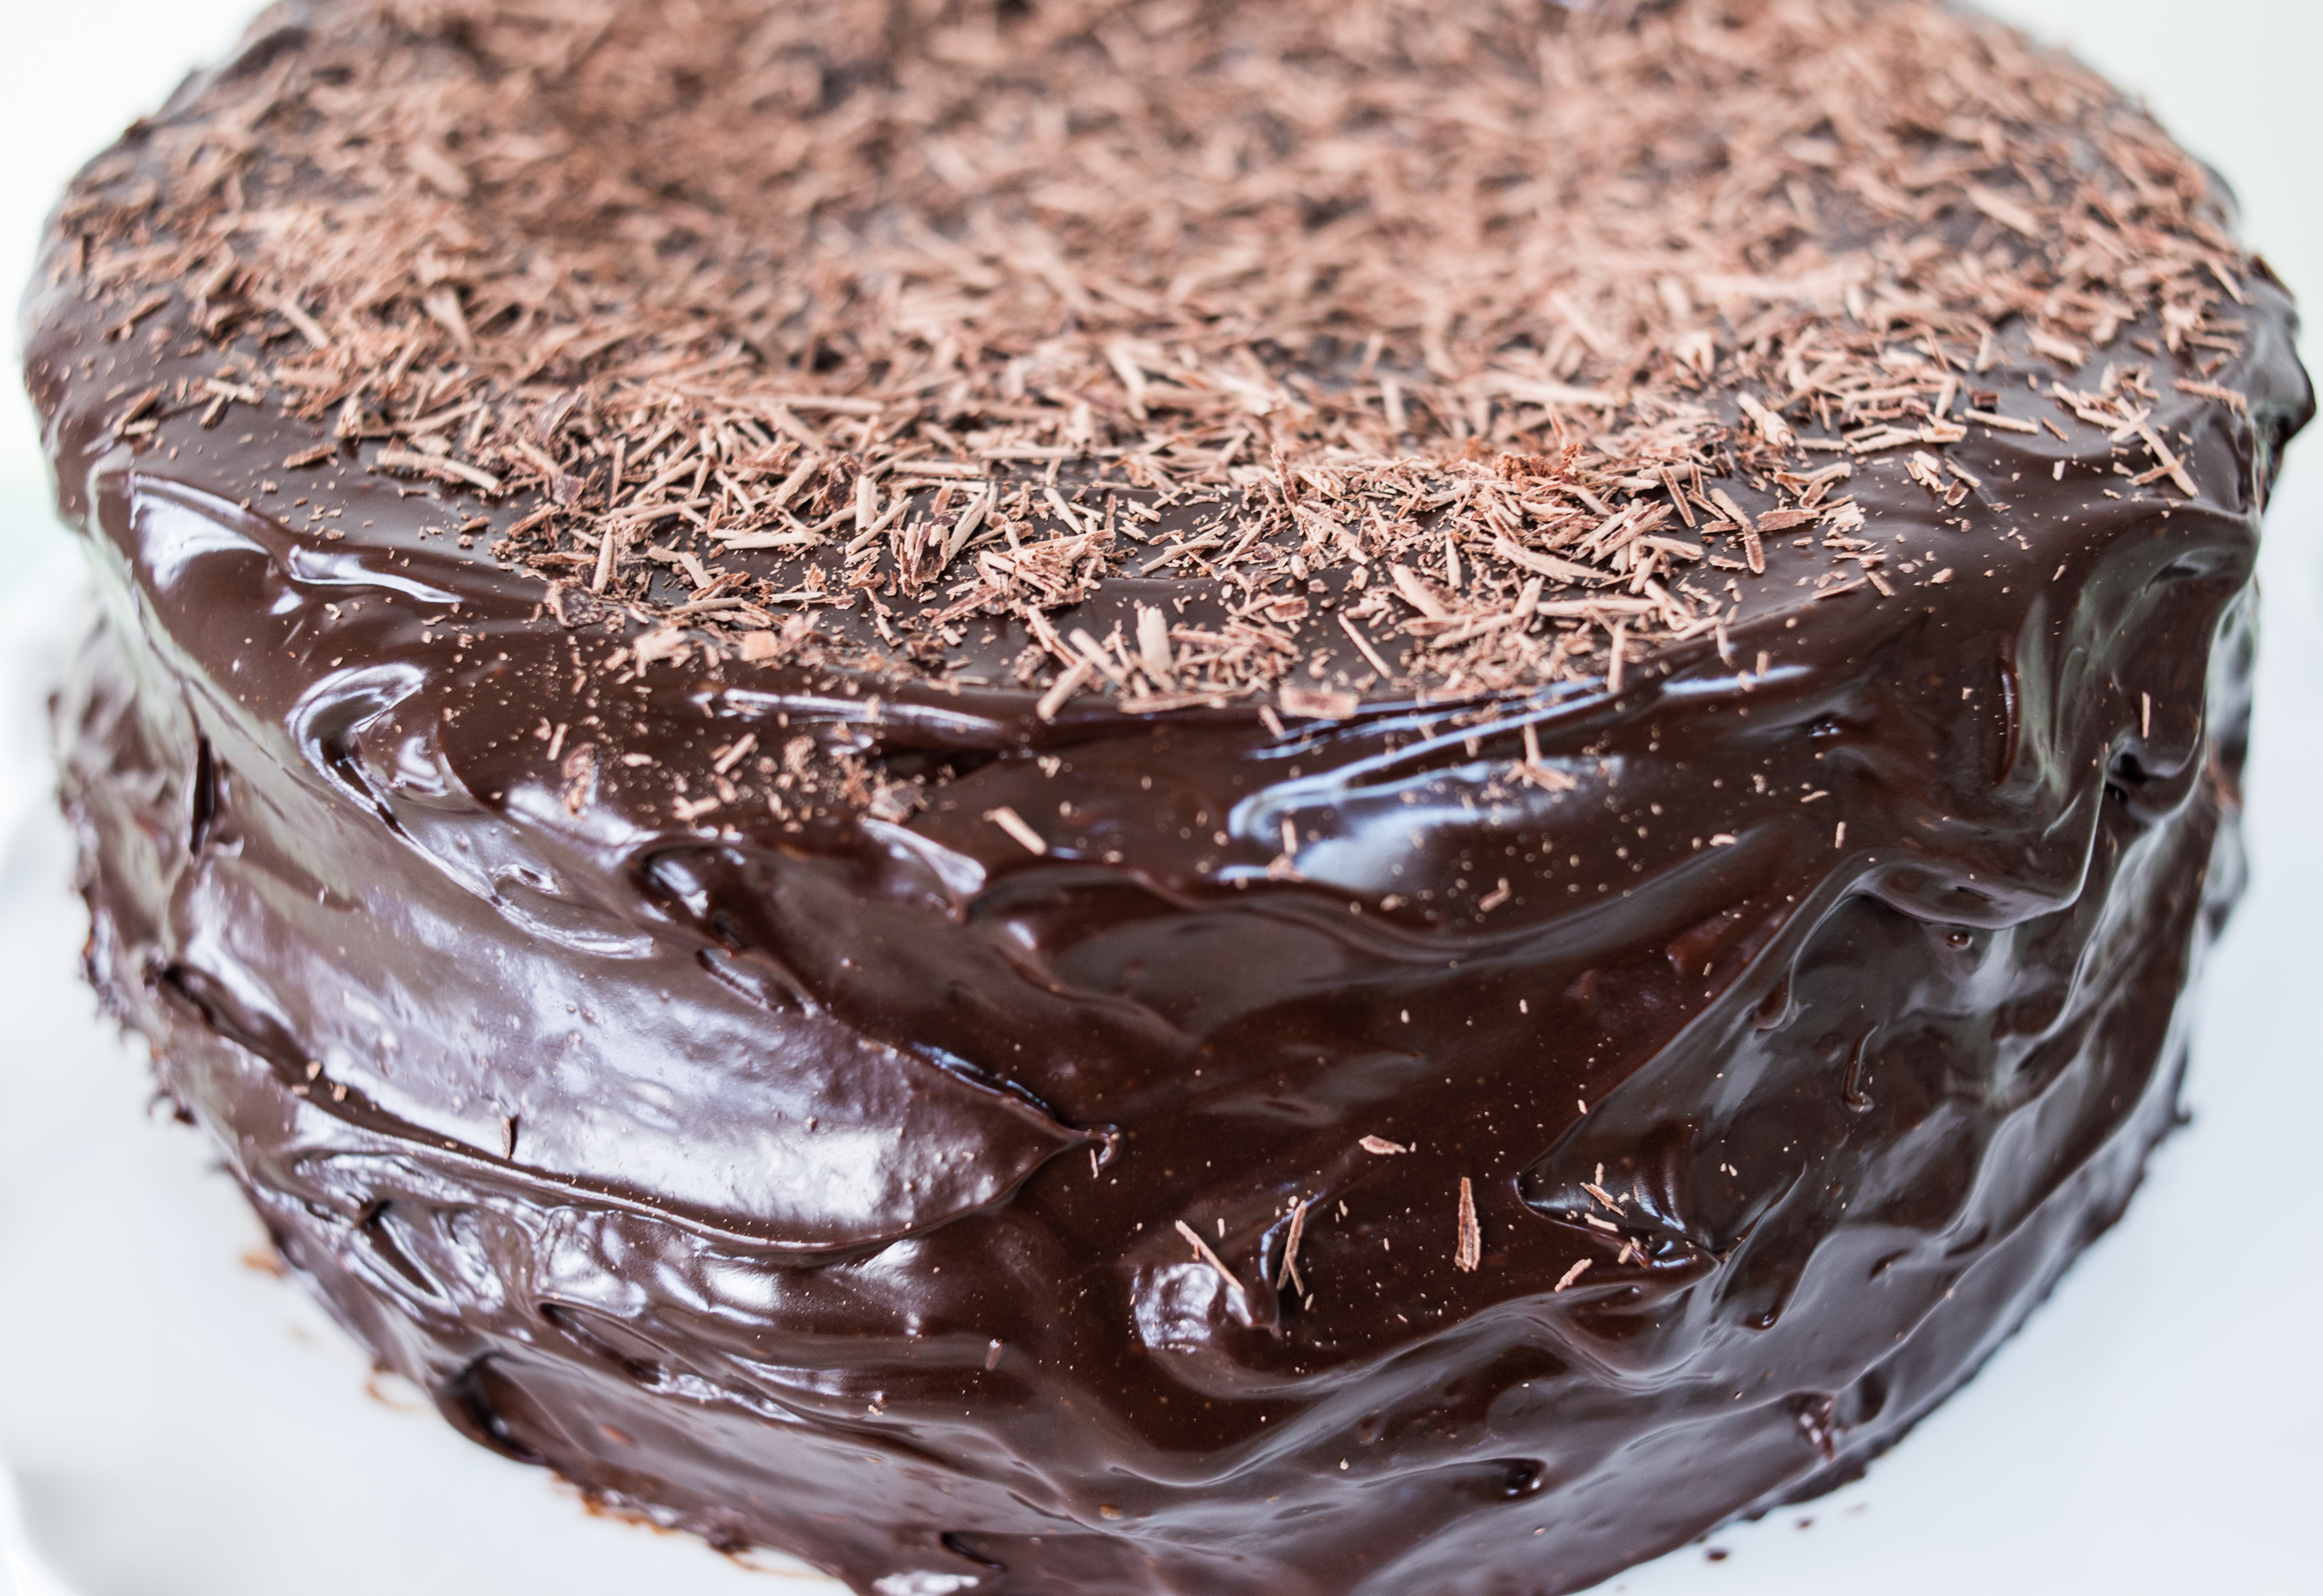
Red Eye Chocolate Cake

Coffee and chocolate. Two things that I love brought together in one cake, the red eye chocolate cake.

For those unaccustomed to hearing “red eye” associated with anything other than an overnight flight, this red eye refers to regular coffee with a shot of espresso added to it. As you might expect, espresso boosts the coffee’s flavor. It also increases the amount of caffeine in the drink. It’s a perfect pick-me-up after a late night flight or simply a late night.

In keeping with its namesake’s bold reputation, Red Eye Chocolate Cake boasts of four layers of cocoa- and coffee-infused cake slathered with thick, rich chocolate ganache. This is a dessert that is both decadent and delicious. I can’t think of a more fitting way to celebrate a holiday known for an arrow-slinging god, a sainted martyr, love and chocolate than with a slice of this lavish sweet.

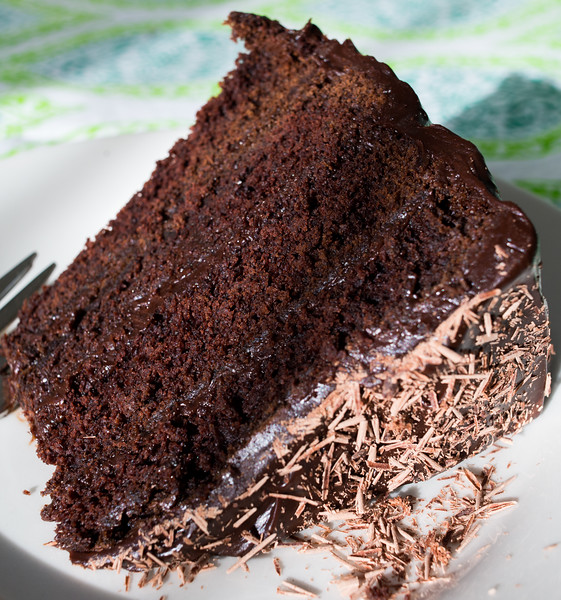
slice of cake

Slice of Red Eye Chocolate Cake

Because people often balk at the thought of icing a cake, particularly a layer cake, I’ve made a short, instructional video on how to frost a cake. As you’ll see firsthand, it’s surprisingly easy to do.

I cannot overemphasize the merits of homemade frosting. With ganache you need only two ingredients—chocolate and heavy cream—and 5 to 10 minutes of time. Although fast and simple, ganache looks elegant and tastes heavenly. Once you’ve made a ganache, you’ll wonder why you ever opened a plastic tub of that artificially enhanced frosting.

RED EYE CHOCOLATE CAKE

Serves 10 to 12

for the cake:
3 cups all-purpose flour
2 teaspoons baking soda
1/2 teaspoon baking powder
1/2 teaspoon salt
3/4 cup strong brewed coffee, at room temperature
1/2 cup espresso, at room temperature
1/4 cup milk
1 cup plus 1 tablespoon unsweetened cocoa powder
1/2 pound unsalted butter, softened
3 cups plus 2 tablespoons granulated sugar
1 teaspoon vanilla extract
4 large eggs, at room temperature

for the icing:
1 1/2 cups heavy cream
24 ounces semi-sweet chocolate morsels
Bar of bittersweet or semi-sweet chocolate, shaved or grated, for decorating

Preheat the oven to 350 degrees Fahrenheit. Grease and line with the bottoms with parchment rounds two 9-inch springform pans.

Sift together the flour, baking soda, baking powder and salt and set aside.

In a large bowl whisk together the coffee, espresso and milk. Add the cocoa powder and whisk until well combined. Set aside.

Using an electric mixer, beat the butter until creamy, 1 to 2 minutes. Add the sugar and continue beating until light and fluffy, periodically scraping down the sides of the bowl. Add the eggs and vanilla and beat until well combined.

Creaming butter and sugar

Creaming the butter and sugar

Add half the flour mixture and beat until combined. Scrape down the sides of the bowl, add the remaining flour and beat until just combined. Pour in the cocoa mixture and beat until incorporated, scraping down the sides of the bowl periodically.

Spoon equal amounts of batter into the prepared pans. Bake for 45 minutes or until a toothpick inserted in the centers comes out clean. Remove the pans from the oven and allow the cakes to cool for 20 to 30 minutes. Take the cakes out of the pans and allow them to cool completely on wire racks.

Once the cakes have cooled, you can make the ganache. To do this, place the cream and chocolate in a non-stick saucepan or microwaveable bowl. If using the stove top, heat the two over medium-low heat, stirring frequently, until the chocolate has melted and the two have combined together. Remove from the heat and, using a wire whisk, whisk until a smooth, creamy frosting has formed. If using the microwave, heat the two for 25 seconds, remove the bowl from the microwave and whisk the ingredients together. Repeat until the chocolate has melted and a smooth, creamy frosting has formed. Allow the ganache to cool to room temperature.

If the cakes seem a bit sticky or soft, chill them in the refrigerator for 20 to 30 minutes before slicing each cake into 2 halves. To slice the cakes, insert a sharp, thin-bladed knife into the middle of the cake’s side and sliced around the cake until you reach your starting point. You may need to re-insert the blade so that you cut all the way through to the center of the cake. Repeat with the other cake. You will then have 4, roughly equally sized layers of cake.

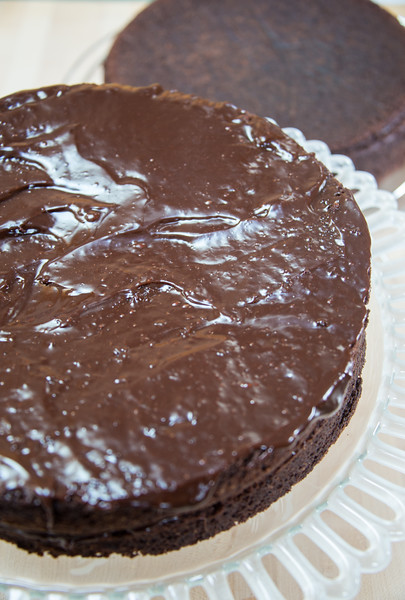
Icing the cake

Icing the cake layers

Center the first layer on a cake stand or plate. Placing 1 to 2 tablespoons of ganache on your icing spatula, spread a thin coating of icing — the “crumb coat” — over the top of the cake. You can then spread more icing on it before placing the next layer on top. Put another crumb coat, followed by a regular coat, of ganache on the cake. Angling your spatula, spread ganache over the sides of the cake. Place another layer of cake on top of the iced layer. Repeat the above steps until the cake is fully frosted.

To decorate, sprinkle chocolate shavings over the top of the cake. Serve with coffee or a big glass of milk.