Latest Posts

Bundt It

The Bundt cake. For some sweets lovers it’s the ultimate retro dessert. Still others write off this dense confection as pure kitsch. At times I’ve found myself in both camps. One look at that perfectly fluted ring and I flashback to elementary school and all the Bundt coffee cakes that my mother would bake. Iced with a mixture of confectioner’s sugar, milk and florescent yellow, orange or red food coloring, these day-glo treats were the psychedelic stars of her late 1970’s kitchen.

Chances are that Bundt cakes popped up my grandmothers’ kitchens, too. In 1949 the Minnesota-based cookware company Nordic Ware produced its first Bundt pan. Crafted from heavy cast aluminum, the 10-cup mold was derived from a ceramic, German cake pan. Unique to the Nordic Ware creation, the form’s fluted sides allowed for even, easy slicing.

Initially, consumers baked pound cakes in the pan. As the years passed, cooks discovered other uses. Quick breads, molded salads, Jello, steamed puddings and ice cream cakes could all be made in it. Although I’ve yet to shape a salad or layer ice cream in my Bundt pan, I nonetheless could thanks to “Bundt Cookbook” (Nordic Ware, 2004).

And just what do I do with my Bundt pan? Bake kitschy, retro Bundt cakes, of course.

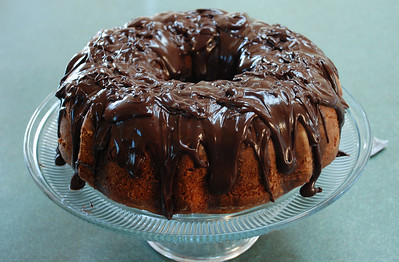
ORANGE CHOCOLATE CHUNK CAKE
Adapted from Ina Garten’s “Barefoot Contessa Parties” (Clarkson Potter, 2001)

For the cake:
2 sticks unsalted butter, at room temperature
2 cups plus 1 tablespoon granulated sugar
4 large eggs, at room temperature
1/3 cup grated orange zest
3 cups plus 1 tablespoon all purpose flour
1/2 teaspoon baking soda
1/2 teaspoon baking powder
1 teaspoon kosher salt
1/4 cup fresh orange juice
3/4 cup buttermilk, at room temperature
1 teaspoon vanilla extract
2 cups semisweet chocolate chips

For the orange syrup:
1/4 cup sugar
1/4 cup fresh orange juice

For the ganache:
9 ounces semisweet chocolate chips
1/2 cup heavy cream
1 teaspoon instant coffee granules

Preheat the oven to 350 degrees Fahrenheit. Grease and flour a 10-cup Bundt pan.

Cream the butter and sugar in the bowl of an electric mixer until light and fluffy, about 5 minutes. With the beaters still running, add the eggs, one at a time, scraping down the sides of the bowl with each addition. Add the orange zest and beat again.

Sift together 3 cups flour, baking powder, baking soda and salt in a large bowl. In another bowl combine the orange juice, buttermilk and vanilla. With the mixer running, add the flour and buttermilk mixtures — alternating in thirds — to the creamed butter, beginning and ending with the flour.

Toss the chocolate chips together with the flour. Add the chips to the batter and stir to combine. Spoon the batter into the greased Bundt pan and smooth out the top. Bake for 45 minutes to 1 hour, until golden brown on top and a cake tester inserted in the cake comes out clean. Place the cake pan on a wire rack and allow it to cool for 15 minutes.

In the interim make the orange syrup. Place the sugar and orange juice in a small saucepan and cook over medium heat until the sugar dissolves. Remove from heat and set aside.

Remove the cake from its pan and place it back on the wire rack. Slide a baking sheet beneath the rack; this will collect the excess syrup. Evenly spoon the orange syrup over the cake. Allow the cake to cool completely before frosting.

To make the ganache, place the chocolate chips, cream and instant coffee in a glass, microwave-safe bowl. Microwave on high, stirring frequently, until the chocolate has melted completely. Drizzle the ganache over the top of the cake.
Let’s Talk Toffee

As a kid, I thought of toffee only as the dark, crunchy center found in those chocolaty Hershey’s treats, Heath bars. It wasn’t until adulthood, when I ventured into Scotland, the land of sweeties and sticky toffee pudding, that I realized how versatile and tasty this confection could be.

Although my toffee epiphany happened in the UK, the sweet itself comes not from Great Britain but from Canada. There a 16th century French educator, Marguerite Bourgeoys, created a molasses candy to attract, as she reputedly called students, the “little savages” to her French Canadian school.

While Bourgeoys’s toffee featured molasses as its main ingredient, British and American versions use a combination of sugar, butter and water or cream. The three are boiled together in a large saucepan until they reach a temperature of anywhere from 260 to 300 degrees Fahrenheit. The higher temperature produces a brittle, tawny candy while the lower yields a luscious, amber syrup.

If firm candy is the goal, the hot toffee is poured out to set. Once it has hardened, it is broken into pieces and either dipped in melted chocolate or doled out as is. In the case of a toffee sauce the liquid is cooled slightly and then drizzled over pudding, cake, ice cream, crepes or other desserts.

In Scotland I sampled several types of toffee. “Sweeties,” the generic term for toffee and other boiled sweets, could be hard, chewy, or almost fudge-like. Flavored with nuts, chocolate, cinnamon, ginger or whisky, these decadent confections bore little resemblance to the Heath bars of my youth.

The same could be said for sticky toffee pudding. This quintessentially British dessert featured a date-filled, cake-like pudding steeped in warm toffee sauce. Just one bite of this velvety last course and I was hooked. Who knew that something as simple as toffee could taste so good?

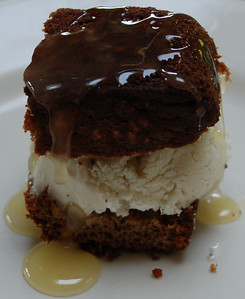
BANANA ICE CREAM WITH TOFFEE SAUCE
Serves 6 to 8

For the ice cream:
1 ½ cups whole milk
1 ½ cups heavy cream
¾ cup sugar
8 egg yolks, beaten
1 ½ ripe bananas, mashed

Place the milk, cream and sugar in a medium saucepan and bring to a boil. Remove from heat and slowly add half of the milk mixture to the eggs, whisking constantly. Once the hot liquid has been incorporated, pour the egg-milk mixture into the saucepan and return to the stove. Whisk the ingredients over medium heat until they begin to thicken, about 5 minutes. Pour through a fine mesh strainer and into a bowl and set in the refrigerator to cool. Once cooled, place in a blender with the 1 ½ ripe bananas and blend. Freeze in an ice cream maker and then follow the manufacturer’s instructions for making ice cream. When ready to serve, place several scoops into small bowls.

For the sauce:
1 2/3 cup sugar
½ cup unsalted butter
½ cup whole milk
¼ teaspoon vanilla

In a medium saucepan melt the butter and sugar, stirring to combine. Bring the mixture to a boil, add the milk and vanilla and cook until thickened, approximately 5 minutes. Cool slightly and then drizzle over the scooped ice cream.

Fabulous Falafel Burgers

I have an embarrassing confession. Although I spend my workdays researching and writing about exotic, far flung foods, I eat the same lunch pretty much every afternoon. And just what is my inevitable meal? It’s a black bean veggie burger with organic ketchup on a slice of high fiber wheat toast. Delicious? Not really. Quick and easy? Absolutely.

After months of dining on this not-so-tasty repast I finally caved in and started considering other fast, protein-rich, high fiber, low fat lunch options. Salads didn’t quite fit the protein criteria. Plus, a few hours after eating a salad, I felt hungry again. Tuna sandwiches proved more satisfying but they didn’t offer much in the fiber front.

What ultimately saved me from a lifetime of black beans was the slender “Meatless Burgers” cookbook. Written by Louise Hagler, “Meatless Burgers” (BPC, 1999) offers over 50 easy, international recipes for this quintessentially American dish. With nutritional values provided at the end of each recipe I had a wealth of healthful lunch options right at my fingertips.

As I love chickpeas, I rightly assumed that I would adore Hagler’s falafel burgers. A Middle Eastern street food that originated in Egypt, falafel are small fried patties or croquettes made from pureed chickpeas and/or fava beans. After being fried, they are stuffed into a pita or wrapped in flat bread and blanketed by such toppings as chopped lettuce, tomatoes, pickles, pickled vegetables and tahini.

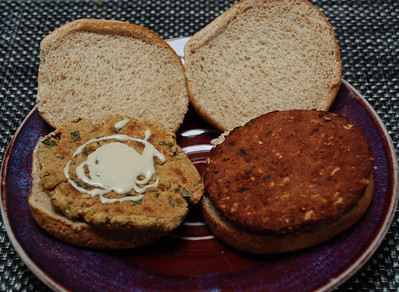
Pureed chickpeas likewise form the base for falafel burgers. Mixed together with chopped onions, parsley and bread crumbs, these burgers are light yet filling. As an added bonus, they can be oven-baked as well as pan-fried.

Falafel Burgers
From Louise Hagler’s “Meatless Burgers” (BPC, 1999)
Makes 6 to 8 burgers

2 cloves garlic
1 (15 ounce) can chickpeas, drained
1/4 cup water
1/2 teaspoon sea salt
1/4 teaspoon black pepper
2 cups bread crumbs (Note: I used whole wheat bread and lightly toasted the crumbs under the broiler)
1/2 cup onion, cut into chunks
1/4 cup Italian flat-leaf parsley, chopped

Preheat the oven to 350 degrees Fahrenheit. Oil a baking sheet and set aside.

In a food processor mince the garlic. Add the chickpeas, water, salt and black pepper and process until creamy. Add the onion chunks and pulse several times to chop and incorporate them into the chickpea mixture.

Place the breadcrumbs in a bowl. Spoon in the chickpea mixture and stir until well combined. Add the parsley, mix the falafel again and form it into burgers. To ensure thorough baking, flatten the burgers to about 1/4 to 1/2-inch thickness.

Arrange the burgers on the oiled baking sheet and bake for roughly 15 minutes on each side until browned. (Note that these also can be pan-fried in olive oil but they will be higher in fat. As is, the burgers contain only 1 gram of fat, 3 grams of fiber, 4 grams of protein and 101 calories.)

Serve on whole wheat buns with tahini, lettuce and sliced tomatoes.

Ramping up for a Zesty Meal

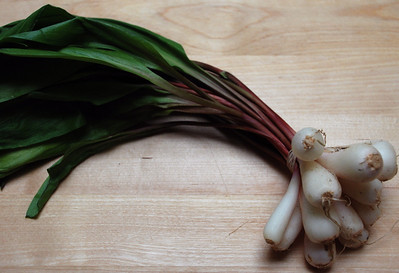
This year’s final tribute to spring produce brings me to a pungent little perennial that grows wild in eastern North America. Known as a wild leek or ramp, this delicate-looking vegetable possesses small, white bulbs, slender, pink stalks, and broad, green leaves.

While this petite plant may appear fragile, the flavor and aroma that it imparts pack powerful punches. Think of the combined bold scents of garlic and onion. Add to these an earthy, lingering aspect and you have the potent smell and taste of a ramp.

Wildly popular in the Appalachian region, ramps are heralded for their culinary as well as medicinal uses. In the latter case locals employ them as seasonal tonics to stimulate dormant appetites and open sinuses long blocked by winter’s chill.

Beyond their role in folk medicine, ramps star in a series of springtime food festivals held throughout West Virginia. At fairs such as the Feast of Ramson in Richwood, W.Va. they are cooked in bacon fat and served alongside ham, beans, potatoes and cornbread. At the International Ramp Cook-off and Festival in Elkins, W. Va. they crop up in everything from burgers and spaghetti to hard tack candy.

Usually, ramps appear in simpler offerings such as “ramps and taters.” A traditional Appalachian recipe, this dish consists of ramps and potatoes fried in bacon fat and served alongside slices of bacon. While potatoes are commonly viewed as the perfect partner, ramps also compliment peas, asparagus, new carrots, chicken and salmon.

When selecting ramps, choose ones that are firm with bright leaves, pink stalks and intact roots. Avoid any slimy or wilted ramps.

Refrigerated, ramps will keep for one week. To store, simply wrap the bulbs and roots in a damp paper towel, put them in a heavy plastic bag and refrigerate. The bag will help stop the odor from overtaking the refrigerator.

Before using, remove the roots, peel off the first layer of the bulb, and trim off the leaves. Wash the ramps thoroughly to dislodge any dirt and then start chopping.

RAMP CASSEROLE
Serves 6 to 8

This recipe comes from “Follow Your Nose . . . Ramp Festival Gourmet Ramp Recipes,” a compendium of the International Ramp Cook-off and Festival contestants’ recipes. The cookbook is published by and available at the Randolph County Convention and Visitors Bureau in Elkins, West Virginia.

8 medium bunches of ramps, diced into 1-inch pieces
2 garlic cloves, peeled and minced
3 tablespoons butter
½ cup freshly grated parmesan cheese
¼ cup heavy cream
2 cups fresh breadcrumbs
1 tablespoon oil

Pre-heat the oven to 350˚F. Butter a medium-sized baking dish.

Heat the 3 tablespoons butter in a large frying pan. Add the ramps and garlic and cook over moderate heat until tender, about five minutes.

Pour in the cream and ¼ cup of parmesan cheese. Stir the mixture together and pour into the prepared baking dish.

In the same frying pan heat the oil over medium until hot but not smoking. Add the breadcrumbs and sauté, stirring constantly until they reach a golden brown, about three minutes.

Top the casserole with the breadcrumbs and remaining cheese then bake uncovered for 20 minutes.

Their robust flavor compliments such foods as potatoes, peas, asparagus and salmon.

Spring Produce Redux


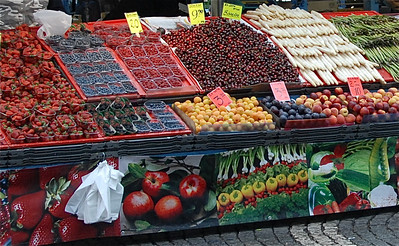
After an endless winter of eating root vegetables and dreaming of lighter cuisine I now am basking in the bounty of spring. So much color, crispness and flavor! So many different seasonal offerings. It’s no wonder that my kitchen counter overflows with the produce of the season.

While curved fiddlehead ferns, honeycombed morel mushrooms and ruby red rhubarb may catch my eye, several of the more traditional foods have stolen my heart. My main heartthrob? The plump, piquant lemon. Ever present in the produce aisle, it hits its prime in the springtime.

A relative of the lime and citron, the lemon performs multiple roles in the kitchen. Wedges serve as as a garnish for seafood and drinks while the zest acts as a flavor enhancer in stuffing and baked goods. Its juice pumps up the flavor in such fruits as peaches, nectarines, guava and papaya. It also balances out rich sauces and vinaigrettes and works as a preservative and anti-browning agent for fragile foods. Talk about a versatile fruit!

Lemons keep at room temperature for one week or in the refrigerator for one month. Choose plump, firm citrus that are heavy for their size. Avoid overly large ones as they will contain mostly peel and little juice.


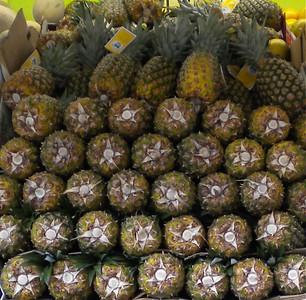
Named for its resemblance to a pinecone, the spiny, green-topped pineapple peaks from March to June. When ripe, its rind varies in color from dark green to orange-yellow. Deep green leaves, flat eyes and a pleasant aroma are also indicate freshness.

When sprinkled with brown sugar and rum and then grilled or broiled, fresh, juicy pineapple makes a decadent dessert. Slices of it compliment grilled lamb, seafood and stir fries and decorate the eponymous pineapple-upside down cake.

The trumpet-shaped chanterelle mushroom rears its wavy, apricot-orange head during the rainy Southeast spring. It possesses a scent similar to apricots and a flavor ranging from meaty to peppery.

A companionable ingredient, these mushrooms form pleasant partnerships with poultry, pork, fish and beef. Likewise, they serve as wonderful fillings for crepes, omelets, and tarts, as well as toppings for pizzas. They can easily be stewed or marinated. Sautéed in butter with a little minced garlic, salt and pepper, they make an irresistible side dish.

When buying this exquisite fungus, choose plump and spongy ones. Steer clear of those with broken or withered caps.

LIMONCELLO DROPS
Serves 6 to 8

Inspired by a recipe for lemon drops in Nigella Lawson’s Forever Summer (Hyperion, 2003), this cocktail turns the rainiest spring day into a warm, sunny afternoon.

6 organic lemons, skins removed
12 ounces limoncello
12 ounces Triple Sec
4 tablespoons granulated sugar
6 to 8 strips of lemon zest, curled

Place the ingredients in a blender and blend until well combined. Using a fine mesh strainer, strain the drink into a large glass pitcher. Cover and refrigerate until ready to serve. Before handing out the drinks, pour the lemon drops into cocktail/martini glasses and drape a strip of curled lemon zest over the rim of each.

Spring for the Season’s Stranger Produce


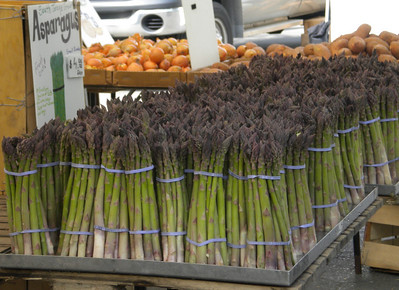
This Earth Day I’m hitting the farmers’ market. To me, nothing says “green living” or springtime like locally grown food. From familiar spring vegetables such as asparagus and leeks to the rare morel and rhubarb the market provides a wealth of vibrant, flavorful produce for my dinner plate.

Of all the vernal offerings the most unusual has to be the fiddlehead fern. Resembling the carved head of a violin, fiddleheads are the unfurled shoots of an ostrich fern. One of the last true wild, foraged foods, they grow in moist woods, floodplains and, in my case, in the damp soil bordering my 19th century farmhouse.


When told by a neighbor that the two-inch long, tightly coiled fern leaves tasted like a cross between asparagus, artichokes, and okra, I assumed that he was joking. Making fun of the city slicker, eh? What would he say next? That sautéed maple leaves reminded him of syrup?

Skepticism aside, I gave fiddlehead ferns a try. Boiled in lightly salted water for 10 minutes or steamed for 20, they do evoke this unusual combination of flavors.

Although traditionally topped with butter, salt and pepper, the vegetable’s distinct taste and firm texture make it a good match for stir fries as well as Hollandaise, cheese and tomato sauces. If stir-frying, remember to blanch the ferns in boiling water before tossing into your wok. Some food-borne illnesses have been attributed to raw or undercooked fiddleheads.

With a season of just two weeks fiddleheads fly out of markets. As they have a short shelf life, they should be consumed within two days.

Along with fiddleheads I stock up on stalky, red rhubarb. Although botanically a vegetable, rhubarb has masqueraded as a fruit since 1947. That year the United States Customs Court in Buffalo, New York deemed it a fruit because of the manner by which it is eaten. In the U.S. rhubarb is traditionally coupled with strawberries and baked in desserts, particularly pies. In fact, its popularity as a pie filling has garnered it the nickname “pie plant.”

Elsewhere rhubarb retains its vegetable identity and appears in savory dishes. In Poland it is cooked with potatoes and spices. It turns up in stews in Iran and with spinach in Afghanistan.

Because of rhubarb’s intense tartness and my lifelong preference for sweets, I invariably pair it with a generous amount of sugar. Once sweetened, it creates velvety jams, sauces and desserts such as rhubarb crumble, trifle, and pie.

When selecting rhubarb, look for moderately thin, pink or red stalks. Thicker, greenish stalks will be sour and stringy. Use non-aluminum cookware with this fruit. Otherwise, the rhubarb will react with the metal.

RHUBARB CRISP
Serves 6

4 cups of rhubarb, cut into 1” pieces
¾ cup granulated sugar
1 ½ teaspoons cinnamon
¼ teaspoon ginger
juice of half of a lemon
¾ cup of light brown sugar, firmly packed
½ cup of all purpose flour
¾ cup of rolled oats
¼ cup of unsalted butter at room temperature

Preheat the oven to 375˚. Grease a 9”x 9” baking dish then set aside.

In a bowl mix together the granulated sugar, ½ teaspoon of cinnamon, and ¼ teaspoon of ginger.

Place the rhubarb in the baking dish then sprinkle the sugar mixture and the juice of half of a lemon over the top.

In another bowl mix together the brown sugar, 1 teaspoon of cinnamon, flour, and rolled oats. Using your fingers, break up the butter into small pieces and add to the dry ingredients. With a fork mix the butter, oats, sugar and flour together until they are well combined. Sprinkle the topping evenly over the rhubarb.

Place the baking dish in the preheated oven. Bake until the crust has browned and the rhubarb is bubbling, about 25 minutes. Serve with a scoop of vanilla or strawberry ice cream.

Portuguese Idyll

Among all the places that I’ve visited Portugal may become one of my favorites. Along with an abundance of pleasant weather, charming people, beautiful sites, relaxed atmosphere and efficient infrastructure, the Iberian country boasted of some of the freshest cuisine that I’ve found.

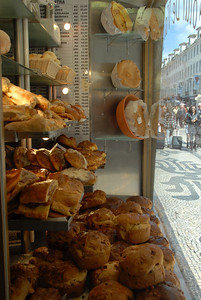
In Lisbon Sean and I roamed the cobblestone streets, nibbling on warm pasteis de natas, the custard cream tarts discussed in a previous entry. While bakeries have become a rarity in the States, in Lisbon they appeared on virtually every street corner. In addition to the luscious de natas these shops offered such delicacies as egg-topped Easter loaves, powdered sugar-dusted coconut puffs, almond cookies, honey cakes, crusty breads and small cups of strong coffee or uma bica. Needless to say, he and I both suffered from a major case of bakery envy.


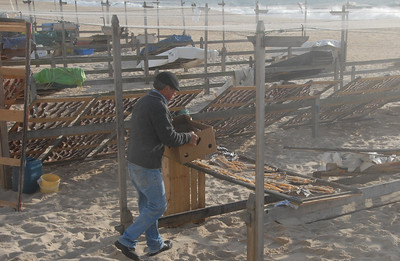
Since we spent much of our time along the coast, we often dined on simply prepared, local seafood such as tuna, mullet, clams, barnacles and bass. Sardines popped up not only in restaurants but also along the beaches, where they were split, placed on wire racks and dried in the sun. While dried sardines didn’t strike my fancy, I did appreciate having them grilled and served alongside a salad of chopped tomatoes, peppers and cucumbers or sauteed greens.


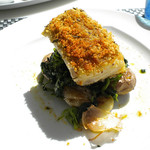
A dried fish that did intrigue me was bacalhau or dried, salted cod. A national favorite, bacalhau must be soaked in water for several days so that it plumps up and loses some of its intense saltiness. Not that this fish won’t seem salty to the uninitiated. Still, most will find it delicious.


In the northern coastal city of Porto Sean and I indulged in the drink for which Portugal and Porto are famous, port wine. Fortified with brandy, this sweet, rich red wine brought a pleasant conclusion to our evening meals. It was dessert with a soothing after effect.


As elsewhere in Portugal, we weren’t far from our food and beverage sources in Porto. Made in the Douro Valley, port wine is blended and aged directly across from Porto, in the lodges of Vila Nova de Gaia. These riverside lodges sample and sell their world-famous ports seven days per week. Needless to say, our visit to Porto included a stroll to and through the lodges.


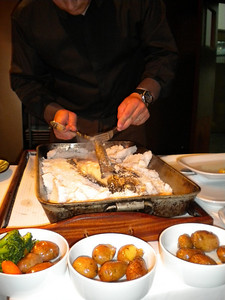
The Portuguese specialties didn’t end here. Lively yet inexpensive wines, flavorful goat’s and ewe’s milk cheeses, vibrant soups, hearty breads and succulent salt-baked fish all enhanced our time in this lovely land. Great food. Great trip. I cannot wait to return and see — and eat — more of Portugal.

The Perfect Portuguese Pastry

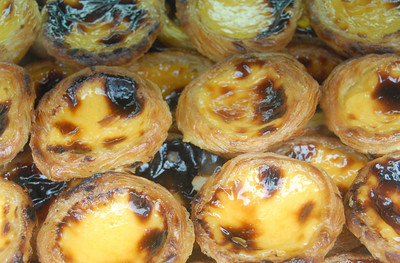
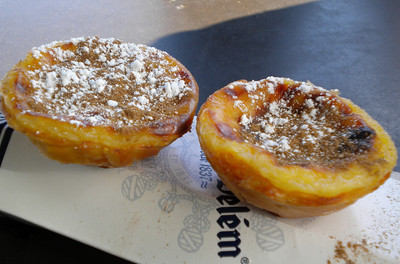
Spend a week in Portugal and no doubt you’ll end up with a serious addiction to pasteis de natas. Sweet and creamy yet with a slight crunch, these small custard tarts line the windows of most bakeries and coffee shops. The locals blanket them with cinnamon and a smidgen of powdered sugar before consuming them at breakfast or as a snack. In my case no day in Portugal was complete without at least one of these bite-sized treats.

Although I found them throughout Portugal, legend has it that de natas originated on the outskirts of Lisbon, at Belem’s Mosteiro dos Jerónimos. There lay bakers produced pasteis de natas for the general public. In the early 19th century, when the monastery closed, a neighboring confectioner, Domingo Rafael Alves, bought the recipe from one of the out-of-work bakers and started offering them in his shop.

Today Alves’ Pasteis de Belem has become a tourist attraction in its own right. Made using the monastery’s original, secret recipe, Pasteis de Belem’s tarts draw countless customers to the cafe seven days per week. On the late afternoon that I visited, a dozen people lined the stone sidewalk outside, patiently waiting for their turn to buy boxes of this delectable sweet. Just remember that here they are called pasteis de Belem while everywhere else they’re known as pasteis de nata.

What makes this pastry so delicious? Perhaps it’s the de nata’s light shell. Reminiscent of puff pastry, its airy crispness provides the perfect contrast to a velvety custard. Then again, maybe it’s the custard. Whipped together from fresh cream, egg yolks and sugar, its warm, gentle flavor makes me yearn for more.

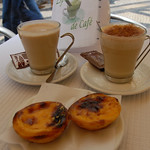
If traveling to Portugal isn’t in your future and you don’t have a Portuguese bakery or restaurant nearby, try baking pasteis de natas at home. Serve them warm, with a demitasse of espresso or cup of strong, black coffee, just as they would in Portugal.

PASTEIS DE NATA
From “Portuguese Cooking” (Casa Editrice Bonechi)
Serves 6

2 cups all purpose flour
lukewarm water
1 cup butter, softened
8 ounces cream
4 egg yolks
1 tablespoon all purpose flour
¾ cup superfine sugar
zest of one lemon
powdered sugar, for decorating
cinnamon, for decorating
Special equipment — 6 (3 1/2-inch to 4-inch) tart pans

Sift the flour into a large bowl. Using a hand mixer, mix with enough lukewarm water so that a soft dough forms. Allow to stand for 15 minutes. Place on a lightly floured surface and knead briefly before forming into a block. Roll out to about 1/2-inch thick. Spread 1/3 of the softened butter over the dough, fold over into thirds, knead and shape into a block again. Repeat these steps for the remaining two-thirds of butter. When finished, allow the dough to rest for 15 minutes.

Roll out the dough to 1/3-inch thick. Cut into 4-inch wide strips then roll these, one by one, into tight cylinders. Cut the cylinders into 1/2-inch thick slices and place each in a tart pan. After wetting your fingers, fit the pastry over the bottom and sides of the pans to line them; don’t allow the pastry to go over the rims.

Preheat the oven to 425 degrees Fahrenheit.

To make the custard, whisk together the cream, egg yolks, flour, sugar and lemon zest in a medium-sized saucepan. Heat the mixture over low heat and slowly bring to a boil, stirring the entire time. As soon as the custard starts to boil, remove from the heat and allow to it to cool to room temperature before pouring into the individual pans. Smooth out the surface of the custards and then bake them until golden brown on top, about 10 to 15 minutes. Remove them from the oven and allow them to cool in their pans. Dust the tops with cinnamon and powdered sugar and serve.

Smokin'

Some consider it a luxury item, served only on special occasions. Others relegate it to the brunch table, as topping for a bagel. Yet, to me, smoked salmon is far more than fancy finger food. Whether featured in a pasta dish, incorporated into a salad or filling a fajita, it remains a versatile, multi-faceted fish.

Although considered a delicacy, smoked salmon has quite humble beginnings. Born out of necessity, smoking was the means by which medieval Europeans ensured that their bountiful salmon catches would remain edible throughout the year.

To preserve their fish, the anglers would first clean and fillet their salmon. They then sprinkled salt and sugar onto the flesh, stacked the fillets on top of each other and inserted them into an active smokehouse. There the salmon would remain in roughly 75 to 85 degree Fahrenheit temperature until smoked completely.

Unlike the tender, moist products of today, the early European versions had a tough texture reminiscent of jerky. They also possessed a strong, salty tang that differed greatly from the present day’s milder flavor.

While the taste and texture have evolved over the years, what hasn’t changed is its healthfulness. Rich in omega-3 fatty acids, smoked salmon remains a high protein, low calorie food.

Although purists may opt to eat smoked salmon with a dusting of ground pepper and on a cracker, bagel or slice of rye or pumpernickel bread, a wealth of hot and cold recipes exist. Consider an updated croque-monsieur or eggs Benedict where smoked salmon replaces the ham. For breakfast sample a smoked salmon quiche, omelet or frittata or smoked salmon wrap, pasta or polenta at dinner.

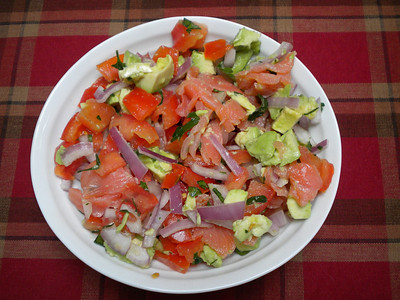
Prefer cold dishes? Try a chopped smoked salmon-avocado-tomato-red onion salad, smoked salmon and cucumber tea sandwiches or smoked salmon gazpacho or vichyssoise soup.

SMOKED SALMON-AVOCADO-TOMATO TARTARE
Serves 4 to 6

You can call this either a tartare or chopped salad and serve it as an appetizer, side or first course.

4 tomatoes, seeded and diced
1 cup red onion, cut into thin, ½ to 1-inch long strips
2 avocados, flesh scooped out and cut into cubes
¼ cup fresh parsley, washed, dried and chopped
juice of 1 lemon
1 cup (approximately 6 ounces) smoked salmon, cut into small strips
freshly ground white pepper, to taste

Place the tomatoes, onions, avocados and parsley in a medium-sized bowl and drizzle the lemon juice over top. Add the smoked salmon and a dash of ground white pepper. Stir to combine and taste for seasoning, adding more ground pepper if necessary. Serve immediately or cover with plastic wrap, pressing down on the surface so that no air collects beneath the wrap, and refrigerate for up to 5 hours.

Bit of the Bubbly


I spent much of last week in Dallas so the obvious choice would be to write about Tex Mex food. Yet, as I quickly learned, there’s more to Texas cuisine than chilies and guacamole. For instance, there is beer. No, I don’t mean the obvious, South-of-the-Border choices such as Corona or Dos Equis but rather all the other fine brews found on tap there.

Want an American craft beer such as Ommegang‘s Three Philosophers or Dogfish Head 60 Minute IPA? How about an Italian Peroni, English Young’s Double Chocolate Stout or a Belgian Maredsous, Leffe Blonde or Chimay? I could enjoy them all and many more at the lively Old Monk and The Ginger Man.

Drinking all these heady lagers and ales made me think, unsurprisingly, about food and how infrequently I use beer when cooking. Sure, every now and then I pull together a tasty Guinness- or Victory Lager-based cheese fondue. Still, I’ve not spent enough time tinkering in the kitchen and seeing what other recipes can benefit from a bottle of good beer.

Thanks to adventurous friends and restaurants, I do know the pleasures of shellfish cooked in this liquid. Mussels, clams and shrimp all perk up when steamed or sauteed in beer. Pair them with an IPA and molasses barbecue sauce and you’ve got a lip-smacking, finger-licking meal.

Fish not your favorite? Braise pork, sausage, beef or chicken in a pilsner. Use stout as the stock for an incredibly rich chili or beef or vegetable stew. Bake bread from an ale-based batter or cake from a porter-chocolate mix. If all else fails, fire up the barbecue and grill some succulent beer can chicken. The options are endless.

Likewise limitless are the number of books devoted to this subject. When searching for a quality beer cookbook, avoid those with recipes that don’t differentiate between varieties — i.e. “12 ounces of beer” versus “12 ounces of stout, pale ale . . ..” Contrary to the generic instructions, the brew that you choose will greatly influence how your dish tastes.

Until I have more time to experiment and test other beer-infused offerings, I’ll pass along a tried and true recipe for cheese fondue. Needless to say, it goes well with an iced cold beer or two.

VICTORY LAGER CHEESE FONDUE
Serves 2 to 3

3 apples, peeled, cored and cut into slices
juice of a lemon
8 ounces Victory Lager or any well-balanced, German-style lager
2 cups Grueyere cheese, shredded
2 cups Emmental cheese, shredded
1/8 teaspoon ground nutmeg
dash ground white pepper
1 baguette, cut into cubes

Special equipment: Fondue pot and fondue forks or long, wooden or bamboo skewers

Place the apple slices in a bowl and sprinkle the lemon juice over them to stop them from browning.

Pour the beer into a fondue pot and bring the liquid to a simmer over moderate heat. Gradually add the cheese to the pot and stir so that the cheese melts evenly. Cook for 5 to 10 minutes until cheese is completely melted and the liquid is creamy. Add the nutmeg and pepper and stir to combine.

Place the bread cubes in a separate bowl. Serve them, along with the apple slices, for dipping.