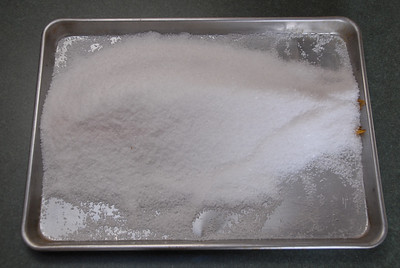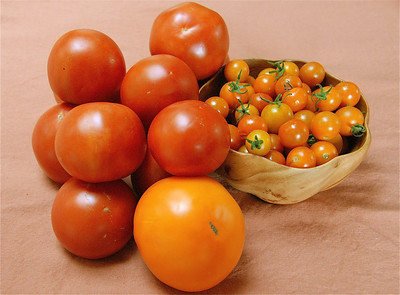
Latest Posts

It’s Tomato Time!

Whether you grow your own vegetables, frequent farmers’ markets, or grocery shop, you’ve no doubt noticed an increase in the quantity and quality of tomatoes. Yes, it’s tomato time, the period from July to October where locally grown, vine-ripened tomatoes hit their prime. For those who happily chomp on tomatoes as a snack, salad, side or main dish, it’s a highly anticipated season. For those like me who don’t share this passion, it means confronting the quandary of what to do with all those tomatoes.

A well-meaning friend once suggested that I try canning them. After all, doesn’t everyone love home preserving? Apparently not. After one steamy, day-long canning class I learned that, like oil and water, canning and Kathy do not mix.

After ruling out canning, I considered other options, including drying tomatoes in a food dehydrator. While pleasant tasting, dried tomatoes lacked the spark of their fresh, juicy brethren. Realizing that, I scratched dehydrating from my list.

Ultimately, I’ve opted either to cook them or to serve them raw in an endless parade of recipes. Lucky for me, tomatoes pair well with almost everything. They possess a special affinity for such fruits and vegetables as arugula, bell and chili peppers, cucumbers, fennel, garlic, lemon, onions, shallots and watermelon but also partner nicely with avocado, green beans, broccoli, cauliflower, eggplant, mango, mushrooms, peas, raspberries, squash and zucchini. Their sweetly sour flavor compliments bay leaves, cilantro, marjoram, mint, flat-leaf parsley, black and white pepper, and thyme.

Likewise, tomatoes go with a variety of cheeses – blue, goat, Gorgonzola, mozzarella, Parmesan and ricotta among them. They also marry successfully with balsamic, red wine, rice, sherry, tarragon and white wine vinegars as well as with olive oil and salt.

Along with countless flavor affinities, tomatoes offer a great degree of cooking versatility. They’re wonderful when baked, broiled, fried, grilled, sauteed, stewed, turned into a sauce or served raw. With the exception of plum tomatoes, which have a fairly tough skin, they don’t require peeling or de-seeding. Just slice and serve them with a dash of salt and black pepper. Easy!

When faced with a huge mound of these veggies, I dig out my stack of tomato-oriented recipes and get to work. Sometimes I’ll plunk them into my food processor and, after adding cucumbers, peppers, garlic and sherry vinegar, make gazpacho soup. I’ll also plop them into a stockpot with chopped garlic, onions and basil and simmer a peasant-style pasta sauce. With smaller amounts I may pull out a sheet of frozen puff pastry, cover it with sliced tomatoes, and bake a tomato tart. I often just layer sliced tomatoes between fresh basil, grilled Haloumi cheese, and thick slices of multigrain bread or grill them with a little goat cheese on top for a tasty Mediterranean lunch.
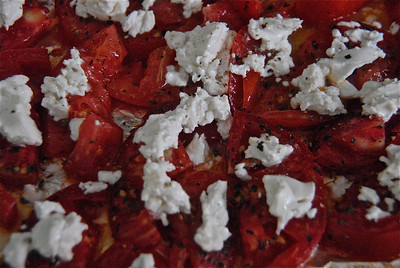
GRILLED MEDITERRANEAN TOMATOES
Serves 2 to 4

2 tablespoons olive oil
2 large, ripe tomatoes, cored and sliced
1/8 to ¼ teaspoon dried oregano or to taste
1/8 to ¼ teaspoon dried basil or to taste
3 ounces goat cheese
dash of freshly ground black pepper

Preheat the grill on high.

Tear off a large sheet of aluminum foil and spread 1 tablespoon of olive oil over it. Place the tomato slices on the greased foil. Sprinkle dried oregano and basil over each slice and then drizzle the remaining olive oil over them. Using a spoon or your fingers, distribute equal amounts of goat cheese on each tomato and then season with ground black pepper.

Lay the foil on the heated grill and allow the tomatoes to cook for 5 minutes or until the cheese has melted slightly and the tomatoes have released some of their juices. Serve the tomatoes on their own or atop steamed couscous.

Crisp, Crumble, Cobble and Slump

If you give fresh fruit to me this summer, chances are that I’ll wash and then tumble it into a greased baking dish and bake a fruit crisp. Rhubarb, strawberries, blackberries, blueberries and peaches have all bubbled away beneath a blanket of brown sugar, cinnamon, oatmeal and butter. Sure, with the exception of rhubarb, I could have enjoyed any of these raw. Yet, I can’t seem to stop myself from making and eating these treats.

What prompted this obsession I do not know. Maybe it’s a touch of summer laziness for the crisp is one of the fastest and easiest desserts to bake. What I do know is that my crisp often gets confused with other sweets. At countless dinners and parties friends have thanked me for bringing a crumble, cobbler or slump. Who’s right? And just what am I baking?

Although I think of “slump” as what my mother told me never to do, the word actually refers to a luscious dessert. Hailing from New England, it consists of fresh fruit topped with dollops of raw dough. As the ingredients stew together in a covered pot, the dough slowly oozes across the top. Some historians claim that this oozing pastry is how the slump got its name. Others, though, believe that slump refers to how the succulent dessert slouches, blob-like, on a plate.

In the case of cobbler, crust differentiates it from a slump. Rather than spoonfuls of dough, cobbler features a thick crust encasing slices of apples, peaches or other fresh fruit. Decorated with granulated sugar, the cobbler is then baked in the oven until golden and bubbling. When cooled and cut, it brings to mind a slice of deep-dish pie that lacks a bottom crust.

Of the three, it’s the crumble that most resembles my fruit offering. Reputedly invented during WW II, it features a simple pastry of flour, sugar and butter. After mixing the ingredients together, they are spooned over apples and baked. As the crumble cooks, the butter melts into the flour and sugar to form a loose, crumbly covering. Hence the name crumble.

Like the crumble, the crisp’s name is derived from its crust. Made a mixture of flour, oatmeal, brown sugar and butter and spiced with cinnamon and sometimes ginger or nutmeg, the topping becomes crisp and brown when baked. Depending on the time of day and diner’s preference, the crisp either gets topped with scoops of ice cream or caps off a bowl of yogurt.

Whether you opt for a crisp, crumble, cobbler or slump, you’re destined for a delectable dessert, one that you’ll end up making — and eating — again and again.

PEACH CRISP
Serves 6 to 8

Note: To turn this into a blueberry crisp, replace the 6 peaches with 5 cups of fresh or frozen blueberries.

butter, for greasing an 8″ x 8″ baking dish
6 peaches, peeled and sliced
1 tablespoon lemon juice
3/4 cup light brown sugar, firmly packed
3/4 cup rolled oats
1/3 cup flour
1 teaspoon cinnamon
4 tablespoons unsalted butter, at room temperature

Preheat the oven to 375 degrees Fahrenheit.

Layer the peaches in the greased, 8″ x 8″ glass or ceramic baking dish and sprinkle them with lemon juice.

Place the brown sugar, rolled oats, flour, cinnamon and butter in a medium-sized bowl. Using either a fork or your fingers, mix or squish the ingredients together until well-blended. Place the topping over the peaches, covering them completely. Bake for 25 to 30 minutes, until the crisp is golden brown and bubbling. Remove, cool slightly and serve either with plain yogurt or peach ice cream.

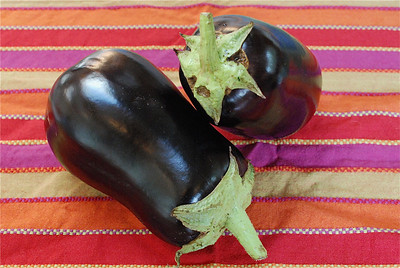
You Say Aubergine, I Say Roly, Poly Eggplant

As a kid, I loathed eggplant. No wonder. My first taste of it came in the form of a bland and watery eggplant Parmesan. One bite of the floppy, cheese-coated, sauce-logged vegetable and I wrote it off for good. Or so I thought.

A decade later eggplant landed on my plate again. This time, though, it looked far more palatable. In fact, it looked downright delicious. Sliced into strips and then seasoned with olive oil, salt and black pepper, it had been grilled until slightly charred around the edges. A tentative taste left me hooked on its mild tang and supple, melting texture. With that my hatred of the purplish-black, teardrop-shaped veg ended and my love affair with eggplant began.

Known in Great Britain and France as an aubergine, the eggplant – along with the tomato and potato – is a member of the flower-bearing nightshade family. Reputedly originating in China, it first hit European shores during the 13th century. There it became the backbone of such renowned dishes as French ratatouille, Greek moussaka, Spanish escalivada and Sicilian caponata.

Today the Middle East, India and Asia cook with this roly, poly fellow far more than Europe and America do. Lebanon, Syria, Jordan and Israel roast and mash it to create baba ghanoush. Northern India features it in a curry known as baingan bartha while Southern India serves it in a chutney called brinjal kosthu.

Whether I use it in curries, ratatouille, or baba ghanoush or just broil, fry or grill it, I should ensure that my eggplant is young and healthy. Otherwise, no matter what I chose to make, I’ll end up with a spongy, bitter tasting dish.

When searching for a good candidate, I look for smooth, firm, blemish-free skin and an overall heftiness. Once I’ve purchased it, I either use the aubergine immediately or store it in my vegetable crisper for up to four days. By the fourth day it invariably begins to wither and should be composted.

Young eggplant doesn’t need to be skinned. Simply slice and cook it as you would squash. Keep in mind, though, that it will readily absorb oil so either employ oils sparingly or coat your eggplant with batter or bread crumbs before cooking.

Although available year-round, eggplant peaks in late summer. Needless to say, now is the perfect time to drop by your local farmers’ market and pick up a few.

RATATOUILLE
Serves 4 to 6

¼ cup olive oil
1 medium eggplant, peeled and cut into 1-inch cubes
2 zucchini, washed, sliced and then cut into quarters
2 tablespoons olive oil
1½ cup yellow onions, chopped
2 green bell peppers, washed and cut into 1-inch squares
5 cloves garlic, chopped
1 teaspoon sea salt
1/2 teaspoon ground black pepper, or to taste
1½ cup of canned, diced, organic tomatoes
dried oregano, to taste
¼ cup fresh basil, washed and finely chopped

Heat the oil in a large Dutch Oven. Add the zucchini and eggplant and cook until golden and tender, about 10 minutes. Add the onions and 2 tablespoons olive oil and cook until softened. Add the peppers, garlic, salt and pepper and cook for 5 to 10 minutes.

Add the tomatoes and oregano. Reduce the heat to low and cook until everything is soft and well-blended. Sprinkle with fresh basil, stir and serve with slices of crusty baguette.

Sipping Summer Cocktails

Hosting a summer soiree, I invariably face the dilemma of what thirst-quenching drinks to provide. While iced tea and lemonade remain obvious choices, I know that some will crave a beverage with more of a kick than chilled raspberry lemonade. That’s when I haul out my blender, pitchers, barware and kitschy, paper umbrellas and start whipping up seasonal cocktails.

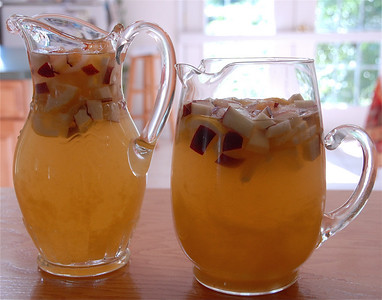
Among my go-to recipes is Sangria Blanco. Typically, when I hear “sangria,” I think of the red wine punch found throughout Spain. In fact, this crimson drink gets its name from the Spanish word for “bleeding.” Yet, in the dead of summer bartenders will replace the signature red wine with a cold white and offer Sangria Blanco to their parched clientele.

Although I love both versions, I tend to think of white sangria as my “everything but the kitchen sink” drink. Into my punch bowl go dry white wine, white rum, triple sec, gin, brandy, fresh orange juice, canned pineapple juice and simple syrup. After stirring the ingredients, I cover and then squeeze the bowl into my refrigerator. There the flavors will meld together for up to 24 hours. Topped with slices of frozen peaches, plums and lemons, Sangria Blanco serves a small army or, in my case, 10 to 12 cocktail-loving friends.

The Limoncello Drop likewise ranks high among my party favorites. A variation of the vodka-based Lemon Drop, this sweet but tart drink reminds me of a childhood treat, Lemon Drop candy. I’m not alone in this impression. Supposedly, the original was named for that confection.

Differing from the Lemon Drop in ingredients as well as name, the Limoncello Drop consists of the Italian liqueur limoncello, triple sec, peeled lemons and sugar. To make this sweet but tart repast, I plunk everything into my blender and blend until smooth. I then strain the drink into a pitcher and refrigerate it until the guests arrive. Cold and smooth, it’s an excellent choice for a steamy summer night.

When I’m not pressed for time, I often opt for watermelon daiquiris. An invention of the late 19th century, the daiquiri hails from the Cuban mining town of the same name.

Unlike the original cocktail of rum, lime, sugar and ice, my concoction includes chunks of frozen watermelon. Here time becomes a factor in that I must cut up and freeze a watermelon. If the cubes don’t harden by the time that I toss them into my blender, I end up creating batches of spiked watermelon smoothies. Tasty but not what I had intended on serving.

SANGRIA BLANCO
Serves 10 to 15

2 1/2 to 3 bottles of dry white wine
3 ounces white rum
3 ounces triple sec
2 ounces gin
brandy, to taste
1 cup orange juice
1/2 cup pineapple juice
1 cup simple syrup
2 peaches
3 plums
2 lemons

Wash and cut into cubes the peaches and plums. Wash and slice in half the lemon and then slice into thin half-moons. Mix the fruit together and then place equal amounts into empty ice cube trays, leaving enough space to add water. Add water to the trays and freeze. (Note: These should be made at least several hours before mixing and/or serving the sangria.)

In a large bowl or pitcher pour in the wine, rum, triple sec, gin, brandy, orange and pineapple juices and simple syrup. Taste and adjust flavors accordingly. Refrigerate until ready to serve.

Before serving, stir so that the ingredients are well-blended. Tumble in the fruit-filled ice cubes and allow guests to help themselves to cold, fruity, Sangria Blanco.

More Hot Days, More Cold Soups

Last week I moaned about the prospect of cooking in the oppressive heat. This week it’s the humidity that keeps me from hanging out in the kitchen. Thanks to a sultry summer, I’m still fixated on soothing, cold soups.

For lunch today I enjoyed a bowl of the crimson, Andalusian version of gazpacho. Originating in southern Spain, this red soup resulted from the 16th century introduction of tomatoes from the New World. Unlike Spain’s other chilled soup, ajo blanco, gazpacho features a puree of tomatoes, sweet bell peppers, cucumbers, garlic, vinegar and olive oil. Some cooks add diced onions, celery, lemon juice, fresh herbs, tomato juice or hot sauce. Others slip in breadcrumbs to thicken the soup.

When serving this dish at home, I occasionally strain the pureed vegetables and ladle out a velvety smooth soup. Other nights I leave in the veggies and dish out a chunky, hearty meal. That’s the beauty of Andalusian gazpacho – one recipe, two different results. Serve it the first night as a thick, vegetable-studded stew. Strain and present it the second evening as a light, satiny soup.

Another refreshing option is cold beet soup. Commonly known as borscht, this purplish, Eastern European delicacy consists of sliced or diced beets simmered in their own broth and then mixed with lemon juice, sugar, and minced onions. It is not to be confused with hot borscht, which has a meat-based stock and may contain beef as well as mushrooms, cabbage and potatoes.

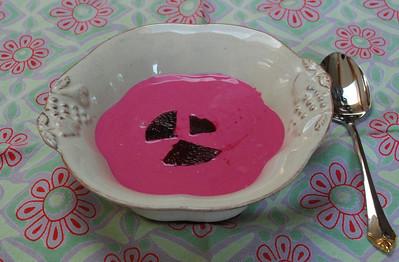
Reminiscent of borscht, the Polish soup chlodnik starts with a refrigerated stock of grated beets, water, vinegar and sugar. Cucumbers, onions, radishes, dill and other herbs join the mix. Sour cream or yogurt is stirred in to give the dish its eye-popping pink color. In some parts of the country cooked crayfish or veal finish off the chlodnik. Elsewhere slices of lemon or hard-boiled eggs accompany it.

When the heat really has me beat, I whip a ridiculously simple version of chlodnik. Chopped pickled beets and their juices join together with low-fat Greek yogurt and a dash of white wine vinegar. Whisked until well-blended, these ingredients form a tart but tasty meal.

GAZPACHO
Serves 6 to 8

3 pounds ripe tomatoes, cored, seeded and chopped into quarters
1 yellow bell pepper, trimmed and cut into chunks
1 green pepper, trimmed and cut into chunks
1 1/2 cucumbers, peeled, seeded and cut into chunks
1 small Spanish onion, quartered
3 cloves garlic, peeled
¼ cup sherry vinegar
2 tablespoons extra-virgin olive oil
1 tablespoon lemon juice
sea salt, to taste

Using a food processor, puree the tomatoes. Add the remaining ingredients to the food processor and puree again.

If desiring a smooth soup: Using a chinois or fine-mesh sieve, strain the soup into a large container. Be sure to press down on the pureed vegetables to extract all the liquid. Discard the solids and refrigerate the liquid for a minimum of three hours so that the flavors can meld. Serve cold.

If preferring a chunky soup, skip straining the liquid and just refrigerate the soup for a minimum of three hours. Serve cold.

CHILLED BEET SOUP
Serves 6 to 8

You can take the time roast and then peel the beets but, since I’m trying not to increase the heat in my kitchen, I’ve opted for canned beets in this recipe. Not as authentic or flavorful but certainly a lot cooler for the cook!

2 (16 ounce) cans of beets
4 cups water or vegetable stock
juice of 1 ½ lemons
1 tablespoon sugar
8 ounces sour cream
salt, to taste
freshly ground white pepper, to taste
2 tablespoons fresh dill, chopped

In two batches place the beets, water or stock, lemon juice and sugar in a blender and blend until smooth. Add salt and white pepper to taste then pour the soup into a pitcher and refrigerate for at least 4 hours or up to 3 days.

Before serving, pour the soup, along with the sour cream, into a blender and mix the two together. Ladle into bowls, sprinkle with dill and serve.

Beat the Heat with Soup

As East Coast temperatures top 100 degrees and I’m convinced that I really could fry an egg on the sidewalk, I’ve started to reconsider my dinner options. While tired of take-out, I’m far from thrilled by the prospect of standing over a hot stove in my simmering kitchen. As refreshing as that half-gallon of rocky road ice cream in my freezer seems, I doubt that it will tide me over until morning.

Around the time that I reach for a box of breakfast cereal, I remember two magical words – cold soup. Sometimes referred to as “liquid salads,” chilled vegetable soups provide the perfect way to cool off on sultry summer nights.

From Spain comes icy gazpacho. Introduced by Arab occupiers sometime between the eighth and thirteenth centuries, this familiar crimson soup began as a cream colored, garlic- and bread-based peasant food. To make the original gazpacho, cooks would pound stale bread, garlic, olive oil, and salt together in a mortar. They then added water to reach the desired consistency and splashed in vinegar for a tart, invigorating taste.

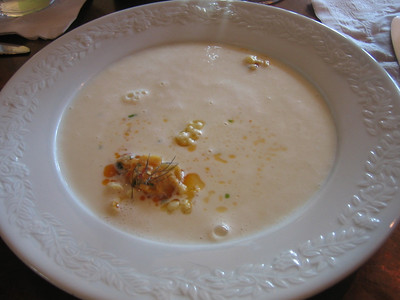
I make the modern incarnation of this soup, ajo blanco, not with a mortar and pestle but in my food processor. I simply toss in blanched almonds, garlic, bread, olive oil, salt, sherry vinegar and water and pulse the ingredients together until they’re finely chopped. I then refrigerate the soup until chilled. Served with a drizzle of extra virgin olive oil, sliced grapes or chopped nuts on top, ajo blanco remains one of my favorite ways to chill out on a hot night.

There is something about a white soup – its cool color and smooth texture – that seems especially soothing. That’s why, along with ajo blanco, I often blend together such simple, yogurt-based fare as tarator and cacik.

Hailing from Bulgaria and with variations in Albania and the Republic of Macedonia, tarator is made from plain yogurt, garlic, cucumbers, walnuts, and olive oil. Thinned with cold water, tarator is served chilled and may even contain chips of ice.

Turkey has a similar summer dish, cacik. Akin to Greece’s tzatziki, cacik acts not only as a soup but also as a salad or dip. Comprised of yogurt, cucumbers, garlic, salt and dried dill or mint, it’s served in small, chilled bowls. In a further effort to beat the heat, it may also include ice cubes.

On days when temperatures soar into the triple digits and my exhausted air conditioner concedes to the heat, I no longer have to reach for take-out menus, cold cereal or ice cream for my meals. Thanks to chilled soups, I now have allies in the battles against my steaming kitchen and the oppressive weather.

CACIK
Serves 4

1 pint plain yogurt
2 cucumbers, seeded and diced
1 clove garlic, minced
1 teaspoon dried mint
two sprigs of fresh dill, finely chopped
1 to 2 cups ice water
handful of ice cubes, for serving

Add the cucumbers, garlic, mint and dill to the yogurt and whisk to combine. Dilute the mixture with the water until the desired consistency is reached. Whip with a whisk again. Pour into small, chilled bowls and toss an ice cube or two into each bowl before serving.

Top It Off

With Independence Day and a long weekend of picnics and BBQs just around the corner, it seems like the perfect time to talk about condiments. Whether sweet, sour, spicy or a tad salty, these toppings have added flavor and flare to food for centuries. While ketchup, mustard and mayonnaise still reign supreme, there are plenty of unusual dressings to spice up your summer meals.

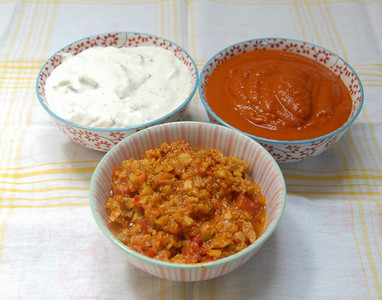
Love some heat with your meat? Spoon on the fiery, North African condiment harissa. This crimson sauce consists of hot chilies, garlic, cumin, caraway seeds and sea salt. As an indicator of just how spicy it can be, commercially produced harissa comes in cans decorated with erupting volcanoes.

Usually harissa accompanies couscous. In Tunisia, though, it’s used as a sandwich spread. It also gives an extra kick to vegetables and seafood. Some cooks add a little yogurt to their harissa and offer it as a dip.

If harissa sounds too searing, try the milder North African chermoula. It starts with a base of cilantro, parsley, garlic, lemon juice and olive oil but can go on to include ginger, red pepper oil, saffron, paprika, cayenne and even vinegar. Every country and cook in North Africa seems to have a unique chermoula recipe.

Unlike the multipurpose harissa, chermoula primarily serves one role – to dress fish. It acts as a marinade for firm, white-fleshed fish and as a cold sauce for fried fish and shellfish.

If you like saltiness, slather on some tapenade. Based on the French word for “capers,” tapenade is a thick, dark paste of pureed capers, black olives, anchovies and olive oil. Variations exist, including tapenades with garlic, lemon juice, mustard, green olives and/or tuna.

In Southern France cooks daub tapenade over crisp baguettes and serve it as an hors d’oeuvre. Elsewhere it flavors seared fish steaks, grilled vegetables, crackers or warm pita bread. It also acts as a stuffing for oven-roasted tomatoes and works as a savory spread for grilled fish sandwiches.

Prefer to cool off your palate? Spread refreshing tzatziki over your grilled lamb, chicken, vegetables or fish. A staple of Greek cuisine, tzatziki couldn’t be simpler to make. Just whisk together strained, plain yogurt, chopped cucumber, diced garlic and minced, fresh mint.

In Greece this creamy sauce tops such dishes as gyros and souvlaki. It can likewise be used a dip for vegetables. Paired with pita bread, it becomes a simple appetizer.

CHERMOULA
Makes roughly 1/3 cup

6 cloves garlic, peeled and quartered
1 ½ teaspoon crushed chili pepper
1 teaspoon ground cumin
1 teaspoon salt
½ teaspoon paprika
generous handful of cilantro, washed and stems removed
handful of parsley, washed and stems removed
juice of 1 ½ lemons
2 ½ tablespoons olive oil
ground black pepper to taste

Using a food processor, pulse all the ingredients together until they have formed a paste. Alternately, you can use a mortar and pestle and combine the garlic with the chili and black pepper, cumin, paprika, cilantro and parsley. Add the oil and lemon juice right before using.

HARISSA
Makes 1/3 cup

warm water, enough to soak the chili peppers
12 medium-sized, dried ancho chili peppers
5 cloves garlic, peeled
1 teaspoon cumin seeds
1 teaspoon coriander seeds
1 tablespoon hot pepper paste
½ teaspoon sea salt
2 tablespoons olive oil

Remove the tops and seeds of peppers and place them in a bowl with enough warm water to cover them. Allow them to soak for about 45 minutes or until they are soft.

Meanwhile place the cumin and coriander seeds in frying pan and toast the over medium heat until golden and aromatic. Remove from the heat, cool and then grind in either a spice or coffee grinder or pulverize with a pestle and mortar.

Drain the chilies and place them in the bowl of a food processor or blender. Add the garlic and pulse until they have become a crunchy paste. Add the ground spices, hot pepper paste, olive oil, salt and pulse twice. Remove the harissa from the bowl and place in an airtight container in the refrigerator until ready to use.

Tantalizing Tagines

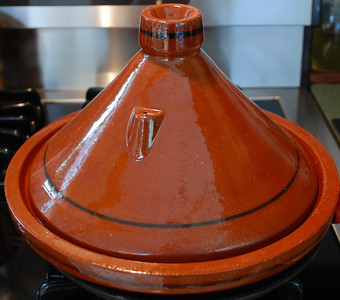
Mention Morocco and visions of sweeping sand dunes, loping camels and bustling marketplaces spring to mind. Mention this exotic North African country to me, and I think of russet colored tagines. For me, Morocco is the land of succulent stews and the shallow, clay containers in which they simmer.

Once you spot a tagine in a bustling North African souk or Western cookware shop, you’ll never mistake it for another pot. It consists of two parts: a circular, shallow pan and the large, conical-topped cover that fits inside the base. The cone shape allows condensation to cascade back down to the casserole, creating a rich, reduced sauce. The lid has a small knob on the top, providing cooks with something to grasp when removing the cover to check on the bubbling contents within.

Thanks to its unique design, the tagine encourages low, slow simmering of its contents. Simmering allows diverse flavors to meld together and ensures a tender, juicy, aromatic meal. Cooks must be vigilant, though, and add water as needed. Otherwise, they will end up with a dinner as dry as the desert.

Traditionally comprised of glazed terra cotta, today’s tagines come in materials familiar to the modern cook. Combinations range from stainless steel and aluminum core, courtesy of All-Clad, to cast iron and earthenware from Le Creuset. Unlike the classic clay construction, the new, pricier versions can be placed directly on a burner without the use of a heat diffuser. I must slide a cast iron skillet of comparable size beneath my old-fashioned pot before firing up the stove top.

Note that if you acquire the terra cotta version, you should season it before its first use. To do this, I placed water, olive oil, onions, zucchini and carrots and a sprinkling of spices, including turmeric, cumin and garlic, in the bottom. After plunking on the lid, I slid the pot into a 300-degree oven for 40 minutes. I then removed it and allowed it to cool. After it had reached room temperature, I removed the contents and washed the tagine in preparation for its cooking premiere. Another option is to soak it in hot water overnight, then rub olive oil onto it and place it in a 200-degree oven for 20 minutes.

Properly seasoned and cleaned, tagines yield such succulent meals as chicken with olives and preserved lemons, red snapper with raisins and sweet onions, and a vegetarian fete of soft artichokes, potatoes and peas. Spiced with such ancient seasonings as pepper, ginger and cinnamon, the aroma simultaneously soothes and stimulates the senses. Most tagine recipes also include cumin, onion, garlic and saffron, common Moroccan flavorings.

TAGINE OF CHICKEN, PRESERVED LEMON AND OLIVES
Serves 6

While traditionally prepared in the conical tagine, the recipes that follow can also be made in a Dutch oven or large, shallow, lidded saute pan. The keys to success are in keeping the heat at a low simmer, covering the dish while cooking and making sure the sauce doesn’t bubble away completely.

6 boneless chicken breast halves
1-1/2 large white onions, grated
6 cloves garlic, peeled and crushed
2 teaspoons dried parsley flakes
1 teaspoon crushed coriander seeds
Juice of 1 lemon
5 tablespoons olive oil
2 teaspoons ground ginger
3/4 teaspoon saffron threads
1-1/2 teaspoons sea salt, or to taste
1-1/2 teaspoons ground black pepper, or to taste
Water
1 preserved lemon (see Note)
Handful of picholine olives
Cooked couscous, optional

Place chicken in a bowl. In another bowl, combine onion, garlic, parsley, coriander, lemon juice, olive oil, ginger and saffron, and whisk to mix. Pour marinade over chicken. Cover, refrigerate and allow chicken to marinate for 1 hour.

Place tagine on stove over medium heat. Arrange chicken so that it covers bottom of tagine. Pour marinade over and sprinkle with salt and pepper. Add enough water to cover chicken by two-thirds. Bring water to a boil, then reduce to simmer. Cover and cook about 1 hour, turning chicken over periodically so that it does not brown on one side or stick to pan.

Rinse preserved lemon, then cut into strips. Add lemon and olives to tagine. Cover and cook 10 minutes to reduce sauce and meld flavors. Remove tagine from heat and serve chicken solo, or with couscous on the side, if desired.

Note: Preserved lemons are available at specialty grocery stores and from online food suppliers, such as Faraway Foods (www.farawayfoods.com) and the gourmet food shop at www.amazon.com. Regular lemons have a sweeter flavor and are not recommended for this dish.

Salt of the Sea

During a recent visit to Portugal I had the thrill of eating an impressive but quite simple-to-make Mediterranean dish – whole fish baked on a bed of salt. On that evening the server had wheeled a cart over to our table and, with a flourish, revealed a white dome of sea salt. After cracking open the top with a knife and peeling back the crust, he then skinned, filleted and doled out our bass table-side.

Seeing the mounds of coarse salt encasing the fish, I assumed that our entrees would taste as salty as the sea. One bite proved how wrong assumptions can be. The flesh had a subtle, almost meaty flavor and lacked any hint of saltiness. Soft and succulent, it was undoubtedly the most delectable and memorable meal on this journey. It was also one that I would feel compelled to replicate in my own kitchen.

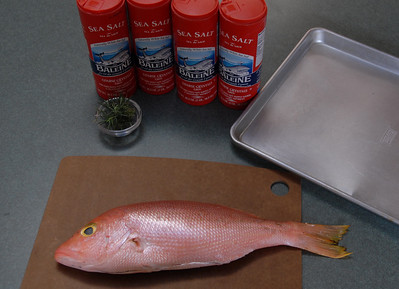
Back at home I amassed approximately 4 1/2 pounds of coarse sea salt and 2 pounds of whole lane snapper. I would have preferred to use a more sustainable fish such as croaker or porgy but, as they weren’t available, lane snapper would have to suffice. Note that any whole, firm, heavy-boned fish, including rockfish, tilefish, striped bass, trout and the over-fished sea bass, work well in this recipe. Keep in mind, though, that you will need roughly 1 pound of fish per person. As a result, cost may become a factor in what fish you choose to bake.

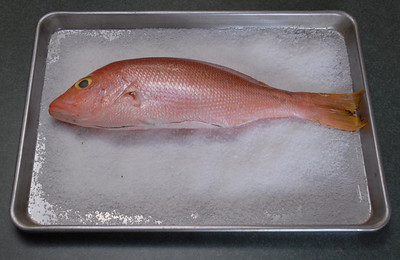
Thanks to my fishmonger, I didn’t have to gut or remove the fins on the snapper; he had already done this for me. Instead I just unwrapped the fish and, after forming a 2-inch layer of sea salt on a baking pan, lowered it onto its bed.

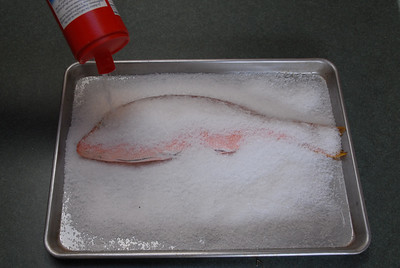
Snapper in place, I then poured and mounded more salt over it. My goal was to have a mountain of salt covering the fish. This would act as an insulator, keeping in moisture and producing a luscious, flavorful dish.

After 40 minutes in a 400-degree Fahrenheit oven this was exactly what I had – a delicious, melt-in-your-mouth dinner for two. Easy to make yet dramatic to view, salt-baked fish wowed me time after time. Hopefully, it will delight you, too.

SALT BAKED SNAPPER
Serves 2

2 pounds lane snapper or other firm fish
4+ pounds coarse sea salt
2 sprigs fresh rosemary

Preheat the oven to 400 degrees Fahrenheit.

On a standard baking sheet make a 2-inch bed of sea salt. Place your fish in the center of the bed and insert two sprigs of rosemary into its main cavity. Fish seasoned, pour enough salt over top to cover and form a thick mound over the fish. Bake for the fish for 40 minutes, checking the internal temperature with a meat thermometer to ensure that it has reached 140 degrees Fahrenheit.

Remove from the oven and, using a knife and fork, crack open and peel back the salt crust and skin. If the skin doesn’t not come off, use your fork and knife to remove it. Fillet the fish and serve immediately.

Dough!

Time to make the doughnuts or, at the very least, eat them. Yes, folks, today is National Doughnut Day.

We can thank one of my former employers, the Salvation Army, for creating this special holiday. Originating from a Salvation Army fundraiser in 1938, the event honored women volunteers who had handed out doughnuts to World War I soldiers in France.

Some may deem a day dedicated to rings of deep-fried dough silly. Yet, when you consider classic American foods, the doughnut invariably springs to mind. With its moist, yielding interior, delicate, sugary crust and ease of portability it has been dazzling and sustaining diners for centuries. Truthfully, it’s about time that the doughnut has its day.

In the 21st century National Doughnut Day means free treats for everyone. Krispy Kreme is giving away one doughnut per customer, no purchase necessary, while Dunkin’ Donuts is offering a free doughnut with any beverage bought.

While Dunkin Donuts and Krispy Kreme may have become somewhat synonymous with this delicious sweet, neither receives the credit for inventing it. Who does? Some historians point to an anecdote by Washington Irving concerning Dutch settlers in New York. Irving stated that these colonists always had fried, sweetened dough balls, called “dough nuts or oly koeks,” on hand. The Dutch, these scholars insist, brought the doughnut to our land. Yet others claim that it hailed from Germany or Central Europe.

No matter where it got its start, the doughnut – also spelled “donut” – remains one of the easiest and tastiest snacks to create. Mix together flour, eggs, milk and a leavening agent such as yeast or baking powder. After the ingredients are combined, roll and cut the resultant dough into orbs or rings.

From here drop the doughnuts in batches of two or three into oil heated to 370 degrees Fahrenheit. Using tongs, turn the doughnuts so that they fry evenly on both sides. When they become golden in color, they’re finished. It’s that simple!

With so many free doughnuts on offer today save the homemade ones for another time. Go out and indulge in a doughnut. After all, it is a national holiday.


BEIGNETS
From Rima and Richard Collin’s The New Orleans Cookbook (Knopf, 2004)
Makes roughly 5 dozen beignets

In France and regions such as Quebec and New Orleans where French cuisine reigns, the rectangular beignet supplants the traditional doughnut. Blanketed with powdered sugar, this pillow of dough is offered hot, around the clock, and with plenty of napkins. Beignet dough must be prepared in advance and chilled overnight. Covered, it will keep for about a week in the refrigerator.

1 1/2 cup warm water
1 package active dry yeast
1/2 cup sugar
1 teaspoon salt
2 large eggs
1 cup undiluted canned evaporated milk
7 cups flour
1/4 vegetable shortening
oil for deep frying
confectioner’s sugar

Put the warm water in a large bowl, add the dry yeast and stir until thoroughly dissolved. Add the sugar, salt, eggs and evaporated milk. Slowly stir in 4 cups of flour. Beat with a wooden spoon until smooth and well combined. Beat in the shortening then add the remaining flour, about 1/3 cup at a time. Stir until it becomes too stiff to do so and then work the dough with your fingers. Cover the bowl with plastic wrap and refrigerate overnight.

On a clean, floured surface roll out the dough to a thickness of 1/8-inch. Using a sharp knife, cut the dough into rectangles measuring 2 1/2 inches by 3 1/2 inches.
Preheat the oven to 200 degrees Fahrenheit. Preheat the oil in a deep fryer to 360 degrees Fahreheit.

Fry 3 or 4 beignets at a time until they are puffed and golden brown on both sides, about 2 to 3 minutes per batch. Using tongs, turn them over once or twice so that they are evenly browned. Drain each batch on a wire cooling rack. Place them on a platter covered with paper towels and put the platter in the oven to keep warm. Repeat with the remaining beignets.

Liberally cover the beignets with powdered sugar and serve hot. Yum!