Latest Posts

Pretty as a Persimmon

persimmons

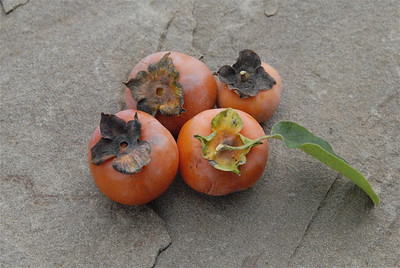
FRESH, RIPE AMERICAN PERSIMMONS

Sometimes we start off on the wrong foot with food. Such was the case with my husband and the pretty, leaf-topped persimmon. One bite of a firm, unripe persimmon and Sean swore never to touch this fall fruit again. Why such a negative reaction? Unless it’s ripe, this small, plump orb tastes as bitter as a harsh astringent.

Persimmons peak in mid-October. By that point they’ve turned a beautiful brilliant orange and taken on a soft texture and honey-apricot flavor. Any picked and eaten before then run the risk of tasting tinny and, in Sean’s case, terrible.

Early settlers learned this invaluable lesson about ripeness from Native Americans. They allowed the fruit to ripen fully and fall from the tree before consuming it. Even with this good example some colonists found out the hard way about young persimmons. In the 17th century Captain John Smith noted that ‘if it be not ripe it will draw a mans mouth awrie with much torment . …” Boy, does that sound familiar!
persimmons

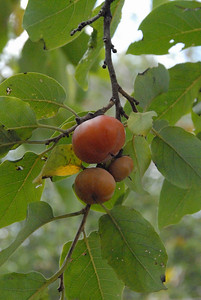
NOT READY-TO-BE-PICKED PERSIMMONS

A good persimmon requires only a quick rinse and removal of its leaves. Depending on how tart the skin tastes, you can either devour the persimmon whole or scoop out the jelly-like flesh and eat it that way. Sliced, it makes a pleasant addition to salads. Pureed with a bit of lemon juice, it becomes a delicious sauce for delicate desserts.

When picking or purchasing persimmons, choose ones that are deep-colored, glossy and heavy for their weight. They should be crack-free and with four green leaves on top. To ripen, leave them uncovered at room temperature or freeze them overnight and then thaw them to remove their astringency. If you can’t eat or bake your persimmons in time, freeze them whole. Otherwise, these tasty treats may be overtaken by fruit flies.

As those pesky fruit flies did attack my persimmon supply, I’ll offer a recipe from the tried and true “Joy of Cooking” (Scribner, 1997).

PERSIMMON BUTTERMILK PUDDING
Serves 8

4 to 6 large, ripe persimmons
4 large eggs
2 1/2 cups buttermilk
4 tablespoons unsalted butter, melted
1 1/2 cups sugar
1 1/2 cups all-purpose flour
1 1/2 teaspoons baking soda
1 1/2 teaspoons baking powder
1/2 teaspoon ground cinnamon
1/2 teaspoon ground nutmeg
1/2 teaspoon salt

Preheat the oven to 400 degrees Fahrenheit. Butter a shallow 3-quart baking dish.

Cut the persimmons in half length-wise. Remove the pits and then scrape the pulp from the skins with a spoon. Puree the pulp in a blender or food processor. If it looks stringy, force it through a sieve with the back of a spoon. Measure 1 1/2 cups persimmon pulp and set aside.

In a large bowl whisk the four eggs. Add the persimmon pulp and whisk and then add the buttermilk and butter and whisk to combine.

In a separate bowl mix together the sugar, flour, baking powder and soda, cinnamon, nutmeg and salt. Add these dry ingrediens to the persimmon mixture and whisk until well blended. Pour the batter into the prepared pan. Bake in a water bath until a toothpick inserted in the center comes out clean, 35 to 45 minutes. Serve warm or cold with whipped cream.
The Geometry of Pasta

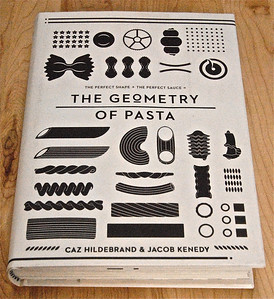
Last week I looked at an older, beloved cookbook, “How to Eat.” This week I explore what seems destined to become a new favorite. Co-created by critically acclaimed chef Jacob Kenedy and graphic designer Caz Hildebrand, “The Geometry of Pasta” (Quirk Books, 2010) delves into the history of pasta shapes and what sauces compliment each shape. Curious about why fusilli looks like a corkscrew or what sauce goes well with that cute, pinwheel-shaped pasta? Through black and white drawings by Hildebrand and over 100 recipes by Kenedy I’ve learned those answers – and more – in this engaging cookbook.

Although I’ve yet to cook my way through all of “The Geometry of Pasta,” I have found quite a few culinary gems. Take, for instance, orecchiette con cime i rappa or orecchiette broccoli rabe. Featuring sliced garlic, crushed red pepper flakes, broccoli rabe and, of course, “little ears” of orecchiette, this light, olive oil-dressed dish works perfectly as a generous meal for two or side for four to six.

Spaghetti alla puttanesca likewise won me over in a bite. Seriously, how could I not love a dish that includes some of my favorite ingredients – cherry tomatoes, capers, black olives – and possesses the intriguing nickname of “whore’s pasta?” While I never learned exactly who inspired that moniker, I did find out that puttanesca sauce goes well with a variety of pastas, including bucatini, farfalle, fusilli, linguine and rigatoni.

Along with savory sauces this book provides steps for making my own agnolotti, cavatelli, gnocchi and orecchiette. These effortless recipes don’t even require me to dust off my neglected pasta maker. Just mix, roll, cut, and boil. Easy!

Simplicity is one of the many things that I appreciate about “The Geometry of Pasta.” Thanks to Kenedy’s well-considered recipes, I won’t spend hours shopping for the nightly meal. Using a handful of everyday ingredients, I can create a spectacular Italian dinner without a lot of fuss. My family and friends may think that I’ve slaved away all day but, luckily, that won’t be the case.

What I admire most about this book are its rich histories, illuminating graphics, and helpful tips. Never again will I wonder how a pasta got its name, why it has a certain shape or what one pairs best with a specific sauce. Everything that I’ll ever need to know about “The Geometry of Pasta” is contained here.

Apple-licious!

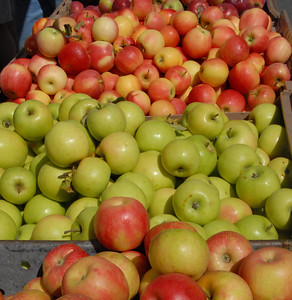
Growing up in a small town in western Pennsylvania, I loved fall. Along with picture-perfect foliage, marching band practices, and Friday night football games I adored all the apples and apple butter, sauce and cider that the season ushered in. While my fruit treats came from the local temple to all-things-apple, Apple Castle, you could find a fresh, crisp, juicy apple virtually everywhere. Although I now live far away from Western Pa., I’m still crazy about fall and, of course, a good apple.

Considered the most important fruit in North America and Europe, the apple has been cultivated for at least 3,000 years. Early trees produced hundreds of tiny, sour fruits. These little orbs resembled crabapples and possessed a large core with little flesh.

During classical Roman times people discovered that they could produce heartier, tastier and more consistent apples through grafting. To do this, they took cuttings from healthy, productive trees and transplanted them onto sturdy roots. Their horticulture methods worked for today we have close to 8,000 varieties in existence.

In the U.S. we grow around 2,500 varieties. We owe this diversity, in no small part, to the efforts of folk hero John Chapman a/k/a Johnny Appleseed. During the 18th century Chapman collected apple seeds from various cider mills. He then traveled around America, planting the seeds throughout the land. Today Michigan, New York and Washington are our leading apple-producers.

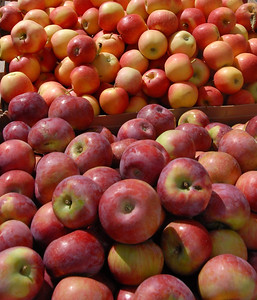
Although Europeans differentiate between eating and cooking apples, Americans typically use the varieties interchangeably. Jonagold, Granny Smith, Jonathan, Empire, Golden Delicious, McIntosh and Macoun are all great for baking and eating raw. Their tastes range from sweet to tangy-tart while their colors vary from pale yellow to wine red. They pair well with such flavors and foods as allspice, apricots, celery, cinnamon, clove, curry, ginger, nuts, onions, pork, poultry and vanilla. Versatile and delicious. No wonder I love them.

When apples hit their peak in the fall, I often buy more than I need. All that fresh, delicious fruit. How could I not take it home with me? Yet, back at home, I wonder what I should do with all the Cortlands, Crispins, Pink Ladies, Rome Beauties and Winesaps overtaking my kitchen.

Along with eating them out of hand, I frequently bake apples in a simple tart, cobbler or crisp. I use them in breads, muffins, pancakes and crepes. Likewise, I add them to stuffing for poultry and pork. I also slice and top them with a little brown sugar, cinnamon and yogurt for a sweet breakfast or after-dinner treat.

When I feel pressed for ideas, I either dig out a copy of Christensen’s and Levin’s The Apple Orchard Cookbook (The Countryman Press, 2010) or set the fruit aside until I concoct a recipe. If unbruised, apples can keep in the refrigerator for up to two weeks. If left out on the counter, they’ll last about two days before they become mealy.

TARTE TATIN
Serves 6

5 tablespoons unsalted butter
3/4 cup sugar
1/4 teaspoon cinnamon
6 apples, peeled, cored and sliced
1 sheet frozen puff pastry, thawed

Preheat the oven to 375 degrees Fahrenheit.

Melt the butter, sugar and cinnamon in a 9-inch, oven-safe pan.

Place the apples, cut side down, in the pan and cook over medium heat until a light colored caramel has formed, about 10 minutes.

Place the puff pastry over the top and then tuck in the edges. Poke a few holes in the top of the pastry and then place the pan in the preheated oven and bake for 20 minutes or until the pastry is golden and puffed up. Remove from the oven and allow to cool slightly. Invert onto a serving platter. Serve warm with optional side of vanilla or cinnamon ice cream.

How to Eat

Over the years of writing about food I have amassed a ridiculous number of cookbooks. Some I refer to several times a week. Others I’ve opened just once. With so many diverse recipe collections right at my fingertips it seems a crime not to share the outstanding ones with you. So, starting this week and hopefully every Tuesday onward, I’ll crack open some longtime favorites and recently published gems and offer a brief review.

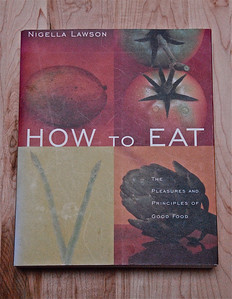
To kick off this cookbook commentary, I’ve pulled out my faded copy of Nigella Lawson’s “How to Eat” (John Wiley & Sons, Inc., 2000). For close to 10 years “How to Eat” has been my go-to book for creative yet uncomplicated soups, vegetable dishes, entrees and desserts. Featuring the British food writer’s breezy, humorous anecdotes and her well-crafted recipes, this book invariably delivers great meals and lavish praise for the cook.

Pick up “How to Eat” and it will fall open to page 175. Printed there in red type is Lawson’s recipe for roast cod with pea puree. I’ve lost track of the number of times that I’ve boiled 5 1/2 cups of frozen peas with 10 to 12 cloves of garlic and then blitzed the duo in my food processor with butter and creme fraiche. It’s an amazingly simple and satisfying vegetable dish. It’s also one that my friends and family repeatedly request for holiday dinners and special events.

Along with chanting “more peas please!” my dinner companions often ask for Lawson’s gooey chocolate puddings. Think of them as the best molten chocolate-chocolate lava-chocolate volcano cakes that you’ll ever eat. Warm, velvety soft and with a rich, oozing chocolate center, this easy dessert never fails to please.

That’s one of the many things that I love about this cookbook. Lawson provides readers with seemingly effortless, crowd-pleasing foods. You don’t have to spend hours tracking down rare ingredients or fiddling around with complicated techniques to delight your family.

Likewise, the recipes in “How to Eat” work as written. Any adjustments that I’ve made have been due to personal tastes, not disastrous results. That cannot be said for all cookbooks.

Ultimately, when I reach for Nigella Lawson’s “How to Eat,” I feel as though I’m embarking on a culinary journey with a bright and trusted friend. Good foods. Witty cooking tales. Well-written, accessible recipes. Cookbooks don’t get much better than this.

NEXT WEEK . . . Caz Hildebrand’s and Jacob Kenedy’s “The Geometry of Pasta” (Quirk Books, 2010)

Chickpeas!

A few years ago I fell madly in love with a little falafel place in the East Village called Chickpea. Truthfully, it may have been the name rather than the food that drew me back again and again. I can’t help it. I absolutely adore those plump, firm, nutty legumes known as chickpeas.

An essential ingredient in Middle Eastern, Mediterranean and Indian cuisines, the chickpea has existed since around 8,000 B.C. While Indians embraced it as early as 4,500 B.C., ancient Romans wrote it off as mere peasant food. Yet, this flavorful, protein-rich gem appeared in many early Mediterranean recipes, including pasta and chickpeas.

In India chickpeas have long starred in fragrant dals and curries and as spiced snacks. When finely milled into a flour, called besan or gram flour, they have formed the batter for such fried favorites as pakoras, or fritters, and aloo bonda.

In North Africa and the Middle East chickpeas serve as the basis for such classics as hummus and falafel. They also pop up in couscous dishes and in spicy stews.

Across the sea in Spain chickpeas are known as garbanzo beans. There Spanish cooks feature them in a variety of soups. The most famous of these is cocido. While this stew does include pork, beef, potatoes, onions, and carrots, its main ingredient remains the humble chickpea.

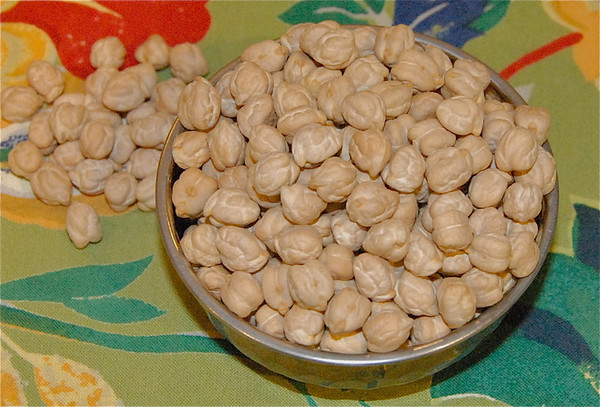
dried chickpeas

Dried chickpeas waiting to be soaked and simmered

Although commonly sold in dried form, you can purchase canned chickpeas. Fresh chickpeas, though, are a rarity. Picked in the spring, they quickly turn from juicy and bright green to their usual dry and pale beige. You can find chickpeas, in dried and canned forms, in virtually every ethnic market and American grocery store. If you go for the dried form, you will have to soak and then simmer the chickpeas in boiling water until they regain their plumpness.

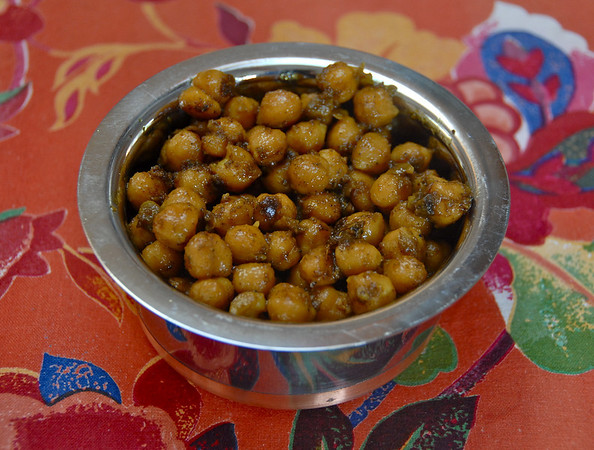
SPICED CHICKPEAS
Serves 4 to 6

Chhole, or spiced chickpeas, are a popular snack sold by Indian street vendors. In addition to eating them as is, I like to scoop the spiced chickpeas into a piece of naan, fold up the edges and eat them as a finger sandwich. They’re also great with a little basmati rice.

2 tablespoons vegetable oil
1 clove garlic, grated
1 teaspoon coriander seeds, toasted and ground with mortar and pestle
1 teaspoon garam masala
½ teaspoon ground cardamom
½ teaspoon turmeric
¼ teaspoon salt
1 (15 ½-ounce) can chickpeas and their juices

In a medium frying pan heat the oil. Add the grated garlic and spices and sauté for 1 minute. Pour in the chickpeas and juices and stir to combine. Simmer for 10 minutes, stirring occasionally so that the chickpeas don’t burn or stick to the pan. Taste and adjust the seasonings if necessary. Tumble into a bowl and serve warm or room temperature.

Beet It

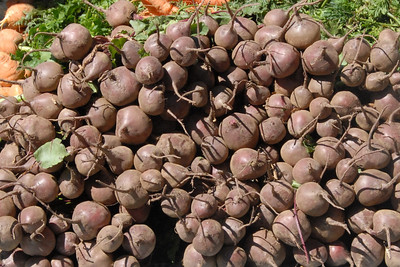
As a kid, I thought that beets were the coolest vegetable on the planet. Round, plump and reddish-purple, they possessed a sweet taste and soft, silky texture that I adored. Sweet AND purple! Who wouldn’t love that quirky vegetable?

Today I appreciate these low calorie root veggies not only for their color and taste but also for their versatility. With beets you can cook the leaves as well as the roots. Just steam or saute the greens in garlic and olive oil for a warm salad or side dish. Roast, boil or steam the roots for sides or soups. One vegetable. Multiple recipes and techniques.

Cultivated since 300 B.C., beets are descendants of a wild seashore plant known as the sea beet. This plant grows in clumps along the Mediterranean and Atlantic coastlines of North Africa and Europe. Unlike its offspring, which can be as small as an orange or as large as a grapefruit, it has a small, skinny root.

Thin or fat, beet roots have long been used in salads and soups. Seventeenth century British cooks served cold salads of boiled and sliced beets. Polish chefs featured grated beets in the chilled soup chlodnik while Eastern Europe as a whole is credited with creating the most famous beet soup, borscht.

When working with beets, I follow a few basic rules. I look for fresh, dark green leaves and firm, round, unblemished roots. The roots should range in size from 1 1/2 to 3 inches in diameter. Larger ones tend to be woody and take a long time to cook. Although beets are available year-round, they’re at their peek from summer to early winter.

Back in my kitchen I cut off the greens, stuff them in a perforated, plastic bag and refrigerate them for up to two days. Unwashed and refrigerated, the roots will keep for three weeks.

Although I do wash beets, I never cut or peel them before cooking. If I did, much of the color and nutrients would leach out.

After I’ve boiled, roasted or steamed them, I pull on a pair of rubber gloves, remove the skins and start cutting. If I don’t wear gloves, my hands will turn a lovely crimson color. Pretty to see but it might make people wonder what I’ve been doing. Cooking beets, maybe?

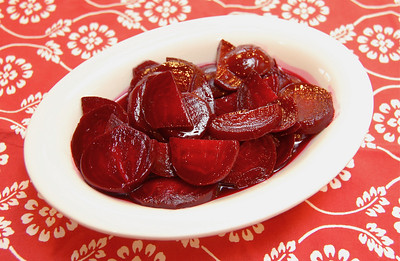
HARVARD BEETS
Serves 4 to 6

For as long as I can recall, I’ve loved Harvard beets. Although my mom’s always came from a jar, I’ve discovered that making them from scratch is almost as easy as and even more delicious than store-bought.

1 1/2 pounds small to medium sized beets, washed
1/2 cup plus 1 tablespoon granulated sugar
1/4 cup water
1/3 cup cider vinegar
3 teaspoons cornstarch
1 tablespoon unsalted butter

Fill a medium-sized stockpot with cold water and 2 teaspoons salt. Bring the salted water to a boil and add the beets. Cover and cook the beets for 20 to 25 minutes, until tender and easily pierced by a knife. Remove the beets and drop them into a pan of cold water. Allow them to cool before putting on rubber gloves and removing the skins and roots. You should be able to remove the skins with your hands. Slice the beets and place them in a bowl. You will end up with about 3 cups of sliced beets.

In a medium-sized saucepan add the sugar, water, cider vinegar and cornstarch and stir to combine. Bring the ingredients to a boil and, stirring constantly, cook for about 1 minute or until the sauce has thickened. Add the butter and stir until melted. Add the sliced beets and stir to coat them. Simmer the Harvard beets for a few minutes and then serve.

No Matter How You Ice It

The calendar may say September, but, thanks to all these sunny days and warm afternoons, I’m not quite ready to give up summery foods. Take, for instance, granita. Known also by its French name “granite” or English moniker “water ice,” cool, refreshing granita is the perfect ending to any summer – or fall, winter or spring – meal.

As with many recipes, debate rages over which country crafted the first water ice. Historians point to France, Italy or Spain as the birthplace of this treat. Yet, the one thing on which they can agree is approximate birth date. Water ice came into being in the mid 17th century, around the same time that ice cream appeared.

Like ice cream, water ice requires few ingredients and little effort. Simply combine water, sugar and fruit juice in a shallow dish and place it in the freezer. After the liquid has started to set, stir the mixture and return it to the freezer. Repeat the stir-freeze step until the water ice takes on a coarse, granular texture. Once hard, chunky crystals have formed, the granita can be served. It’s that easy!

When making this at home, I often chop up whole fruit, such as watermelon or strawberries, and toss that into a blender with water, sugar and a little lime juice. Every now and then I may replace the fruit or fruit juice with coffee or tea. Depending on who’s eating it, I might pour in a smidge of vodka or light rum. I’m always careful not to add too much sugar or alcohol. If I heavily sweeten or spike the ingredients, they won’t freeze completely.

Along with serving granita as a dessert, I sometimes offer it as an appetizer or refreshment. If I really want to impress my dinner guests, I present it between the soup or salad and main course. Just a little something to cleanse the palate before the real eating begins.

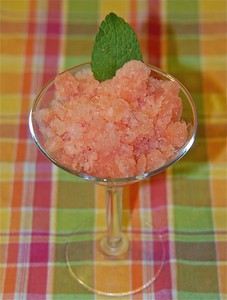
WATERMELON GRANITA
Makes 5 cups

If you want this granita to have a little kick, pour a smidgen of light rum over it before serving.

4 1/2 cups chopped, seedless watermelon
1/4 cup water
1/3 cup granulated sugar
juice of 1/2 lime
fresh mint leaves, washed and dried
light rum, optional and to taste

Place the watermelon, water, sugar and lime juice in a blender and blend until smooth. Pour the contents into a shallow baking dish and place the dish in the freezer for 1 hour. After an hour remove and, using a fork or spoon, scrape the granita so that it no longer sticks to the dish. Place the dish back in the freezer for another hour and scrape again. Repeat this process until hard, coarse crystals have formed. You can then spoon the water ice in cocktail glasses, garnish with mint, add the light rum if desired, and serve.

Red Hot Peppers

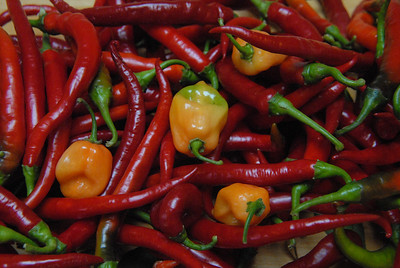
A few weeks ago I faced an unusual culinary dilemma: What to do when friends drop by with two pounds of freshly picked chili peppers? On that afternoon I wasn’t up for stuffing, coating and frying the peppers for a fiery take on chilies rellenos. Nor did I anticipate making several gallons of spicy pico de gallo. Forget about hosting a scorching, week-long celebration of Mexican, South American, South Indian and Thai food. So, just what would I do with all these potent veggies?

For centuries cooks have faced a similar quandary. In Mexico chilies have been cultivated since at least 3,500 B.C. Thanks to Portuguese and Spanish explorers who transported these plants around the globe, Indian and Southeast Asian chefs started dabbling with chilies in the 15th century. By the mid 16th century Europeans had incorporated them into their recipes.

Although I normally associate chilies with heat, these early cooks added them for flavor. Chopped or ground up, dried or roasted, the peppers enhanced countless regional dishes. Ultimately, they became renowned not as a vegetable but as a spice or seasoning. Not much has changed in five centuries. They still appear primarily in condiments and are the main ingredient in such classics as chili paste, Tabasco sauce and chili pepper salad dressing.

Chilies get their heat from capsaicin, a compound found in the white membrane to which pepper seeds cling. Because they proportionally contain more seeds and tissue, small chilies tend to be hotter than large ones. Short, lantern-shaped habaneros and Scotch bonnets rank among the strongest. Long, slender Anaheims are among the mildest.

The only way to reduce a chili’s intensity is to remove its seeds and membranes. Remember either to wear gloves while or wash your hands after doing this. Otherwise, depending on the pepper variety, you may burn your skin.

By stringing chili peppers and making ristras, you can avoid the risk of burnt fingers and faces. This is what my friends and I did. Yet, if you opt to turn your chilies into a sauce, try Unlucky Thirteen Sauce. It’s guaranteed to be a fiery hit.

UNLUCKY THIRTEEN SAUCE
Recipe courtesy of Paul Oliver, writer, creator of the literary blog The Devil’s Accountant and hot sauce aficionado

1 chipotle pepper, found in the dried goods area of produce sections
12 habanero peppers (lessen the number of these peppers and de-seed to lesson the heat of the sauce)
3-6 garlic cloves, to taste
1/2 yellow onion, quartered
1 bottle of white vinegar
3oz (1/2 of a Cento can) of tomato paste
4 tablespoons of salt
1 tablespoon of sugar

Place the chipotle pepper in a small saucepan filled with water, place it on low heat and allow it to soften.

Cut the habanero peppers and garlic in half. Place them and the onion in a medium sized pot. Pour in the white vinegar until the peppers float or all the ingredients are covered. Add the salt, sugar, tomato paste and the softened chipotle and bring the entire mixture to a boil. Note that you should be wary of the pot as it begins to boil for the vinegar and capsaicin in the peppers produce an irritating vapor. As soon as the ingredients begin to bubble, stir and remove from the heat. You want to heat but also to avoid fully cooking any of the ingredients. By not stewing the ingredients, you will get a “fresher” pepper flavor and minimize the vapor.

Pour the sauce into a blender or food processor and blend on low. Be sure to set it on a low, especially if you are doing this with a blender. You DO NOT want to have this stuff spraying everywhere. Slowly increase the speed, mixing until the sauce is completely smooth. Note that, if you’ve left the seeds in the peppers, you’ll have to blend for a longer period of time.

Place the sauce in a glass container (mason jars are great) and refrigerate. Once cooled, it is ready to use, although allowing it to rest for 1 to 2 weeks is highly recommended.

*A FEW TIPS FOR UNLUCKY THIRTEEN SAUCE
Do not use aluminum pots/pans for this. The capsicum and vinegar will pit them.

Wash before, during and after this whole process. Do it thoroughly. You do not want to forget to do this.

Let the sauce sit. It really does get better after a week or so of sitting in the fridge. Be ready, though, for this smokey, citrusy hot sauce is not for the faint.

piping mascarpone cheese

Cool as a . . .

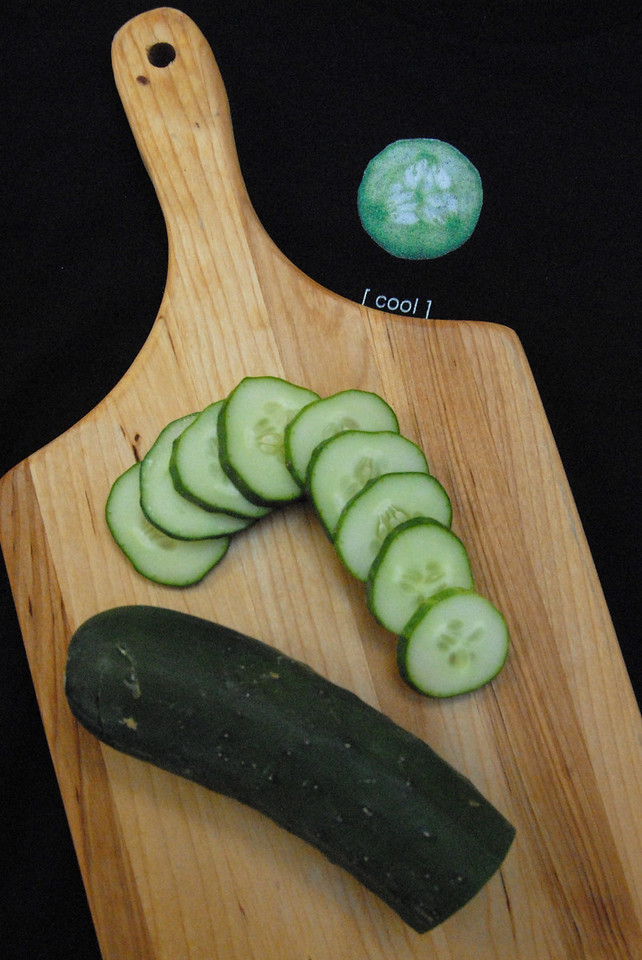
sliced cucumber

Yeah, a cucumber.

I’ve never thought of the cucumber as particularly cool. Crisp and juicy? Yes. Cool? Well . . ..

Before I start rambling on about the hipness of this vegetable, I should admit that its coolness refers not to trendiness but to temperature — quite simply, a cucumber feels cool to the touch. Yet, this member of the gourd family offers far more than catch phrases and temperature gauges. Available year-round, it’s a staple ingredient in many dishes and a star in its own right.

Rumored to have originated in South India, the cucumber has been cultivated for at least 4,000 years. In spite of its longstanding popularity, it didn’t arrive in North America until the late 15th century. Christopher Columbus introduced the first cucumber to Haiti in 1494. From there demand for this crunchy, green vegetable spread.

And just what do people do with all these cucumbers? A third of the roughly 100 varieties grown are used for pickling. The rest we eat in salads, from crudite platters, in dips, and as garnishes or soups.

One of my favorite cuke offerings consists of chopped cucumbers, thinly sliced red onion, diced kalamata olives and crumbled feta cheese. Making this dish couldn’t be easier. Just toss the cucumbers and onions in a bowl. Whisk together lemon juice, olive oil and ground white pepper. Drizzle the dressing over the salad and then refrigerate. Because cucumbers are 96 percent water, you’ll want to hold off on adding the salty cheese and olives until right before serving. Otherwise, you’ll end up with something more reminiscent of a soup than a salad.

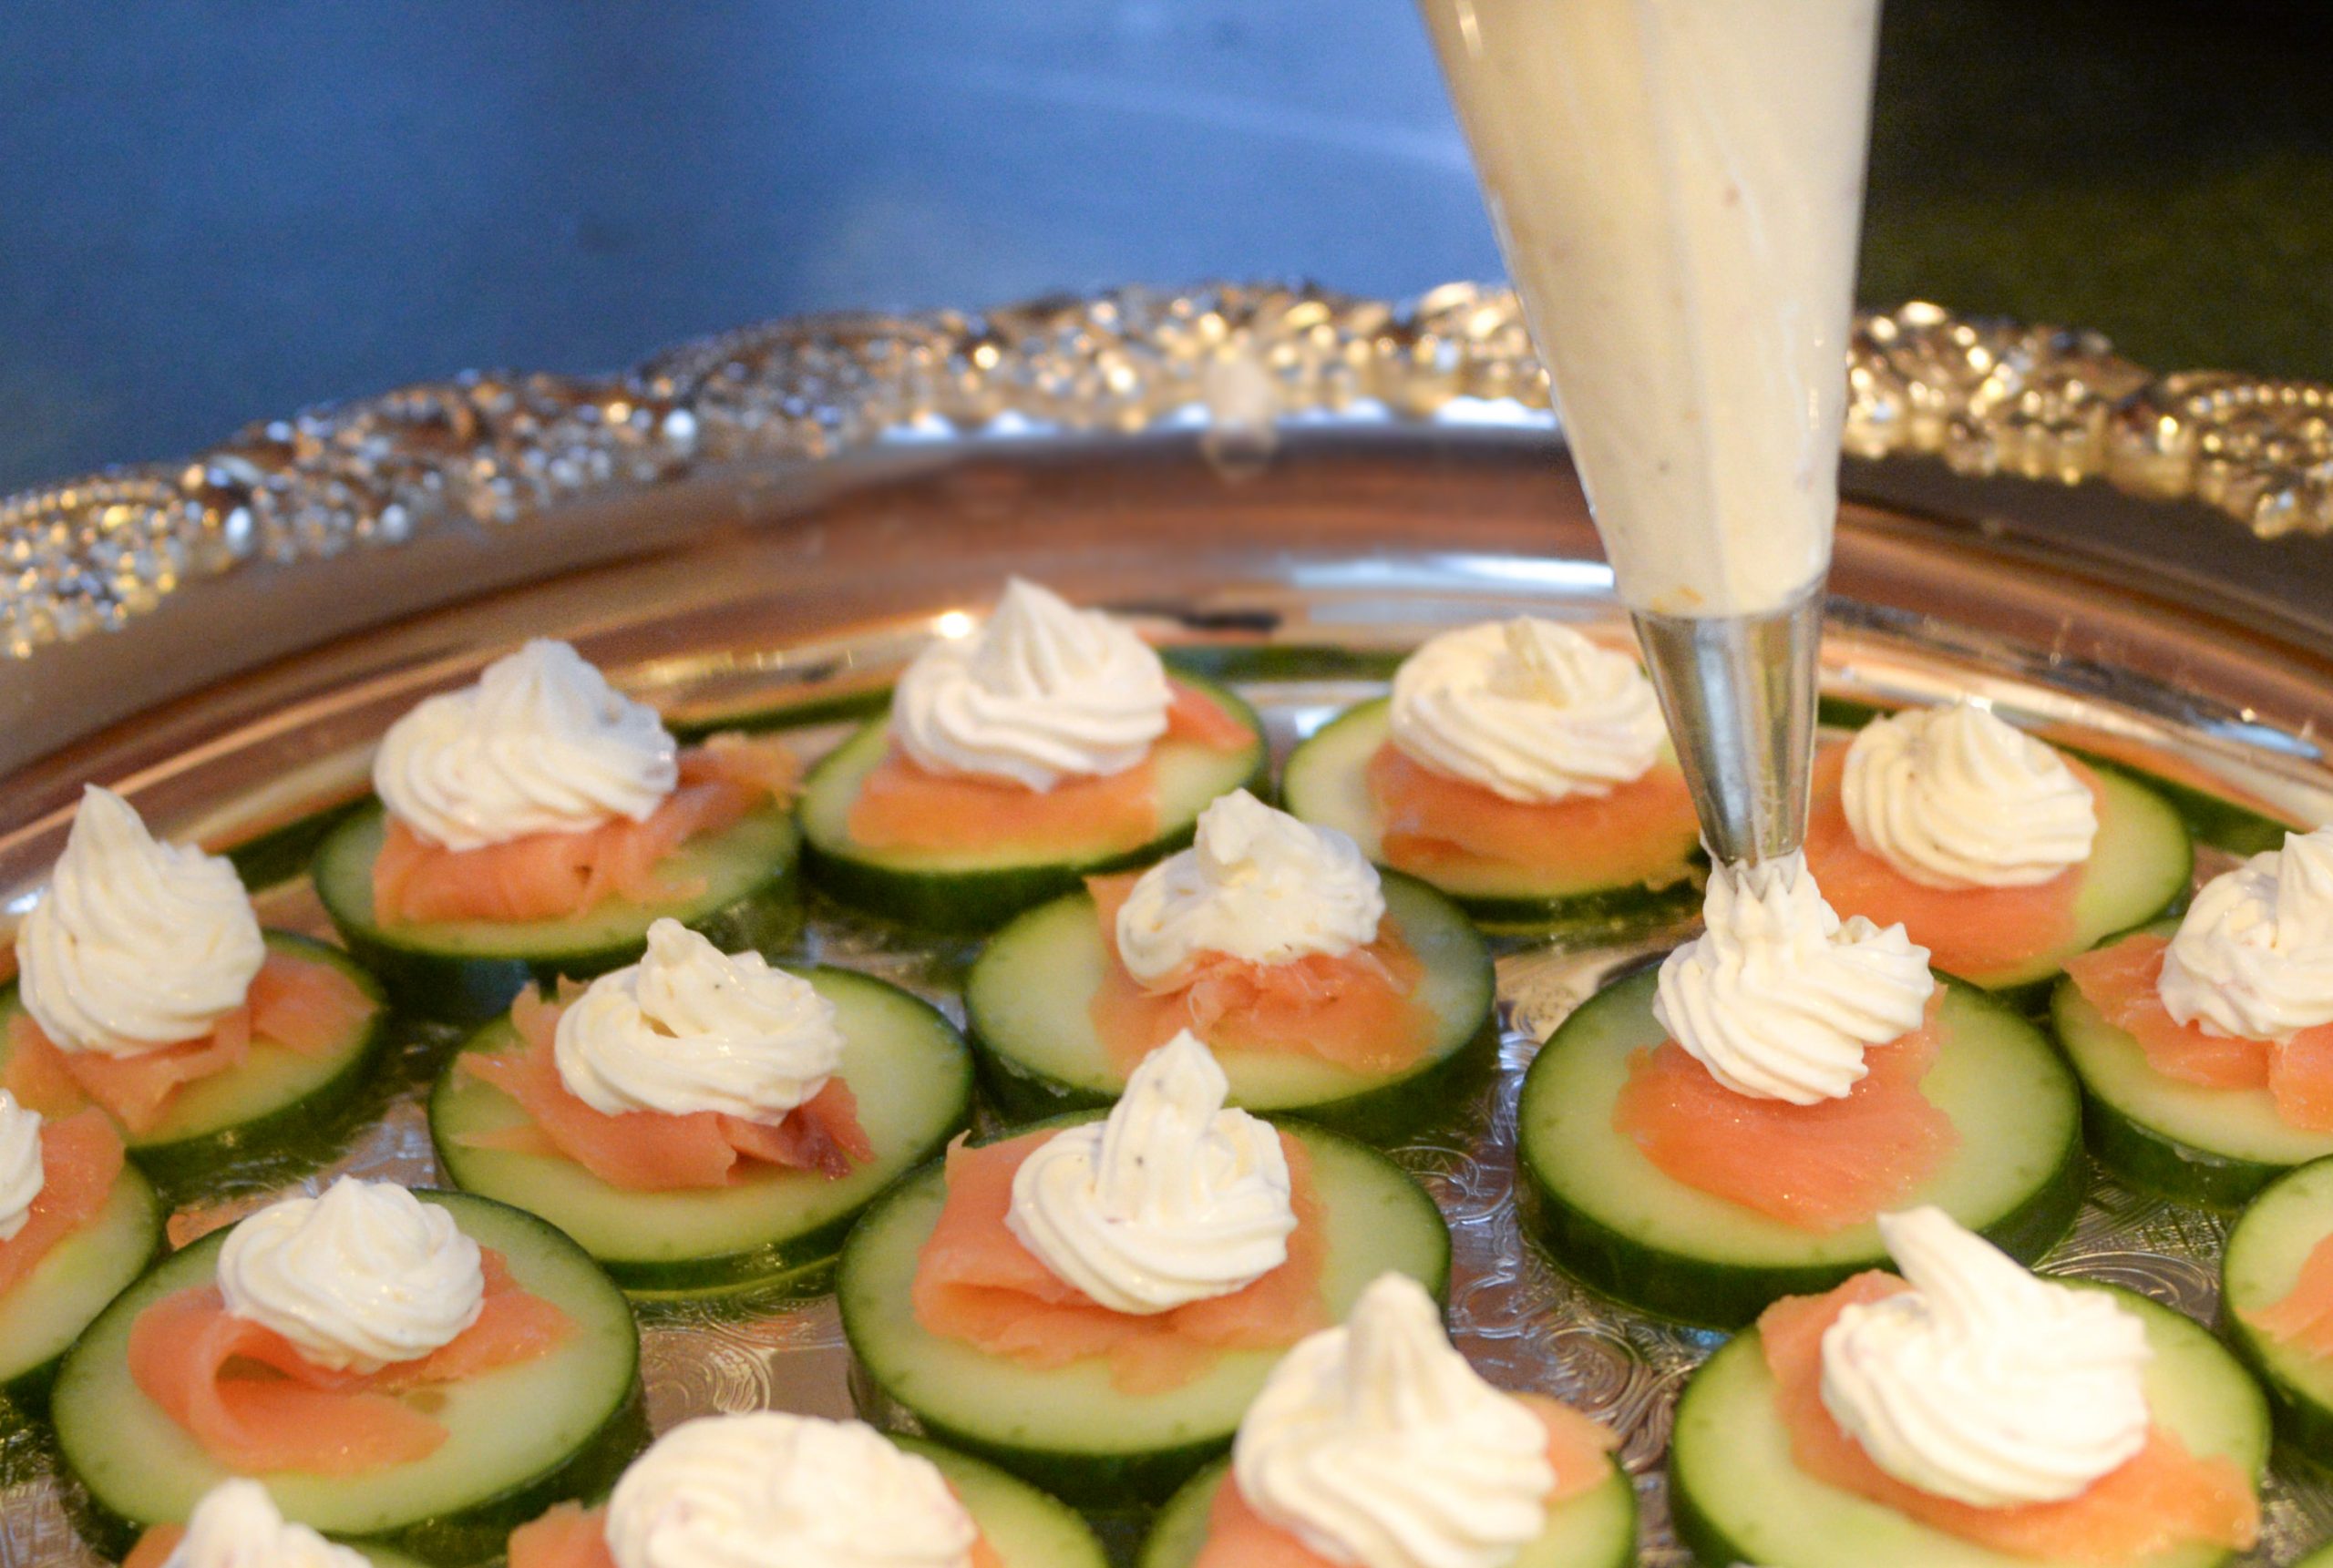
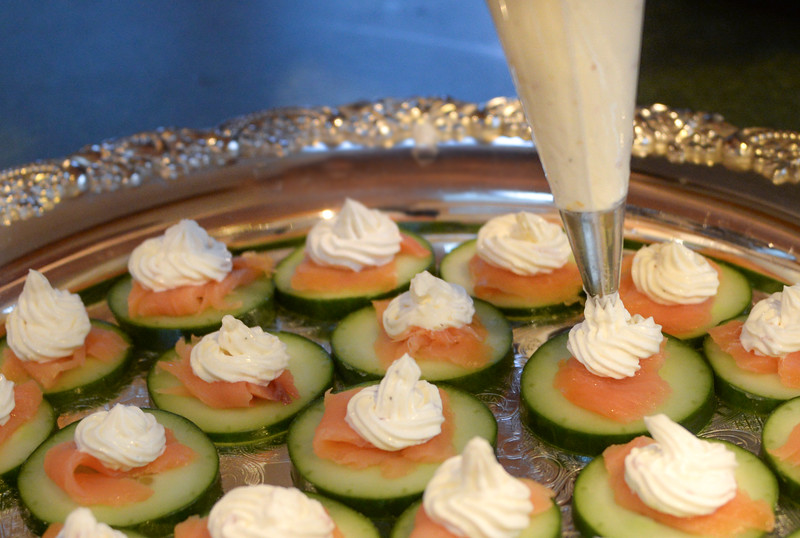
Salads aren’t the only simple cucumber dishes. Dress sliced cucumbers with yogurt and add either a little coriander, mint or garlic and you’ve made Indian raita, Greek tzatziki or Turkish cacik. Place wafer-thin cucumber slices between two pieces of buttered bread for a traditional English tea sandwich. Spoon a dab of creme fraiche or cream cheese, sliver of smoked salmon and sprig of fresh dill on top of a cucumber slice and you’ve got a quick and tasty appetizer. Puree cucumbers with avocados, garlic, and chicken stock and you’ll have a delicious summer soup, courtesy of Canal House Cooking Volume 4.

Piping mascarpone cheese

Piping mascarpone onto smoked salmon cucumber rounds

Smoked Salmon Cucumber Rounds

Makes approximately 30 rounds

2 large unwaxed cucumbers, washed

8 ounces mascarpone cheese

Grated zest of 1 lemon

Juice of 1/2 lemon

1/4 teaspoon salt

1/4 teaspoon white ground pepper

1 (4-ounce) package smoked salmon, cut into 1-inch strips

Fresh dill

Slice the cucumbers into 1/4-inch-thick rounds. Place them on a platter.

In a medium size bowl stir together the mascarpone cheese, lemon zest and juice, salt and white ground pepper, mixing until combined.

To assemble the smoked salmon cucumber rounds, place a slice of smoked salmon on top of each cucumber slice. Using either a piping bag or teaspoon, put 1 to 1 1/2 teaspoons of mascarpone on each piece of salmon. Top each with a sprig of dill. Refrigerate until ready to serve.

Great Gravlax!

This summer it seems as though everyone whom I know has come down with Swedish fever. Maybe you have friends suffering from this affliction, too. They clutch dog-eared copies of Stieg Larsson’s “The Girl Who Played with Fire” and sit on the edge of their Ikea-designed seats, watching the film adaptation of Larsson’s “The Girl with the Dragon Tattoo” over and over again. When not hashing over missing Larsson manuscripts or the Kenneth Branagh series “Wallander,” they pound the pavement in search of gravlax and good, strong aquavit.

Believe me, I’m not scoffing at their plight. In fact, I’m battling a similar addiction. From ethereal cloudberry preserves and delicately flavored kanelbullar to hearty root vegetables and tangy fish I’m completely hooked on the wholesome cuisine of Sweden.

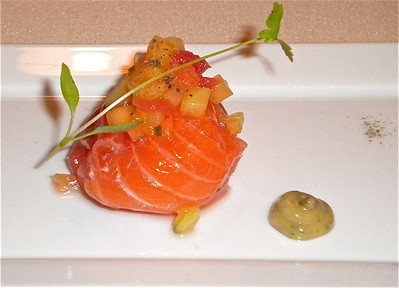
It all started with gravlax. Often confused with smoked salmon, gravlax is raw salmon cured in a mixture of salt, sugar and dill. Similar to its smoked cousin, this Swedish specialty originated from the need to store fish in a time when refrigeration did not exist.

In medieval times fishermen salted their freshly caught salmon, wrapped them in birch bark, and then buried them in the ground. This burial protected the macerating fish from wild and ravenous animals. It also provided the preserved salmon with its name. In Swedish “grav” means “tomb” or “grave” while “lax” refers to salmon.

Today’s gravlax skips the birch bark and underground burial. Instead, after being cured with salt, sugar and dill, the salmon is sealed in plastic and refrigerated for 24 to 48 hours. After that time it’s removed from the fridge, rinsed cleaned and then thinly sliced. Once sliced, gravlax will keep for up to 5 days in the refrigerator.

In my case gravlax never hangs around for a full 5 days. No sooner have I bought gravlax than I’m ripping open the package and nibbling on a piece. Thanks to its velvety, melt-in-your-mouth texture, subtle aroma, and mildly piquant flavor, it’s become one of my favorite savory treats.

I first sampled gravlax at a quintessentially Swedish place, a smorgasbord. Here paper-thin, coral-colored slices overlapped on a stark white ceramic platter. A border of fresh, feathery dill surrounded them. Pretty to behold, gravlax was even better to eat.

And eat I did. I devoured it atop wedges of dark brown bread, alongside poached eggs, and with stewed potatoes. When I ran out of bread, eggs or potatoes, I ate it on its own with a dollop of sweet mustard sauce. Every bite was an utter delight. And with that my passion for gravlax and all-things-Swedish began.

GRAVLAX WITH SWEET MUSTARD SAUCE
Adapted from “Very Swedish” by Annica Triberg, Per Ranung and Tore Hagman (Bokförlaget Max Ström, 2007)

For the gravlax:
2 1/4 pounds salmon fillet, de-boned but with the skin intact
3 1/2 ounces sugar
1 TBSP coarsely ground white pepper
4 ounces iodized salt
3 handfuls fresh dill

For the sauce:
1 TBSP mild mustard
1 TSP Dijon mustard
1 TBSP sugar
2 TBSP red wine vinegar
1/2 cup oil (not olive)
1/4 cup finely chopped dill

Mix together the sugar, salt and pepper and massage it into both sides of the salmon. Spread the dill on the meat (not skin) side. Place the fish in a plastic bag, seal the bag, put it on a plate and place a heavy cutting board on top of it. Allow the fish to rest at room temperature for 2 hours. After 2 hours have passed, remove the cutting board and refrigerate the salmon for 24 to 48 hours, turning it 3 to 4 times during this period.

Remove the fish from the refrigerator, dry it off and scrape off the seasonings. Slice thinly and either serve or refrigerate. Gravlax will keep for 4 to 5 days in the fridge and can also be deep-frozen.

For the sauce, mix together the mustards, sugar and vinegar. Drizzle in the oil while mixing swiftly. Stir in the chopped dill. Set aside in a cool place.