Latest Posts

Mad for Shad!

Last Saturday I made what’s quickly becoming an annual pilgrimage to Shad Fest in Lambertville, New Jersey. Although hundreds go to check out the art, crafts and antiques on display, I’m there for the shad that swims upriver to spawn each spring.

Shad has been called the world’s boniest edible fish. Native American lore attributes this boniness to an unhappy porcupine who yearned to look different than he did. The porcupine asked the Great Spirit Manitou to alter his appearance. In response Manitou turned it inside out and tossed it into a river. At that moment the shad was born.

While its numerous, small bones make it impossible to eat whole, a filleted shad is outstanding. Possessing a rich, oily, succulent meat, shad has a remarkable flavor that needs few extra ingredients or fancy techniques to shine. Just slide the fillets under your broiler or plunk them in a pan and cook until lightly browned. You can also bake or grill this fish. I’d advise having a skilled fishmonger or fisherman fillet it for you. Otherwise, you could kill an hour, or more, picking out all the little bones.

Originally known as a food of the poor, shad eventually became prized for its flavorful meat and its sweet, nutty roe. Moist and orange in color, its roe is a springtime delicacy. It responds well to sautéing, poaching and broiling. For a classic shad roe dish, sauté it in 2 to 4 tablespoons of butter until lightly browned, about 6 to 8 minutes. Sprinkle a little ground black pepper over the top and serve immediately.

Unfortunately, shad has become a victim of its popularity and of modern times. According to the Environmental Defense Fund, overfishing, pollution and loss of habitat have reduced the shad population to an all-time low. Whether it recovers or not remains to be seen. With that in mind I’ll continue to enjoy shad but sparingly. So, until the next shad festival . . .

BROILED SHAD FILLETS
Serves 4

1 teaspoon olive oil
1/2 teaspoon ground black pepper
1/2 teaspoon salt
1/4 teaspoon paprika
pinch of cayenne pepper
4 shad fillets (about 2 pounds total)
lemon wedges, for serving

Preheat the broiler on high. Lightly grease a baking sheet with 1 teaspoon olive oil. Mix together the ground pepper, salt, paprika and cayenne pepper.

Lay the fillets, skin side down, on the baking sheet. Sprinkle the seasoning over each fillet and then slide the fish onto the oven’s top rack, directly beneath the broiler. Broil until cooked through and golden on top, about 6 minutes. You can also use a meat thermometer to determine when done. Serve immediately with the lemon wedges.

Tender

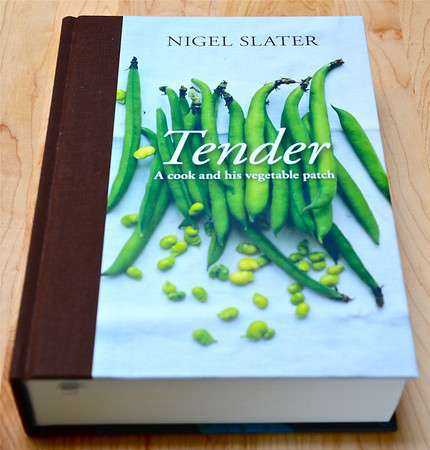
As the weather grows warmer and the days longer, I start thinking about gardens. Because I’ve neither inherited nor developed a green thumb, I usually rely upon farmers’ markets and horticulturally-gifted friends for my garden-fresh produce. However, after reading and cooking from Nigel Slater’s Tender (Ten Speed Press, 2011), I’m tempted to give gardening another try. After all, if Slater can harvest runner beans, pumpkins and eggplants on his small, London terrace, surely I could learn to grow a tomato or two.

In Tender the British food writer shares his experiences planting, cooking and consuming 29 different vegetables. He offers advice on seed selection, composting, humane pest control and gardening tools. Of course, he also discusses cooking techniques, explaining that asparagus needs only a quick steaming or boiling and raw celery root a splash of flavorful vinaigrette to make them great eating.

The 400 or so recipes in Tender are straightforward but delightful nonetheless. Some, such as root vegetable korma, chowder of mussels and leeks, or salad of beans, peas and Pecorino, stand on their own as entrees. Others, such as a Parmesan and olive oil mash or roast cherry tomatoes, serve as lovely sides. A few, including ‘a chicken lunch for a searingly hot summer’s day’ and sea bass with lemon potatoes, provide both main and accompanying dish.

Slater doesn’t focus on savory offerings alone. He also presents delectable, vegetable-infused desserts such as carrot cake, chocolate-beet cake and pumpkin scones. If it can grow in a pot or patch, Slater will have a recipe ready for that vegetable.

Although I devoured his gardening anecdotes, I can only utilize some of the many growing tips. While the East Coast’s climate is somewhat comparable to the UK’s, not every vegetable is planted at the same as or fairs as well as it would in England. Nonetheless, I still loved Slater’s informative and charming stories about nurturing and cultivating produce.

Even if I wimp out and never plant a single seed, I’m glad that I picked up and read this book. Likewise am I happy that I’ve cooked from Tender. Sensible and sensational, it’s a wonderful cookbook for any level of cook.

As Perfect as a Gingered Pear Tart

Some food moments stay with you forever. For me, it’s that first bite of a pear. Thinking that he’d introduce his only child to a delightful, new food, my father had plucked a pear from his lone fruit tree and handed it over to four-year-old me. Willing to please and try anything, I chomped into the golden skin and pulled off a huge piece. It all went downhill from there.

As the story goes, I grimaced, pronounced the pear “gritty” and spit out the offending, unripened piece. That’s the assessment that I made over three decades ago and the one that I’d cling to for almost as long. Care for a pear? No thank you!

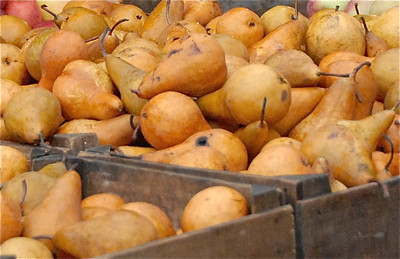
Today, though, I’m quite fond of this bell-shaped fruit. When allowed to ripen off the tree, it can be a divine treat. With over 1,000 varieties and seasons that spread throughout the year I can find a soft, honeyed pear almost anywhere.

Similar to its cousin, the apple, the pear originated in the border between Europe and Asia known as the Caucasus. Spread by traveling Aryan tribes, it moved into North India and Europe. Eventually it arrived in China as well as in America where it became wildly popular in 19th century New England. In the U.S. most of our pears now come from Washington, Oregon and California.

In ancient times the pear was considered superior to apples, more or less the perfect fruit. Its fragrant and juicy flesh made it a beloved dessert. As varieties developed and spread, it also become a favorite for cooking. No wonder. In terms of cooking a pear responds well to a range of methods including baking, grilling, poaching, roasting, sauteing and stewing. It compliments a wealth of foods including almonds, cheese, chocolate, duck, ginger, oranges, pork, raisins, walnuts and wine.

When selecting pears, I look for shiny, firm, unblemished fruit. At home I put them in a cool spot to ripen. When ripe, they are tender, aromatic and easily bruised. I use mature pears right away or refrigerate them to stave off spoilage.

Now that I know how to choose and, most importantly, not to eat immature pears, I use them in an assortment of dishes. I slice and saute them in a sugar and butter and serve them over ice cream. I chop and add them to salads or pair them with Gorganzola, Stilton, Parmesan or Brie cheese and serve them as a first course. My favorite way to prepare pears, though, is to feature them in a tart.

GINGERED PEAR TART
Serves 6

5 pears, peeled, cored and sliced
6 tablespoons unsalted butter
¾ cup granulated sugar
½ teaspoon ground ginger
1/8 teaspoon ground cinnamon
1 sheet (roughly ½ pound) frozen puff pastry, defrosted and cut to fit a 9-inch frying pan

Preheat the oven to 375 degrees Fahrenheit.

Melt the butter, sugar, ginger and cinnamon together in a 9-inch, oven proof pan. Arrange the pear slices in the pan and cook over medium heat for 15 minutes or until a light colored caramel has formed in the pan.

Place the pastry over the pears. Tuck in any extra pastry and then place the pan in the oven. Bake for 20 minutes or until the pastry has turned golden brown. Remove the pan from the oven and allow it to cool.

Invert the pear tart onto a large serving dish and serve warm.

Falafel Frenzy

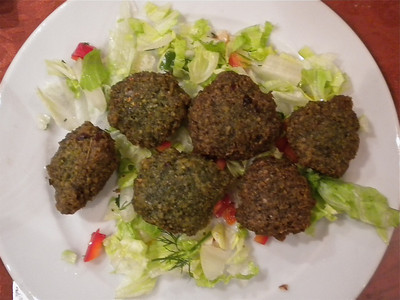
Okay, maybe there isn’t an all-out, nationwide frenzy for falafel. Yet, on the same night this week that I made falafel sandwiches for dinner, I learned that Subway now sells foot-long falafel subs. Although I walk past a Subway shop several times a day – coincidentally, en route to the actual subway — I hadn’t been aware of its new offering. What I do know and have experienced are countless croquettes of spiced, ground chickpeas known as falafel.

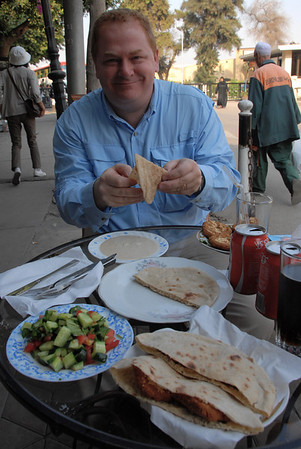
A specialty of the Middle East, falafel reputedly originated in ancient Egypt. Today it’s one of the country’s national dishes and served as an appetizer as well as a snack. Among Egypt’s Coptic Christians, it’s acts as a substitute for meat during Lent. Tucked inside a soft, fresh pita and dressed with tomatoes, cucumbers, lettuce and/or tahini or a yogurt dressing, falafel makes a delightful sandwich.

In Egypt falafel are made with white broad beans or fava beans. In Lebanon, Syria, Jordan, Palestine and Israel they come from chickpeas or a mixture of chickpeas and fava beans, which is how I know them best.

To make falafel, dried chickpeas or fava beans are soaked in water overnight before being ground together with parsley, garlic and other seasonings. Note that cooked, canned chickpeas or fava beans are never used. These would make the falafel too mushy.

The subsequent paste is shaped into balls or patties. I use my hands to do this but you can employ a special tool, aleb falafel, to form them. An aleb falafel looks a bit like an ice cream scoop and possesses a lever that pops the ball into the bubbling cooking oil. If you’re concerned about your falafel falling apart or splashing oil as it enters the deep fryer, this is a handy tool to have.

Once the falafel balls have turned a golden brown, they’re plucked from the oil and placed on paper towels to drain. From here they’re served warm, over lettuce or in an open pita. In my opinion, they’re absolutely delicious. Delicious on a hoagie roll at Subway? I’m a tad skeptical. However, if you’re curious, check out this review from NPR.

FALAFEL
Courtesy of Clare Ferguson’s Street Food (Time Life Books, 1999)
Serves 6

1 1/4 cups skinned, dried fava beans
2/3 cup dried chickpeas
8 scallions, chopped
4 cloves garlic, chopped
3/4 cup chopped parsley
3/4 cup chopped cilantro
1/2 teaspoon chili powder
2 teaspoons cumin seeds, crushed
2 teaspoons coriander seeds, crushed
1 teaspoon salt
2 teaspoons baking powder
olive oil, for deep frying
6 pitas, for serving
sliced lettuce, onion, tomato, cucumber, for serving
tahini, for serving

Soak the beans and chickpeas separately in cold water for 24 hours. When ready to prepare, drain the beans and chickpeas, put into a food processor and puree to a coarse paste. Add, in batches, the scallions, garlic, parsley, cilantro, chili powder, cumin, coriander seeds, salt and baking powder.

Scoop out golf ball-sized spoonfuls of the mixture and press between your palms into sauce-shaped disks. Repeat until all the mixture has been used.

Fill a large saucepan 1/3-full with the olive oil and heat to 350 degrees Fahrenheit or until a cube of bread browns in 40 seconds. Add the falafel, a few at a time, and deep-fry for about 2 minutes, turning them over halfway through. Remove from the oil with tongs or a slotted spoon, drain on crumpled paper towels and keep warm in the oven — oven on low — until ready to serve.

Place the falafel inside the pitas, add the lettuce, tomato, onions and cucumber and drizzle with tahini.

Shrimp!

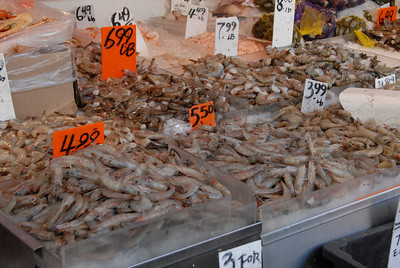
They’re Americans’ favorite shellfish and, after canned tuna, their preferred seafood. Yet, until the 20th century, shrimp were not readily available to diners. Unless you lived in the South, where shrimp were sold live, you missed out on these flavorful, little crustaceans. By the early 1900’s, though, advances in fishing trawler refrigeration allowed the mass marketing of and subsequent nationwide craze for shrimp.

Over 300 species exist worldwide but I tend to find six or seven in our markets. Gulf White, Pink and Brown, Ecuadoran or Mexican White, Chinese White, Black Tiger and Rock are the types that I see. As the names suggest, Gulf shrimp hail from the Gulf Coast, Chinese and Black Tiger come from Asia, etc. Of these Black Tiger is the largest, growing up to one-foot in length. It’s also one of the more expensive. As a general rule, the larger the shrimp, the higher the cost.

Buy shrimp and you buy according to number per pound or count. The smaller the number in the count, the larger the shrimp will be. You’ll need only 10 or less colossal shrimp to make a pound. With jumbo shrimp it’s 11 to 15 per pound. Extra-large is 16 to 20. Large needs 21 to 30. Medium requires 31 to 35 while small has a count of 26 to 45.

When purchasing shrimp, you’ll end up buying frozen or frozen that has been defrosted and displayed in your fishmonger’s case. As there’s no benefit to defrosted shrimp, go with frozen. That way you don’t have to use it right away. Nor do you need to fret over how long it’s been hanging around in the case. If you do opt for defrosted, smell the shrimp before buying it. If you get a whiff of ammonia or other off odors, skip it. Likewise, stay away from shrimp with pitted, yellow or spotted shells and those that feel mushy.

Why do Americans love shrimp? I can think of a slew of reasons, including simplicity, versatility, ease of preparation and flavor. I can bake, boil, broil, deep-fry, grill, poach, roast, saute, steam or stir-fry these guys. I can serve them with a splash of lemon juice or cocktail sauce, lay them over a bed of lettuce or pasta, layer them in a sandwich or feature them in a stir fry. They require only a minimal amount of cooking — just until they turn pink — and have a wonderfully nutty taste.

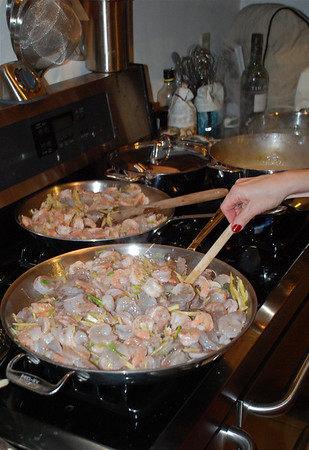
One of my favorite ways to prepare shrimp is to saute them with a bit of ginger, garlic, spring onion, olive oil and sherry. The end result is Ginger-Scallion Shrimp, a quick, easy and delicious dish.

SAUTEED GINGER-SCALLION SHRIMP
Serves 4

1 pound frozen jumbo or extra large shrimp
3 scallions, washed
1 medium-sized fresh ginger root, peeled
2 cloves garlic, peeled
2 tablespoons olive oil
generous splash of Tio Pepe sherry

Defrost the shrimp in the refrigerator or in a bowl of cold water. Peel them and set aside.

Slice the scallions, ginger and garlic into spiky matchsticks. Place them in a large saute or frying pan, add the oil and heat on medium, stirring occasionally. Once the vegetables have started simmering, add the peeled shrimp and toss to combine. Cook for 3 to 5 minutes, tossing periodically. When finished, the shrimp will have turned coral pink in color. Add the sherry, toss to combine again and serve immediately with slices of Italian or French bread.

Seven Fires

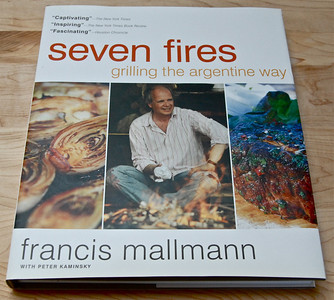
Whether you’re dusting off your grill as the weather warms or toughing it out and grilling year-round in snow, sleet and freezing rain, you’ll want to check out Francis Mallmann’s Seven Fires Grilling the Argentine Way (Artisan, 2009). Employing time-honored techniques, South America’s most celebrated chef shares how to grill, both expertly and easily, meats, seafood, vegetables, fruits and breads. Everything that I’ve wanted to know about good grilling I’ve found in Seven Fires.

Mallmann’s seven fires are seven methods of wood-fired cooking. These consist of cooking in wood ovens (horno de barro), spits (asador), cast-iron grates (parilla), sheets (chapa) and kettles (caldero) as well as in embers (rescoldo) and extreme heat (infiernillo). Early in the book Mallmann details how to work with these seven fires. He also covers how to build and light wood fires and how to gauge cooking temperatures. In essence he takes all the guesswork out of grilling.

Fundamentals finished, Seven Fires moves on to the meat of the cookbook — recipes. Although Argentinian cuisine strongly favors beef, Mallmann gives equal billing to other meats, seafood and produce. In fact, I’ve used his caramelized endives with vinegar, smashed potatoes with tapenade crust and stacked ratatouille as a meal for vegetarian friends. For the pescetarians in the bunch I’ve also made his burnt carrots with goat cheese, parsley, arugula and crispy garlic chips as an appetizer, grilled scallops with endive and radicchio as the main course and burnt oranges with rosemary for dessert. Sophisticated yet simple, his recipes never fail to please. I only wish that he included more than 100 or so dishes in the book.

For those unable to build a big wood fire, get an infiernillo going and grill outdoors Mallmann has adapted his recipes. Many can be executed by placing a two-burner cast iron griddle or grill over your cook top or firing up your oven to 500 degrees Fahrenheit. The experience won’t be as atmospheric as cooking outdoors but it will still yield highly flavorful foods.

Similar to other favorite cookbooks, Seven Fires can serve as both a cookery and a coffee table book. Flip through the illustrated pages and you’ll embark on a cultural journey through Mallmann’s homeland, Argentina. Sumptuous color photographs of the Argentinian landscape, people, and, of course, food accompany Mallmann’s well-written and thoughtful text. No question about it. Seven Fires is a visual as well as gustatory delight.

This spring, as you reach for your grill tongs, be sure to grab Seven Fires, too. Insightful, sensible and beautiful, it will change the way that you grill forever and for the better.

Tap into Maple Syrup

If you live in the Northeast, the arrival of spring means many things. Warmer temperatures. Less snow. More rain. The end of maple tapping season. Starting in mid-February and lasting for roughly six weeks, maple trees across this region get tapped for their sap. Once warmer weather hits, tapping season ends and my quest for the tastiest maple syrup begins.

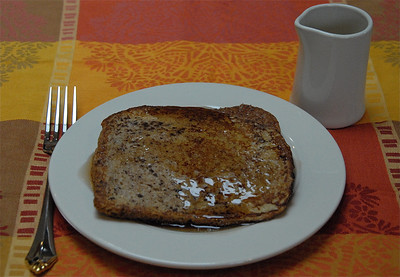
Every time I pour rich, Grade A syrup over my French toast, waffles or pancakes, I should thank the Native Americans for this lovely sweetener. As they did with so many other useful foodstuffs, Native Americans taught the early settlers how to tap maple trees and create maple syrup and sugar.

The process is fairly simple. Put in spout in a sugar or black maple tree. Attach a bucket to the spout. Collect the tree’s sap in this bucket and then boil it down so that the most of the water evaporates and the sap becomes thick and dark. Want maple sugar? Just keep boiling the sap until it becomes granulated like sugar.

Until the late 19th century maple sugar, not syrup, was the preferred product. Today, though, it’s the syrup that we all crave. Whether I’m pouring it over my pancakes, glazing vegetables with it or adding it to baked goods, it’s a delightful way to enliven a variety of foods.

As I’m a bit of a maple syrup snob, I tend to splurge on darker, bolder ones. When searching for true palate pleasers, I look at the grade, color and ingredients. “Maple-flavored” gets set aside immediately for this indicates a high percentage of corn syrup with a splash of maple added for color and taste. What I want is pure maple syrup.

Once I’ve established that it’s pure syrup, I consider the grade. Rated according to flavor and color, American-produced maple syrup comes in Grades AA (also known as “Fancy”), A, B and C. Grade AA possesses a very mild taste and light amber hue. Grade A is slightly stronger in color and flavor while Grade B boasts a hearty taste and dark amber shade. Grade C, which isn’t table-grade, most closely resembles molasses.

For the following recipe I use Grade A maple syrup. Since pure maple syrup must be refrigerated after opening, I allow it come to room temperature before measuring and adding it to the muffin butter.

VERMONT MAPLE SYRUP MUFFINS
from The Joy of Muffings by Genevieve Farrow and Diane Dreher (Golden West, 2002)
Makes 12 muffins

2 cups all-purpose flour
4 teaspoons baking powder
1/2 teaspoon salt
1 large egg, room temperature
1/2 cup milk
1/2 cup maple syrup
1/2 cup unsalted butter, melted

Preheat the oven to 400 degrees Fahrenheit. Grease 12 muffin cups.

Sift the flour, baking powder and salt together in a bowl. Form a well in the center of the ingredients and set the bowl aside.

In a separate bowl whisk together the egg, milk, syrup and butter. Gradually pour the egg mixture into the well at the center of the dry ingredients and stir together. The batter should be lumpy. Do not overbeat or the muffins will be tough. Spoon the batter into greased muffin cups and bake until brown, about 15 minutes.

Bowled over by Bisteeya

Lunch this week at the Moroccan restaurant Cafe Mogador reminded me of just how much I love this lively North African cuisine. Heady spices merge with fluffy grains, piquant fruits, and tender pulses, poultry and fish to create some of the most distinctive, delectable foods that I’ve ever eaten. Of the wonderful Moroccan offerings, the most unique has to be bisteeya. Considered by many to be Morocco’s most complex and elegant dish, this flaky, poultry-filled pastry remains beyond compare.
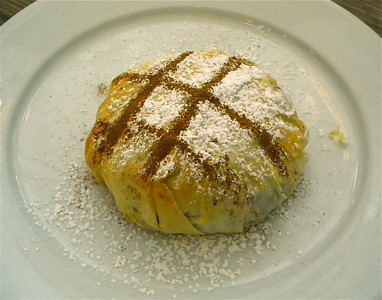
Bisteeya has its roots in the Middle East. As early as the 7th century, Arab invaders introduced the concept of encasing spiced meats and nuts in dough. They also encouraged the use of paper-thin leaves of pastry, which Moroccans perfected and now refer to as warka. Warka is one of several ingredients that make bisteeya so memorable.

To make warka, you press a ball of well-kneaded dough onto a hot, flat pan. As soon as the edges begin to dry, peel off the leaf and place it on a clean, flat surface. Cover it with a towel so that it doesn’t dry out. Repeat this process until you have enough warka for a bisteeya. It seems to takes mere seconds to create a delicate warka leaf. Yet, in reality three hours could pass before you have the needed 40 or so leaves.

Not only the fragile casing but also the sweet and savory filling contribute to bisteeya’s uniqueness. Traditionally, the stuffing features poached and shredded squab (young pigeon) or chicken. Placed on sheets of warka, the poultry is covered with a mixture of eggs and a lemon-onion sauce before being blanketed with dough. A layer of sugar-dusted almonds follows before the final sheets of warka are tucked around and under the tartly sweet stuffing. Once it’s finished baking, the top of the pastry is decorated with cinnamon and confectioner’s sugar.

Cut into the golden pastry and you’ll encounter a warm, aromatic blend of saffron, tumeric, lemon, garlic and cinnamon. Take a bite and you’ll experience the perfect combination of moist and crisp, savory and sweet. It’s otherworldly.

Since I usually lack the time — and patience — to fuss with homemade warka, my bisteeya isn’t as authentic or ethereal as it could be. However, in a pinch, store-bought phyllo dough serves as a good substitute. Should you decide to make your own dough, consult Paula Wolfert’s Couscous and Other Good Food from Morocco (William Morrow, 1987). She devotes an entire chapter to this topic.

BISTEEYA
Adapted from Sarah Woodward’sTastes of North Africa (Kyle Cathie LImited, 1998)
Serves 6 to 8

1 pound chicken breasts
4 sprigs each fresh parsley and cilantro, tied together
1 stick cinnamon
1/2 teaspoon black pepper
1/4 teaspoon saffron
pinch of sea salt
1 white onion, peeled and grated
8 to 10 tablespoons unsalted butter
7 ounces whole blanched almonds
1 teaspoon ground cinnamon
1 1/2 tablespoons confectioner’s sugar
4 whole eggs
4 egg yolks
2 tablespoons lemon juice
1 pound phyllo dough
ground cinnamon, for garnish
confectioner’s sugar, for garnish

Place the chicken in a casserole or heavy pan. Add the herbs, cinnamon, black pepper, saffron, salt, onion and four tablespoons of butter. Pour in enough water to just cover the chicken. Bring the water to a boil, lower to a simmer, cover and allow to cook for 1 to 1 1/4 hours.

As the chicken cooks, heat 1 tablespoon of butter in a small frying pan. Add the almonds and toast until golden. Remove from heat and allow to cool. Once they’ve cooled, grind the almonds in a food processor or blender. Add the 1 teaspoon of cinnamon and 1 1/2 tablespoons of confectioner’s sugar to the ground almonds and mix to combine.

Remove the chicken from the poaching liquid and allow to cool before cutting or shredding into small pieces. Boil down the remaining liquid to half its volume and then set aside to cool.

Beat together the eggs and egg yolks until frothy. Add the lemon juice and beat again. Stir the egg mixture into the reduced liquid. Return the pan to the heat and simmer on low, stirring constantly until the sauce thickens. Check and adjust the seasonings as needed.

Preheat the oven to 350 degrees Fahrenheit. Lightly grease a shallow, non-stick pie pan. Melt the remaining butter over low heat and skim off any scum on top.

Lay a sheet of phyllo across the greased pie pan, allowing the edges to hang over, and brush lightly with the melted butter. Lay another sheet at an angle and brush it with butter, too. Repeat with another 4 sheets of phyllo so that the pie dish is completely covered and a circle has been formed.

Scatter the shredded chicken over the pastry. Top with the egg sauce. Fold 2 layers of phyllo in half and place in the preheated oven for 1 minute to crisp up. Place over the egg sauce and top with the almond-cinnamon-sugar mixture. Fold in the overlapping edges of phyllo, brushing the surface lightly with butter. Lay two sheets of phyllo over the surface and gently tuck them under the pie, cutting off any excess dough. Brush the surface with the melted butter.

Bake for 30 minutes and then carefully invert the pie onto a baking sheet. Bake it upside down for another 20 minutes before returning it to the top side. Bake for 10 more minutes, until the top is crisp and golden. Sprinkle with cinnamon and sugar and serve hot.
Plenty

London chef and restaurateur Yotam Ottolenghi’s second cookbook Plenty (Ebury Press, 2010) was released in the U.S. last week but, thanks to a friend in Europe, I’ve had the pleasure of cooking from his colorful book since last fall. “Pleasure” remains the key word for, thus far, every recipe that I’ve tried has been a delight to make and eat.

Inspired by the “New Vegetarian column” that Ottolenghi writes for London’s Guardian newspaper, Plenty focuses on vegetables and how to cook them in flavorful, creative ways. Many of the preparations are quite simple — roasting Jerusalem artichokes or poaching baby carrots doesn’t take a lot of time or effort. Yet, because of Ottolenghi’s thoughtful use of seasonings and inventive pairing of flavors, I end up with fabulous tasting vegetables.

Plenty brims with close-up, full-page, color photographs of each dish. These beautiful photos not only illustrate but also inspire different takes on the proffered vegetables. One glance at the vibrant “tomato party” or “Tamara’s ratatouille” and I start thinking of additions and pairings for these recipes. Chances are that you will, too.

Unlike the majority of cookbooks, Plenty is not organized according to course. Instead each chapter features a favorite, frequently Mediterranean ingredient of the Israeli-born Ottolenghi. “Funny Onions” showcases leeks, garlic and shallots while “Green Things” hones in on cucumbers, artichokes, asparagus and okra. Not limited to vegetables, the book also offers sections on cereals, pastas and pulses. In fact, “Fruit with Cheese” presents just that — figs, peaches, quinces, pears, dates and watermelon all partnered with different cheeses.

Since many of the recipes call for dairy products, I wouldn’t classify this as a vegetarian cookbook. Nonetheless, Plenty should win over “pragmatic vegetarians,” as the omnivore Ottolenghi refers to his readers, as well as those searching for a new vegetable appetizer, side or entree. Some recipes do work, though, for strict vegetarians and vegans. Multi-vegetable paella, Tamara’s ratatouille and soba noodles with aubergine and mango are three such dishes. Unfortunately, most of my favorites, such as caramelized garlic tart with its goat cheese-egg-creme fraiche-heavy cream filling, will not.

Fast Food the French Way

I was all set to chat about the imminent arrival of spring produce but then I stepped outside, saw the ice on the sidewalk, felt the chill in the air and decided that I needed something warmer and heartier today than leeks and asparagus. Looking down at my old, red, wool scarf that I had picked up years ago at the department store la Samaritaine, I started to think about France, which immediately made me think of crepes.

I fell in love with crepes on a cold, late December evening in Paris. Famished as well as jet-lagged, I roamed the 1st arrondissement in search of something warm, filling and quick to eat. On a sex shop-lined street near our rented apartment on Rue Saint Denise Impasse I spotted a stout, middle-aged man standing on a street corner, cooking paper thin pancakes on an oversized, portable hot plate. After flipping them once, he filled his crepes with fresh, sliced bananas, the chocolate-hazelnut spread Nutella, strawberry preserves or a combination of the three. He then rolled up the griddle cakes, sprinkled them with granulated sugar, wrapped them in sheets of waxed paper and handed them out to the hungry.

Mesmerized by the honeyed fragrance and simple artfulness of his creations, I slid into line and awaited my turn for a confiture d’fraise, or strawberry jam, crepe. In less than five minutes I had in my hand a warm, otherworldly meal. Tender to the tooth and with a delicate sweet touch, they were like nothing I had ever eaten.

The next morning I returned to the crepe stand for breakfast – basically, the same as my dinner but this time consumed at nine in the morning. I continued this pattern throughout my stay and on subsequent trips to the country. Quick and delicious, this treat became the epitome of French fast food for me.

French for “pancake,” a crepe is just that — a paper-thin pancake. Made with either sweetened or plain batter, crepes serve a multitude of roles. They can be eaten as breakfast, lunch, dinner, dessert or a snack. Sweet ones usually get filled with fresh fruit, jam, chocolate or a combination of the three and often appear as dessert or breakfast entrees. Savory crepes are stuffed with cheeses, vegetables, meats and/or eggs and provide a highly satisfying meal.

My infatuation with crepes led me to tinker around with some recipes and come up with my own version. While mine don’t surpass those luscious French originals, these crepes rank a close second. I use a minimal amount of batter swirled out evenly on a heated, lightly buttered crepe pan. After cooking both sides, I slather them Nutella or strawberry jam, fold them into triangles, and dig in.

Unfilled crepes can be made several hours in advance and refrigerated. Simply lay the first crepe on a plate then place a sheet of waxed paper over top of it. Lay the next crepe on top of the paper, cover it with a sheet of waxed paper and repeat. After the last crepe has been placed, cover the plate with plastic wrap and place in the refrigerator. The crepes can be reheated in the crepe pan – roughly 20 seconds on each side – or served cold.

SWEET CREPES
Makes 10 (8-inch) crepes

1 cup all purpose flour, sifted
1 tablespoon granulated sugar
pinch of salt
2 eggs, at room temperature
1 ½ cups skim milk, at room temperature
2 teaspoons vanilla
2 tablespoons unsalted butter, melted and cooled
butter for greasing crepe pan
granulated sugar, optional garnish
honey, optional garnish

Sift the flour, sugar and salt into a bowl. In a separate bowl whisk together the eggs, milk, vanilla and butter. Combine the liquids with the flour and whisk these ingredients together until most of the lumps have been removed. Refrigerate the batter for at least 1 hour. Strain out lumps, if necessary, before using.

Using an 8-inch crepe pan or low-sided frying pan, heat the pan then add a dab of butter. Coat the entire surface of the pan with the melted butter. Holding the pan off the flame, pour about 2 to 3 tablespoons of batter onto the pan. Swirl the batter so that the entire surface is evenly coated with batter. Cook for 2 to 3 minutes or until the bottom is light brown and the top has set. Using either a spatula or your fingers, flip the crepe over and allow the other side to cook for 1 minute.

Place the crepe on plate and spoon jam, Nutella or fresh fruit into the center. Fold the crepe in half then into a triangle. Sprinkle sugar or drizzle honey over the top and serve.