Latest Posts

Great Books for Cooks

As a food writer, occasional reviewer and all-around fan of cookbooks, I have a long list of favorite books. Each year the lineup grows to include recent publications as well as titles new to my collection. Below are the best from my 2012 acquisitions. Whether you’re holiday shopping or just browsing for yourself, the following will be wonderful additions to any kitchen shelf. Next week . . . a few fabulous baking and culinary history books.

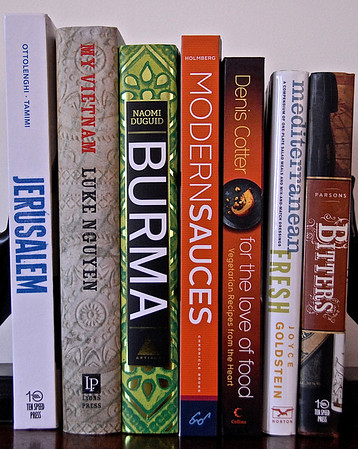
For the Love of Food by Denis Cotter (Collins, 2011)
In his fourth cookbook Irish chef and restauranteur Denis Cotter serves up a wealth of quick, flavorful vegetarian recipes. Over the course of nine chapters he covers such sumptuous dishes as Portobello and roast tomato florentine, orecchiette with broad beans and baby courgettes, and citrus, sultana and maple rice pudding with raspberries. Once again, Cotter offers creative meals that will delight both vegetarians and meat-eaters.

Burma by Naomi Duguid (Artisan, 2012)
Maybe you love to learn about exotic lands. Perhaps you crave a new cuisine to cook. In either case you’ll want to explore Burma. In this beautifully photographed tome Naomi Duguid takes readers on a cultural and culinary journey through this formerly isolated region. Through 125 detailed recipes she exposes the warmth and exoticism of the Southeast Asian country known as Burma or Myanmar.

Mediterranean Fresh by Joyce Goldstein (Norton, 2008)
If you know someone who wants to eat more healthfully and interestingly, then Mediterranean Fresh is the cookbook to give to him. Featuring 110 salad and 30 dressing recipes, Joyce Goldstein’s book showcases the wholesome ingredients and flavors of the Mediterranean. As the book jacket claims, “there is more to salads than the salad bar.”

Modern Sauces by Martha Holmberg (Chronicle Books, 2012)
One part reference manual plus one part techniques class plus one part recipe book equals an invaluable cookbook. In Modern Sauces Martha Holmberg shows how to create such classics as bechamel, hollandaise and sabayon and use them in such modern dishes as smoked salmon Benedict bites and rum-soaked prune and frangipane tart with maple-rum sabayon. Featuring over 150 recipes and handy tips, Holmberg’s book is a must-have for any serious cook.

My Vietnam by Luke Nguyen (Lyons Press, 2011)
As a fan of Vietnamese cuisine and a recent traveler in Vietnam, I am smitten with Luke Nguyen’s personal look at regional Vietnamese cooking. To learn why, see my January 2012 review at Zester Daily.

Jerusalem by Yotam Ottolenghi and Sami Tamimi (Ten Speed Press, 2012)
Last year I recommended both Ottolenghi and Plenty as holiday gifts. This year I’m touting Ottolenghi’s and Tamimi’s exploration of their homeland, Jerusalem. With gorgeous, illustrative photographs and easy-to-follow recipes for such dishes as marinated sweet and sour fish and semolina, coconut and marmalade cake it’s sure to become a favorite of yours/your gift recipient.

Bitters by Brad Thomas Parsons (Ten Speed Press, 2011)
Brad Thomas Parsons provides readers with a fascinating look at the storied cocktail ingredient bitters. Through histories, engaging anecdotes, flavor profiles and recipes for both classic and modern drinks, he takes the mystery out of this powerful and aromatic spirit. Even if you never mix a “Horse’s Neck” or own a bottle of bitters, you’ll enjoy reading this engaging book.
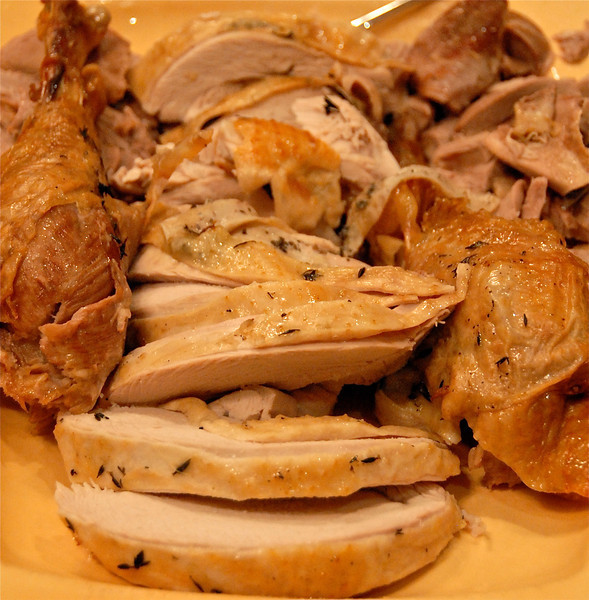
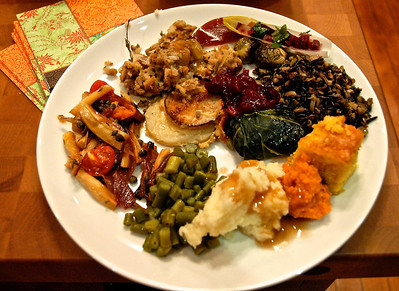
Taking Sides on Turkey Day Take 2

The countdown to turkey day has begun! Rather than take up valuable shopping and cooking time talking about the history of Thanksgiving side dishes, this year I’ll share a few recipes for easy and fabulous offerings. Whether you’re hosting a huge feast for family and friends, traveling to a potluck or holding an intimate dinner for two, the following sides will surely satisfy. For additional Thanksgiving recipes, check out Kitchen Kat’s 2011 entry on Taking Sides for Turkey Day.

“TOP” (TURNIP-ONION-POTATO) CASSEROLE
Serves 4 to 6

2 turnips, trimmed and cut into chunks
1 large red onion, cut in half and then quartered
1 large yellow onion, cut in half and then quartered
1 yam, peeled and cut into chunks
1 Idaho potato, peeled and cut into chunks
3 red bliss potatoes, washed and quartered
1 large orange bell pepper, cut into chunks
8 cloves garlic, peeled and halved
1/3 cup olive oil
freshly ground black pepper, to taste
4 ounces Haloumi cheese, thinly sliced

Preheat the oven to 400 degrees Fahrenheit.

Coat the interior of a baking dish with 1 tablespoon olive oil. Add the vegetables and then drizzle the remaining olive oil over them. Season with pepper and then toss to coat evenly.

Bake, uncovered, for 45 minutes or until the vegetables have browned slightly.

Remove the baking dish from the oven. Turn the broiler on medium.

Spread the sliced Haloumi over the vegetables and return to the top rack of the oven. Broil until the cheese has melted and browned, 1 to 2 minutes. Serve immediately.

GOLDEN CAULIFLOWER
Serves 8

6 pounds cauliflower, cut into 1-inch florets
4 tablespoons olive oil
11/2 teaspoons sea salt
1 teaspoon freshly ground black pepper
1/2 teaspoon ground nutmeg
Good-quality aged balsamic vinegar

Preheat the oven to 450 degrees Fahrenheit.

In a large bowl toss together the cauliflower, olive oil, salt, pepper and nutmeg.

Spread the cauliflower evenly over a large baking sheet. Roast, turning the florets periodically, until they become soft and golden brown, 25 to 35 minutes. Drizzle balsamic vinegar over the top and serve.

APPLE-CRANBERRY-CORNBREAD STUFFING
Serves 6 to 8

4 cups crumbled cornbread
2 cups wheat bread crumbs
4 tablespoons unsalted butter
1/2 cup finely chopped white onion
1/2 cup finely chopped celery
1 cup diced Macintosh apples
1/2 cup dried cranberries
1/2 teaspoon dried thyme
1/2 teaspoon dried rosemary
1/2 teaspoon salt
2/3 cup apple cider
1/2 cup chicken stock

Place cornbread and wheat bread crumbs on a baking sheet and toast under a medium broiler until browned. Remove and place in a large bowl.

Preheat the oven to 350 degrees Fahrenheit. Butter a large baking dish.

In a small sauté pan heat 2 tablespoons of butter. Add the onion and celery and sauté for 10 minutes, until softened but not browned. Place the sautéed vegetables in the bowl with the breadcrumbs. Add the apples, cranberries, thyme, rosemary and salt and stir until the ingredients are well combined. Evenly pour the apple cider and the stock over the stuffing and toss together.

Loosely layer the stuffing in the buttered baking dish. Dot the top with the remaining 2 tablespoons of butter. Cover the dish with foil and bake for 30 minutes. After 30 minutes remove the foil and continue to bake for another 10 minutes until browned. If reheating, preheat an oven to 325 degrees Fahrenheit. Dot the top of the stuffing with a smidgen of butter and cover with foil. Heat for 10 to 15 minutes and serve.

‘Tis the Season for Cranberries

Cranberries never seem to get their due. At Thanksgiving we mash them into chunky, oft neglected sauces. Face it—no matter how tasty it may be, no one asks for seconds on cranberry sauce. Once that holiday passes, we shove string through their waxy, red skins and fling them across fir trees. The rest of the year we squeeze out their tart, crimson juice for fruit cocktails or dry them until withered and toss them into scones and salads. All and all, not very dignified ways to use such a spectacular fruit.

Native to North America, cranberries were a favorite of Native Americans and European settlers. They made them into compotes, jams, sauces, soups, tarts, cakes, breads and wine. Sometimes they dried them. Other times they ate them straight from the vine.

Unquestionably, the settlers knew a good fruit when they saw one. High in antioxidants and fiber, cranberries go well with a myriad of foods and flavors. As you might expect, they pair beautifully with apples, cinnamon, cloves, chicken, pumpkin, sweet potatoes and turkey. They also make a good partner for apricots, goat cheese, dark chocolate, oats, peaches, pork and wild game. Their tart flavor marries nicely with allspice, cognac, ginger, honey, lemon juice, orange juice, star anise, vanilla and white wine.

Grown on moors and mountainsides as well as in bogs, these hardy little berries possess a natural preservative that gives them an especially long shelf life. No doubt this is why sailors and whalers packed the vitamin C-rich fruit on ocean voyages; they lasted for ages and they prevented scurvy. Whole, fresh cranberries will keep for up to 3 months in the refrigerator or for over 1 year in the freezer.

This season, rather than mashing or stringing them up on your Christmas tree, try making a cranberry tart, soup or cake. You’ll be surprised how delicious these little guys will be.

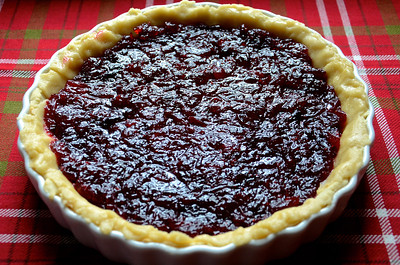
The following tart is one of my all-time favorite ways to use cranberries. Blanketed with homemade royal icing, it has a luscious, sweetly tart taste that any dessert lover will adore. Finally, cranberries get their due!

CRANBERRY BAKEWELL TART
Adapted from Nigella Lawson’s Feast (Hyperion, 2004)

Serves 8 to 10

for the cranberry jam:
2 cups cranberries
3/4 cups plus 2 tablespoons sugar

for the pastry:
1 1/4 cups all-purpose flour
1/3 cup ground almonds
1/3 cup confectioner’s sugar
1 stick plus 1 tablespoon butter, diced
1 egg, beaten
pinch of salt
1-3 tablespoons iced water

for the filling and icing:
1 stick plus 1 tablespoon butter
1/2 cup plus 2 tablespoons sugar
3 eggs
Zest and juice of 1 orange
1 cup cranberry jam (see above)
1 1/4 cup ground almonds
4 cups confectioner’s sugar
2 large egg whites

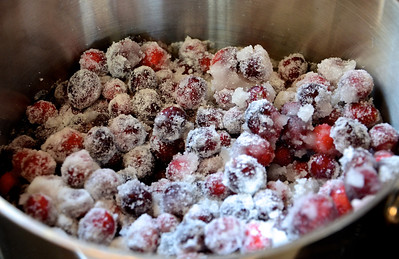
To make the jam, put a few tablespoons of water in a large saucepan. Add the cranberries and sugar and bring to a boil over medium heat, stirring periodically. Cook for 7 minutes or until the cranberries reach a jam-like consistency. Remove from heat and allow to cool.

To make the pastry, place the flour, almonds and confectioner’s sugar in the bowl of a food processor or blender and pulse to combine. Add the diced butter and pulse until the mixture becomes crumbly and almost oatmeal-like.

In a bowl beat together the egg, salt and iced water. Turn on the food processor or blender and, as it’s processing, pour in the liquids so that the pastry binds together. If necessary, add more water until you have a smooth dough.

Form the pastry into a flat disc, cover in plastic wrap and refrigerate.

Preheat the oven to 400 degrees Fahrenheit.

To make the filling and icing, melt the butter and set aside to cool.

Beat together the sugar, eggs and zest. Add the melted butter and stir in the ground almonds.

Roll out the pastry dough to fit a 10-inch, deep, fluted tart pan. Lay the pastry in the pan, pressing down to fit it in, and then prick the bottom with a fork. Spread the cranberry jam over the dough and then pour the almond mixture over the jam.

Bake for 45 minutes, until the filling is puffy and the pastry golden. Remove and cool completely on a wire rack.

Once the tart has cooled, make the icing. In a large bowl beat together the egg whites, sugar and orange juice. If the icing appears too thin, add more sugar; too thick, add more egg whites. You want the icing to be somewhat thick but spreadable. Spread over the tart and allow it to set before serving.

This Holiday Season Have a Scotch … Egg


While I know that the holidays are steeped in tradition, I do like to spice things up a bit by adding a new dish or two to the Thanksgiving menu. This year I’m leaning toward scotch eggs.

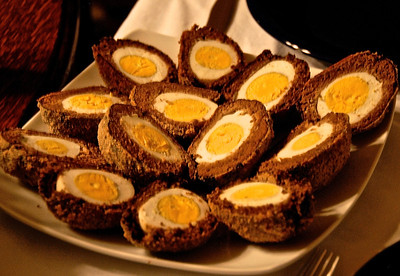
Although it’s now a fixture at British pubs, the scotch egg had tonier beginnings. The posh London department store Fortnum & Mason claims to have created the very first in 1738. Inspired by Indian kofta, a scotch egg consists of a hard-boiled egg encased in ground sausage and seasoned breadcrumbs. Deep-fried until golden brown, it is then cooled and served at room temperature. Nice on its own, it also goes well with dash of hot sauce or splash of gravy.

Sans sauce, a flavorful scotch egg makes for great finger food. Hence why, along with being a pub favorite, this portable treat also shows up at picnics and at English high tea. Its taste, portability and eye-catching appearance likewise make it a welcome addition to the holiday appetizer, dinner or brunch table.

For vegetarian guests I offer a pork-free alternative, substituting veggie meat crumble for the sausage. Pulse that, along with a generous amount of olive oil and seasonings such as thyme, sage and black pepper, in the bowl of a blender or food processor. From here just follow the steps for making traditional scotch eggs. Having tried both regular and veggie versions, I can vouch for each.

The following recipe comes from high school friend and scotch egg master, Bob Richards. His advice for a great scotch egg? Be sure to set up an orderly assembly line.

BOBBY R’s SCOTCH EGGS
Unlike what you’ll find at the pub, these delightful scotch eggs are baked instead of fried. Note that you can also deep- or pan-fry them.
Makes 6

Flour
Milk
Bread crumbs
2 packages pork breakfast sausage (Jimmy Dean Low Fat works best because it doesn’t “shrink” as much)
6 shelled hard boiled eggs

Preheat your oven to 350 degrees Fahrenheit.

Set up your assembly line with separate bowls for the milk, flour and bread crumbs.

Roll out the sausage. You can roll out it out in between to sheets of wax paper with a rolling pin or press it in between 2 cutting boards w/ wax paper (takes a little effort/muscle, but is faster). The sausage needs to be about 1/4-inch thick.

Dip the shelled hard boiled egg in milk, then flour, set it on the sausage and cut out a circle big enough to cover the egg. Wrap it around with your hands into a big meatball then roll in the bread crumbs.

Place the eggs on a baking sheet and bake for 20-30 minutes until the sausage is cooked.

Cool and then cut them in half.

Return to the Pumpkin Patch

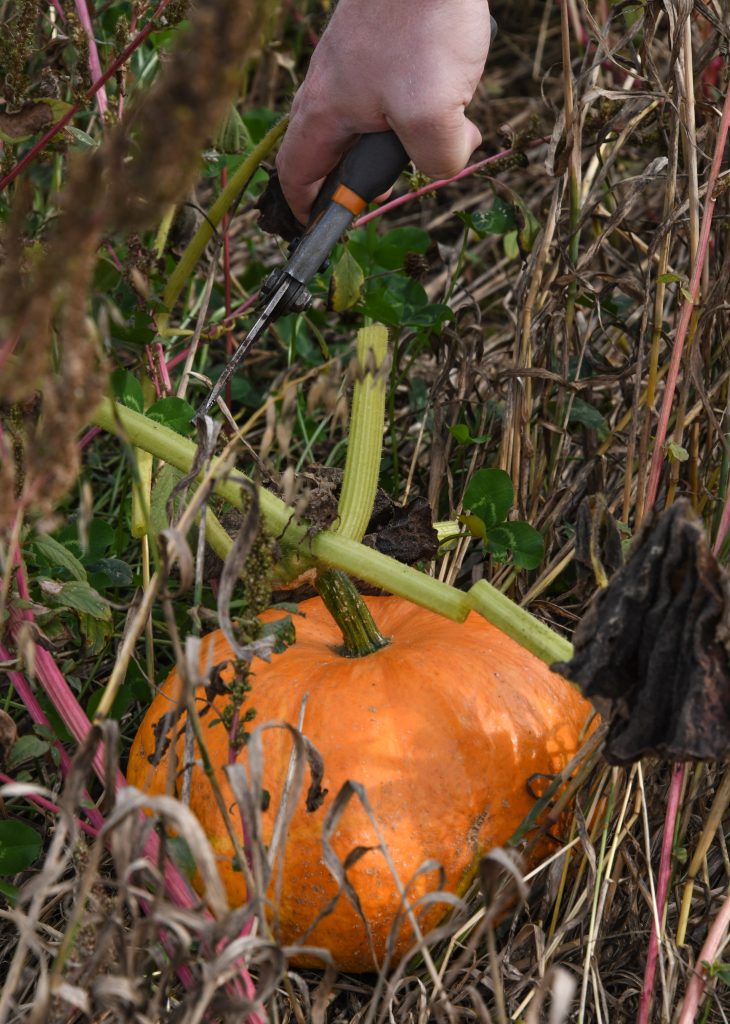
I can’t let autumn pass by without mentioning that amazing, globular fall fruit known as the pumpkin. Ranging in size from two to a whopping 800 pounds, this hefty fellow was once relegated to seasonal pies and decor. Today, though, I keep this low-fat, low-calorie, firm-fleshed gourd in my kitchen long past Thanksgiving.

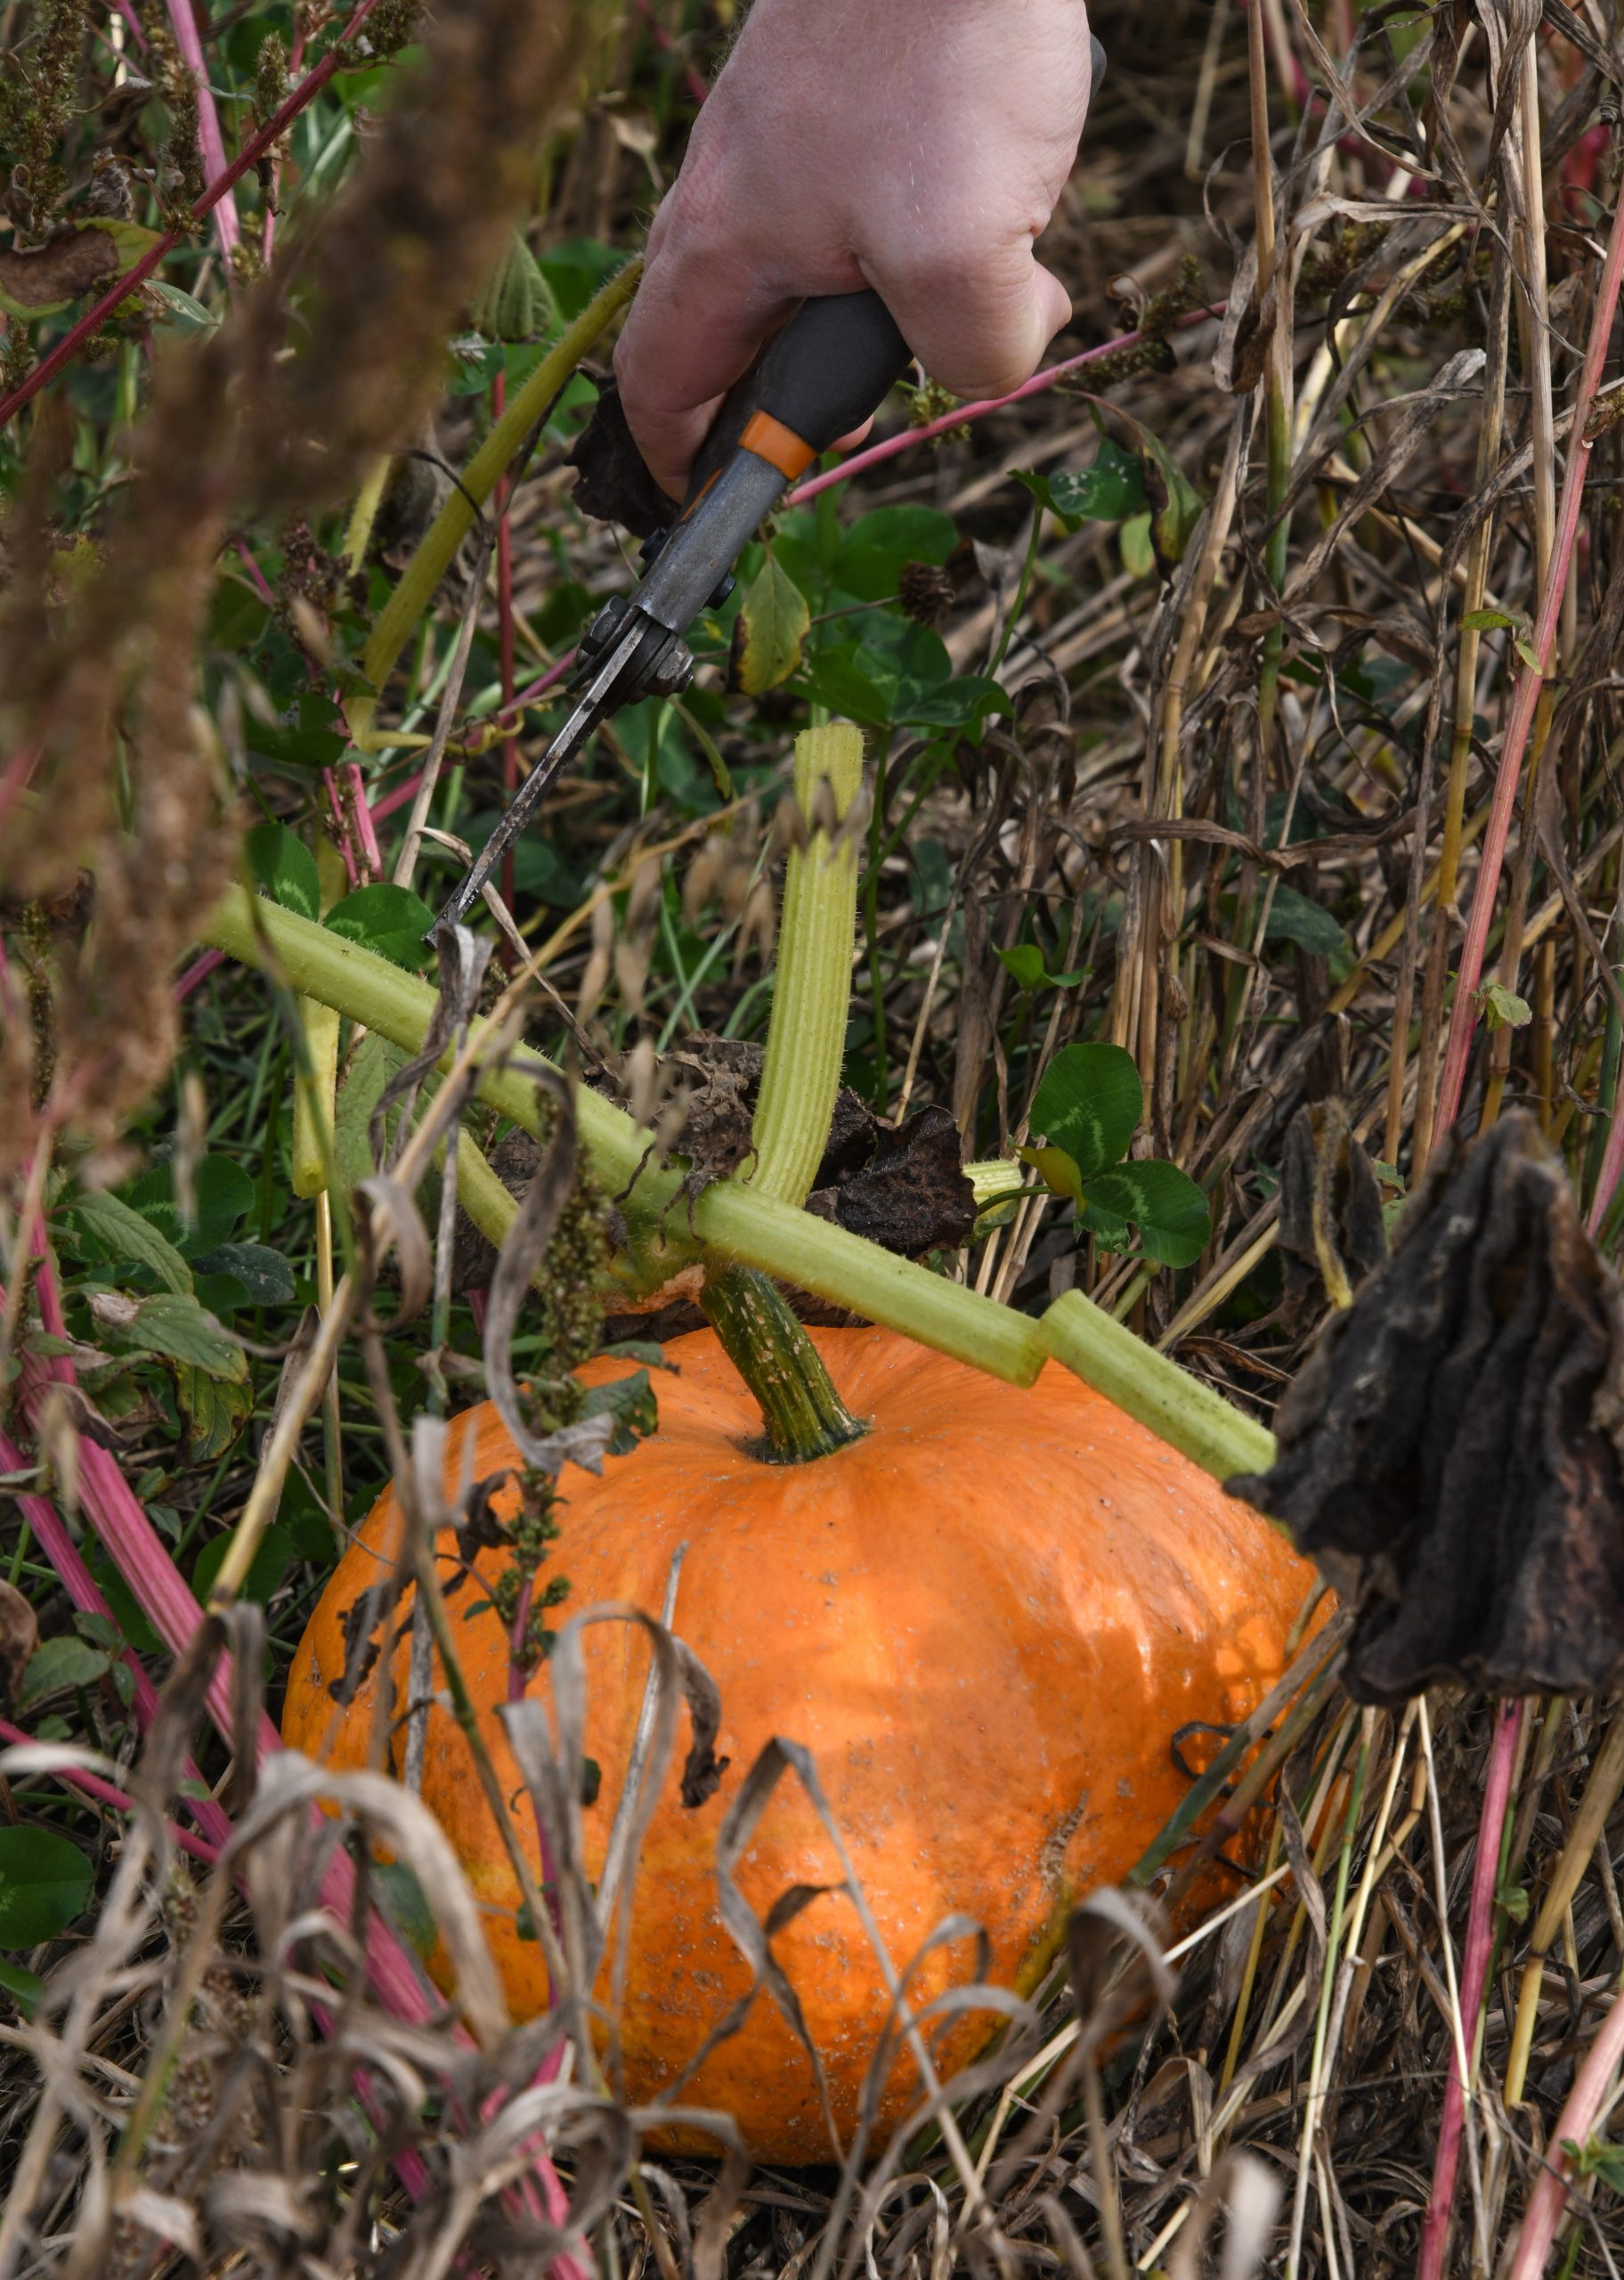
Although I lack the green thumb and good soil to grow pumpkins, thanks to friends who have both, I’ve learned a thing or two about harvesting a great pumpkin. A trailing plant, this winter squash needs space to grow. It likewise requires temperate weather and regular watering.

Mature at 16 weeks, a pumpkin can be picked and stored whole in a cool, dry, dark place for several months. When cut, it must be refrigerated and used within a few days.

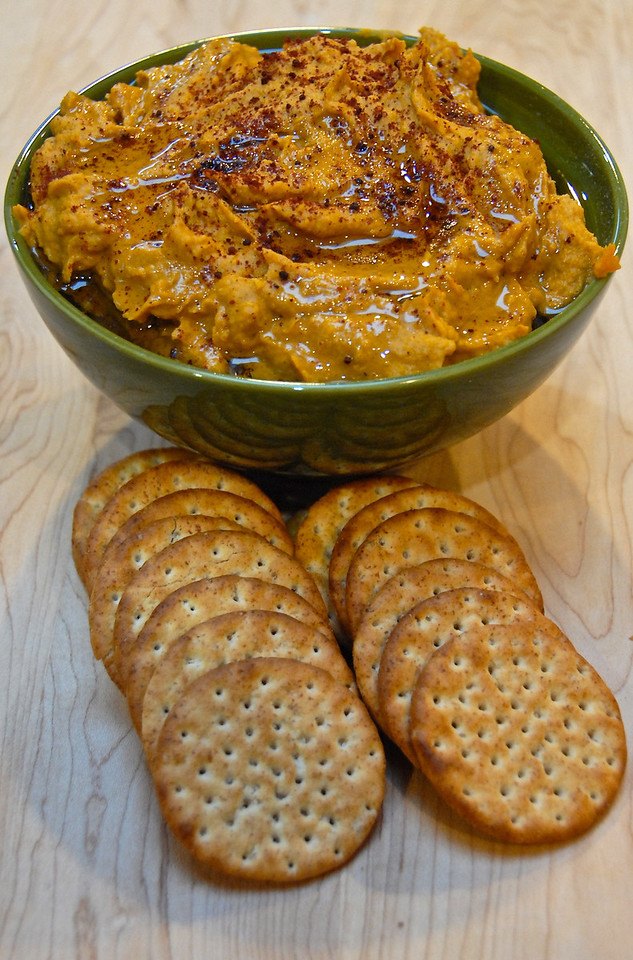
Big bowl of pumpkin hummus

How to use a freshly cut pumpkin? I love turning it into a silky puree. After removing the seeds, I put the pumpkin halves, cut side down, on a rimmed baking sheet and sprinkle a half cup of water over them. I then put the pan in my oven, which has been preheated to 375F, and roast the pieces until tender. Depending on the size of the pumpkin, this takes between 30 to 45 minutes.

Once the halves have cooled, I scrape the flesh from the skin and place it either in the bowl of my food processor or a regular mixing bowl. Based upon the amount of roasted pumpkin, I add several tablespoons of butter – usually one tablespoon per eight ounces of flesh – and process or mash with a big wooden spoon until smooth.

For savory purees I might toss in some dried thyme, minced garlic, salt and pepper. For sweet ones I might include a dash of ginger, nutmeg, cinnamon and honey, brown sugar or maple syrup to taste. Both benefit from a splash of room temperature whipping cream stirred in before serving.

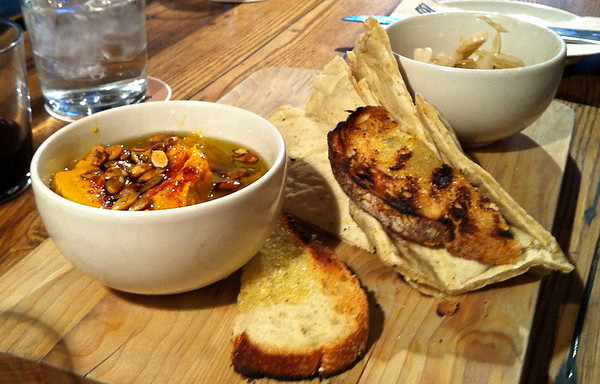
Pumpkin hummus at BackForty West
The inspiration for my pumpkin hummus at BackForty West

Last weekend I ordered a fabulous pumpkin puree, pumpkin hummus, at one of my favorite local, seasonal restaurants, Back Forty West. Below is my take on this dish. To save time and the mess, I’ve substituted canned pure pumpkin for fresh.

Pumpkin Hummus

Serves 2 to 4

15 ounces pure pumpkin
1 clove garlic
2 tablespoons tahini
1/4 teaspoon ground white pepper
1/4 teaspoon all spice
1/2 teaspoon sweet paprika
1/2 teaspoon salt
3 tablespoons extra-virgin olive oil, plus extra for garnish
pinch of ground sumac, for garnish

In the bowl of a blender or food processor place the pumpkin, garlic, tahini, pepper, all spice, paprika, salt and 3 tablespoons oil and puree until smooth. Spoon into a bowl, sprinkle the top with ground sumac and extra-virgin olive oil and serve.

Misunderstood Macadamias


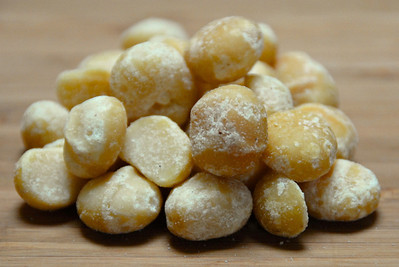
Compile a list of misunderstood foods and macadamia nuts would undoubtedly rank near the top. For years I’ve heard them called everything from macadamien and macadam to plain old mag nuts. Then there’s the issue of origin. Although macadamia trees hail from Northeast Australia, many folks insist that they’re native, if not exclusive, to Hawaii. Get past those misconceptions and you face the question of consumption. How do you cook with macadamia nuts? More than a handful will argue that you don’t cook these plump, buttery jewels; you eat them straight from the vacuum-packed can.

Uncultivated in Australia until the late 1800’s, these nuts initially were called Queenslands nuts. Botanists later changed their name to macadamia to honor the chemist, John McAdam, who had promoted their cultivation.

In the 1890’s macadamia nuts traveled to Hawaii. Because they prefer moist yet well-drained, fertile soils and moderate temperatures, the trees and nuts thrived there. In fact, today the state produces close to 90% of the world’s macadamia nuts.

What do you do with macadamia nuts? Most people eat the roasted, salted nuts directly from the jar or can. However, because of their rich, unique taste, I prefer to use them as flavor enhancers and cook and bake with them.

In terms of affinities these nuts go particularly well with apricots, bananas, dark and white chocolate, dates, figs, lime, mangos, peaches, raspberries and vanilla. They also pair nicely with cashews, chicken, cod, crab, goat cheese, halibut, mahi mahi, mint and scallops. Because they marry with both sweet and savory foods, I put them in desserts as well as in stuffings and crusts for seafood and in seasonal salads.

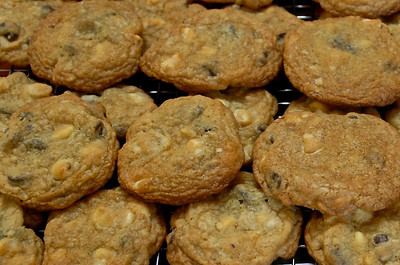
The following treat comes directly from the pages of Bruce Zipes’ Bruce’s Bakery Cookbook. It’s one of those rare recipes that’s so perfect, I haven’t changed a thing.

DOUBLE CHOCOLATE CHIP COOKIES W/ MACADAMIA NUTS
From Bruce Zipes’ Bruce’s Bakery Cookbook (Random House, 2000)
Makes about 36 cookies

1 cup all-purpose flour
1/2 teaspoon baking soda
1/2 teaspoon salt
1/2 cup unsalted butter, softened
1/2 cup firmly packed light brown sugar
1/4 cup granulated sugar
1 egg
1 teaspoon vanilla extract
3/4 cup coarsely chopped macadamia nuts
6 ounces bittersweet chocolate, coarsely hopped
6 ounces white chocolate, coarsely chopped

Preheat the oven to 375 degrees Fahrenheit.

In a medium-sized bowl sift together the flour, baking soda and salt. Stir to combine.

Using an electric beater and in a large bowl, beat the butter until creamy. Add the sugars and beat another 2 to 3 minutes, until the mixture is light in texture and color. Scrape down the sides of the bowl and add the vanilla and egg, beating well.

On low speed beat in the flour mixture in two additions, scraping down the sides of the bowl with each addition. Stir in the macadamia nuts and chocolates.

Shape the dough into balls and place them two inches apart on ungreased cookie sheets. Bake for 8 to 10 minutes or until the edges are lightly browned. Cool the cookies on the baking sheets for 2 minutes and then transfer to wire racks to cool completely.

Squash!

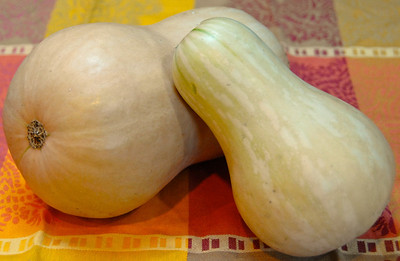
Stop to admire a friend’s flourishing fall garden and you may walk away with an armload of autumn vegetables. This happened to me two weekends ago when I visited college friends in Lancaster County, Pa. Although I had gone to Amish country empty-handed, I returned home with bags of homegrown pumpkins and butternut squash. Unquestionably, I was grateful for the unexpected gifts but I was also at a loss for what to do with all this food.

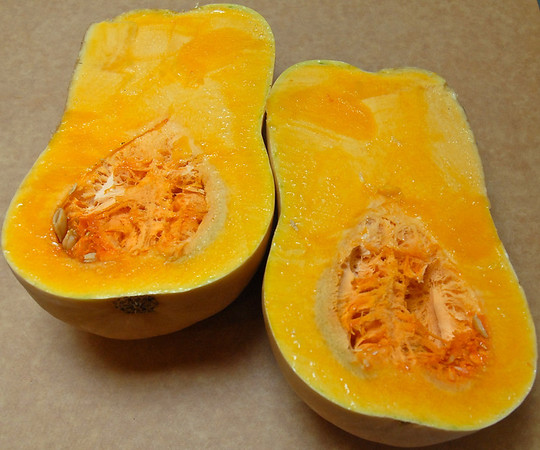
Considered by many cooks to be the best winter squash, the bowling pin-shaped butternut possesses a tough, smooth, tan skin. Cut into the skin with a heavy, serrated knife and you’ll find creamy, orange, fragrant flesh. Some compare its sweet, rich flavor to sweet potatoes while others liken it to roasted chestnuts. To me it tastes like butternut squash.

A versatile vegetable, this squash goes nicely with savory foods such as bacon, anchovies, cheese, garlic and onions. It also compliments such sweets as brown sugar, coconut, maple syrup, vanilla and yams.

In spite of its versatility I tend to use butternut squash in a limited number of recipes. Because it bakes, braises and mashes well, I feature it in gratins, soups, mashes and purees. While these are all great dishes, I should broaden my use of this lovely, low-calorie, high fiber veggie. I should expand my squash repertoire.

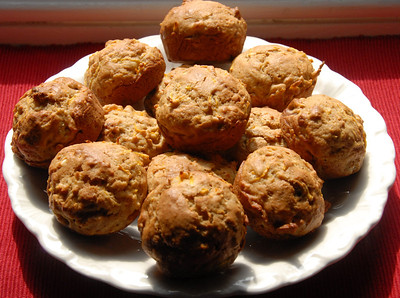
Cashing in on the vegetable’s sweetness, I turned some of my squash stash into muffins. As you might expect from a baked good dubbed “butter-nut-squash,” the following muffins include butter, nuts and squash.

BUTTER-NUT-SQUASH MUFFINS
Makes 2 dozen

3 cups all-purpose flour
1 teaspoon baking powder
1 teaspoon baking soda
1/2 teaspoon salt
1 teaspoon cinnamon
1/2 teaspoon nutmeg
1/4 teaspoon ground cloves
1 2/3 cups grated butternut squash (from 1/2 small squash)
1 cup roughly chopped walnuts
4 eggs, at room temperature
3/4 cup firmly packed light brown sugar
6 tablespoons unsalted butter, melted and cooled
1/3 cup milk, at room temperature
1 teaspoon vanilla

Preheat the oven to 400 degrees Fahrenheit. Grease 2 (12-cup) muffin pans and set aside.

In a large bowl sift together the flour, baking powder and soda, salt, cinnamon, nutmeg and cloves. Add the squash and nuts and toss to coat.

In a separate bowl whisk together the eggs, sugar, butter, milk and vanilla. Once the liquids are well-blended, add them to the flour mixture and stir until just combined. Don’t overmix the lumpy batter.

Spoon the batter into the greased muffin cups and bake for 20 to 22 minutes; when finished, the muffins will be golden brown on top. Remove the pans from the oven and allow the muffins to stand for 2 to 3 minutes. Remove the muffins from the pans and, placing them on a wire rack, allow them to cool before serving.

When in Singapore, Sling It!

To me, no trip to Singapore could ever be complete without trying a deliciously fruity, ever-so potent Singapore Sling. Face it. If you’ve been shoe horned into your economy class seat for 25-plus hours — or a paltry 19, if you can swing a non-stop flight — then you’ve earned a vibrant and strong chilled cocktail. You’ve earned a Singapore Sling.

Drop by Raffles Hotel and you’ll get not only the colorful drink but also its history. As the lore goes, it was here, in the hotel’s Long Bar, that bartender Ngiam Tong Boon whipped up the first Singapore Sling. Although the exact date remains unknown, it’s believed that he created his ‘cocktail for ladies’ sometime between 1907 and 1910.

The sling itself had been around since the turn of the 19th century. A fairly generic term, sling referred to a beverage containing brandy, gin, vodka or whisky, confectioner’s sugar and fruit juice.

What Boon had invented contained far more than just three ingredients. While the original recipe was lost in the 1930’s, notes from the previous decade indicate that his concoction included gin and lemon juice as well as the herbal liqueur Benedictine, cherry brandy, Angostura bitters and orange juice. Poured into either an old fashioned, high ball or Collins glass, it was topped off with club soda and a spiral lime peel.

It’s been said that no two Singapore Sling recipes are alike. After hours spent searching through bartender’s books and websites for the authentic Raffles Hotel drink, I’d have to agree. Maybe it was the Long Bar’s plantation-style atmosphere — palm frond fans, leather stools, wicker chairs and mahogany everywhere — or that I’d made it to sultry Singapore or that I hadn’t slept in days but I never found a recipe to match the complex flavor of that pink, ambrosial treat. Having said that, the following comes close to what I fell for.

SINGAPORE SLING
Cobbled together from sundry recipes, this version serves one but I always make at least two. With something this strong it’s best not to drink alone.

Serves 1

2 ounces gin
1 ounce Cherry Heering liqueur
1/2 ounce (1 TBSP) grenadine
1/4 ounce (1/2 TBSP) Benedictine
1/4 ounce (1/2 TBSP) Cointreau
4 ounces pineapple juice
1 ounce lime juice
1/2 teaspoon confectioner’s sugar
dash of Angostura bitters
ice cubes, for shaking
1 to 2 maraschino cherries, for garnish
1 paper cocktail umbrella or bamboo pick, for garnish

Place everything but the garnishes in a cocktail shaker and shake together until frothy and chilled. Pour the Singapore Sling, sans cubes, into a tall glass. Skewer the maraschino cherries onto a cocktail umbrella or pick and place them on the edge of the glass. Serve immediately.

Sizzlin’ Satay

Over Labor Day weekend I invited few friends over for Singapore Slings and chicken satay. You know how it goes. I visit a foreign country, buy and lug home 20 pounds of cookbooks and then have to justify my aching back and sagging bookshelves with exotic drinks and noshings.

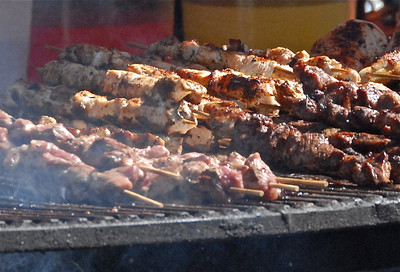
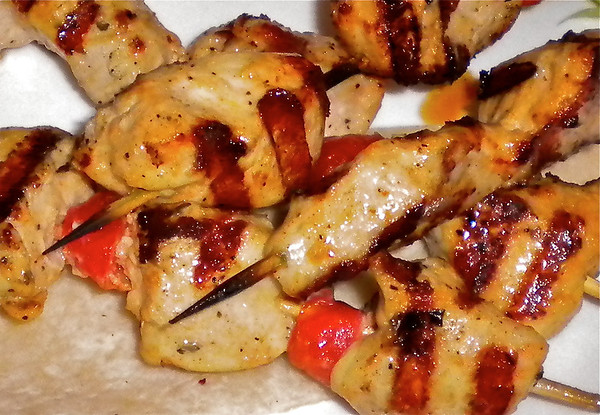
Depending on where you’re from, you may refer to what I grilled as a kebab, souvlaki, yakatori, espetada, shashlik or brochette. Then again, you might skip the fancy name and just say, “meat-on-a-stick.” However, if you’re eating Southeast Asian cuisine, you can only be talking about one thing — satay.

Some historians attribute satay to the Indonesian island of Java. There Muslim traders from India reputedly introduced the islanders to kebabs. Indonesian cooks transformed these grilled hunks of skewered meat into the marinated and grilled strips of chicken, fish or meat known as satay.

While Indonesia may lay claim to its creation, many Southeast Asian countries feature satay in their cuisines. It’s especially popular in Thailand, Malaysia and Singapore. Served with a dipping sauce made from boiled ground peanuts, satay makes a lovely appetizer, main dish and accompaniment to a chilled Singapore Sling. More on that beverage later. For now . . .

SINGAPOREAN CHICKEN SATAY
Adapted from Sharon Wee’s Growing up in a Nonya Kitchen (Marshall Cavendish, 2012)
Serves 4 to 6

1 1/2 tablespoons granulated sugar
1 tablespoon ground coriander
1 tablespoon minced galangal
1 teaspoon cumin
1 teaspoon ground turmeric
1/2 teaspoon salt
1/4 teaspoon fennel seeds
1/2 stalk lemongrass, roughly chopped
1 large shallot, roughly chopped
5 cloves garlic
1/4 cup coconut milk
1 1/2 pounds skinless chicken breasts, cut into 1-inch cubes
olive oil, for greasing
bamboo skewers, soaked in water for 30 minutes before using
peanut sauce, optional, for serving

In the bowl of a food processor or blender pulse together the sugar, coriander, galangal, cumin, turmeric, salt, fennel, lemongrass, shallot, garlic and coconut milk until a thick, fairly smooth marinade forms.

In a large bowl or dish toss the marinade and chicken cubes together until all the cubes are coated. Cover the container with plastic wrap and refrigerate for a minimum of 1 hour or maximum of 24 hours.

Preheat a grill on high. Evenly spread a layer of olive oil over a sheet of aluminum foil; the foil should be large enough to cover your grill grate.

Remove the chicken from the refrigerator and thread the cubes onto the presoaked skewers, leaving about an inch between each piece. Depending on the length of the bamboo, you should fit either 3 or 4 cubes onto a skewer.

Lay the greased aluminum foil, oil-side up, on the preheated grill and place the skewers on it. Cover and cook, turning periodically, until the chicken is firm, golden and cooked through, about 8 to 10 minutes. Depending on the size of your grill, you made need to do this in batches.

Serve the chicken satay on the skewers and optionally alongside store-bought peanut sauce. Note that homemade peanut sauce will be covered in a future Kitchen Kat entry.

Pizza! Pizza!

For years I had a problem with pizza. What I liked and what I ended up eating were two vastly different things. I wanted crunchy yet chewy thin crusts with fresh, flavorful toppings. What I got were gummy, limp slices with bland and greasy cheese that oozed onto my hands, shirt, jeans . . ..

Turned off by floppy, oily take-away, I periodically tried to make my own pies. While the recipes in The Joy of Cooking, Fanny Farmer and Marcella Hazan’s Essentials of Classic Italian Cooking made perfectly respectable pizzas, none resulted in the crisp, wafer-thin crust that I craved.

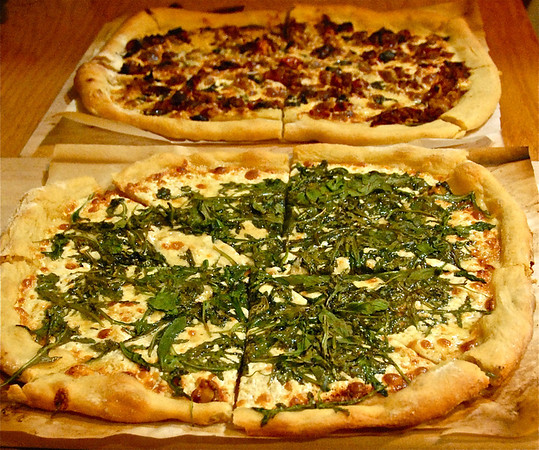
Around the time that I had resigned myself to mediocrity my husband and I had dinner at the home of our friends Rob and Brande. On that fateful night we ate Rob’s ethereal, homemade pizzas. With their firm yet light crusts, hearty sauces and fresh, wholesome toppings these pizzas ranked among the best that I’d ever consumed. With one amazing meal I rediscovered my love of this food.

After months of badgering Rob for lessons, last weekend I walked, step-by-step, through his pie-making process. Needless to say, it was a fun way for this food-lover to spend a Saturday night. It was also a great opportunity to pick up tips for fellow fledgling pizza bakers.

Usually recipes contain at least one ingredient that sets them apart from all others. In Rob’s case it’s vital wheat gluten. Found in the baking aisle of most grocery stores, this powdery, high protein substance bumps up the elasticity of baked goods. Want a chewier pizza? Add vital wheat gluten.

Another inside scoop pertains to parchment paper. Cut your parchment paper so that it matches the dimensions of your pizza stone. This way you don’t have paper slopping over the sides or pizza baking directly on top of the stone. How sensible!

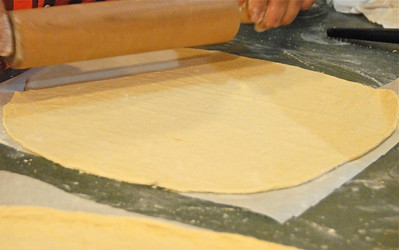
Once your dough has risen, you’ll divide it into two or three balls — the more balls you shape, the thinner the dough and resulting crust will be. Using a flour-dusted rolling pin, roll out a dough ball so that it covers the parchment. You’ll then brush the top with olive oil that has simmered alongside sliced garlic, fresh oregano and crushed red pepper. This infused oil was my husband’s favorite tip of the night. Who needs messy tomato sauce when you can slather a warm, zesty oil over the surface of your pie?

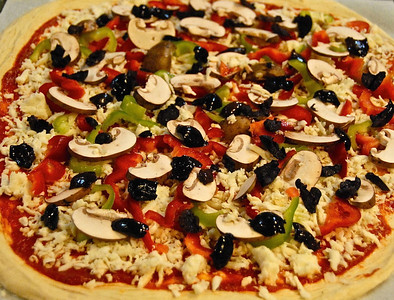
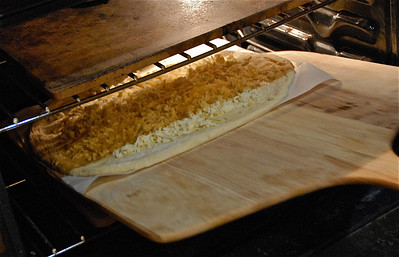
At this point you’ll add your toppings. Layer on the cheeses, veggies, meats — whatever you desire. Dough dressed, you’ll slide a pizza peel beneath your parchment paper and ease your pie into your preheated oven and onto the preheated pizza stone. Twelve to sixteen minutes later you’ll have a crisp and delectable repast.

Note that, although I’d been against adding more gadgets to my already overstocked kitchen, I am quite pleased with the acquisitions of pizza peel and stone. How else could I have gotten my pies into and out of the oven without dropping them on the tile floor, oven door or fat cat who lingers on the floor by the oven door? Likewise, how could I have gotten them to cook evenly and completely? I couldn’t have.

ROBBIE P’S PIZZA DOUGH
Makes 2 to 3 (8-slice) pizzas

2 1/2 generous cups all-purpose flour
1/2 generous cup cornmeal
pinch kosher salt
1 tablespoon vital wheat gluten
2 generous teaspoons dry active yeast
1/4 teaspoon honey
2 cups lukewarm water
2 1/2 teaspoons olive oil, plus more for greasing hands

In a large bowl whisk together the flour, cornmeal, salt and vital wheat gluten.

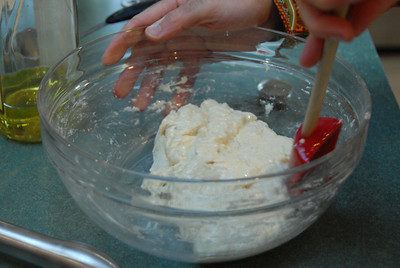
In a separate bowl mix together the yeast and honey. Add the water to the yeast and honey and stir to combine. Pour almost all of the water into the flour mixture. Stir to combine. If the dough seems too dry, add the rest of the water and stir again. Add the olive oil, stir, and cover the bowl with cling wrap.

Place the bowl in a warm spot and allow the dough to rise for a minimum of 3 hours. (Note that the dough can be made a day in advance. Once the dough has risen, divide it into 2 to 3 balls, place each in a well-oiled bowl, cover and refrigerate.)

Cut two to three sheets of parchment paper to match the size of your pizza stone.

Preheat your oven to 550 degrees Fahrenheit.

Once the dough has risen, remove the cling wrap. Place a small mound of flour onto a sheet of cut parchment paper.

Rub some olive oil on your hands. Remove the dough from the bowl and divide it into two or three equal parts. Place the remaining dough into 1 or 2 oiled bowls and set aside.

Fold the dough several times and then make it into a ball. Put the ball on top of the flour and, using your hands and flipping it over and over, shape it into a square. (If you have a round pizza stone, you’ll shape it into a circle.)

Roll out the dough until it’s the shape and size of the parchment paper. Crimp the edges all the way around and then brush olive oil over the top.

From here you’ll layer sauce and/or cheese, vegetables, meats, etc. onto the pizza. Bake at 550 degrees Fahrenheit for 12 to 16 minutes, checking periodically to ensure that the pizza doesn’t overcook. Remove and serve hot.