Latest Posts

Awesome Apple Kuchen

One of the many things that I love about travel is how it opens my eyes to other cuisines. Prior to a recent trip to Switzerland, I hadn’t considered how the country’s cooking has been influenced by its proximity to Germany, France and Italy. Then I traveled to Geneva and beyond and started ordering from Swiss menus. Alongside the expected Swiss fondue, raclette and roesti were Italian pizzas, French tarte tatins and German pretzels and kuchens. Not exactly what I had imagined when I thought of Swiss food.

While in Switzerland, I did have a ridiculous number of meals featuring locally produced breads and Appenzeller, Gruyere and Emmental cheeses. Although I could happily eat bread and cheese seven days a week, I needed to balance out the abundance of these dairy-based dinners. Forget Swiss muesli, cabbage salads or barley soup. I went straight to the country’s fruit-filled offerings. Out of the myriad of fruit treats available, my favorite was the German-inspired apple kuchen.

In Germany kuchen means cake. In Switzerland it refers to a sweet laden with fresh fruit — often apple — and blanketed with toasted almonds and/or confectioner’s sugar. Depending upon the region or canton in which I was, apple kuchen may or may not have been yeast-based. In some places it resembled a pie more than a cake. A few kuchens even contained a layer of cheese or custard beneath sliced or pureed apples. As I craved lighter, uncomplicated sweets, the cheese or custard seemed like overkill but that didn’t stop me from eating them.
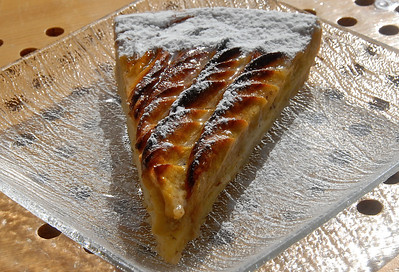
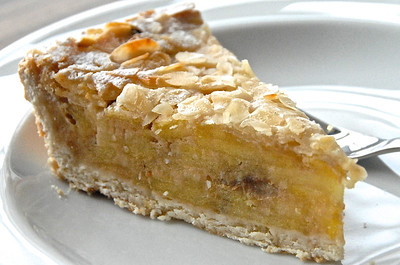
Apple kuchen in Zermatt. More like a tart than a cake but still delicious.

Back at home I’m now experimenting with my own apple kuchen recipe. The following features the best of what I enjoyed in Switzerland — layers of thinly sliced apples infused with sugar and a splash of lemon juice and topped with a thin crust of lightly toasted almonds and dusting of confectioner’s sugar.

APPLE-ALMOND KUCHEN
Although this is lovely at room temperature, I actually prefer to eat it chilled, straight out of the refrigerator. The choice is yours.
Serves 8

1/2 cup whole blanched almonds
1/3 cup plus 1 teaspoon granulated sugar
3/4 cup all-purpose flour
1/2 cup (1 stick) unsalted butter, at room temperature
1/4 cup almond paste
2 1/4 pounds (5 to 6) Granny Smith or other moderately sweet, crisp apples, peeled, cored and thinly sliced
1 tablespoon lemon juice
1/2 cup sliced almonds
Confectioner’s sugar, for garnish

Preheat the oven to 350 degrees Fahrenheit. Grease and flour a 9″ x 2″, round cake pan and set aside.

Place the whole almonds and 1 teaspoon sugar in the bowl of a food processor and process until finely ground. Add the flour and pulse to combine. Add the butter and almond paste and process together until a crumbly dough forms.

Remove the dough from the bowl and press it into the cake pan, evenly covering the bottom and sides. Bake for 5 to 10 minutes, until the crust has set. Remove from the oven to cool.

In a large bowl toss together 1/3 cup sugar, apples and lemon juice. Layer the fruit over the crust, pressing down on the apples so that they all fit into the pan. Bake for 30 to 40 minutes, until the crust has browned and the apples have softened.

Remove the kuchen from the oven. Spread the sliced almonds over the top. Bake for another 15 to 20 minutes, until the almonds have turned golden brown. Cool completely on a wire rack. Dust with confectioner’s sugar before serving.
A Generous Dose of Minestrone Soup

I, along with pretty much everyone whom I know, have been plodding through this season with a runny nose and sore throat. While friends reach for Neti pots, echinacea or Benadryl to beat the sniffles, I turn to the cold remedies of my childhood — fitful naps, bad B-movies, good books and warming soups.

As a kid, I invariably received a course of Jewish penicillin as well as doses of minestrone and stracciatella. Sound unusual? Keep in mind that I grew up in an Italian-American community where my parents’ favorite restaurant, Egidio’s, doled out tasty, Italian soups.

Minestrone remains one of my preferred cold cures. Chocked full of wholesome vegetables and soothing broth, it goes down easy and warms me to the core.

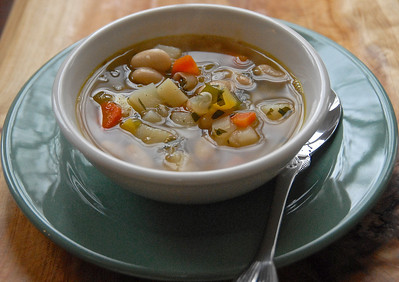
The minestrone that I make is based upon what chef-owner and cookbook author Laura Pensiero serves at her Rhinebeck, NY restaurant, Gigi Trattoria. Light, wholesome and flavorful, her vegetarian-friendly, Northern Italian soup features diced potatoes, beans, carrots, celery and fresh herbs. Mine does, too.

VEGETARIAN MINESTRONE
While I prefer using homemade vegetable stock in this soup, you can substitute a good quality, low-sodium stock for homemade.

Serves 4 to 6

1 tablespoon extra virgin olive oil
1 small carrot, chopped
1 stalk celery, diced
1 small yellow onion, diced
2 cloves garlic, minced
1/2 teaspoon salt, divided, plus more as needed
1 russet potato, diced
1/2 small yellow squash, halved, seeded and sliced
4 cups vegetable stock
2 cups water
3 tablespoons chopped fresh flat-leaf parsley
1 1/2 teaspoons (about 1 stem) chopped fresh rosemary
1/2 teaspoon dried oregano
1 (15.5-ounce) can cannellini beans, rinsed and drained
Ground black pepper, to taste
Parmesan cheese, optional, for serving

In a large saucepan heat the olive oil over medium heat. Add the carrot, celery, onion, garlic and half of the salt and sauté over medium heat for 5 minutes or until slightly softened. Add the potato and squash and cook for another 5 minutes before adding the stock, water, parsley, rosemary and oregano and stirring to combine.

Bring the ingredients to a boil over medium-high heat and then reduce the heat to medium-low. Simmer for 15 minutes.

Add the cannellini beans and continue to cook over medium-low for 15 to 20 minutes, until all the vegetables have softened and the flavors have melded together. Add ground black pepper to taste, stir to combine and add more salt and pepper if needed.

Ladle the minestrone into soup bowls and optionally grate Parmesan cheese over top of each. Serve hot.

A Love Affair with Greek Cookies

KOURABIEDES, GREEK SHORTBREAD COOKIES

KOURABIEDES, GREEK SHORTBREAD COOKIES

This year Valentine’s Day fell on the very same night that for the past six years my literary fiction book group has met. I had a tough choice to make; eat a romantic dinner with my husband or moderate a discussion of Jeffrey Eugenides’ The Marriage Plot. In the end I did what any lifelong, insatiable reader would do. I baked a batch of Greek cookies, invited Sean to the book group and spent the evening with some of my favorite people, treats and activities.

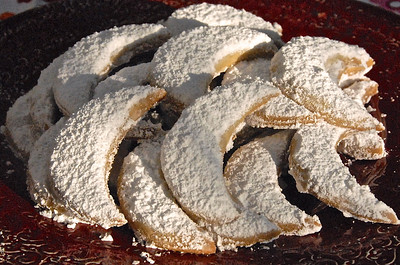
The cookies that I baked are kourabiedes. Reminiscent of shortbread cookies, these crescent-shaped sweets are usually consumed at holidays and special occasions. Hence my decision to serve them on Valentine’s Day. Okay, that isn’t the only reason behind my making them. Flavored with splashes of vanilla extract and anise liqueur and blanketed with soft, fluffy confectioner’s sugar, they have been my cookie of choice since the ninth grade.

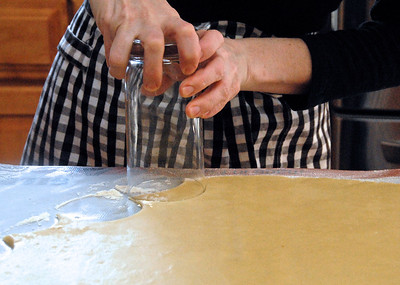
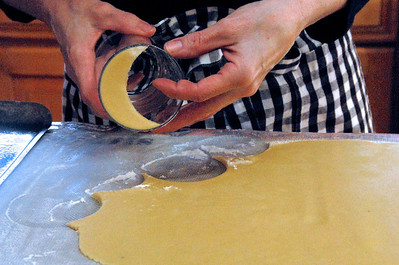
CUTTING OUT THE CRESCENT-SHAPED COOKIES

CUTTING OUT THE CRESCENT-SHAPED COOKIES

My addiction started in the home of one of my closest childhood friends. The daughter of Greek immigrants and restaurant owners, Nickie always had access to the most amazing baked goods. Drop by my parents’ house and you’d receive store-bought cupcakes or chips. Go over to Nickie’s and you’d enjoy platters of freshly baked baklava and those wonderfully velvety, powdered sugar-laden kourabiedes.

CRESCENT-SHAPED SHORTBREAD COOKIES

PERFECT CRESCENT!

It took only one bite to hook me for life. Thanks to Nickie’s mom, for years I brought plates of these cookies home to my parents. After college I made numerous trips back to the East Coast with boxes of them. At my wedding reception kourabiedes featured prominently at the cookie table. In recent years, when traveling through Greece, I’ve made sure to sample every bakery’s, market’s and truck stop’s version. Yeah, I’m completely smitten.

Even if you never travel to Greece or become, like me, “Greek by osmosis,” you can easily create these divine sweets. Just mix together a simple cookie dough and flavor it with vanilla and a shot of ouzo. Roll out the dough and, using either a cookie cutter or water glass, cut out a series of crescents. Bake, shake sugar over the top and enjoy. It’s that simple.

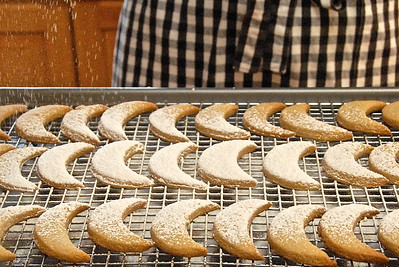
KOURABIEDES

DUSTING THE KOURABIEDES WITH CONFECTIONER’S SUGAR

Fittingly enough, my recipe comes from the woman who inspired this lifelong love of kourabiedes. From her kitchen to mine to yours . . .

KOURABIEDES
Recipe courtesy of Vasiliki Kolovos
Makes about 4 dozen

2 sticks (1/2 pound) unsalted butter, at room temperature, plus more for greasing baking sheets
1/4 cup sugar
1 egg yolk
1/2 teaspoon vanilla extract
2 1/2 tablespoons ouzo (anise-flavored liqueur)
About 2 cups flour, divided and sifted
1/2 teaspoon baking powder
Confectioners’ sugar

Preheat the oven to 350 degrees Fahrenheit. Grease two baking sheets and set aside.

Using an electric mixer, beat the butter until light and fluffy. Add the sugar and egg yolk and continue beating until well blended. Add the vanilla and ouzo and beat until combined.

Mix 1 cup flour with the baking powder and add this to the butter mixture. Add about another 1 cup flour, a little at a time. You may need less — or more — flour to make a dough that is supple but not sticky.

Place the dough on a flat, flour-dusted work surface and roll it out so that it’s 1/2-inch thick. To make crescent shaped cookies, use either a crescent-shaped cookie cutter or the lip of a water glass. If using a glass, place roughly half of the lip onto the dough and press downward. Alternatively, use the glass to make circles or with your hands roll dough into small balls.

Put the cookies 1 inch apart on the greased baking sheets and bake for 15 to 20 minutes, until the tops are light brown. Cool for 5 minutes, then remove the cookies from the sheets, place them on cooling racks and generously sift confectioners’ sugar over top.

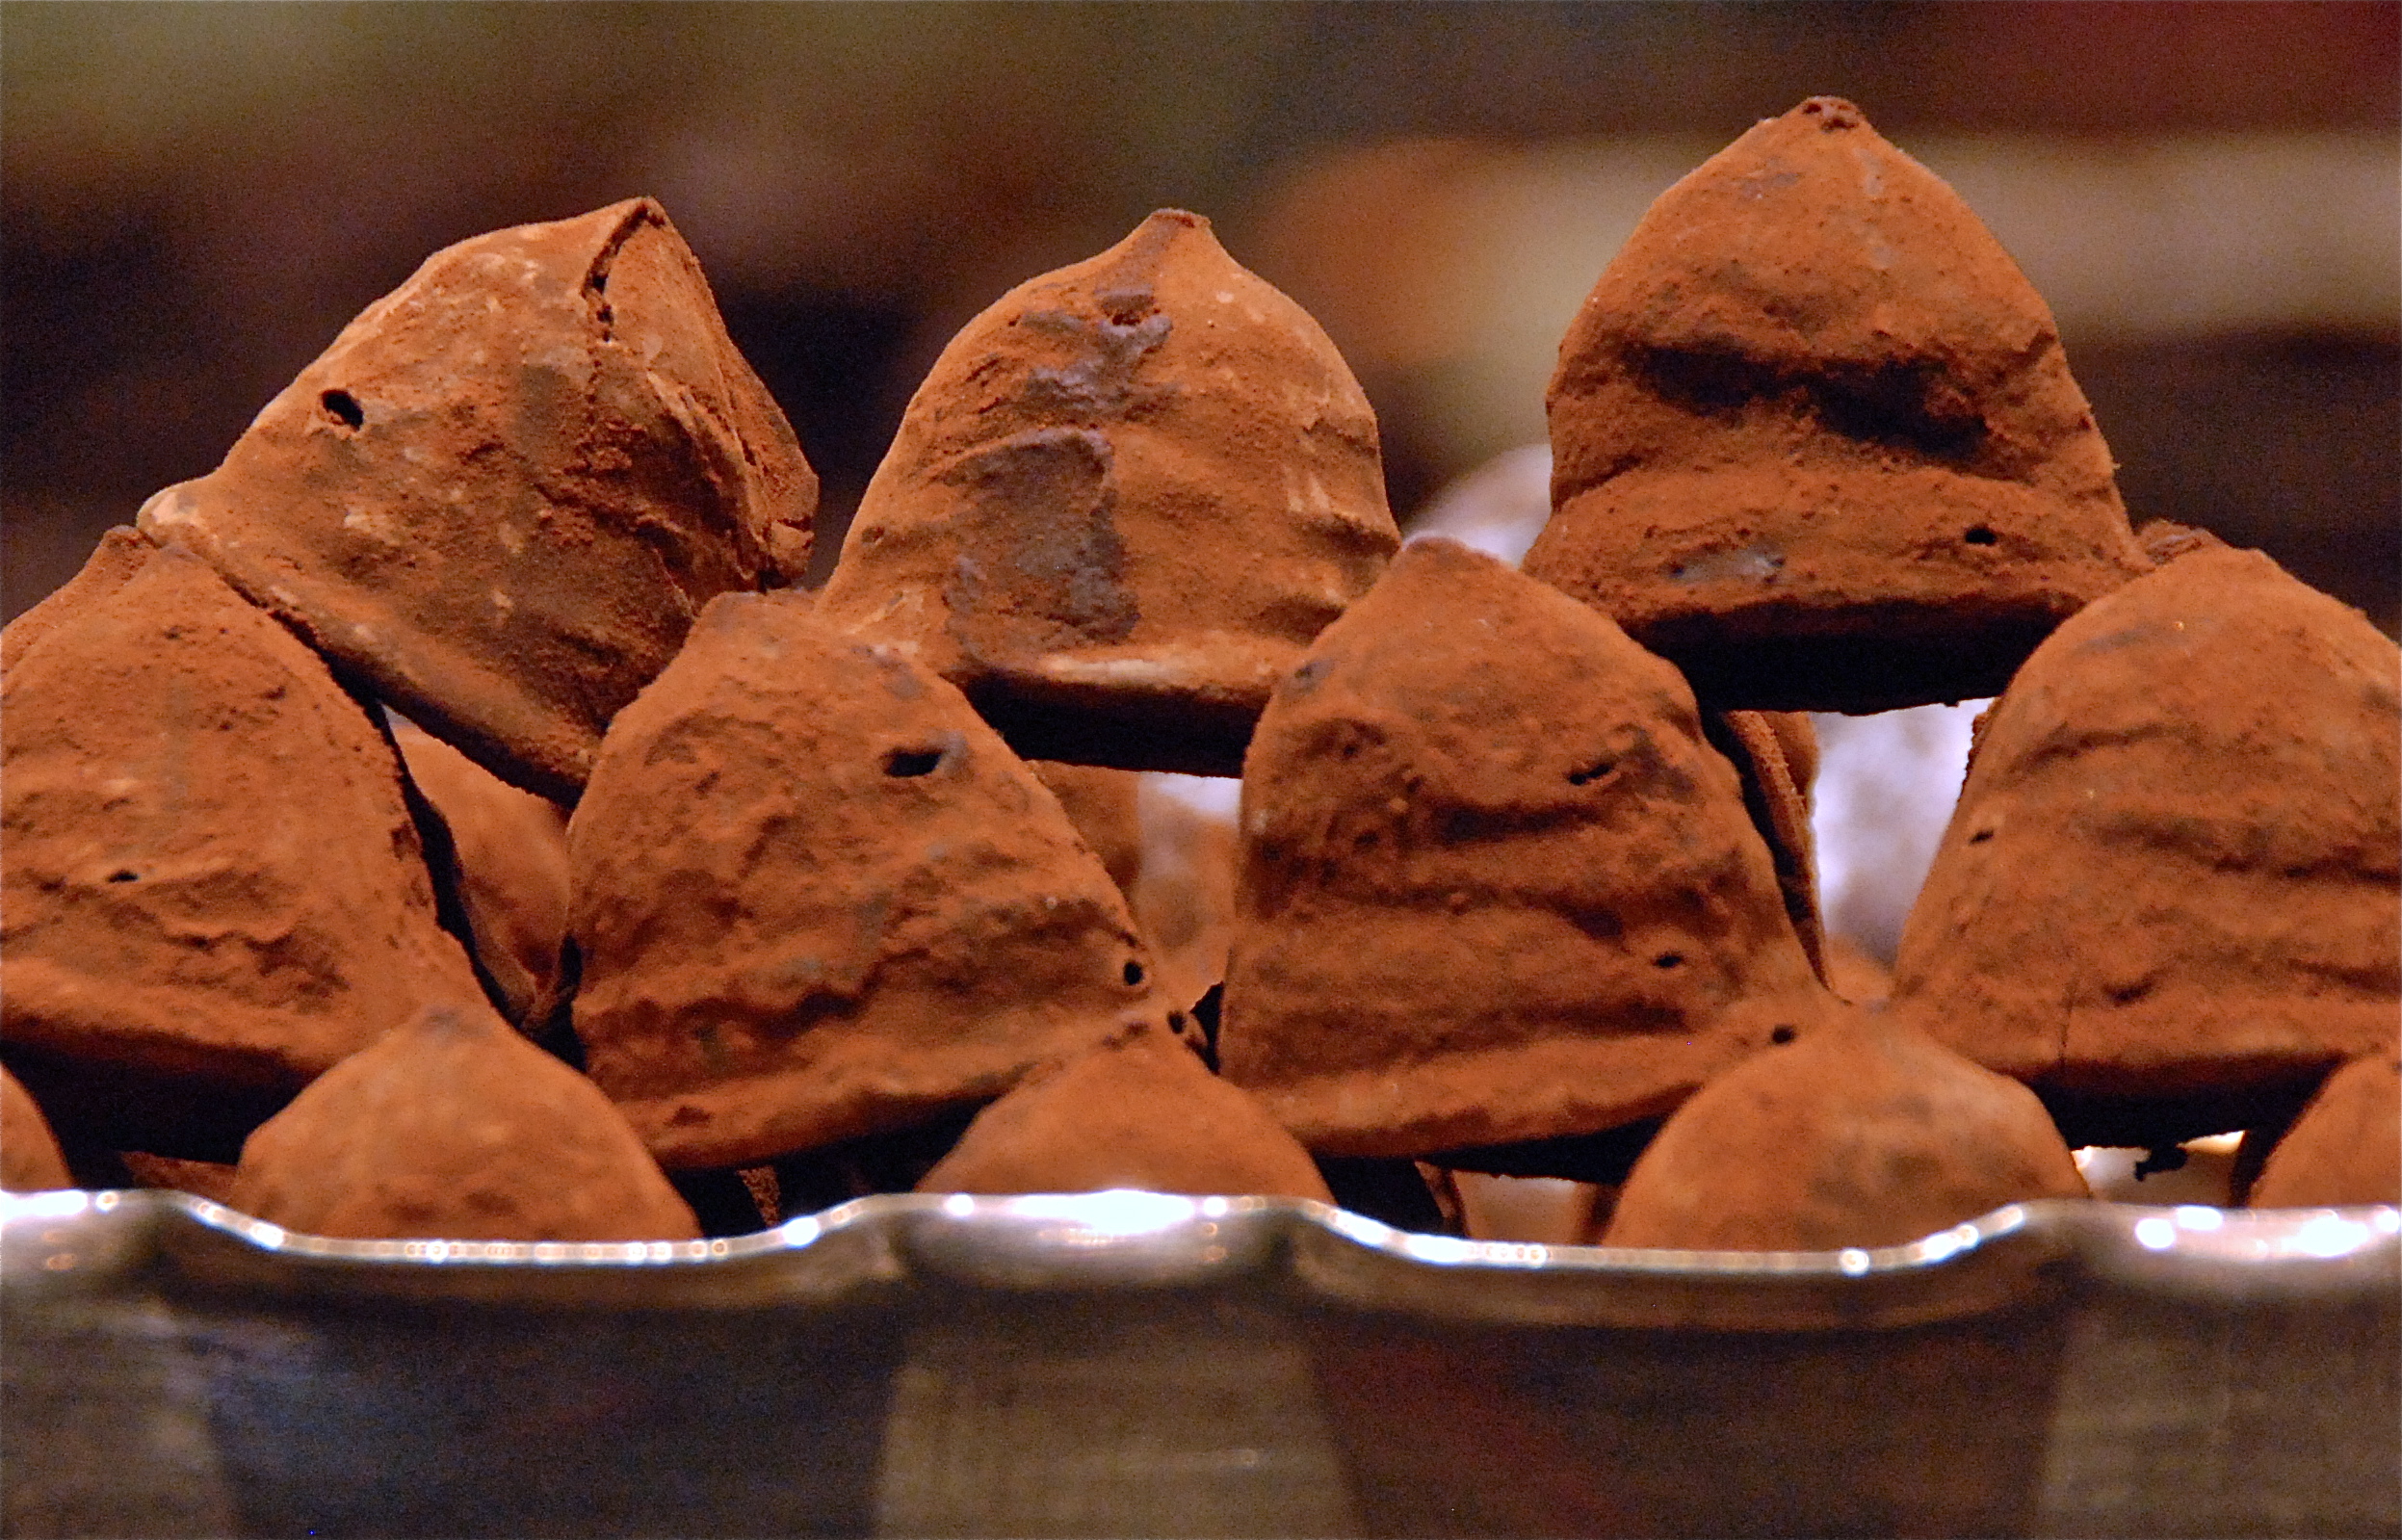
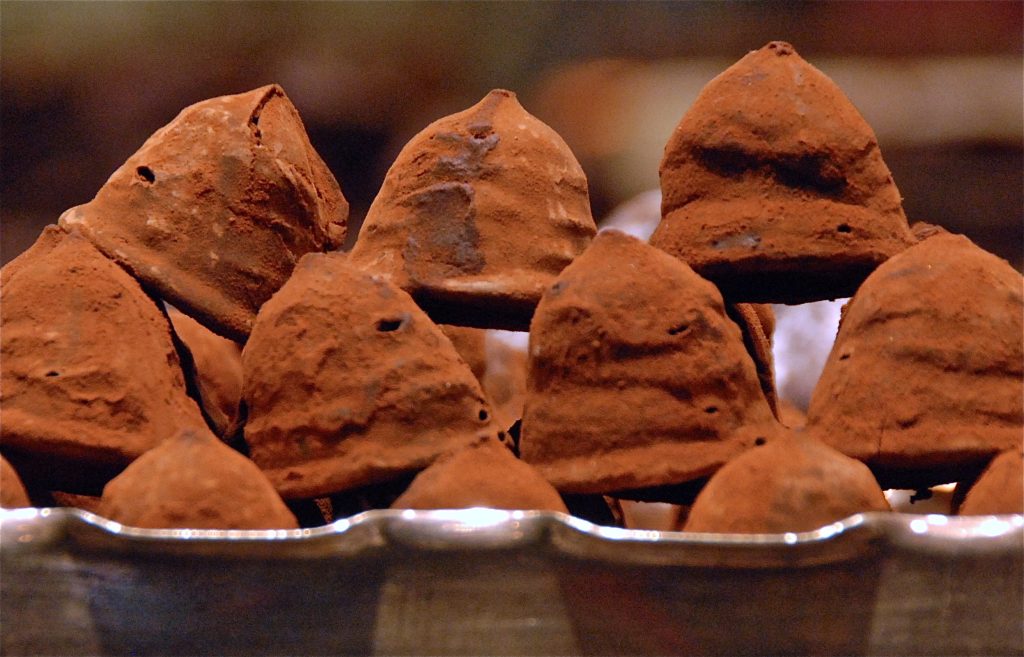
dark chocolate truffles

Truffles for Valentine’s Day and Beyond!

dark chocolate truffles

Truffles in a Brussels candy shop

Although I am one of the least craftsy people alive, I love making Valentine’s Day gifts. Specifically, I adore homemade, chocolate truffles. Shaped like the plump, lopsided mushrooms for which they’re named, hand-rolled truffles are a snap to prepare. If you can melt chocolate and don’t mind getting the palms of your hands a little gooey, you can create these sweets in no time.

Dating back to 19th century France, truffles consist primarily of ganache, a blend of chopped white, milk or dark chocolate, heavy cream and optional smidgen of butter. To make ganache, cream is heated until scalding and then poured over the chocolate bits. Stirred together until smooth and creamy, the mixture is set aside to cool. Depending upon the ratio of cream to chocolate and the amount of time cooled, ganache can be used as a filling, icing or, as in the case of truffles, candy.

As much as I like chocolate, I do think that truffles benefit from a dash of flavoring. Liqueurs, extracts, fruit purees or spices lend these bite-sized confections a bit of zing. Slivered or ground nuts, chopped chocolate, cocoa powder or confectioner’s sugar also boost their taste and dress up their lumpy look.

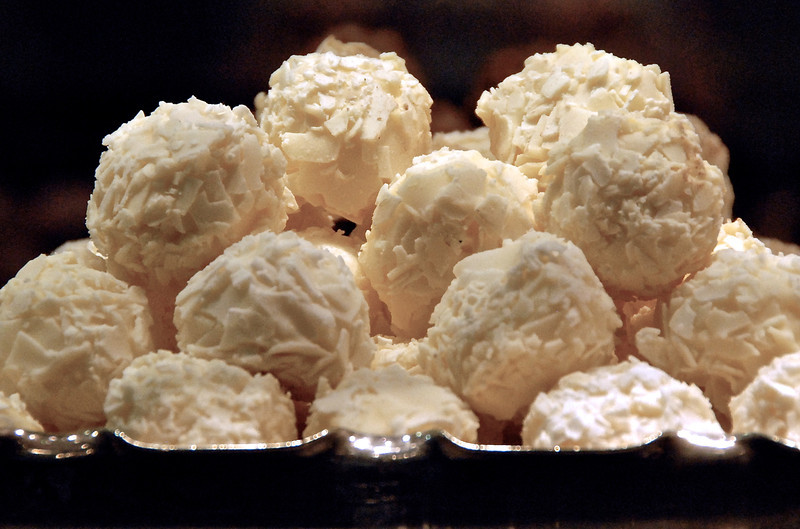
white chocolate truffles

White chocolate truffles

The beauty of the following recipe is how easily it can be altered to suit your tastes. Don’t care for raspberry? Use orange, hazelnut, almond or coffee liqueur to flavor your candy. Prefer your chocolates smooth instead of crunchy? Replace the almonds with cocoa powder.

CHOCOLATE RASPBERRY TRUFFLES
Placed in an air-tight container and refrigerated, truffles can keep between 2 to 3 weeks. Frozen, they last for around 2 months.

Makes 25 to 30

1/2 cup heavy whipping cream
9 ounces semi-sweet chocolate chips
1 tablespoon plus 1/2 teaspoon raspberry liqueur
1/3 cup almonds, without shells or skins
1/2 teaspoon granulated sugar

Place the cream in a small saucepan and bring to a boil. Meanwhile, put the chocolate chips in a medium-sized bowl.

Once the cream has begun to boil, pour it over the chips. Stir the two together until the chips have melted and the ganache is smooth and creamy in texture.

Add the raspberry liqueur to the ganache and stir until well combined. Cover the bowl with plastic wrap and refrigerate for 3 hours.

In a frying pan, toast the almonds until they become a light, golden brown. Place the almonds and sugar in the bowl of a food processor and pulse until the almonds are finely chopped. Pour the almonds into a small bowl and set aside.

Remove the bowl of ganache from the refrigerator and uncover. Using a melon baller, scoop out a portion of the chocolate. Roll it between the palms of your hands, forming a ball.

Drop the truffle into the bowl of chopped almonds and roll it around until it is completely covered with nuts. Place the truffle on a baking sheet or in a container lined with waxed or parchment paper. Repeat the ball forming and coating steps until all the truffles have been made. Refrigerate the batch until ready to consume.

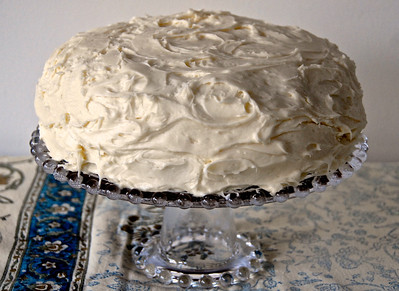
The Best Carrot Cake Ever

My husband likes to say that he’s a simple man but I’ve never known anyone to have a more complicated relationship with carrots than he. Just try sneaking an orange sliver into a stew, pot pie or casserole. With the quick flick of his spoon the offending veg flies off his plate and onto mine. Forget about slipping raw, julienned carrots into a salad or slaw. The cat, who eats anything, ends up eating them. However, if you ask Sean what his favorite dessert is, his answer will be carrot cake.

If you like to cook and live with someone who has a favorite dish, chances are that you’ve tried to perfect it. Such is the case with me and carrot cake. After countless years and cakes I found perfection yesterday in the following recipe. I’d love to claim that I conjured up this winsome sweet on my own but I can’t; the recipe comes courtesy of my husband’s aunt, Nancy Haberberger. Sweet but not cloying, moist but not soggy, flavorful but not overly rich, it is, as my father-in-law states, the best carrot cake ever.

As I tend to tinker with recipes, I made a few minor changes to Nancy’s cake. To plump up the raisins, I placed them in a pan with enough water to cover and simmered them over medium heat for 5 minutes. I then took the pan off the burner and allowed the raisins to soften for 10 minutes. From there I drained, dried and added them to the batter. If you prefer chewier raisins, feel free to ignore this step.

Because I had used springform pans and made a layer cake, I doubled the ingredients for the icing; that way I had a generous amount of frosting to spread between and over the cakes. I also increased the amount of vanilla to 1 1/2 teaspoons or, as I’d doubled the recipe, 1 tablespoon. I likewise added 1 tablespoon of milk to the icing so that it would spread more smoothly.

AUNT NANCY’S CARROT CAKE
Serves 10 to 12

For the cake:
1 cup firmly packed brown sugar
1 cup granulated sugar
1 1/2 cups vegetable oil
4 eggs
2 cups all-purpose flour
2 teaspoons baking soda
2 teaspoons ground cinnamon
1 teaspoon salt
3 cups grated carrots
1 cup raisins
1 cup nuts (walnuts, roughly chopped)

For the icing:
8 ounces cream cheese
1 stick unsalted butter, softened
1 teaspoon vanilla extract
1 pound confectioner’s sugar

Preheat the oven to 300 degrees Fahrenheit. Grease and flour a 9 x 13-inch baking pan or two 9-inch springform pans. If using springform pans, line the bottom of the pans with parchment paper before greasing and flouring.

Using an electric mixer and in a large bowl, beat together the sugars, oil and eggs.

In a separate bowl sift together the flour, baking soda, cinnamon and salt. Add the dry ingredients to the liquids, beating on low speed until incorporated and then beating on high until well-blended. Scrape down the sides of the bowl and then add the carrots, nuts and raisins. Mix together either on low speed or by hand until combined.

Pour the batter into the prepared pan(s). Bake for 45 minutes or until a toothpick inserted in the center comes out clean. Place the cake pan(s) on a wire rack to cool. If using springform pans, after 10 minutes remove the cakes from the pans, invert them onto cooling racks and peel the parchment paper from the bottom. Cool completely before icing.

To make the icing, place the butter and cream cheese in a large bowl. With an electric mixer beat until smooth and creamy, about 5 minutes. Add the vanilla and beat again to combine. Slowly add the confectioner’s sugar, mixing on low speed until incorporated and then beating on high speed until blended.

Using a knife or icing spatula, spread the icing evenly over the cake(s). Serve.

Perfecting Pita

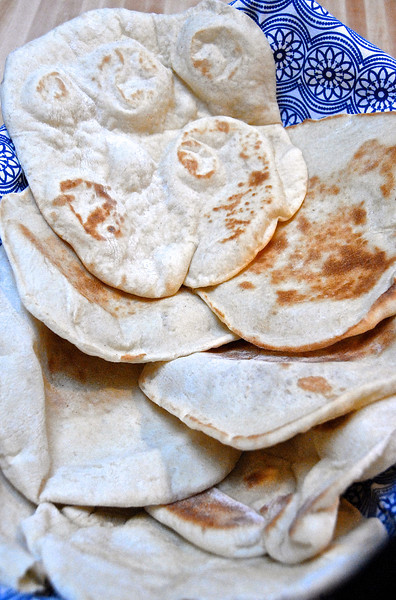
PITA

BASKET OF SOFT, HOT-FROM-THE-OVEN PITA

I’d call this my winter of eating globally but, truthfully, my interest in world cuisines started early and largely as a result of my Western Pennsylvania hometown. A former steel city, New Castle boasted of an array of ethnic backgrounds and extraordinary foods. Forget bland white bread, burgers, tomato soup and apple pie. I grew up eating such exotic, Mediterranean specialties as spinach pie (spanikopita), stuffed grape leaves (dolma), pasta fagioli and tiramisu.

A childhood favorite that I still adore is pita. Unfortunately, depending on whose you’ve eaten, this Mediterranean flat bread is either an ethereal vessel for falafel and souvlaki or a dry, tough disc that’s impossible to chew. In recent months, as markets and Mediterranean cafes change their bakeries, I’ve been stuck with the unappetizing kind. Because I love the tag team of hummus and pita — I could eat it every day of the week — I’ve become annoyed, really annoyed, with the lousy pita supply.

Enter homemade pita. Soft and airy, it’s a far cry from stale, store-bought bread. Plus, it’s so quick and easy to make; I’m embarrassed that I didn’t start baking my own sooner.

PITA DOUGH

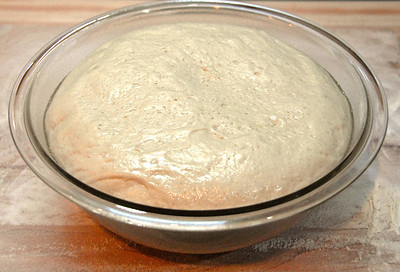
THE RISING OF THE PITA DOUGH

For my first attempt I followed the pita recipe from The Joy of Cooking (Scribner, 1997). With its simple ingredients, concise instructions and the book’s excellent track record it was an obvious starting point.

The recipe didn’t disappoint. After two hours of watching the dough rise and three minutes of baking it I had one mini and eight large pitas. Soft, fluffy and flexible, they left the stale, mass-produced versions in the dust.

BAKING PITA

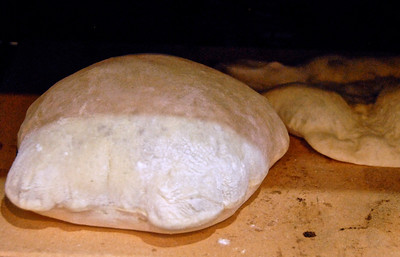
PITA PUFFED UP IN THE OVEN!

At this point I won’t claim to have mastered pita making. Compared to commercially baked pita, my loaves seem a bit large. They may also be a tad too light to hold hot, juicy foods such as grilled chicken or fish. They are perfect, though, for scooping up hummus and enveloping salads.

For now I’ll pass along The Joy of Cooking recipe, sans tweaks. Check back in the coming weeks for updates as I attempt to perfect pita. Up next . . . what to stuff into your homemade Mediterranean flat bread.

PITA BREAD
from Rombauer et al’s The Joy of Cooking (Scribner, 1997)
Makes 8 pitas

3 cups bread flour
1 1/2 tablespoons sugar
1 1/2 teaspoons salt
4 teaspoon active dry yeast
2 tablespoons melted butter
1 1/4 cups room temperature water

In a large mixing bowl or heavy mixer combine the flour, sugar, salt and yeast. Add the butter and water and mix to combine. Using either your hands or the dough hook on your mixer, knead for 10 minutes or until the dough is smooth, soft and elastic. Add extra water as needed; the dough should not be sticky.

Transfer the dough to an oiled bowl and turn it over once to coat. Cover with plastic wrap and allow to rise at room temperature until doubled in volume, 1 to 1 1/2 hours.

Punch down the dough, divide equally into 8 pieces and roll each piece into a ball. Cover and allow to rest for 20 minutes.

Preheat the oven to 450 degrees Fahrenheit. If you don’t have a pizza or baking stone, place a baking sheet upside down on an oven rack to serve as your hearth.

On a lightly floured surface, roll out each ball into a round that’s 8-inches in diameter and about 1/8-inch thick. Spray the stone or baking sheet with water, wait 30 seconds and then place as many dough rounds as will fit without touching onto the hearth. Bake until the dough puffs up, about 3 minutes, wait 30 seconds and then remove each loaf to a cooling rack. Repeat until all the dough rounds have baked.

Simmering Heat of Szechuan Pepper Shrimp

Another week into the new year and I’m still fixated on lighter fare. Although Asian cuisine continues to dominate my dinner menus, right now it’s not so much a specific dish as it is a spice, Szechuan pepper, that I crave. With its mildly hot, slightly piquant tang Szechuan pepper brings a clean, wholesome warmth to my winter cooking.

SZCHECHUAN PEPPER

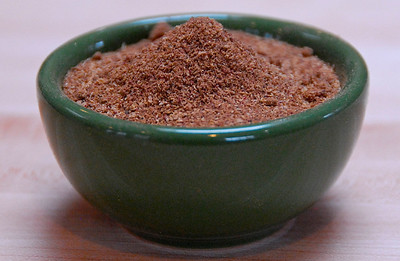
GROUND SZCHECHUAN PEPPER

Contrary to its name, Szechuan pepper doesn’t belong to the peppercorn family or even grow on vines as peppercorns do. Instead these reddish-brown berries come from prickly ash trees. Originating in the Szechuan province of China, they also appear in parts of Japan, India, Tibet and Indonesia. Dried, the aromatic berries are sold whole and in powdered form. With a little searching I can find both whole and ground Szechuan pepper at Asian markets and well-stocked spice shops such as Kalustyan’s.

Cooks often use Szechuan pepper to dress up spare ribs, pork loin or duck. Because I’m not a pork or beef eater, I add it to my favorite protein source, seafood. When tossed together with sea salt and possibly another spice or two, it makes a lovely, zesty coating for shrimp, char and catfish. Its gentle heat also pairs nicely with cloves, garlic, ginger, onions, rice wine, soy sauce, star anise and snow peas. When mixed with ground cloves, cinnamon, star anise and fennel, it becomes the spice blend known as Chinese five spice powder.

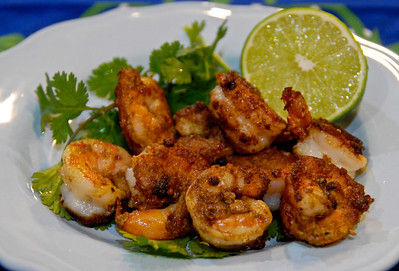
Below is my current favorite way to cook with Szechuan pepper. As my husband says about this Kitchen Kat creation, ‘it’s the perfect spicy food for people who don’t like spicy foods.’

SZCHECHUAN PEPPER SHRIMP

SZECHUAN PEPPER SHRIMP
Serves 4

1 teaspoon coarse sea salt
1 teaspoon ground Szechuan pepper
1 teaspoon red peppercorns
½ teaspoon garlic powder
¼ teaspoon ground ginger
2 tablespoons olive oil
1 pound (26-31 count) farmed, North American shrimp, defrosted and peeled
1 egg white
1 lime, quartered

In a small mortar and pestle or spice grinder mash together the salt, Szechuan pepper, peppercorns, garlic powder and ginger. Spread the mixture across a small plate.

Heat the olive in a large frying pan over medium heat. As the oil is heating, dredge the shrimp, one at a time, through the egg white and then through the spice mixture, lightly coating both sides. Repeat for all the shrimp.

Place the coated shrimp in the pan and cook for 3 minutes. Flip the shrimp over and cook until curled and cooked through, 2 to 4 minutes. Remove from the heat and serve with the lime wedges.

Fortify the New Year with Pho


Like many, I’ve been in a post-holiday slump. Endless days of cooking, baking and eating rich, heavy dishes have left me apathetic about food. Want lunch? Pour some milk over a bowl of Cheerios and dig in. Yeah, I’ve felt that uninspired.

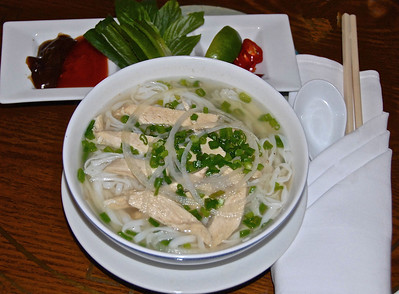
Since I can’t live on dry, oat cereal alone, I’ve turned to a delicate dish favored by my husband’s Vietnamese step-father, pho. Part soup, part entree, this Vietnamese specialty boasts of clean flavors, fresh ingredients and satisfying portions. Pho’s wholesome simplicity and ease of preparation make it a wonderful antidote to the food funk into which I’ve slipped.

Pho begins with a clear stock made from beef, chicken or pork, water and a bouquet garni. Cooks pour the heated stock into bowls filled with blanched rice noodles, strips of meat or fish and sliced spring onions. To this they may add mint, cilantro, bean sprouts and/or chilis. To add a little zing, they may serve pho with a splash of lime juice or fish sauce or dab of chili paste. Appetizing and light, it’s a surprisingly filling dish. I can last for hours, sans snacks, on a single bowl of pho. Pretty much a miracle for a grazer like me.

Traveling through South Vietnam two winters ago, I ate pho at breakfast, lunch and dinner. Although considered street food, it was served by home cooks and featured in sit-down restaurants. Any time that I felt hungry, I could count on finding a steaming bowl of pho. Its uncomplicated nature, delicious flavor and wide availability made it an easy and obvious meal.

Fresh and restorative, pho has pulled me out of my seasonal stupor. Perhaps it will do the same for you. Why not put down that box of dull cereal and cook up a fortifying pot of pho?

CHICKEN PHO
Serves 8

Fight the urge to use store-bought chicken broth and make your own for this dish. The quality and flavor of homemade is vastly superior to commercial stock and will result in a tastier pho.

For the stock:
5 quarts water
1 tablespoon black peppercorns
6 cloves garlic, smashed
3-inch piece of fresh ginger, smashed
1/2 bunch fresh cilantro
2 large white onions, peeled and halved
2 stalks celery, halved
1 (31/2- to 4-pound) whole chicken, quartered
1 teaspoon sugar
2 tablespoons salt
1/2 cup fish sauce, divided

For the pho:
3 pounds flat rice noodles
4 spring onions, whites and 1-inch of greens sliced
2 cups bean sprouts
1/2 bunch fresh mint, roughly chopped
1 bunch fresh cilantro, roughly chopped
2 serrano or Thai/bird’s eye chilies, sliced, optional
2 limes, cut into wedges, for serving
fish sauce, for serving
Tabasco sauce, for serving

Place the water in a large stockpot and bring to a boil over high heat. As the water is heating, place the peppercorns, garlic, ginger and cilantro in a square of cheesecloth. Fold the cloth into an envelope and then tie off to close. (You can also use a large spice ball for your bouquet garni.)

Lower the bouquet garni, onions, celery and chicken into the boiling water. Cook, uncovered, for 30 to 40 minutes, skimming off any impurities. Once the chicken has cooked completely, remove and place it on a cutting board. Using a chef’s or carving knife, remove the skin and bones from the chicken and return them to the stockpot. Allow the meat to cool before slicing into 2-inch strips, covering and refrigerating for later use.

Reduce the heat on the stockpot to medium-low and add the sugar, salt and half of the fish sauce. Cover and allow to simmer for 2 hours or until the stock has reduced by half. Taste and add the remaining fish sauce if needed.

Strain the stock through a cheesecloth-lined, fine mesh strainer or chinois and into a clean stockpot. Place the stockpot on a burner over low heat and cover to keep warm.

Bring a large saucepan filled with water to a boil over high heat. Add 6 to 7 ounces of rice noodles and cook for 20 to 30 seconds. Remove the noodles, drain and place them in a large soup bowl. Repeat with the remaining noodles, distributing them into 7 additional soup bowls.

Lay equal amounts of cooked chicken, green onions and bean sprouts on top of each mound of noodles. Pour hot stock over the ingredients, covering completely. Garnish the pho with mint and cilantro and optional chilies. Serve with little bowls of fish sauce, lime wedges and Tabasco.

A Basket of Bakers’ Delights

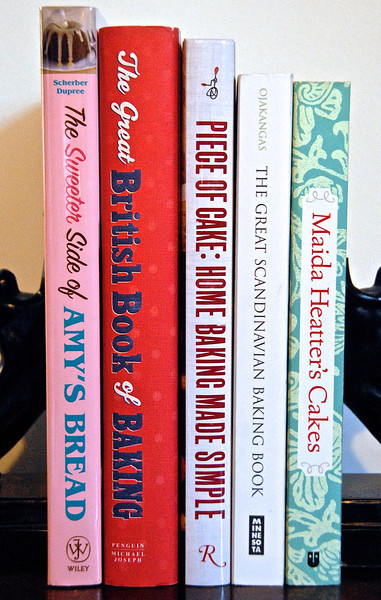
It’s my favorite time of the year — time to bake and eat lots of glorious sweets! For bakers and the bakers on your shopping list I offer a few cookbook titles for the holiday season. Included are some oldies but goodies and loads of delicious treats.

The Great British Book of Baking by Linda Collister (Michael Joseph, 2010)
A British import, The Great British Book of Baking delights the Anglophile in me. Yet, you don’t have to love scones or soda bread to appreciate this beautiful book. Featuring 120 classic as well as modern recipes and histories and anecdotes for each, it takes readers on a journey through the best of British baking. Please note that ingredient measurements are in metric.

Maida Heatter’s Cakes by Maida Heatter (Andrews McMeel, 2011)
First published in 1982, Maida Heatter’s Cakes offers 175 reliable, delectable recipes for cakes of countless stripes. Plain, chocolate, layer, fruit, nut, cheese, gingerbread, vegetable . . . you name the cake, this James Beard Award-winning “Queen of Desserts” has it covered. Similar to Heatter’s other timeless dessert books, this cookbook features clear, precise instructions, ensuring that even a novice baker can succeed in making such elaborate creations as Star-Spangled Banner and Black-and-White Layer Cakes.

Piece of Cake by David Muniz and David Lesniak (Rizzoli, 2012)
Written by Americans Muniz and Lesniak, who own and operate London’s first American bakeshop, Outsider Tart, Piece of Cake celebrates quintessential American sweets. Whoopie pies, brownies and cheesecakes all get their due. Likewise, one of my favorites, the humble coffee cake, gets a dash of excitement in such recipes as nutmeg and strawberry rhubarb coffee cakes. Subtitled “Home Baking Made Simple,” this cookbook shows how easy it is to create winning, homemade sweets.

The Great Scandinavian Baking Book by Beatrice Ojakangas (University of Minnesota, 1999)
Whether you’re intrigued by Scandinavia or simply interested in expanding your baking repertoire, you’ll adore The Great Scandinavian Baking Book. Showcasing the baked goods of Sweden, Denmark and Norway as well as Iceland and Finland, the cookbook enables both skilled and first time bakers to make a host of exotic yet wholesome goodies. With concise instructions and detailed illustrations you’ll be braiding your own fragrant cardamom rings and rolling creamy butterhorns in no time.

The Sweeter Side of Amy’s Bread by Amy Scherber and Toy Kim Dupree (Wiley, 2008)
Just typing the title makes me hungry. A longtime fan of Amy’s Bread, I had to own this cookbook. With it in my collection I can whip up unbeatable devil’s food cupcakes, gooey coconut dream bars and cinnamon raisin twists at any place or time. Even if you’ve never tried one of Amy’s heavenly butterscotch cashew bars or ethereal red velvet cake, you’ll end up craving this colorful book. Brimming with over 70 exquisite recipes, The Sweeter Side of Amy’s Bread is a dessert lover’s dream cookbook.

Books for Readers and Cooks

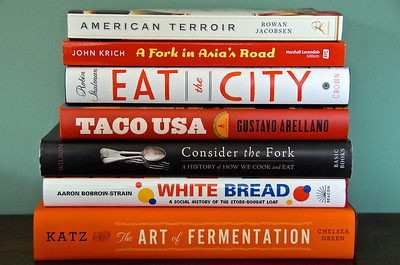
For as long as I can remember, I’ve been a voracious reader. Fiction, non-fiction, newspapers, magazines, websites, blogs, cereal boxes . . .. Thanks to my not-so-secret addiction and a gravitation to the culinary world, I consume a lot of good — and not so good — food writing. Below are the best of what I read in 2012.

Other than having well-written, well-researched, engaging text and being great holiday gifts, there is no common theme for these selections. Nonetheless, you may notice several America-centric books as well as two with “fork” in the title. These are pure coincidences. Next week, noteworthy baking cookbooks.

Taco USA by Gustavo Arellano (Scribner, 2012)
Rest assured – this is not just about tacos. Gustavo Arellano discusses a host of Mexican imports including such beloved foods as salsa, tortillas, burritos and, yes, tacos. He includes profiles of such disparate characters as the founders of Frito-Lay, Old El Paso and Chipotle and the creator of the frozen margarita machine. As you might expect from the title and aforementioned figures, Taco USA delivers a uniquely American take on Mexican cuisine.

White Bread by Aaron Bobrow-Strain (Beacon, 2012)
Ever wonder how Americans came to love and later to disdain loaves of soft, processed, white bread? Even if you haven’t, you’ll still enjoy Aaron Bobrow-Strain’s compelling look at the history of white bread. Detailing the social, economic, political and health conditions surrounding the rise and fall of processed bread, he provides a thoughtful and appealing account of this oft maligned but still fundamental food.

American Terroir by Rowan Jacobsen (Bloomsbury, 2010)
American Terroir shares the spot with Eat the City as my favorite food read of 2012. Fascinating, informative and entertaining, Rowan Jacobsen’s book explores the relationships between soil, climate and food. Profiling such diverse American favorites as maple syrup, salmon, avocados and cheese, he shows just how complex the partnership between earth and food can be. Recipes and buying sources accompany each chapter.

The Art of Fermentation by Sandor Ellix Katz (Chelsea Green, 2012)
An invaluable resource for any serious cook, this books deserves a category of its own. Perhaps ‘outstanding reference manual for home fermenters’ for that describes The Art of Fermentation perfectly. Filled with historical, cultural, nutritional and practical information, Katz’s book is written for both novices and old hands at home fermenting. Whether you’re interested in making sauerkraut, want to cure meat, or just curious about how sodas and beer get their fizz, you’ll find this book illuminating.

A Fork in Asia’s Road by John Krich (Marshall Cavendish, 2012)
Intrepid travelers, adventuresome eaters and fans of Asian cuisine will appreciate A Fork in Asia’s Road. In 50 short essays John Krich looks at the foods and food fads of such countries as China, India, Singapore, Malaysia, Vietnam and Japan. Covering such themes as food as novelty, history, politics and science, he provides a colorful, first-hand glimpse at this region’s surprising cuisines.

Eat the City by Robin Shulman (Crown, 2012)
In this well-crafted book of culinary journalism and social history Robin Shulman looks at the past and present food producers of New York City. From rooftop beekeepers and East River fishermen to the shuttered Domino Sugar factory and Fourteenth Street Market she explores how people live and eat off the land, even when much of that land is covered by concrete. Revealing and captivating, Eat the City will charm fans of good writing, history, urban farming and, of course, NYC.

Consider the Fork by Bee Wilson (Basic Books, 2012)
Dubbed “A history of how we cook and eat,” Consider the Fork delves into the backgrounds of such fundamental tools as knives, spoons, mortars and pestles and chopsticks. Bee Wilson’s narrative also covers such basic techniques as measuring, blending, heating and chilling, showing readers how each everyday act came into being. Chocked full of interesting facts and illustrations, it’s both a charming and enlightening book.

Although I won’t provide reviews, I want to mention a few other memorable reads from 2012. These include Upton Sinclair’s seminal fictional account of the meatpacking industry, The Jungle (Doubleday, 1906) and the non-fiction The End of the Line: How Overfishing is Changing the World and What We Eat by Charles Clover (New Press, 2006), The Last Fish Tale by Mark Kurlansky (Riverhead, 2009), Empires of Food by Evan D.G. Fraser and Andrew Rimas (Arrow, 2011), The Sushi Economy by Sasha Issenberg (Gotham, 2008) and Jancis Johnson’s The Oxford Companion to Wine (Oxford University Press, 2006).