Latest Posts

Launching Fish Market

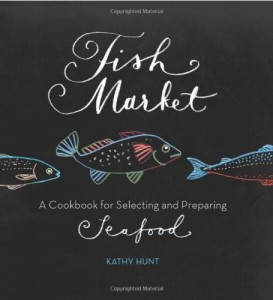
Fish Market cookbook and two seafood recipes from it

Fish Market and a few dishes from it

If you follow Kitchen Kat, you know that my first cookbook, Fish Market, has hit bookstore shelves. Published by Running Press, it covers 48 fish and shellfish and has handy, final chapter on seafood-friendly side dishes. As a longtime food writer, recipe tester and pescetarian (person who eats seafood but doesn’t consume meat or poultry), I am thrilled by its publication. Finally, I get to share all of my fish tales and recipes with you.

Although you know about the book, you may not realize that I’m throwing a big party in honor of it and you all are invited! On Friday, May 31st, at 7 PM I’ll host the official Fish Market launch party at the Towne Book Center in Collegeville, Pa. A spacious, well-stocked, independent bookstore, the Towne is conveniently located near our work-in-progress farmhouse. If you’re going to restore an old house in the country, let it be near a good bookstore.

Friday’s events include a sampling of dishes from my book, drinks, a brief talk about seafood, Q&A and a book signing. Thanks to our buddy Tom Ransom, you’ll also have a boatload of cool, seafood-related tunes to groove to. The party is open to the public. If you find yourself in suburban Philadelphia on Friday May 31st, stop by the Towne Book Center and get hooked on Fish Market!

If you don’t reside in the Philly area but want to attend a talk, book signing or cooking class, please check out the events page at FishMarketBook.com. You’ll find details about upcoming appearances there. Keep checking back for I’ll add more events. You never know. I could turn up at a bookstore, cooking school or event space near you.
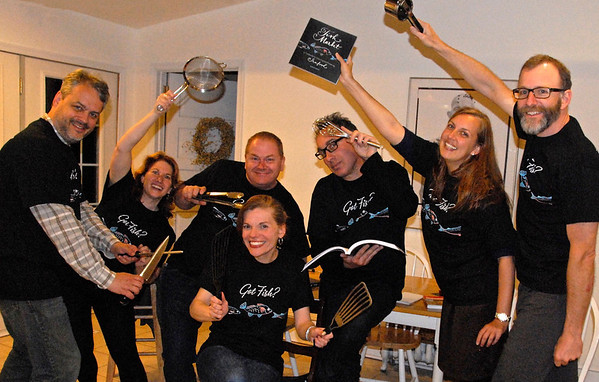
Fish Market author Kathy Hunt and friends

Kathy Hunt and her Fish Market-teers!
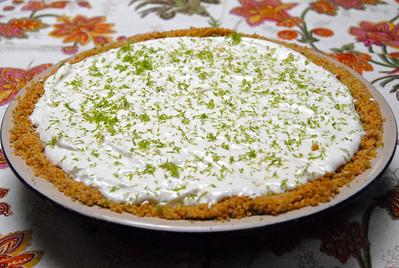
The Apple Jane-Key Lime Pie Conflict

I’m not a fan of conflict. Ditto for controversy. Yet, in spite of this I’ve become embroiled in a battle to end all battles. No doubt, like most skirmishes, this one began harmlessly enough. Two weeks ago a friend, “Apple Jane,” made a key lime pie, brought it over to our place and served it for dessert. It was a nice, generous gesture but one that kicked off a hot dispute.
At issue was the pie’s crust. Jane’s husband, “Apple Frankie,” had definite opinions and questions about it. Should Jane have baked it so that it became firm and toffee-like? Should she have doubled the recipe, adding an extra bit of crunch to every bite? Frank, the crust curmudgeon, thought so. Jane, however, did not.

In an attempt to settle the debate last week I made two key lime pies. The first was Apple Frankie-style, with a baked and chewy double crust. As much as I love sweets, I found this concoction cloying and hard to cut. The second was my compromise pie — the original crust recipe increased by half and left unbaked. Although still very sweet, this pie could easily be sliced. Overall, the compromise pie hit the spot. Was it good enough to end the troubles? Probably not.

For now we’re at an impasse in the key lime pie conflict. I guess that I’ll have to keep tinkering with Apple Jane’s recipe until a resolution can be met. I know. It’s a tremendous sacrifice but, I can’t help but think, ‘if only all wars could be this sweet . . ..’

APPLE JANE’S KEY LIME PIE (the compromise version)
Serves 8

1 3/4 cups graham cracker crumbs
1/3 cup sugar
7 1/2 tablespoons butter, melted
1/2 cup key lime juice
1 (8-ounce) package cream cheese, at room temperature
1 (14-ounce) can sweetened condensed milk
1 teaspoon vanilla
Grated zest of 1 lime

In a medium bowl mix together the graham cracker crumbs, sugar and butter. With a spoon or your fingers evenly distribute the crust across the interior of a 9-inch pie pan. Press down so that the crust sets and also comes up to the lip of the pan.

Using an electric mixer and in a large bowl, beat together the key lime juice, cream cheese, sweetened condensed milk and vanilla. Beat until smooth and fluffy, 3 to 5 minutes. Spoon the filling into the crust. Cover and place the pie on a flat surface in the freezer for 45 minutes or until just set. Before serving, sprinkle the lime zest evenly over the pie. Serve chilled.

In Honor of Mother’s Day, My Mom’s Strawberry-Yogurt Pie

Although it’s been a whirlwind of a week, I couldn’t let Mother’s Day pass by without sharing a recipe in honor of my late mother and all the other hardworking moms around the globe.
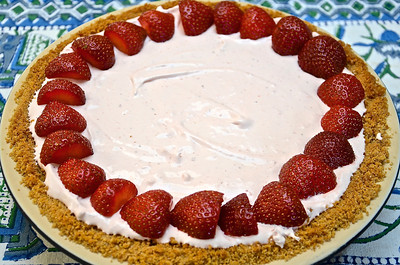
Among the many things that my mother was, she was a huge fan of sweets. At dinnertime she was more apt to enjoy a slice of seasonal pie or quick bread than eat the meal over which she’d labored. At breakfast, while I choked down grainy, bland and much dreaded Cream of Wheat, she nibbled on iced, fruit-filled pastries or glazed May’s donuts. Craving a cookie? We always had a box, bag or tin filled with chocolate chip, date-filled oatmeal or sugar cookies on hand, just in case the need arose.

When my mother spoke of her own late mother, she talked of weekends spent making fudge, divinity candy, meringues and cakes. Needless to say, I come from a long line of sweets lovers. If a sweet tooth is hereditary, there’s no question from which side of my family mine came.

A few years ago I shared my mother’s recipe for Strawberry Yogurt Pie. As it was one of her specialties, I’m passing this simple but lovely dessert along again.

PAT HUNT’S STRAWBERRY YOGURT PIE
Serves 8

2 1/2 (6-ounce) containers of strawberry yogurt
1 (8-ounce) container of Lite Cool Whip
1 store-bought graham cracker pie crust
1 handful of fresh strawberries, washed, trimmed and halved

In a medium-sized bowl mix together the strawberry yogurt and Cool Whip until well-combined. Pour the filling into the graham cracker pie crust, cover and refrigerate for 1 hour or until lightly set. Remove the pie and place the halved strawberries around the edge of the crust. Cover again and return to the freezer where the pie should remain until frozen. Remove 30 minutes before serving so that the pie thaws slightly and is easier to cut and consume.

The Surprisingly Alluring Sardine

Over the past few weeks I’ve been inviting friends over for a series of “Pretend You’re at Williams-Sonoma Sampling Food” nights. On these evenings I ply them with recipes from my cookbook Fish Market in an attempt to see which dishes appeal to even the most apathetic seafood eaters. Unequivocally, they have gone for sardine spread. Considering how many had initially voiced their distaste for this small, iridescent fish, I’m both surprised and pleased by the discovery.
What makes people dislike sardines? Beats me. I do know why I enjoy them. For such small fish they possess a ton of rich, meaty flavor. Add a few to a salad, sandwich, pizza or pie and you end up with one fabulously savory and complex tasting dish. Then there are the health aspects. These guys are packed with heart-healthy omega-3 fatty acids and protein. Plus, they pair well with an array of ingredients. Eggplant, tomato, onion, orange, lemon, cheese, olives, fennel, rosemary and parsley all marry beautifully with sardines.

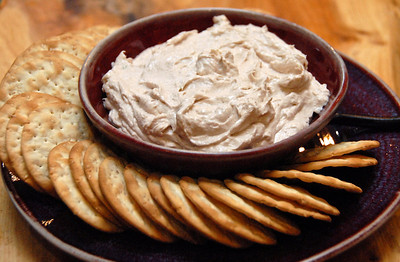
What makes our friends, many of whom had never eaten a sardine before these “Pretend You’re at …” nights, like sardine spread? I think that it’s the pleasant earthiness and slight tang that the fish impart. Then again, it could be that the spread goes with everything from crackers, pita, pretzels and bread to cucumbers, carrots, spring onions and bell peppers. Pretty much whatever food you have on hand can be dipped into it.

If you come out this summer or fall to see me do a Fish Market event, you might just get a chance to sample the following spread. Then again, you might just be tempted to try it long before then.

SARDINE SPREAD
From Fish Market (Running Press, 2013)
Makes about 1 1/2 cups

1 (8-ounce) package cream cheese, softened
1 (3.75-ounce) can boneless, skinless sardines, drained
1 garlic clove, crushed
1 teaspoon freshly squeezed lemon juice
3 tablespoons reduced-fat mayonnaise
Freshly ground white pepper, to taste
Sea salt, to taste

Place all of the ingredients in the bowl of a food processor or in a medium mixing bowl and process or mash together until the mixture is smooth and well combined. Taste and adjust the seasonings as necessary, then cover and refrigerate until firm, at least 30 minutes. Serve chilled.

Dreamy Triple Chocolate Coconut Bars

triple chocolate coconut bars

I’m married to a guy who adores coconut. Me? Not so much. Hand me a Mounds or Bounty bar and I’ll nibble off the smooth, rich chocolate, leaving behind a sticky blob of sinewy coconut for my husband to eat. Gross but true.

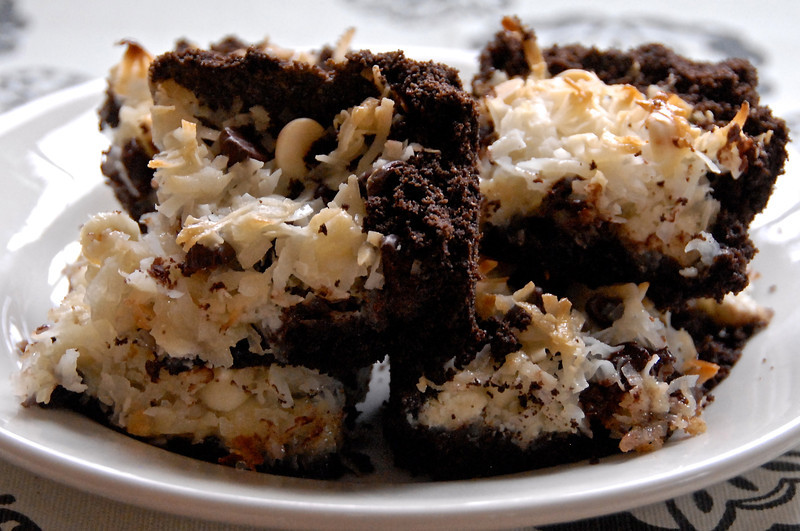
Because of my apathy toward coconut, I rarely bake desserts featuring it. However, when I do, I make Dreamy Triple Chocolate Coconut Bars. Inspired by Amy’s Bread’s coconut dream bars, these luxurious treats feature plenty of coconut for my husband and an ample amount of chocolate for me. They’re the perfect compromise for two only children who love radically different sweets.

Dreamy Triple Chocolate Coconut Bars will keep for several days. If you aren’t going to serve them right away, cover them with plastic wrap and store in a cool place.

DREAMY TRIPLE CHOCOLATE COCONUT BARS
Makes 20 bars

3 cups chocolate graham cracker crumbs
3/4 cup unsalted butter, melted
1/2 cup white chocolate chips
1/2 cup semi-sweet chocolate chips
3 1/4 cups sweetened coconut flakes
1 3/4 cups sweetened condensed milk

Preheat the oven to 350 degrees Fahrenheit. Grease and then line a 9″ x 13″ pan with parchment paper.

In a large bowl mix together the cookie crumbs and butter. Pat evenly into the prepared pan.

In another bowl mix together the chocolate chips and coconut. Spread the mixture evenly over the crust. Drizzle the condensed milk evenly over the chocolate-coconut mixture.

Bake for 30 to 35 minutes, rotating the pan once halfway during the cooking time. When finished, the top will be lightly browned. Place the pan on a wire rack and cool completely. Cut into 20 bars, 4 across by 5 down, and enjoy!

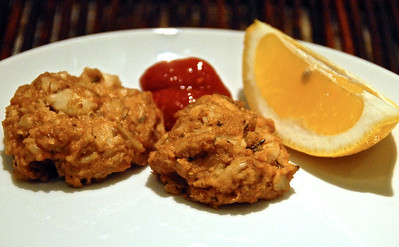
Chesapeake Bay Crab Balls

Thanks to good friends who live in the Chesapeake Bay area, I spend quite a bit of time cooking and eating along Maryland’s coastline. Hang out in this region for any amount of time and you’ll quickly see how crazy everyone is about crabs. It’s not hard to figure out why. Native to the western Atlantic, blue crabs play a major role in the local marine fisheries and economy.

As their name suggests, blue crabs sport blue claws and bluish-green bodies. Along with their striking appearance they possess sweet, soft and flaky meat, a trait that wins them many fans. Got blue crabs? Then you’ve got a lot of recipes featuring savory crab meat.

What do my Chesapeake Bay buddies do with their crustaceans? They steam or sauté them, shape them into patties for crab cakes or add them to soups and stews. One of my favorite Chesapeake Bay creations is a quick, zesty appetizer known as crab balls. Created by old friend and cooking pal Elizabeth Theisen, crab balls are this week’s Kitchen Kat offering.

Note that, because the blue crab population has decreased in recent years, I try to use a more eco-friendly species such as stone, Dungeness or peekytoe crab in this and other crab recipes.

CHESAPEAKE BAY CRAB BALLS
Recipe courtesy of Elizabeth Theisen
Makes 1 dozen

1 extra-large egg
1/3 cup mayonnaise
3 tablespoons Dijon mustard
1 tablespoon horseradish
2 tablespoon Worcestershire sauce
2 teaspoons low sodium soy sauce
2 tablespoons Old Bay seasoning
2 teaspoons dried parsley
Juice of 1/2 lemon
3/4 cup panko bread crumbs
1 pound jumbo lump crab meat
Lemon wedges, optional, for serving
Cocktail sauce, optional, for serving

Preheat the oven to 350 degrees Fahrenheit.

Whisk together everything but the bread crumbs and crab meat. Add the bread crumbs and stir to combine. Fold in the crab meat.

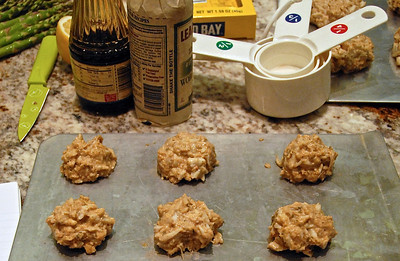
Using 1 1/2 tablespoons of crab mix, form a small ball and place it on a baking sheet. Repeat, leaving about a half inch space between the balls, until all the crab mixture is gone.

Bake the crab balls for 18 to 20 minutes or until golden brown and crisp around the edges. Serve warm with optional lemon wedges and cocktail sauce.

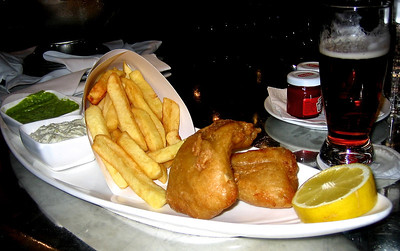
The Friday Fish Fry


Last week I heard two words that jettisoned me right back to high school — fish fry. Thanks to a heart attack that my father had suffered at a school football game and our family’s subsequent dietary restrictions, I grew up eating a lot of dry, unadorned fish dinners. Several times a season, though, we would slip out of these tight restraints and head off to a Friday night fish fry. Hosted by local churches and the Telephone Pioneers of America, of which my engineer dad was a devoted member, these events were the highpoint of our otherwise drab seafood diet.

What I remember most about those fish fries are the oil-stained, white paper plates that collapsed beneath the weight of their contents and the contents themselves. The cargo varied slightly, with sides of coleslaw, mac and cheese, pierogies or french fries, but always contained triangles of crunchy, golden batter encasing fillets of white fish. Paired with tartar sauce, malt vinegar and ketchup, the crisp, deep-fried fish was, in my mind, outrageously delicious.

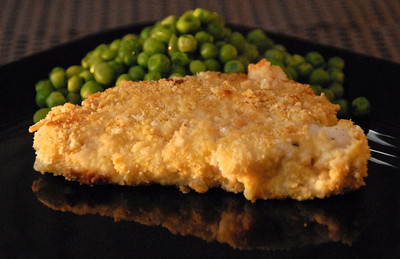
Today I can’t say “no” to attending a fish fry nor can I go to an English pub without ordering fish and chips. When I’m at home, though, I am more apt to bake, saute or pan-fry my seafood. Even so I still like a bit of crackle and crunch at dinner. That’s when I turn to Crunchy Haddock Fillets.

The following recipe has been adapted from my upcoming cookbook Fish Market. If you can, purchase U.S., hook and line caught haddock, which has limited bycatch.

CRUNCHY HADDOCK FILLETS
Don’t expect the same crispiness as you’d get with deep-fried fish. Nonetheless, you will definitely enjoy a complexity of texture and flavor in this dish. You can also use Pacific cod, U.S. farmed catfish, Norwegian pollock and most other white fish.
Serves 4

1/3 cup cornmeal
2/3 cup buttery cracker crumbs (about 16 crushed crackers)
1 teaspoon onion powder
1/4 teaspoon ground white pepper
1 large egg
1 tablespoon water
4 (4- to 6-ounce) haddock fillets
Sea salt, to taste
Ground black pepper, to taste

Preheat the oven on 425˚F. Grease a large baking sheet.

In a large bowl mix together the cornmeal, cracker crumbs, onion powder and white pepper. In a small bowl beat together the egg and water.

Season the fillets with salt and black pepper. Dip each into the egg mixture and then into the cornmeal-cracker topping, coating the fish completely. Lay the haddock on the greased baking sheet. Repeat with the remaining fillets, leaving 1 inch between each on the baking sheet.

Bake for 6 minutes on one side before turning over the fish and baking for an additional 4 to 6 minutes. When finished, the coating will be light brown and crisp in appearance. Serve immediately.

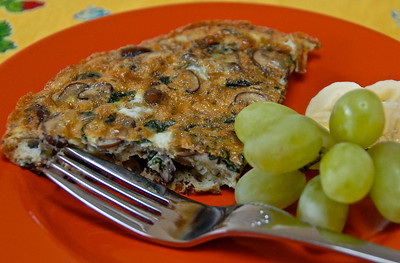
Spring Vegetable Frittata

SPRING VEGETABLE FRITTATA

SPRING VEGETABLE FRITTATA WITH GRAPES AND BANANAS

Beyond chocolate bunnies, jelly beans and marshmallow chicks, I’ve never associated a specific food with Easter. When I was a kid, my mother would occasionally bake a ham pricked with cloves and draped with pineapple rings. Served alongside creamy scalloped potatoes and peas, it was the closest that my family ever came to a traditional, home cooked, Easter meal.

More often than not, on Easter Sunday we went out for brunch. Some years we hit an upscale buffet brimming with glistening Danishes, steamy scrabbled eggs, roast beef and shrimp cocktail. Other times we enjoyed a sit down meal of fruit- and cream cheese-stuffed French toast, eggs Benedict or chicken divan. Once again, there was no set cuisine or, for that matter, locale.

Oddly enough, I’ve married into a family that likewise celebrates this holiday with brunch. Taking into account that recurring meal, I’d like to share a fresh, easy, brunch offering, Spring Vegetable Frittata.

VEGETABLE FRITTATA

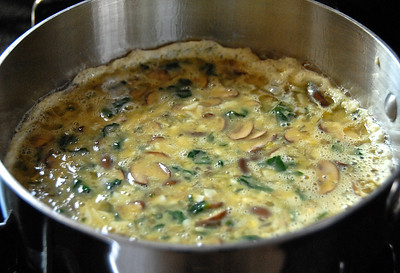
FRITTATA SIMMERING IN THE PAN

It may sound fancy but a frittata is nothing more than the Italian version of a French omelet. With omelets you fold cooked eggs over such fillings as cheese, onions or greens. In frittatas you mix these ingredients with the eggs and cook them together, leaving the dish open-face and finishing off it beneath a broiler. It’s a bit like a quiche but without the buttery crust and, in my recipe, cream.

SPRING VEGETABLE FRITTATA
Spring heralds the return of such seasonal treats as porcini/cepes mushrooms, leeks, spinach and tarragon. However, if you cannot find fresh tarragon, you can substitute dried.
Serves 6

2 tablespoons olive oil, divided

8 ounces porcini/cepes mushrooms, trimmed and sliced

1 large leek, whites and 1-inch greens chopped

2 cups firmly packed baby spinach, stems removed and roughly chopped

1/2 teaspoon salt

1/4 teaspoon ground white pepper

8 large eggs

1 tablespoon chopped fresh tarragon OR 1 teaspoon dried tarragon

1/3 cup grated Romano cheese

Making sure that the oven rack is directly beneath the broiler, preheat your oven broiler.

Heat 1 tablespoon olive oil in a large, non-stick skillet over medium heat. Add the mushrooms and sauté until they have softened slightly, 2 minutes. Add the leek, spinach, salt and pepper and sauté until the vegetables have softened, 3 minutes. Remove the pan from the heat and set aside.

Heat the remaining tablespoon of olive oil in large, oven-safe pan over medium heat. Swirl the oil so that the pan is coated completely.

As the oil is heating, whisk the eggs, tarragon and cheese together in a large bowl. Add the sautéed vegetables to the eggs and whisk to combine. Pour the egg mixture into the pan and allow the eggs to cook until they’ve set and the bottom of the frittata has browned, 6 to 8 minutes. Place the pan under the broiler and broil until the top of the frittata has puffed up and become golden brown in color, about 1 minute. Remove and serve immediately.

Scallops from the Sea

SCALLOPS

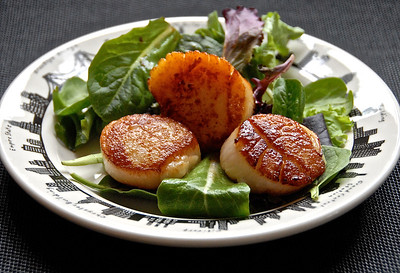
PAN-SEARED SEA SCALLOPS

Although I’ve been a pescatarian for over 15 years, I truly don’t have a favorite seafood; there are too many delicious fish in the sea – and lakes and rivers – to favor only one. I do, though, have a few that I turn to when having friends and family over for dinner. These are the fish and shellfish that appear glamorous on the plate and also taste fabulous on the palate.

Among these tasty lookers are sea scallops. Generally eco-friendly bivalves, scallops fall into two categories —— the tiny, costly bay and larger, more abundant and less expensive sea. The latter is what you usually see at grocery stores and restaurants. At present diver-caught, Pacific sea scallops are the best choice for consumers.

If you want beautiful presentation, you can’t go wrong with sea scallops. Whole, they resemble plump, round pillows perched atop a china or porcelain bed. Cut into them and you’ll find pearl colored, jewel-like, mildly sweet flesh. Just gorgeous!

SCALLOPS

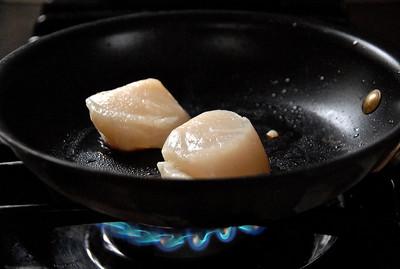
FRYING SCALLOPS

As with most seafood, scallops are a snap to prepare. They cook quickly and don’t need much to make them shine. A dash of salt and pepper or squeeze of lemon or lime juice will do the trick.

If you want a more complex dish, you can add a variety of ingredients to your scallops. Among the foods with which they marry are avocado, bacon, basil, chile peppers, cilantro, cream, garlic, ginger, grapefruit, mango, pancetta, shallots, spinach, tomatoes, vinegar and wine. They also go well with unsalted, brown or clarified butter. Out of this trio, I prefer brown butter and dressing my scallops with a drizzle of this.

PAN-SEARED SEA SCALLOPS WTIH BROWN BUTTER DRIZZLE
I like to serve these over a bed of mixed greens or homemade polenta. They also pair nicely with a side of garlic pea puree.
Serves 4

6 tablespoons unsalted butter
1 scant tablespoon olive oil
1 pound large sea scallops
Salt, to taste
Ground black pepper, to taste
Mixed greens or polenta, optional, for serving

Using a small saucepan, melt the butter over medium heat, swirling the pan over the heat. Continue cooking and swirling the pan. A foam will form and then slowly disappear. At this point the butter should be turning golden in color. Three to four minutes after foaming, the bubbling butter should begin to smell nutty and bits of milk solids will begin to turn brown. Give the butter a final swirl, remove from the heat, and set aside.

In a large nonstick frying pan heat the olive oil on high. Add the scallops, season with salt and pepper, and reduce the heat to medium-high. Sear the scallops until brown on the bottom and almost cooked through; depending on the size, this will take between 3 and 4 minutes. Flip them over and fry the other side for 1 to 3 minutes. Don’t overcook them as the scallops will become tough and chewy.

Lay the scallops on optional beds of mixed greens or polenta or just on dinner plates. Drizzle the brown butter over top of each and serve immediately.

Toast St. Patrick’s Day with Chocolate Guinness Cupcakes

CHOCOLATE GUINNESS CUPCAKE

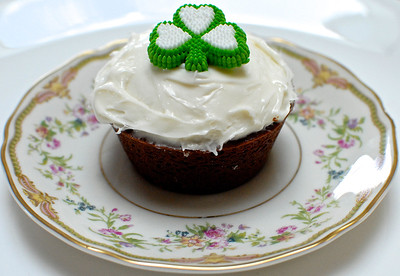
A DAINTY CHOCOLATE GUINNESS CUPCAKE

Since St. Patrick’s Day is right around the corner, I thought it fitting to share a recipe inspired by some Irish favorites. No, I’m not talking about fish and chips or Irish stew and soda bread. I mean Guinness, Bailey’s and chocolate. (As an aside, if you don’t think of chocolate as being especially Irish, take a peek at Butlers. And, if you find yourself in Dublin, Cork or Galway, try Butlers hot cocoa and truffles. So, so good.)

Considering my enormous sweet tooth, I’ll surprise no one with my choice of dessert over a savory, Irish specialty. Yet, thanks to one of their namesakes, Chocolate Guinness Cupcakes aren’t overwhelmingly sweet. The smokiness of the stout evens out the chocolatey, sugary batter. In turn, the vanilla-infused, cream cheese frosting tempers the tang of the Guinness-enriched cake. It’s the perfect balance of flavors.

CHOCOLATE GUINNESS CUPCAKES

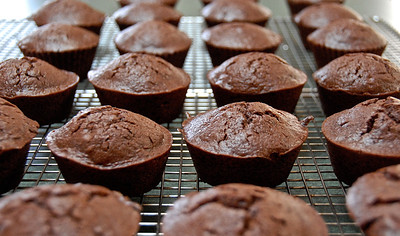
AN ARMY OF CHOCOLATE GUINNESS CUPCAKES WAITING TO BE ICED

Along with possessing that ideal taste, these boozy, little cupcakes have an added bonus; they are quite simple to make. Put all the ingredients in a saucepan and stir together. Pour the batter into a muffin pan and bake. It really is that easy.

Whether you’re celebrating St. Patrick’s Day or looking for a lovely sweet to share with friends, try these cupcakes. Painless to make and delightful to eat, chocolate Guinness cupcakes are a fabulous, Ireland-inspired treat.

CHOCOLATE GUINNESS CUPCAKES

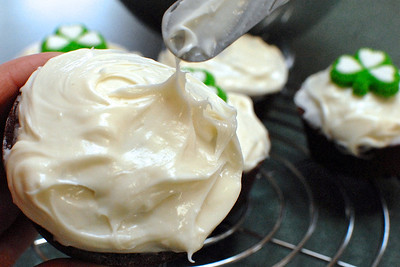
ICING THE CUPCAKES WITH A CREAM CHEESE FROSTING

CHOCOLATE GUINNESS CUPCAKES
Think of these as the dessert equivalent of an Irish car bomb with a generous shot of chocolate replacing the usual Irish whiskey.

Makes 2 dozen

1 cup Guinness
1 stick plus 2 tablespoons unsalted butter
3/4 cup unsweetened cocoa
2 cups granulated sugar
2 large eggs
3/4 cup sour cream
2 tablespoons Bailey’s Irish Cream
2 cups all-purpose flour
2 1/2 teaspoons baking powder
Pinch of salt
6 ounces semi-sweet chocolate, chopped
8 ounces cream cheese
1 1/2 cups confectioner’s sugar, sifted
1 teaspoon vanilla extract
2 tablespoons heavy cream
Sugar shamrocks, optional, for garnish

Preheat the oven to 350 degrees Fahrenheit. Grease 2 (12-cup) muffin pans and set aside.

In a large saucepan heat the Guinness and butter over medium heat, stirring until the butter has melted. Remove the pan from the heat and whisk in the cocoa and sugar.

In a separate bowl whisk together the eggs, sour cream and Bailey’s and then pour these liquids into the saucepan, stirring to combine. Whisk in the flour, baking powder and salt. Stir until well combined and most of the lumps are gone. Add the chopped chocolate and stir to blend.

Pour the batter into each muffin cup; you should have about 1/2-inch of space left in each. Bake for 20 to 22 minutes, until a toothpick inserted into the center of the cupcakes comes out clean. Place the pans on wire racks and cool for 5 minutes before removing the cupcakes from the pans, arranging them on the racks and allowing them to cool completely.

To make the icing, using an electric mixer, beat the cream cheese until fluffy. Add the sifted confectioner’s sugar and vanilla extract and beat until smooth and well combined. To thin out the icing and make it more spreadable, add 1 to 2 tablespoons of heavy cream and beat until incorporated.

Using an icing knife or small, narrow spatula, frost each cupcake. Swirl the knife over the icing so that small peaks or swirls form on top. At this point you can dress up your Guinness cupcakes with sugar shamrocks or leave them as is.