Latest Posts

The Favored Few: Cookbooks in Review

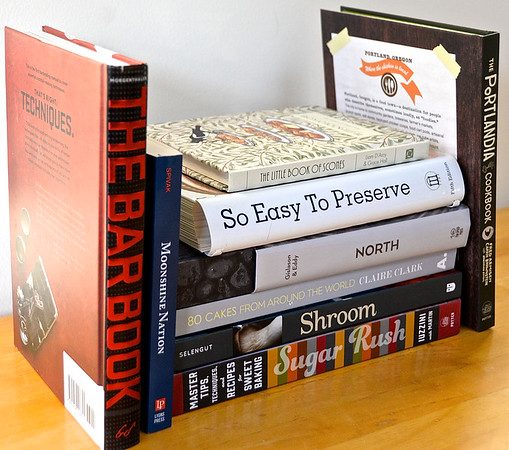
It’s that time of year again, time for my rundown of good books for food lovers and cooks. Among 2014’s recommendations are three sweets-oriented cookbooks, two boozy books, a tome dedicated to Nordic cuisine, another focused on preservation and one devoted to mushrooms. Capping off the list is a quirky and humorous general purpose cookbook. So, without further introduction, here are my favorites of 2014.

80 Cakes from around the World by Claire Clark (Absolute Press, 2014)
Fans of baking, world travel and food histories will especially enjoy Claire Clark’s colorful dessert book. It includes traditional recipes for Irish barmbrack, Hungarian dobos torte and Dutch apple cake as well as modern takes on French croquembouche, American doughnuts and Polish beetroot cake. Historical accounts and photographs enliven every sweet.

The Little Book of Scones by Liam D’Arcy and Grace Hall (Random House UK, 2014)
Possessing the tagline “meet the 21st-century scone,” D’Arcy and Hall’s slender cookbook introduces readers to 30 contemporary scone creations. Basil and salt dip scone sticks and red velvet scone fancies are among the savory or sweet recipes on offer. Illustrations and music suggestions accompany the treats.

North by Gunnar Karl Gislason and Jody Eddy (Ten Speed Press, 2014)
Fifteen years after traveling through Iceland, subsisting on toasted cheese sandwiches and the odd fish dish, I have fallen for North: The New Nordic Cuisine of Iceland. Part sumptuous culinary travelogue, part innovative cookbook, this first-time offering from acclaimed Reykjavik chef Gislason showcases his country’s fresh cuisine and proves to me that the country offers more than toasted cheese. Featuring dishes such as Smoked Haddock, Dark Cod Consummé, Raw Vegetables and Yesterday’s Bread and Crispy Oats Cooked in Beer with Malt Cream, North is as gorgeous and unusual as Iceland itself.

Sugar Rush by Johnny Iuzzini and Web Martin (Clarkson Potter, 2014)
James Beard Award-winning pastry chef Johnny Iuzzini takes readers step-by-step through over 150 delectable sweets. Ranging from such dessert basics as caramelized fruit, toasted nuts and candied peel to fancier fare such as sticky caramel date cake and smoky chocolate-ginger ganache tart, Sugar Rush offers something for every level of home baker. A clever final chapter pulls recipes together and builds “a balanced dessert.” Truly a tasty, thorough and balanced cookbook.

The Bar Book by Jeffrey Morgenthaler and Martha Holmberg (Chronicle Books, 2014)
From famed Portland bartender and cocktail blogger Jeffrey Morgenthaler comes this comprehensive look at cocktail making. Covering essential tools, techniques, ingredients and recipes and with ample illustrative photos, The Bar Book guides readers through creating over 60 fabulous drinks. Whether you’re interested in setting up a well-stocked home bar or making a better cocktail, this book will satisfy all your mixology needs.

Shroom by Becky Selengut (Andrews McMeel, 2014)
Because I’d interviewed the author and reviewed Shroom for Zester Daily, I’ll pass along the link to that piece.

Moonshine Nation by Mark Spivak (Lyons Press, 2014)
The only food history/narrative to make the list, Moonshine Nation gives a fascinating account of that outlaw spirit, moonshine, and the renegades who made, and continue to make, it. Well-researched and written, this culinary history will keep readers captivated from beginning to end.

So Easy to Preserve by the University of Georgia Cooperative Extension (University of Georgia, 2014)
Long before today’s preservation craze, the University of Georgia’s Cooperative Extension produced this detailed yet approachable guide to preserving food. Now in its sixth edition (I own and have pictured the fifth edition from 2006), this user-friendly book takes readers through pickling, canning, curing, drying and freezing produce, dairy products and meats. It’s a must-have for anyone interested in preserved goods.

We could all use a little more levity in the kitchen. That’s why I’ve included a less serious choice for your holiday shopping list. It’s The Portlandia Cookbook by Fred Armisen, Carrie Brownstein and Johnathan Krisel (Clarkson Potter, 2014).
Whether your gift recipients cook, adore Portlandia or just love a good laugh, they’ll appreciate this fun-loving cookbook. Recipes range from simple baked Manchego-filled dates to the more complex Korean short rib stew.

As always, I have to plug my own seafood cookbook Fish Market (Running Press, 2013). For more information about it, visit FishMarketBook.com, Amazon or your neighborhood bookstore.
Lovely Littlenecks with Sherry-Shallot Butter

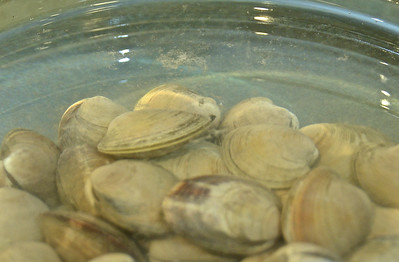
LITTLENECK CLAMS

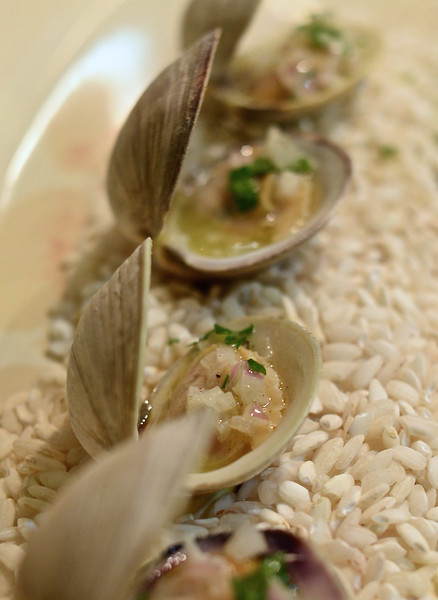
LITTLENECK CLAMS DRESSED AND READY FOR DINNER

I’ve got a bit of thing for clams, particularly for the smallest of all hard-shell clams, littlenecks. Whether farmed or hand-harvested, these bivalves are one of the eco-friendliest shellfish around. Along with sustainability, they have healthfulness in their favor. Rich in omega-3 fatty acids and protein, they’re a heart-healthy seafood.

The joys don’t end here. Quick to cook and easy to pair, clams make wonderful appetizers as well as entrees. What would winter be without a warming bowl of clam chowder or linguine with clam sauce? In my case it would be a cold, dreary winter.

What I adore most, though, about clams is how simple it is to clean them.

Before cleaning, you should sort out the clams with broken shells or shells that don’t close completely after being tapped with a knife or finger. Once you’ve discarded the duds, tumble the remaining bivalves into a large bowl. Cover them with cold water and then add a generous amount of salt. Almost immediately the clams will begin to push the salted water—and bits of sand—out of their shells.

cleaning clams

WATCHING CLAMS CLEAN THEMSELVES

Allow the clams to soak in the briny water for 25 to 30 minutes. By this point a noticeable amount of sand and other debris will have floated to the top of the bowl.After 30 minutes, drain and rinse the clams in cold water. Once the clams are clean, I start cooking. Usually I just lay the clams on a hot grill, cover and allow them to cook for 5 to 8 minutes or until most of the shells have opened. I then top them with lemon juice, Tabasco or a homemade sauce such as the following sherry-shallot butter sauce.

LITTLENECKS WITH SHERRY-SHALLOT BUTTER SAUCE
Serves 6

5 dozen littleneck clams, cleaned (See video above for cleaning instructions)
1 stick (8 tablespoons) unsalted butter, divided
3 tablespoons minced shallot
1/4 teaspoon salt
2 tablespoons dry sherry
1/2 teaspoon Dijon mustard
1/2 teaspoon ground white pepper
2 tablespoons chopped flat leaf parsley

Preheat a grill or grill pan on high. Lay the clams on the grill, cover and cook until most, if not all, of the clams have opened, 5 to 8 minutes.

As the clams are cooking, melt half the butter in a small saucepan over medium heat. Add the shallots and salt. Sauté 1 to 2 minutes.

Add the remaining butter and sherry to the pan and stir to combine. Whisk in the Dijon mustard and pepper and simmer for 2 minutes. Remove the pan from the heat and stir in the parsley.

Once the clams have finished cooking, place them on a platter or individual plates. Spoon equal amounts of the shallot-sherry sauce over the clams. Serve immediately.

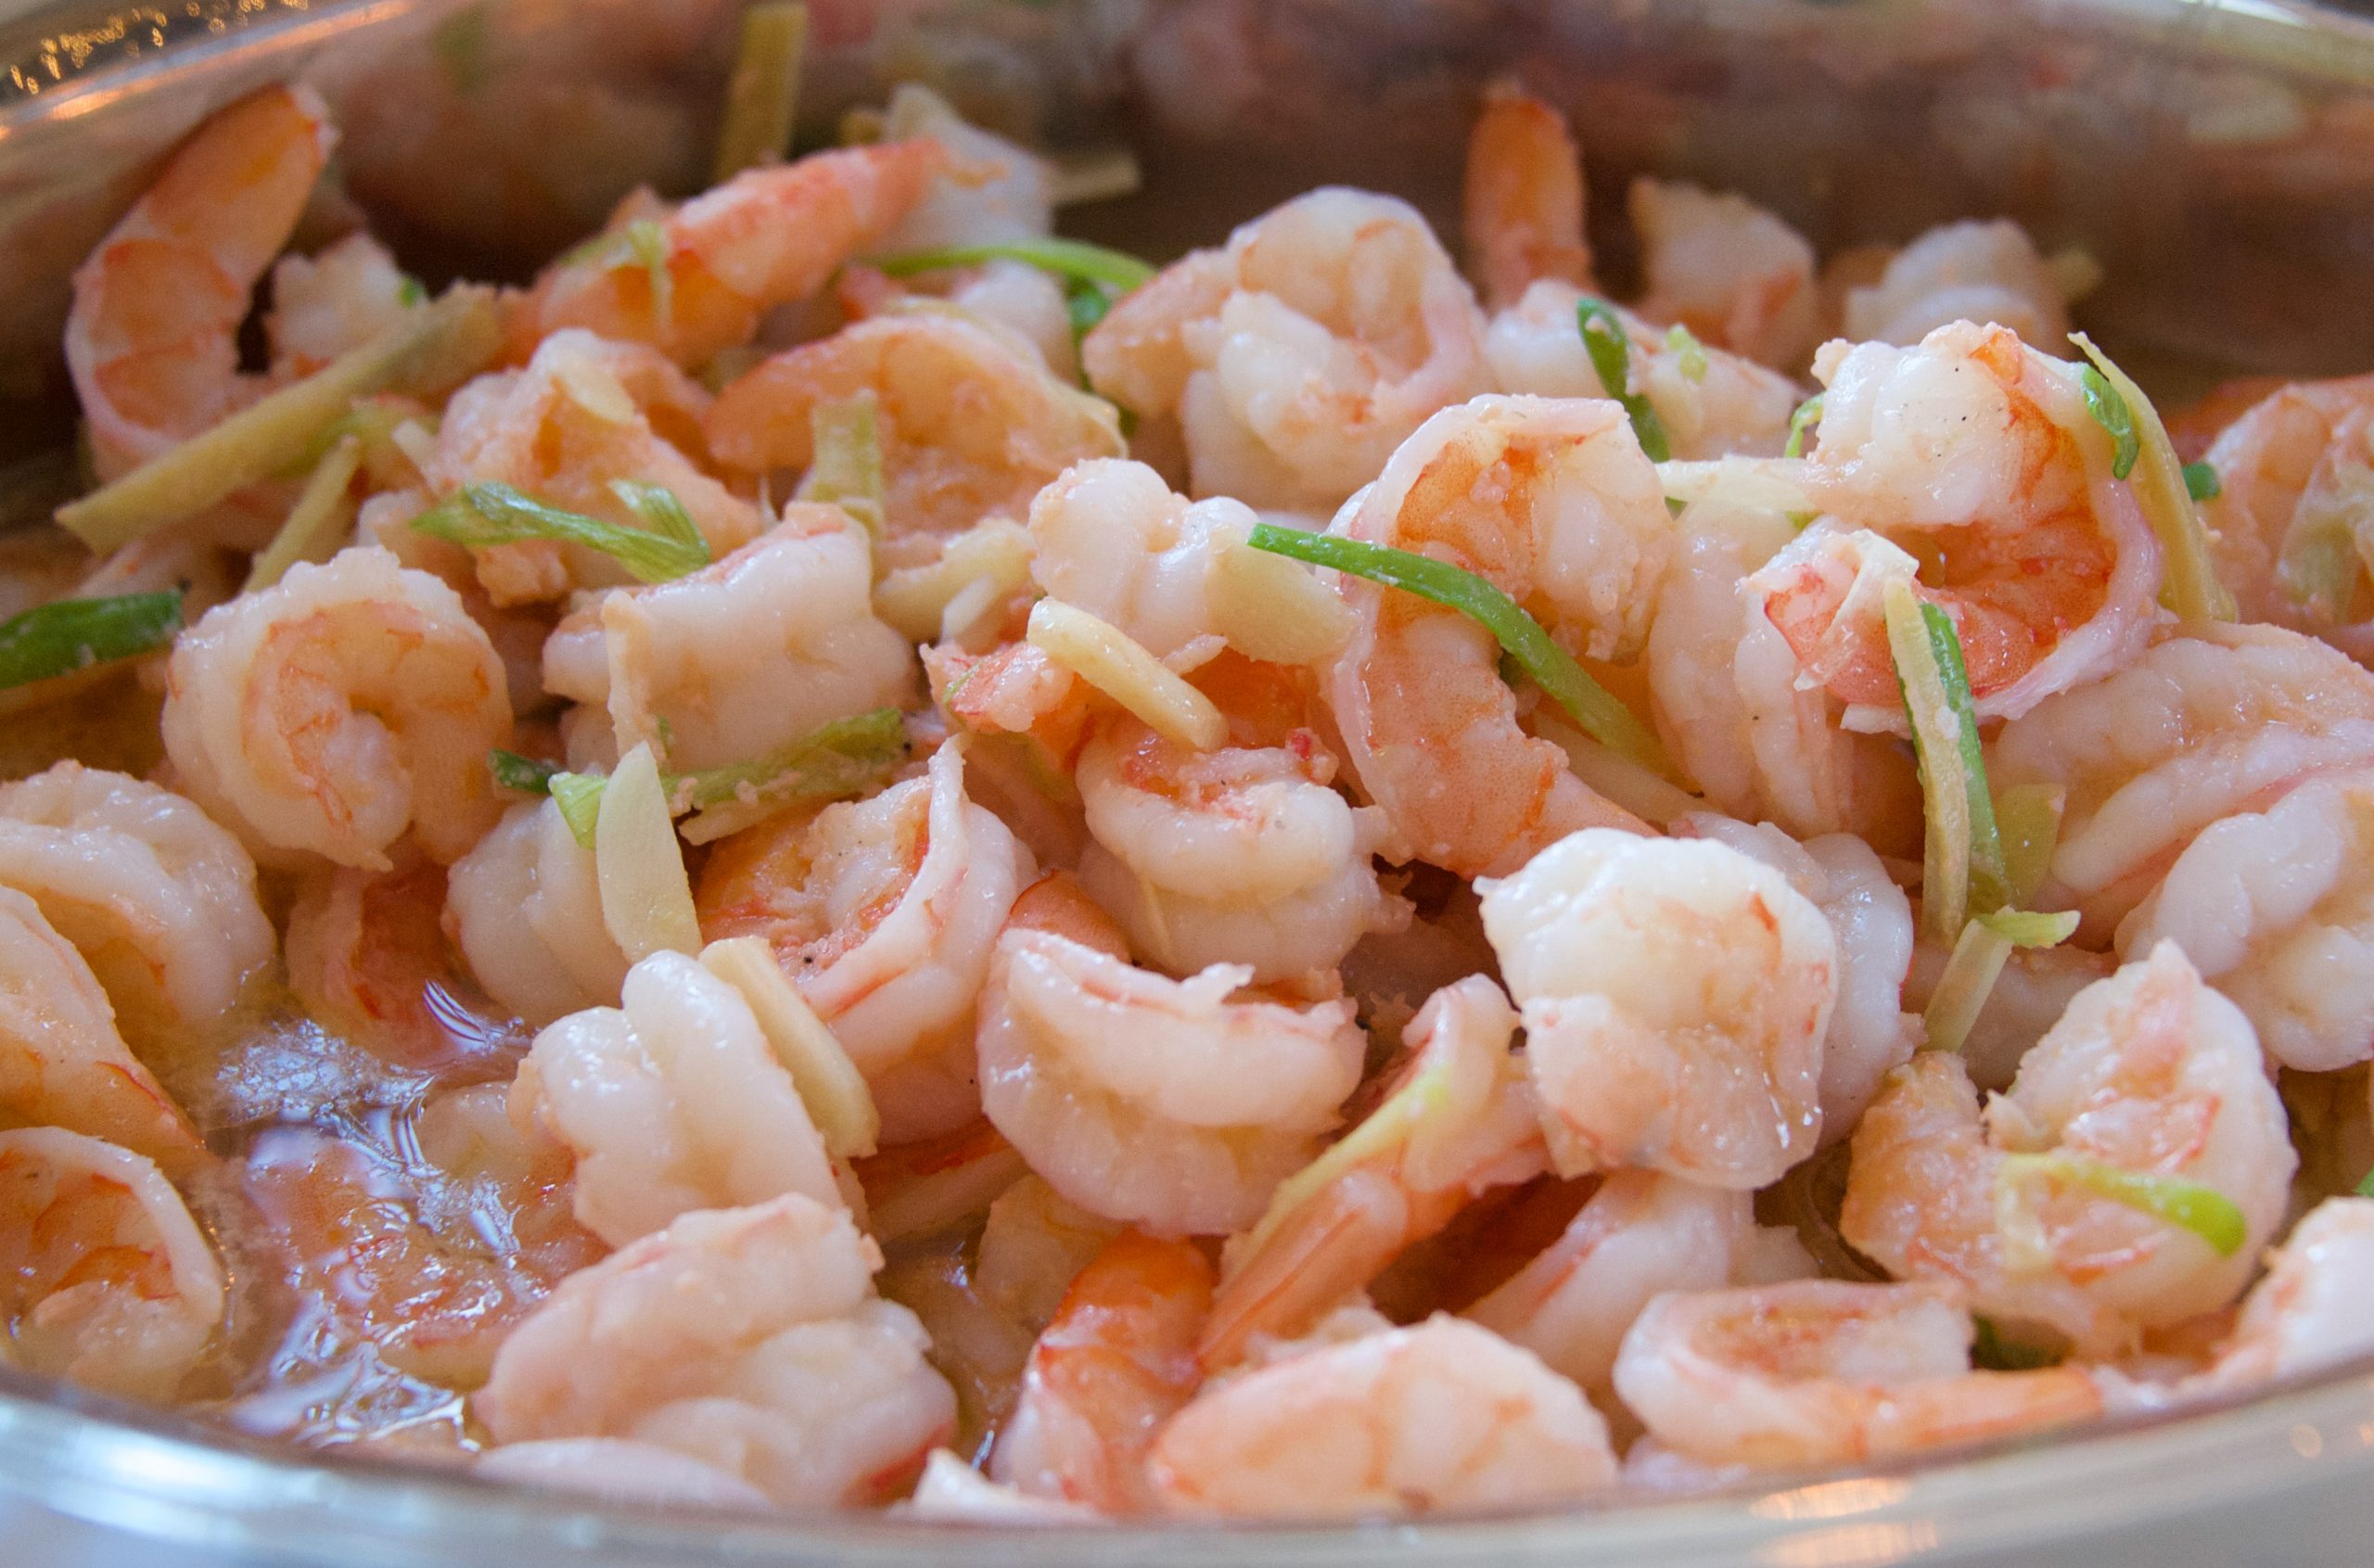
ginger-scallion shrimp

Sautéed Ginger-Scallion Shrimp at Shockingly Delicious!

ginger-scallion shrimp

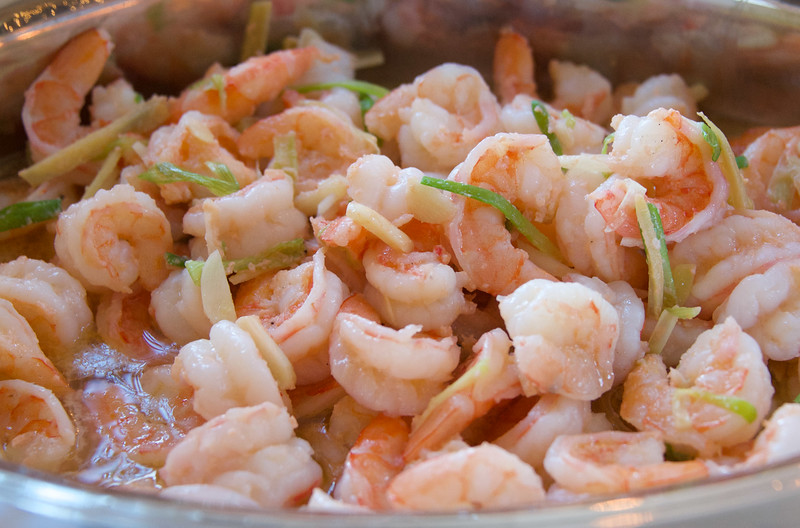
A chafing dish filled to the rim with ginger-scallion shrimp

I’m thrilled to be branching out this week and sharing Sautéed Ginger-Scallion Shrimp with the readers of Shockingly Delicious. If you’ve yet to check out this fabulous food blog, it offers “unbelievably drool-worthy, scrumptious, ‘scary good’ recipes for people who love food!” Such a nice venue for this quick and delicious shrimp recipe!

Please head over to fellow journalist, food blogger and seafood fan Dorothy Reinhold’s site for more about Sautéed Ginger-Scallion Shrimp. You’re sure to get hooked. It’s Shockingly Delicious!

The Persuasive Persimmon Graham Pie

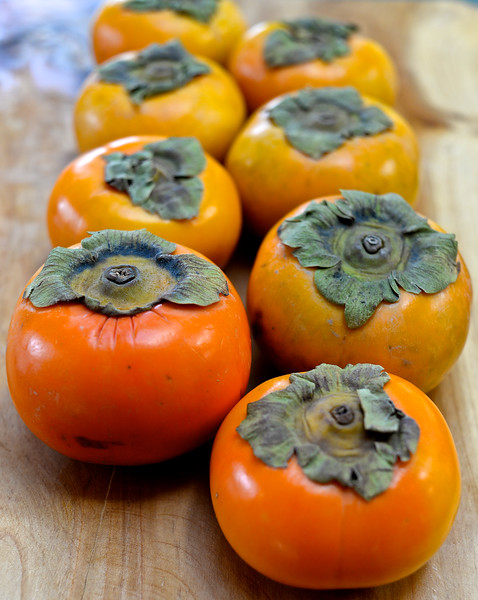
persimmons

A smattering of ripe and unripe persimmons

Every fall I try to convince my husband that persimmons are one of autumn’s best treats. In turn, he reminds me that the most repugnant fruit that he’s ever eaten remains an unripe persimmon. For years we’ve been stuck at this impasse.

Here’s the deal with persimmons. If you yank a hard, yellowish persimmon from its leafy branch and then immediately take a bite, you’ll experience the bitterest fruit around. Have some patience, wait until the orb has turned reddish-orange in color, has softened and maybe even fallen to the ground and you’ll taste a honeyed fruit like no other.

How do I erase a bad food memory or, at the very least, persuade someone to give this berry another try? Persimmon pudding didn’t do the trick nor did persimmon tarts. No matter how beautiful or aromatic I made the offering, the memory of that acrid flavor lingered on.

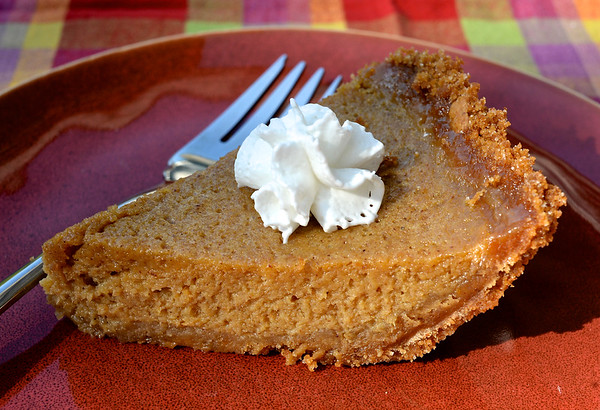
This year, though, I hit upon a winning combo, matching pureed persimmons with graham cracker crust. Maybe it’s the mild sweetness of the cookies or the contrast between creamy filling and crumbly crust. In any case, this simple crust tends to elevate pies, making them utterly divine. In my case, it changed the status of persimmons from dreaded to desired ingredient.

slice of persimmon graham pie

A slice of persimmon graham pie

PERSIMMON GRAHAM PIE
Eons ago, when I attempted my first homemade graham cracker crust, I read “12 graham crackers” in the recipe’s ingredient list and dutifully broke off 12 individual, little cookies. This, I quickly realized, was not what the recipe writer had meant. For 1 1/2 cups of graham cracker crumbs, you’ll use 12 sheets of graham crackers. Alternately, you can do what my make-less-work-for-yourself-in-the-kitchen mother used to do and use a store-bought graham cracker crust.
Serves 8

for the crust:
1 1/2 cups graham cracker crumbs (from 12 plain graham crackers, crushed with a rolling pin or ground in a food processor or blender)
1/4 cup granulated sugar
4 tablespoons unsalted butter, melted
Pinch salt

for the filling:
3 large or 4 small ripe persimmons, peeled and cut into chunks
1/2 cup firmly packed light brown sugar
2 eggs
1/2 cup evaporated milk
1 teaspoon vanilla extract
1/2 teaspoon ground ginger
1/2 teaspoon ground cinnamon
Pinch ground cloves

Preheat the oven to 350 degrees F. Grease a 9-inch pie pan and set aside.

If making your own graham cracker crust, stir together the graham cracker crumbs, granulated sugar, melted butter and salt. Fill the pie pan with the crumb mixture and, using your fingers, evenly spread it over the bottom and sides of the pan, pressing the crumbs together to form a crust.

Place the pie crust in the oven and bake for 10 minutes.

While the crust is baking, put the persimmon chunks into the bowl of a blender and puree until smooth in consistency. Pour the puree into a measuring cup to ensure that you end up with 1 cup puree.

Return the persimmon puree to the blender. Add the brown sugar, eggs, evaporated milk, vanilla, ginger, cinnamon and cloves and pulse the ingredients together.

persimmon pie

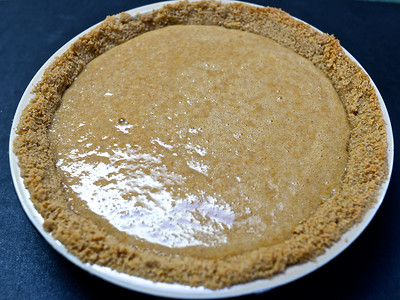
Persimmon batter poured into a homemade graham cracker crust

Remove the pie crust from the oven. Pour the persimmon puree into the crust.

Return the pie to the oven and bake for 35 to 45 minutes, checking after 20 minutes to ensure that the crust isn’t browning too much. If it is, cover the crust with strips of aluminum foil or with pie shields. When finished baking, the filling will have set and puffed up. Remove the pie from the oven and cool on a wire rack. Serve warm or at room temperature.

The Always Delightful Dal Tadka

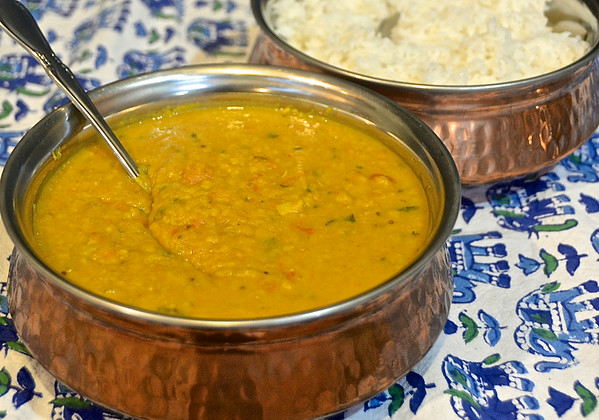
Thanks to a Sunday evening spent eating platefuls of homemade Indian curries and watching Ritash Batra’s charming The Lunchbox, I’m shifting gears this week to share one of my favorite meals, dal tadka. In India dal is both an ingredient—legumes such as split peas, beans or lentils—and a savory dish.

Regarding the dish, at least 60 types of dal exist. What differentiates each are the combination of legumes and spices, the cooking times and the final consistency. Some dals are soupy while others are thick and stew-like. In the case of dal tadka I’ve made and eaten both types.

chana and toor dal

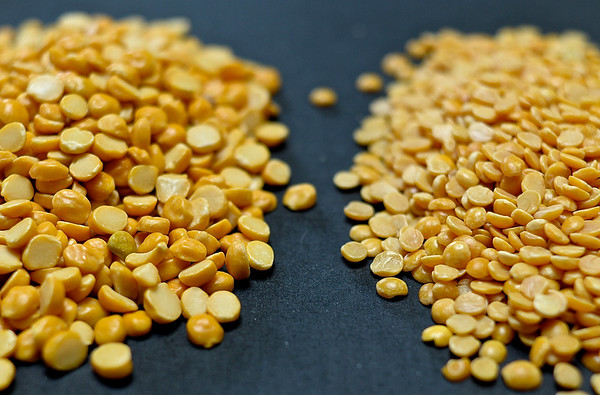
Chana dal (L) and the smaller toor dal (R)

Although turmeric injects its rich color into dal tadka, legumes likewise imbue it with a golden hue. Wondering which legume to use? In northern India I was instructed to buy yellow lentils. However, the staff at New York’s Kalustyan’s swear by chana dal or split black chickpeas. Following their advice, I use chana but, when I don’t have that on hand, I substitute the smaller toor dal or split pigeon pea. With the latter you get a denser, softer dish.

produce sold on the street in India

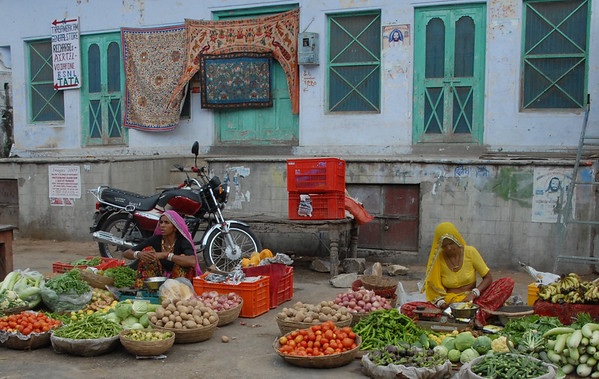
Produce seller in Pushkar, Rajasthan, India

A few years ago, while at the Oberoi Amarvilas in Agra, India, I came across what I dubbed “the ideal dal tadka.” Flavorful and filling, it possessed the perfect blend of aromatic spices and toothsome lentils. Direct-from-the-garden produce, including sweetly sour ginger, spicy green chilies and juicy, red tomatoes, balanced out the delightful dish.

I became so smitten with this dal tadka that the chef there ended up writing down the ingredients and steps and hand-delivering them to me. My version of dal tadka has been adapted from the Oberoi’s delightful recipe.

DELIGHTFUL DAL TADKA
Although it may require more than a few ingredients, dal tadka is still quite simple to make. Boil the lentils. Saute the onion, tomato, peppers and spices. Stir everything together with fresh lemon juice, chopped cilantro and dried chilies. Easy!

Serves 6 to 8

9 cups water
2 cups split pigeon peas (toor dal), chana dal or yellow lentils
1 1/2 tablespoons ground turmeric
2 teaspoons salt
1/4 cup olive oil
1 teaspoon cumin seeds
1 teaspoon black mustard seeds
3/4 cup chopped onion
1 1/2 tablespoons grated fresh ginger
1 1/2 tablespoons chopped green chili pepper
4 plum tomatoes, chopped
2 tablespoons granulated onion
1 tablespoon ground cumin
2 tablespoons lemon juice
4 to 6 dried red chilies
Generous handful of cilantro, chopped
Basmati rice, for serving

In a large sauce pan bring the lentils, turmeric, salt and water to a boil. Skim the foam off the top, cover the pan with a lid and simmer over medium-low for roughly 1 hour. When finished, the lentils will be soft. Remove the pan from the heat and set aside.

In a medium sauté pan heat the oil. Add the cumin seeds, black mustard seeds, chopped onion, ginger and green chilies. Saute until the onion browns and then add the tomato, granulated onion and ground cumin and sauté it for 1 minute. Add the lentils, lemon juice and chilies to the cooked onion-tomato (masala) mixture. Check and adjust the seasonings as needed. Finish the dish with chopped coriander. Serve with a side of basmati rice.

Sailing away in Raspberry Meringue Boats

raspberry meringue boat

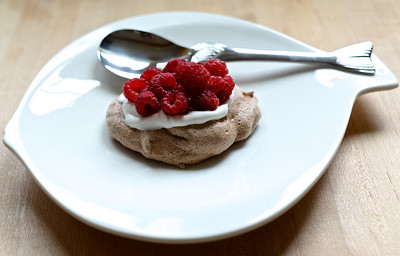
RASPBERRY MERINGUE BOAT

Sometimes my timing is off. During the last days of summer I collected and baked a rare autumn treat, ground cherries. On the first day of fall I took a field trip to a community supported agricultural garden and picked a quart of a beloved summer delicacy, raspberries. That they had not already been scavenged by birds, bees and other berry fiends amazed me. That they retained their brilliant ruby color and sweet, juicy flavor at the end of a long growing season was even more shocking. How lucky could I get?

BAKING MERINGUES

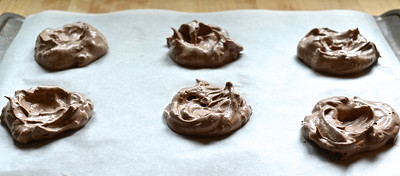
BAKING CHOCOLATE MERINGUES

Although I’d spent much of the summer simmering, pureeing and swirling fruits into desserts, I didn’t want to toss these fresh-from-the-vine beauties into a blender or pot. Such gorgeousness should be showcased and not transformed into a lumpy, red mass. Rather than just serve them whole with a dollop of homemade whipped cream, I turned to an old family favorite, the meringue. A simple sweet, it would be the perfect foundation for these exquisite berries.

If your ancestors are French as a smattering of mine are, then you might swear that meringues originated in France. After all, they star in the classic French dessert île flottante. However, if your relatives are Swiss, you may claim these sweetened, whipped and slowly baked egg whites for Switzerland. Historians can’t say with any certainty which country created them. The one thing upon which everyone can agree, though, is that meringues make a lovely vessel for seasonal fruit.

Although tempted to sail my raspberry meringue boats across an ocean of crème anglaise and channel the old île flottante, I left them dry docked on dessert plates. You can eat these with fork or fingers. The choice is yours.

RASPBERRY MERINGUE

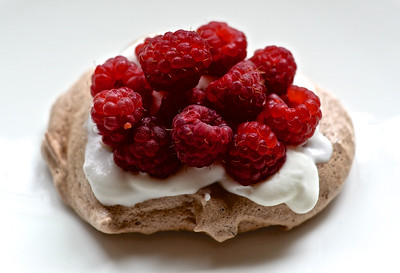
FRESH RASPBERRIES WITH WHIPPED CREAM AND CHOCOLATE MERINGUE

RASPBERRY MERINGUE BOATS
Makes 2 dozen

for the meringues:
4 large egg whites, at room temperature
3/4 cup granulated sugar
1/2 teaspoon vanilla extract
1/2 teaspoon balsamic vinegar
3 tablespoons unsweetened cocoa
2 ounces semi-sweet chocolate, finely chopped
2-3 cups fresh raspberries

for the almond cream:
1 cup heavy cream
1/4 cup granulated sugar
1 teaspoon almond extract

To make the raspberry-chocolate meringue boats, preheat the oven to 350 degrees Fahrenheit. Line two baking sheets with parchment paper and set aside.

BEATING EGG WHITES

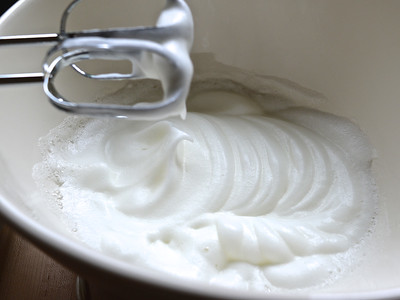
BEATING EGG WHITES UNTIL SOFT PEAKS FORM

Using an electric mixer, beat the egg whites until soft peaks form. See the photo directly below for an example of soft peaks.

BEATING EGG WHITES

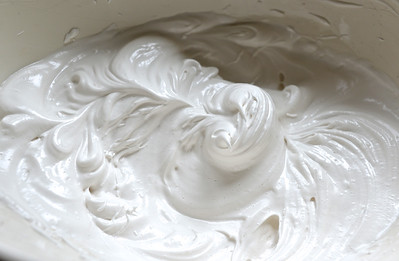
EGG WHITES WITH STIFF, GLOSSY PEAKS

Add the vanilla extract and balsamic vinegar and beat until incorporate. Adding the sugar a spoonful at a time, continue to beat the egg whites until stiff, glossy peaks form. The photo below depicts egg whites beaten into stiff, glossy peaks.

Sprinkle the ground cocoa and chopped chocolate over the top. Using a spatula, fold the cocoa and chocolate into the egg whites. Once they’ve been incorporated, place 1 to 2 tablespoons of meringue on the parchment-lined baking sheet. Using the back of the spoon, make a shallow indentation in the center of the meringue; this is where the raspberries will “sail.” Repeat until you’ve filled up both cookie sheets.

Place the baking sheets in the oven and lower the temperature to 280 degrees. Bake for 1 1/4 hours and then check for doneness by sampling one of the meringues. If, when you bite into it, the texture is firm and the center seems crisp, the meringue is done. If it’s still moist and sticky, leave the meringues in the oven for another 15 to 30 minutes. When finished, turn off the oven and allow the meringues to cool inside on the parchment. When cool, the meringues should lift easily from the parchment paper. If not, use a thin, flat, metal spatula to remove them.

Before assembling your raspberry boats, you’ll need to make the almond cream. Place the cream, sugar and almond extract in a large bowl and beat until soft peaks form.

To assemble, spread a thin layer of whipped cream over the meringue boat. Place an ample amount of raspberries on top of the cream. Repeat until all the boats are made.

Dishy and Delicious Pistachio Coconut Creams

COCONUT CREAM

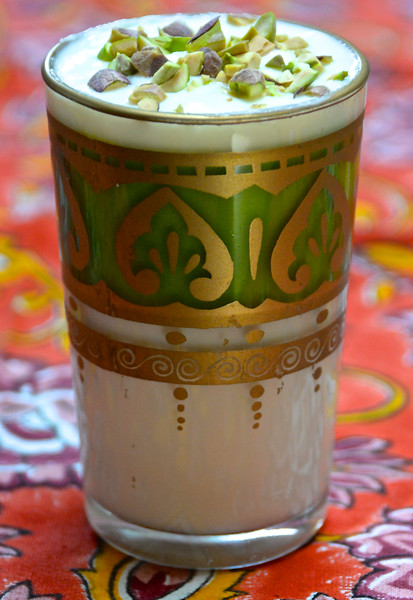
A TEA GLASS OF PISTACHIO COCONUT CREAM

Over the summer I became infatuated with the English syllabub. Velvety and light, this simple dessert consists of only three ingredients—cream, sugar and a smidgen of alcohol. If you’re a traditionalist, you add sweet wine or cider. If you’re more of a rebel, you may include a splash of rum, brandy or any other liqueur or flavoring that strikes your fancy. Whip it all together and you’ve got an ambrosial syllabub.

As winter creeps closer to my doorstep, I start to crave desserts heartier than flavored whipped cream. I still like the idea of a creamy treat that I can spoon into and out of elegant Moroccan tea glasses. However, instead of stuffing these delicate souvenirs with cream, I’m filling them with a far more common and filling Moroccan ingredient, yogurt, and a few other tasty things. The end result? The easy, dishy and delicious Pistachio Coconut Cream.

COCONUT CREAM

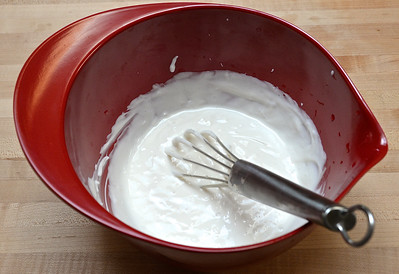
WHISKING TOGETHER THE COCONUT CREAM

Reminiscent of the English syllabub, Pistachio Coconut Creams feature yogurt whisked together with confectioner’s sugar, dried coconut and thick and sweetened cream of coconut. Don’t confuse cream of coconut with its thinner, less flavorful relation, coconut milk. You will find both in the international aisle of most grocery stores and in Latin American, Asian and Caribbean markets.

PISTACHIO COCONUT CREAMS
You can also top the coconut creams with chopped toasted almonds, grated chocolate, raspberries or a swirl of chocolate sauce.
Serves 4

1/3 cup plus 1 tablespoon cream of coconut
2 cups low-fat, plain Greek yogurt
6 tablespoons confectioner’s sugar, sifted
3 tablespoons sweetened, dried coconut
1 teaspoon vanilla extract
2-3 tablespoons chopped pistachios

In a large bowl whisk together the cream of coconut, yogurt, sugar, dried coconut and vanilla. Spoon into four small glasses or bowls and refrigerate until ready to serve. Just before serving, sprinkle the tops with chopped pistachios.

Bewitching Black Currant Palmiers

BLACK CURRANT PALMIERS

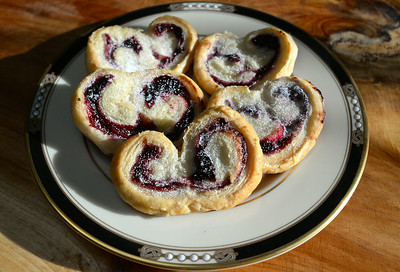
PLATE OF BLACK CURRANT PALMIERS

A few Sundays ago I lucked out and found fresh, plump red and black currants at the Rhinebeck Farmers Market. Unlike the red currants, which I’d churned into sherbet, I took a fairly traditional approach with the larger, purplish-black fruit and cooked up a batch of black currant jelly.

BLACK CURRANTS

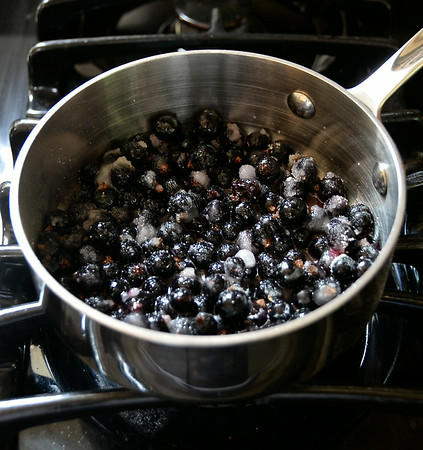
BOILING DOWN THE FRESH BLACK CURRANTS

Why jelly? Like their red relation, black currants contain a large amount of pectin, the substance that causes foods to thicken and gel. To make black currant jelly, I simmered the fruit with some sugar and lemon juice. Once the berries had softened and the sugar had dissolved, I strained the reddish-violet syrup into a glass bowl. I allowed it to cool and set and — voila! — I had black currant jelly.
Because I’d wanted to do more with currants than just make preserves, I came up with a twist on an old family favorite, palmiers. Made from puff pastry, this simple French cookie gets its name from its palm leaf-like shape. Depending on where you live and how you perceive its appearance, you may know this treat as an elephant ear, angel wing or butterfly. Different names. Same sweet.

When I was growing up, my grandmother would make palmiers from leftover dough and granulated sugar, the same ingredients and technique that French bakers had been employing for a century. As elegant as they may sound, palmiers originated in France as a means of using up scraps of puff pastry.

BLACK CURRANT JAM

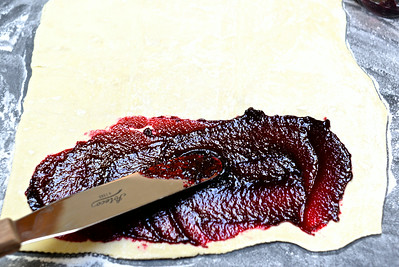
SPREADING THE BLACK CURRANT JAM

In spite of the cookie’s humble origins I’m more likely to buy puff pastry specifically to make palmiers. I also like to dress up the cookies with ground cinnamon, ginger or chocolate or almond paste. Spreading a thin layer of homemade black currant jelly over the puff pastry isn’t much of a stretch.

If you’re come across black currants and decide to make your own jelly for these cookies, you’ll need to follow the Easy Black Currant Jelly recipe.

EASY BLACK CURRANT JELLY
Makes about 1/2 cup

10 ounces black currants
3/4 cup plus 1 tablespoon granulated sugar
1 1/2 tablespoons lemon juice

Place the currants, sugar and lemon juice in a medium saucepan and bring the ingredients to a boil over medium heat. Cook until the berries have softened, the sugar has dissolved and the released juices have thickened, about 10 minutes. Remove from heat and allow the mixture to cool slightly.

BLACK CURRANT JUICE

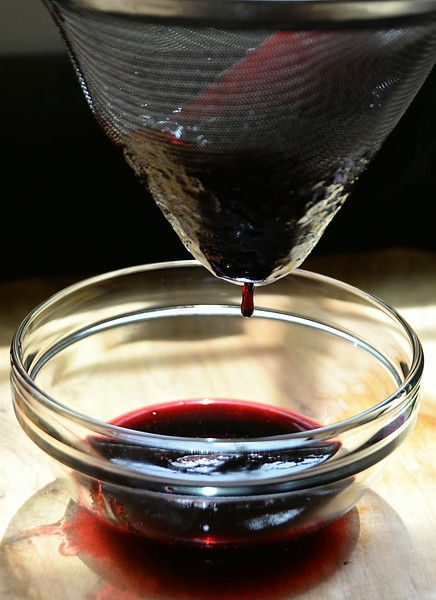
STRAINING THE JUICE FROM THE BOILED BLACK CURRANTS

Pour the berries and juice into a fine mesh strainer placed over a glass bow. Strain the liquid into the bowl. Using a spoon, press down on the berries to ensure that you squeeze out all of their juices. When finished, discard the spent berries.
Allow the syrup to cool to room temperature. Cover the bowl with plastic wrap and refrigerate until the jelly has set completely, at least 2 hours.

BLACK CURRANT PALMIERS
Makes 2 dozen

1 sheet puff pastry, thawed
1/4 cup black currant jelly
2-3 tablespoons granulated sugar

Preheat the oven to 425 degrees F. Line a baking sheet with parchment paper. Lightly dust your work surface with flour.

Place the puff pastry on the flour-covered work surface and roll it out to about 1/8-inch thick. Evenly spread a thin layer of jelly over the pastry.

FOLDING PASTRY DOUGH

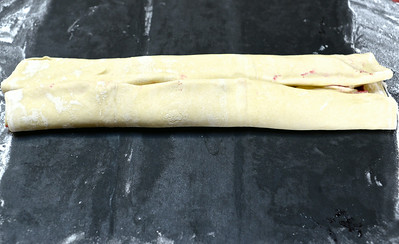
FOLDING THE PASTRY DOUGH

Fold the longer sides of the pastry to the middle of the dough, so that the edges of the two touch. Fold each side to the middle again so that you have the long roll that’s depicted in the photo below. Fold one long side over the other so that you have one long, skinny roll. Cut off the uneven ends and set aside the scraps. You can bake or compost them later.

If you find that the puff pastry seems too soft, refrigerate for 5 to 10 minutes or until chilled and firm. Otherwise, using a sharp knife, slice the pastry into 1/4-inch rounds. Place the rounds on the parchment-lined baking sheet, leaving about an inch between each. As you’re slicing, be sure to wipe off the knife periodically so that your cookies don’t also become jelly-coated instead of just jelly-filled.

Dust the tops of the cookies with the sugar. Bake for 13-15 minutes or until golden and puffed. Cool completely on wire racks before consuming.

Elderberries and Cream

ELDERBERRIES

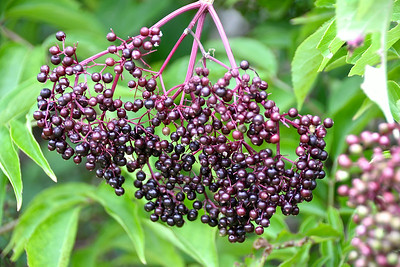
ALMOST RIPE ELDERBERRIES

A little over a month ago I spent a morning picking elderflowers at my friends’ farm in Southeastern Pennsylvania. Last weekend I returned to find one lone cluster of white flowers and an inordinate number of reddish- to blackish-purple berries drooping from the limbs of their elderberry trees. Since my last visit those pert, little flowers had transformed into August’s big bounty, tart and spicy elderberries.

As with all of this summer’s foraged fruit, elderberry collecting is a new undertaking for me. Sure, I’ve been the beneficiary of others’ wild berry gathering, adding elderberries to mini apple pies and boiling them into violet-colored sauces. However, this would be my first venture into harvesting them.

Thankfully, the task turned out to be quite easy. Just look for the darkest fruit, snap off the sprays of berries and shake them into a big bowl. As I said, easy!

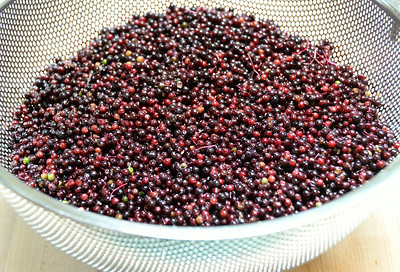
Berries picked and shucked, I took my share home and tried to think of creative ways to use two pounds of this fruit. After washing and removing any remaining stems, leaves, green berries and unlucky insects, I placed half in a large freezer bag and popped them into the freezer. At some point I’d include these in a pie or tart.

ELDERBERRIES

CLEANING THE FRESH, RIPE ELDERBERRIES

Along with putting them in baked goods, cooks have long made elderberries into jams, jellies, chutneys, cordials and wine. The fruit’s bold, tangy flavor works particularly well in the latter beverage. Because elderberries do possess this strong, rather earthy taste, I like to temper them with mild and sweet or sweetly tart ingredients such as whipped cream, ice cream, yogurt, apples, pears and oranges.

ELDERBERRIES AND CREAM

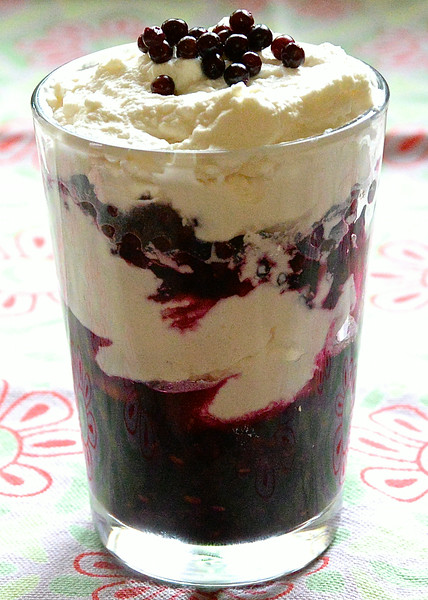
ELDERBERRIES AND CREAM

The following dish may call to mind such earlier summer offerings as Blackberry Fool and Coconut Syllabub. Unlike in fools, the fruit in this recipe is not folded into the cream. If you choose to mix the elderberries into the whipped cream, you will technically have the aforementioned British dessert.

ELDERBERRIES AND CREAM
Serves 4 to 6

1 pound elderberries, washed, drained and all debris removed
1/2 cup granulated sugar
2 tablespoons water
2 tablespoons Grand Marnier or other orange liqueur
1 cup heavy cream
1 teaspoon vanilla extract
1/4 cup confectioner’s sugar, sifted

Place the elderberries, granulated sugar and water in medium saucepan and bring the ingredients to a boil over medium heat. Cook, uncovered, for 8 minutes.

Remove the pan from the burner and add the Grand Marnier. Stir to combine, return the pan to the heat and bring the ingredients to a boil. Cook for an additional 2 to 3 minutes. Remove and allow the ingredients to cool completely.

To make the whipped cream, using an electric mixer, beat the cream until soft peaks form. Add the confectioner’s sugar and vanilla extract and continue beating until stiff peaks take shape.

To assemble the desserts, spoon equal amounts of elderberries and sauce into 4 to 6 small or juice-sized glasses. Cover the berries with a thick layer of whipped cream. Spoon another layer of elderberries over the whipped cream. Top this with a final layer of whipped cream. Refrigerate until ready to serve.

Rockin’ Red Currant Sherbet

FRESH RED CURRANTS

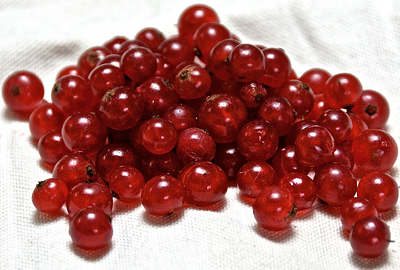
A RARE DELICACY, FRESH RED CURRANTS

This week I’ve got a great farmers’ market find—currants. In season from June to August, these petite relatives of the gooseberry come in three colors and two sizes. The smaller red and white berries possess a moderately sweet and tart taste and bright, glossy skin. The larger black currant is milder in flavor and duller in color but still has a visual and gustatory bite. All are high in pectin, making them rich in fiber and quick to gel.

British cooks often turn red currants into jams, jellies and sauces. Pop a handful of these little guys into your mouth and you’ll see why. As small as they are, these berries are chocked full of seeds. Although I have munched on fresh currants, I find them far more enjoyable after they’ve been cooked, pureed and strained as the British do. Freed from the currants’ crunchy seeds, I’m left with a thick, ruby syrup that can be made into the aforementioned specialities or into a cotton candy pink sherbet, sorbet or ice cream.

RED CURRANT SHERBET

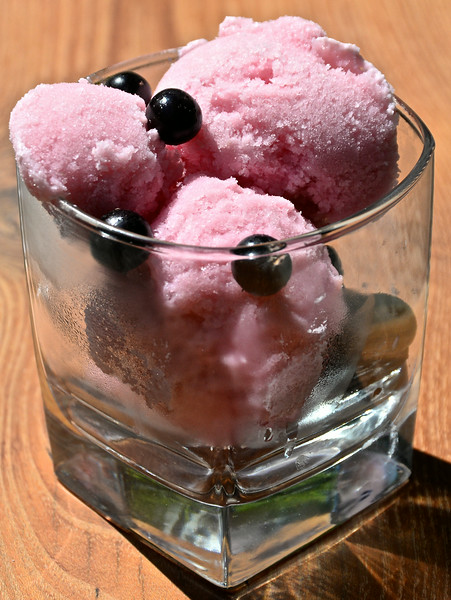
RED CURRANT SHERBET DRESSED WITH BLACK CURRANTS

What’s the difference between ice cream, sherbet and sorbet? Dairy. Ice creams typically contain cream. Sherbets may or may not contain milk. Sorbets are dairy-free. Yet, this wasn’t always the case. Two centuries ago sherbet and sorbet referred to the same dish, a cold, sweet, fruit juice-based drink. By the 20th century this cold drink had transformed into a frozen juice. Sometimes it contained milk, making it a sherbet. Sometimes it did not, which meant that it was a sorbet or, in some regions of the country, still a sherbet. When it comes to sherbet versus sorbet, there is no ironclad rule.

Before I share this week’s recipe, I have to present a little discourse on spelling. In the UK this fruit is spelled as one word, i.e. redcurrant. In the U.S. you often see it spelled as two words. Since both Merriam-Webster and Oxford Dictionaries opt for the latter, that’s what I’ve chosen to do, too.

RED CURRANT SHERBET
Makes about 4 cups

2 tablespoons water
3/4 cups granulated sugar
1 pound red currants
Juice of 1 lemon
3 cups whole milk
Handful of blackcurrants or blueberries, optional, for serving

Place the water, sugar, currants and lemon juice in a medium saucepan and bring the ingredients to a boil over medium heat. Cook, stirring occasionally, until the currants have softened and released their juices and the resulting liquid has thickened, 7 to 10 minutes. Remove the pan from the burner and allow the ingredients to cool slightly.

Puree the currant mixture in a blender and then strain the puree through a sieve or fine mesh strainer, reserving the thickened syrup and discarding the pulp and seeds. Whisk together the syrup and milk and refrigerate the combo for 45 minutes or until chilled.

To make the sherbet, pour the mixture into an ice cream maker. Follow the manufacturer’s instructions for making ice cream. Freeze until ready to serve.