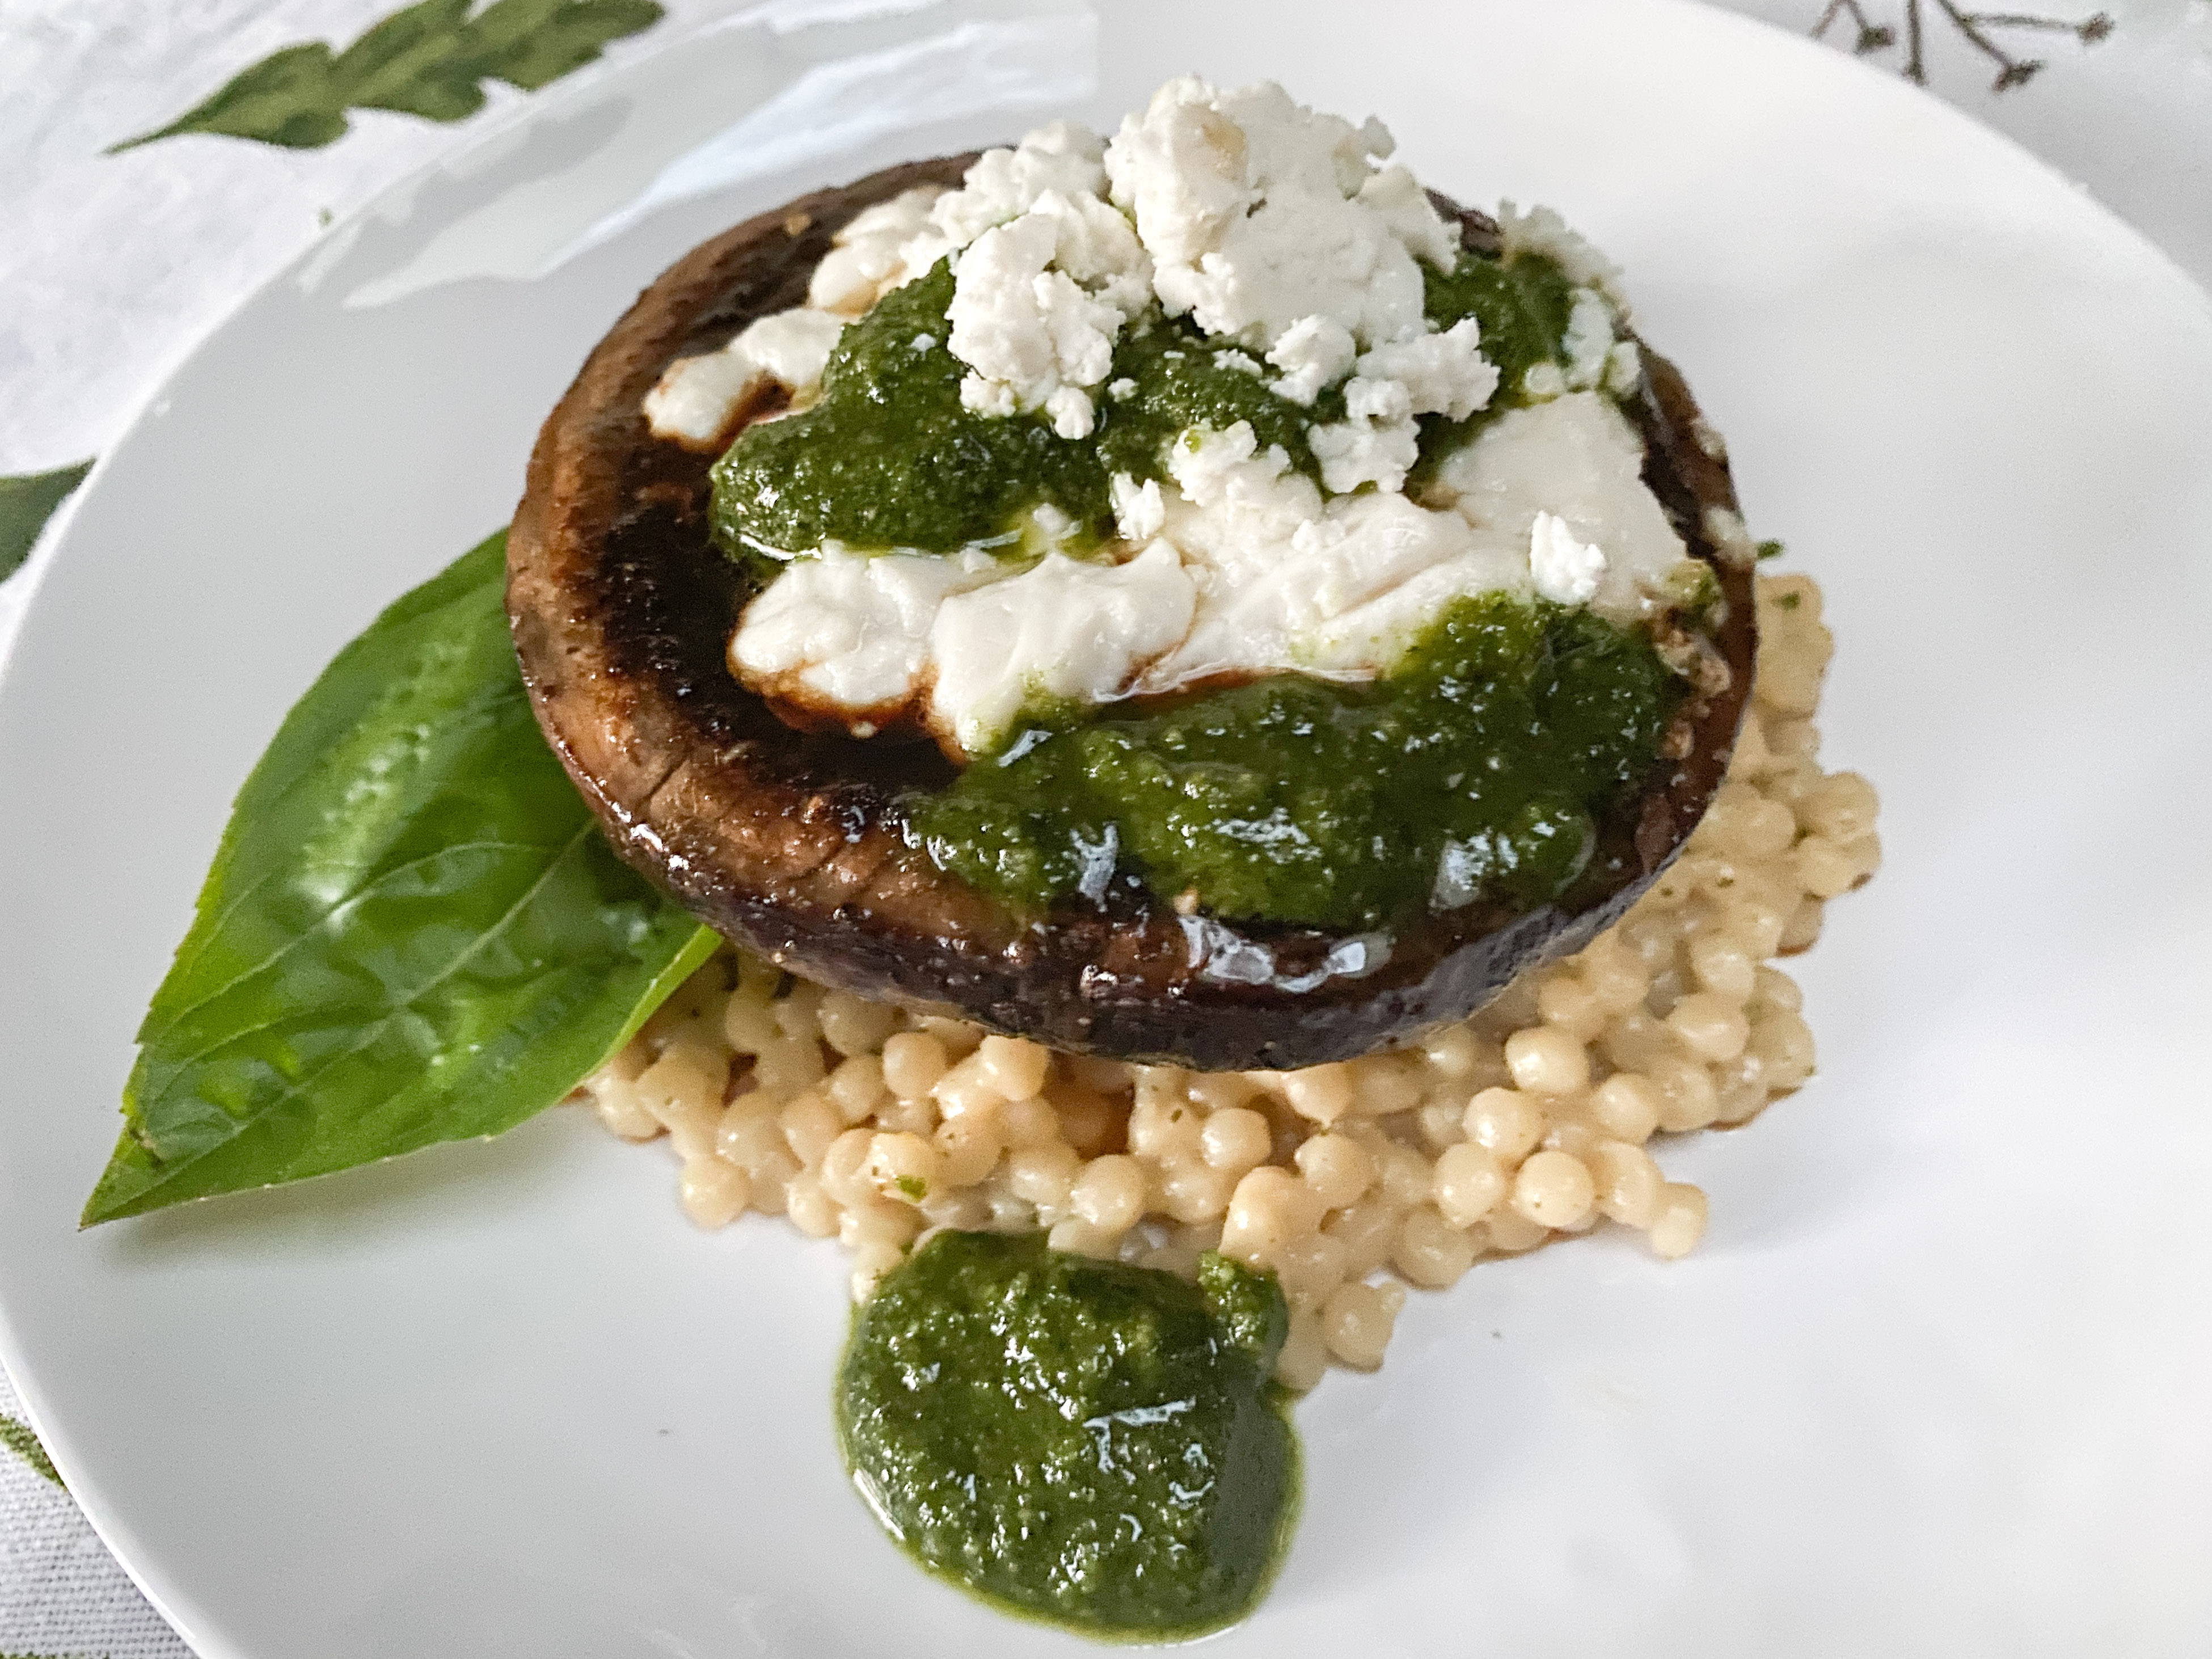
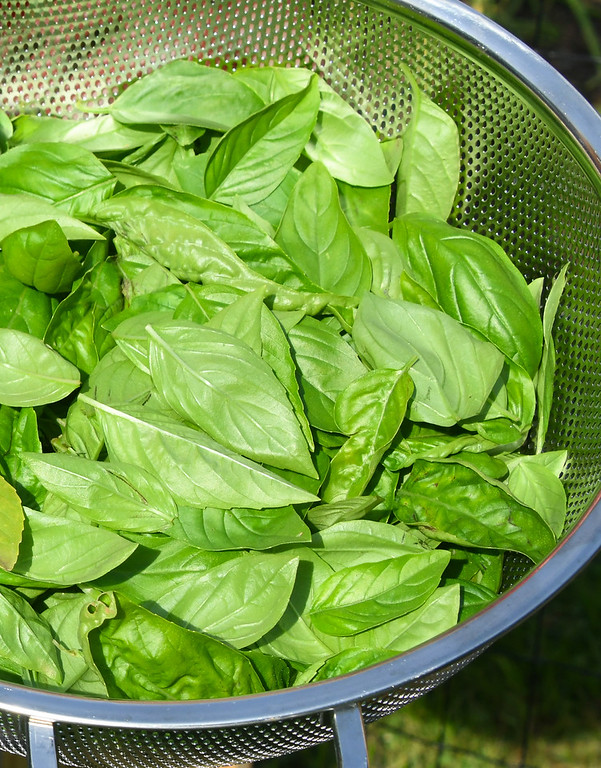
What to do with all the basil that you grew in containers on your patio or fire escape or in your garden? The obvious choice is make pesto. But, then what do you do with all that pesto? If you’re someone who loves the earthy flavor of mushrooms, you might just drizzle it over baked portobello mushrooms.
That brings me to this short entry and luscious, tender, and juicy offering, Pesto-Goat Cheese Portobello Mushrooms. So, grab a big bowl, collect an even bigger bunch of basil, and get ready for an extraordinary, pesto-dressed meal.
A bit of basil from the garden
Pesto-Goat Cheese Portobello Mushrooms
Serves 2
Ingredients:
for the pesto:
2 cups packed basil leaves, washed and dried
¼ cup blanched almonds
3 cloves garlic
1 to 2 ounces Pecorino Romano
½ teaspoon salt
1/8 teaspoon ground black pepper
½ cup extra virgin olive oil
for the mushrooms:
2 tablespoons olive oil, plus more for greasing baking dish
2 tablespoons balsamic vinegar
1 teaspoon granulated garlic
¼ teaspoon salt
1/8 teaspoon ground black pepper
2 portobello mushrooms, cleaned and trimmed
2 to 3 ounces goat cheese
Pesto (see above)
Couscous, optional, for serving
Directions:
Move an oven rack to the top position. Preheat the oven on 375 degrees Fahrenheit.
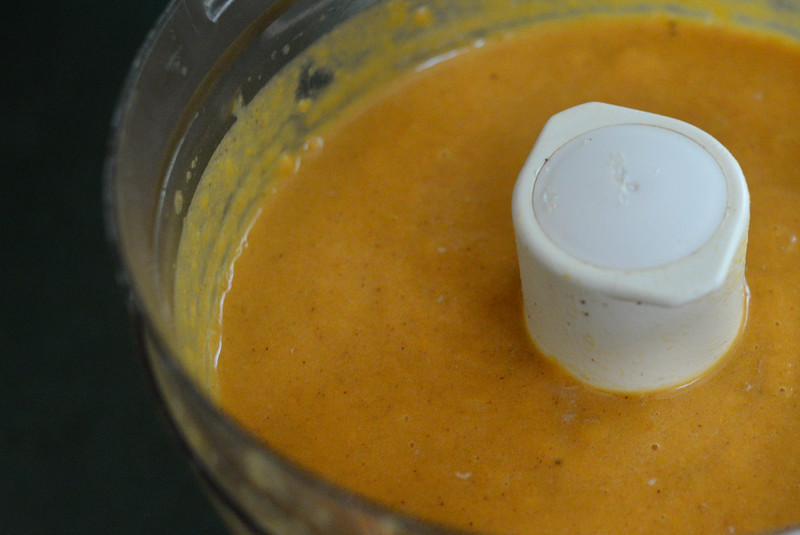
To make the pesto, put the basil leaves, almonds, garlic, salt and pepper in the bowl of a food processor or blender and pulse until minced, 20 to 30 seconds.
While the processor is running, pour in the extra virgin olive oil. Scrape down the sides of the bowl and process again until smooth. Set the pesto aside.
Brush the bottom of a baking dish with olive oil. Place the mushrooms, trimmed side up, in the baking dish.
In a small bowl whisk together the two tablespoons olive oil and balsamic vinegar, granulated garlic, salt and pepper. Pour equal amounts of the vinegar dressing over each mushroom.
Bake the mushrooms for 10 to 15 minutes, until softened. Remove the baking dish from the oven.
Preheat the broiler on high.
Spoon equal amounts of goat cheese on top of each mushroom. Place the baking dish on the top oven rack, directly under the broiler. Broil until the cheese is lightly melted, 30 to 60 seconds. Remove the baking dish from the oven.
If serving with couscous, place equal amounts of couscous in the center of two plates. Center the mushrooms on top of the couscous. Drizzle equal amounts of pesto over top of each. Serve hot.
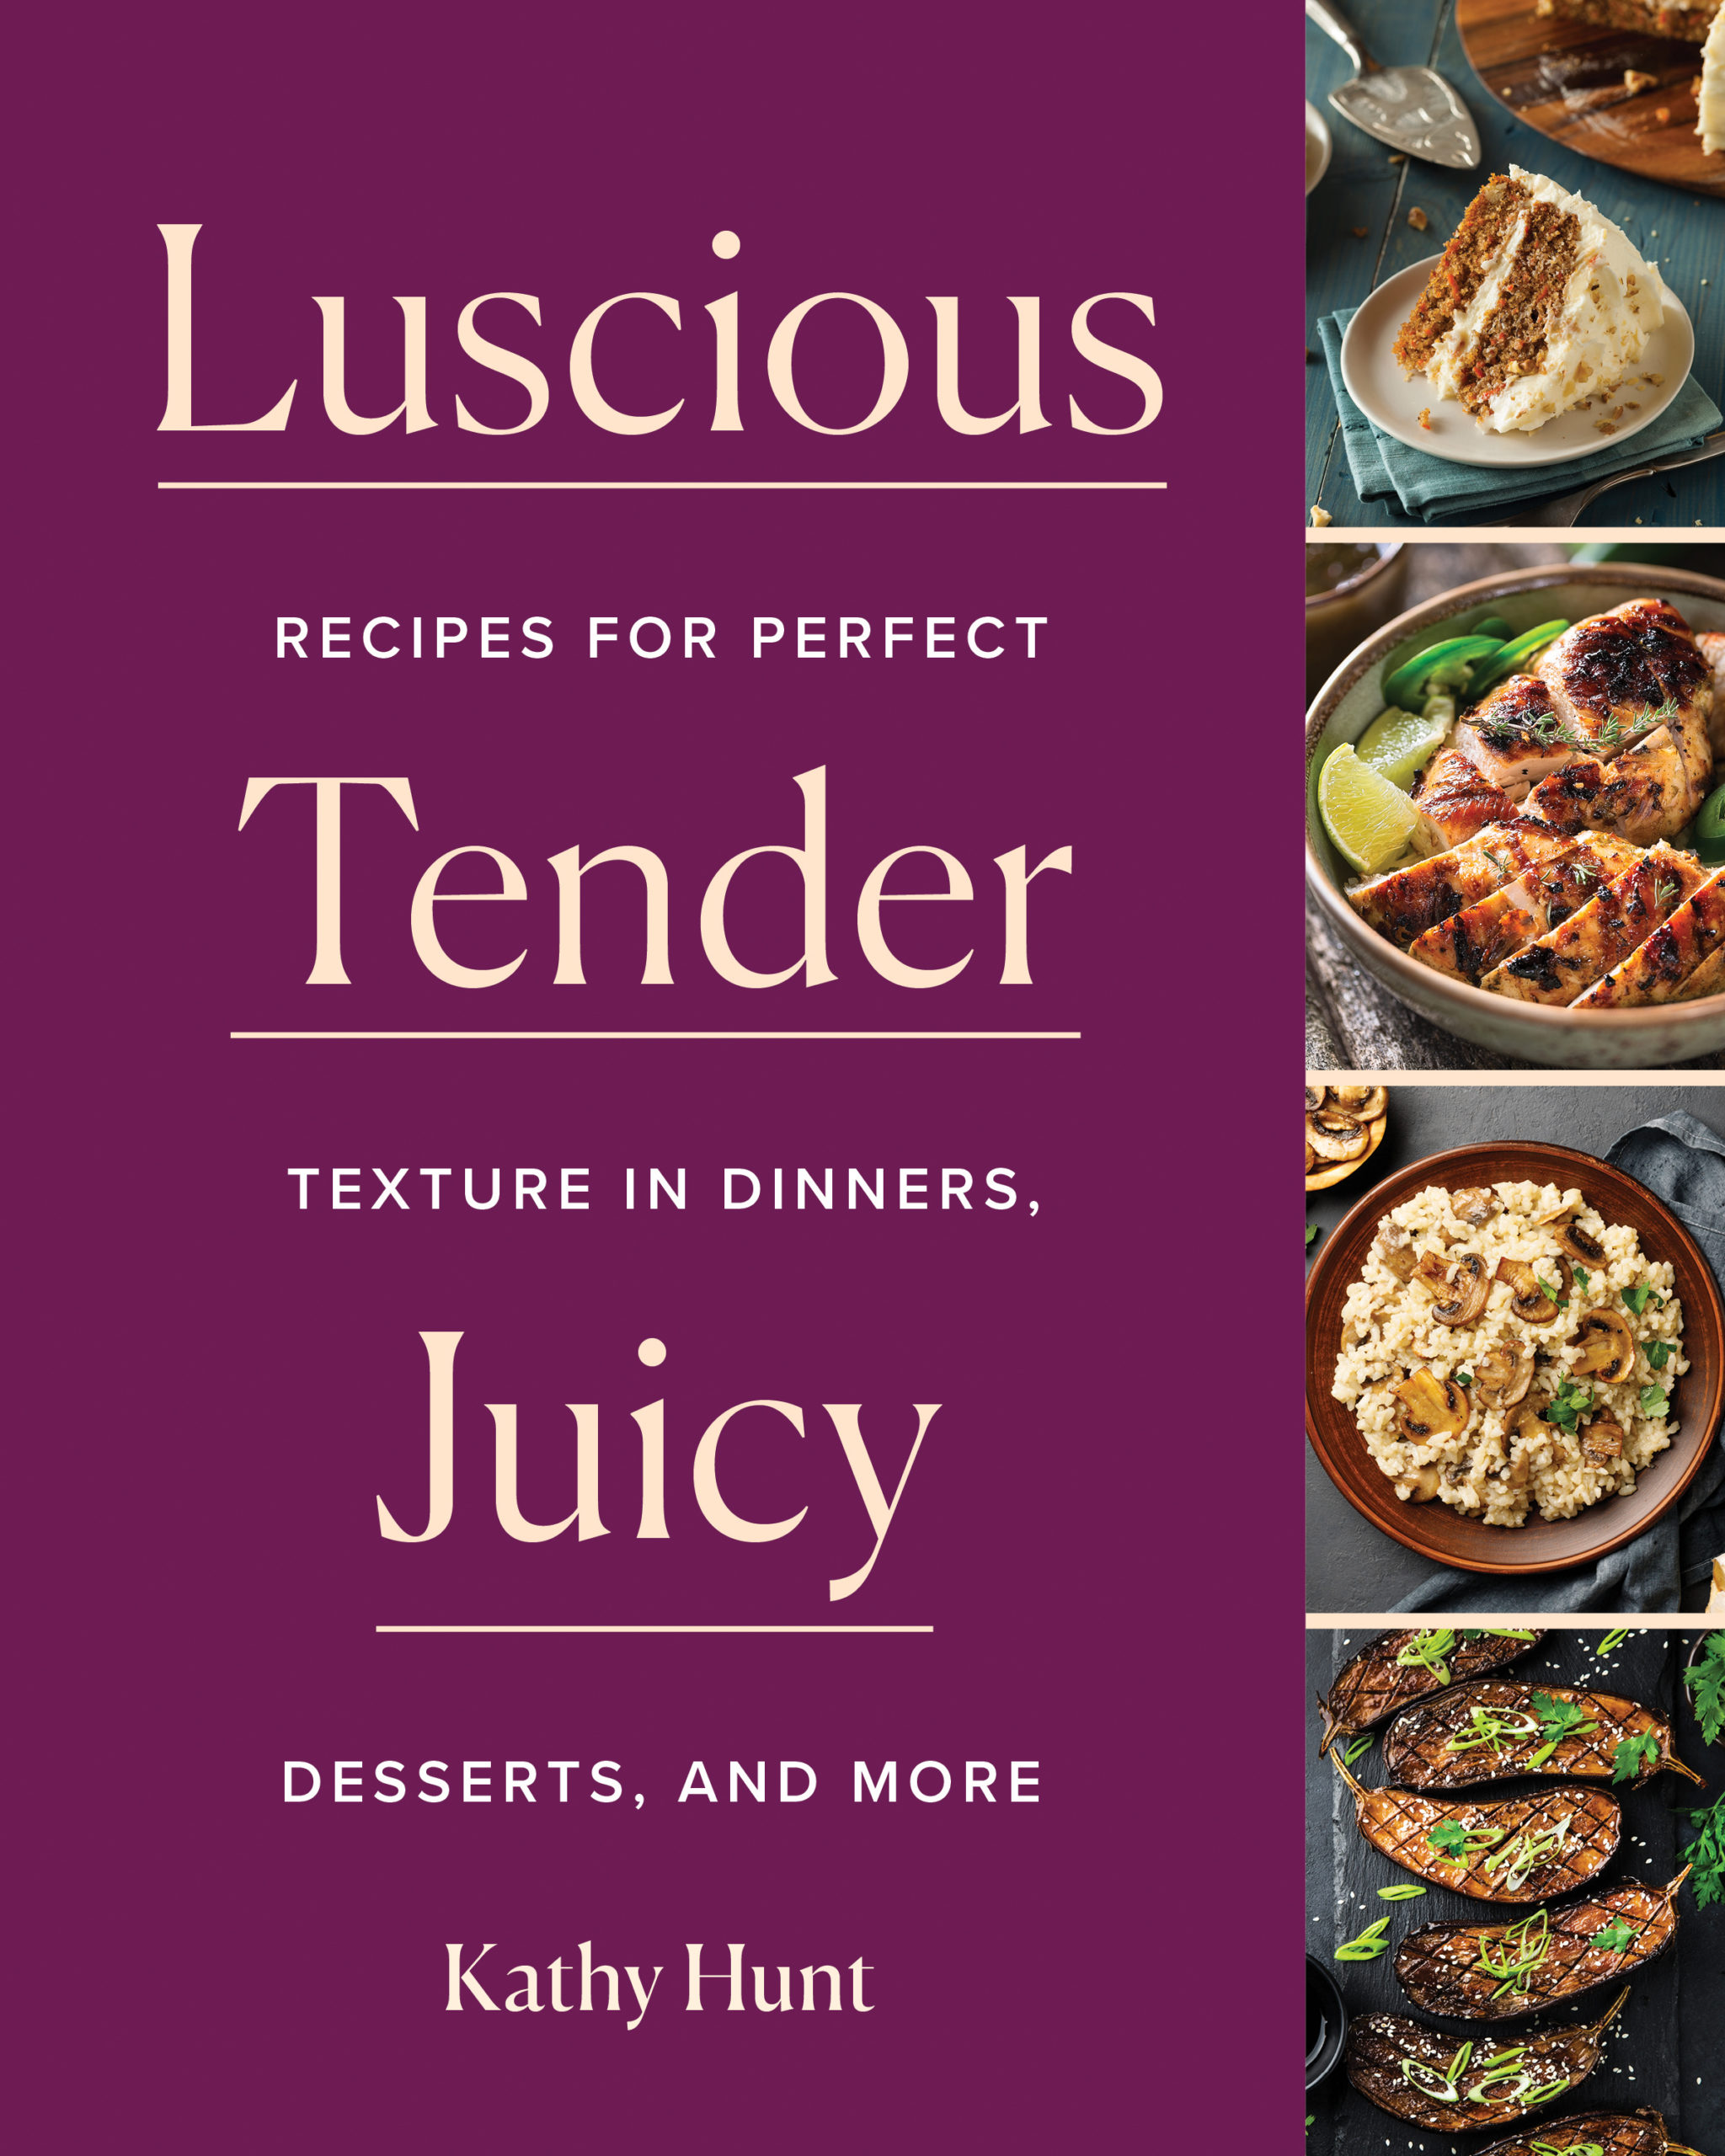
Kathy Hunt’s new technique cookbookLuscious, Tender, Juicydetails cooking methods for mastering the perfect, satisfying, velvety texture each and every time.
Succulent shrimp, moist cakes, vegetables bursting with fresh flavor―the secret to cooking exceptional food is keeping it luscious and tender. In this technique-focused guide to delectable dishes, Hunt delivers recipes for global appetizers, mains, sides, desserts, and sweet baked goods. Written for novice and accomplished cooks alike, this masterclass in texture inspires an appreciation for the skills needed to craft exquisite mouthfeel, an often overlooked facet of cooking. From stir-frying noodles and sautéing fish to grilling delicate vegetables and roasting hearty meats, Luscious, Tender, Juicy covers a wealth of preparation techniques.
“This appealing collection of recipes for everyday meals and desserts places a special emphasis on teaching you how to make food that is lushly textured, or, to use of the the most dreaded words in the modern vocabulary, mois
From a gustatory point of view, Kathy Hunt cannot understand why some people react so strongly to the mention of something that is not dried out. A widely travelled cooking teacher and writer, she happily shares her techniques and recipes for making sure that you’re not eating rubbery shrimp, unexpectedly chewy chicken, wizened peas, or dust-dry brownies.
Hunt’s resourcefulness extends both to cooking method and ingredient choice, and she frequently calls your attention to how you can borrow ideas from her recipes to improve your own. You’ll also find many illuminating sidebars on everything from selecting scallops to getting that extra bit of loft in your sponge cake.”
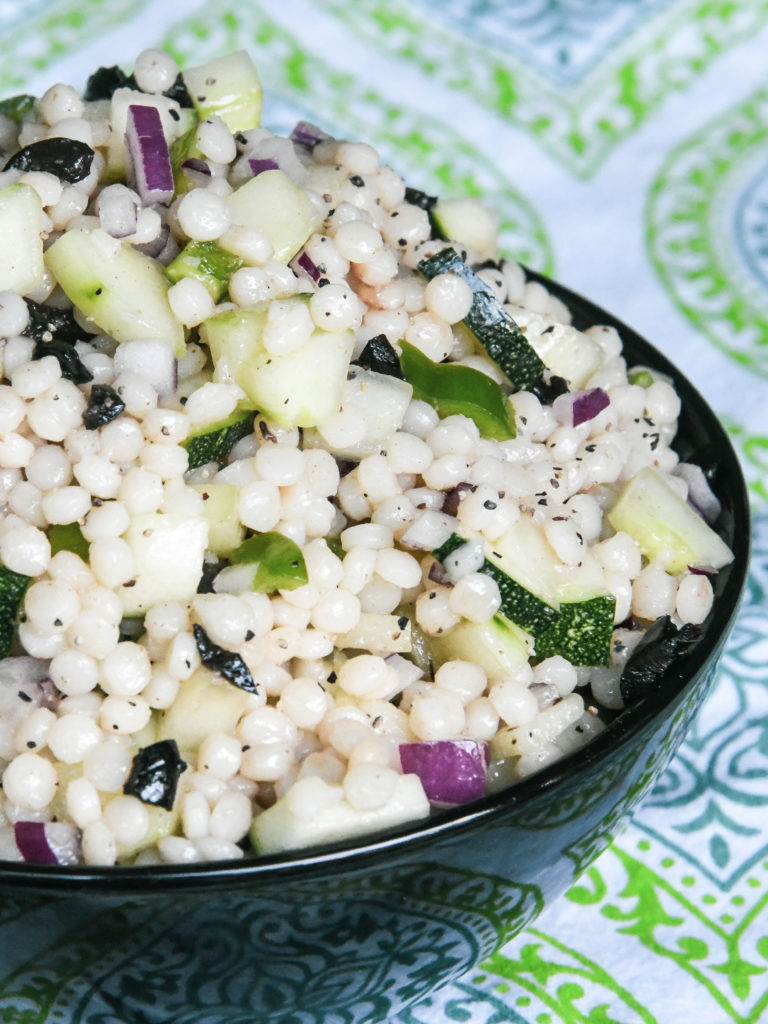
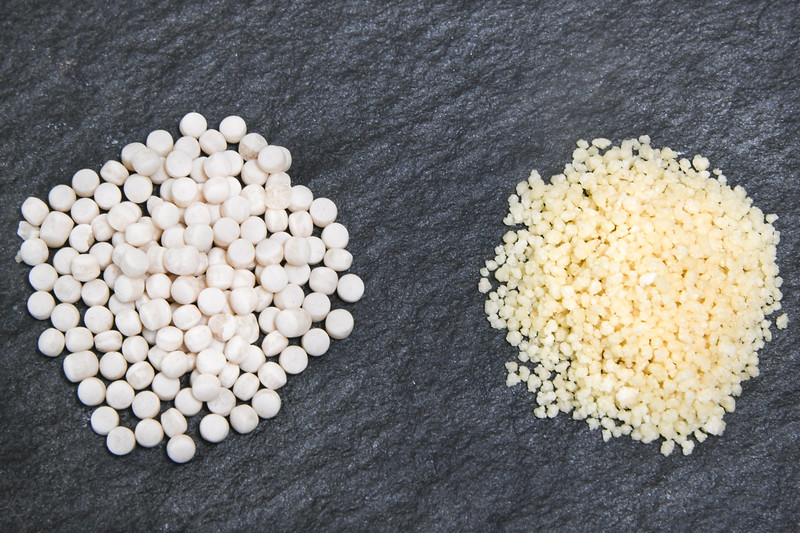
We’ve hit that point in the season where, whether you have a garden or not, produce has begun to pile up in your kitchen. Everyone you know wants to share some zucchini, cucumbers, tomatoes and more. If the prospect of cucumber-infused drinks and zucchini bread has lost its appeal, try something a bit different. Add your summer surplus, along with fresh herbs, to a big bowl of pearl or Israeli couscous. You’ll be happy that you did.
Pearl (left) and traditional (right) couscous
Go big with pearl couscous
Invented in Israel as a substitute for rice in the 1950s, pearl or Israeli couscous possesses a chewy texture and uniformly round shape. Unlike traditional couscous, it is toasted rather than dried. As a result, it has a slightly nutty flavor. Its larger shape and complex taste make it an excellent addition to stuffing, stews and salads.
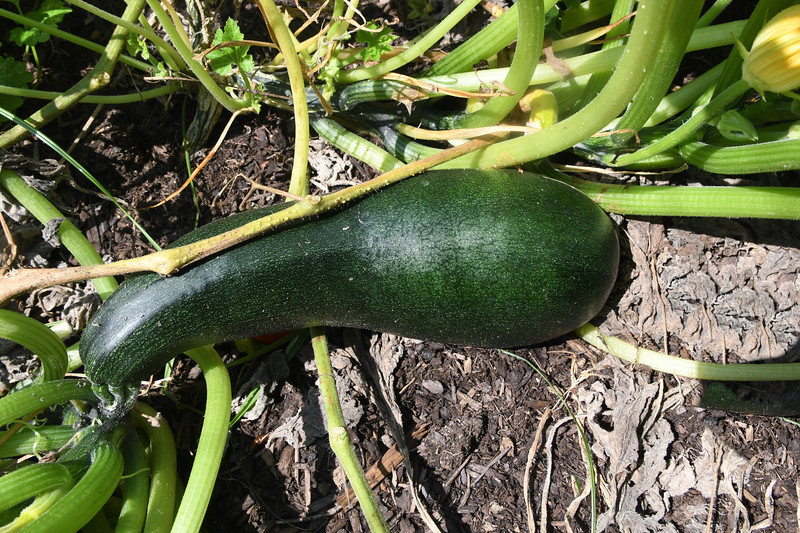
Zucchini on the edge of being a bit too big.
A few words on raw zucchini
Although people usually cook zucchini before consuming it, you can eat this summer squash in its raw form. Keep in mind that the smaller the zucchini, the fresher and milder the flavor. Gargantuan zucchinis, which have been left on the vine too long, tend to have a bitter flavor and pulpy texture. If you’re featuring raw zucchini in a dish, opt for the little guys that measure roughly six to eight inches in length.
Cucumber, Zucchini, Basil and Couscous Salad
Serves 4
Ingredients
1 ½ cups dried pearl/Israeli couscous
1 clove garlic, minced
¼ cup white balsamic vinegar
3 tablespoons extra-virgin olive oil
1 teaspoon salt
½ teaspoon ground black pepper
1 cucumber, peeled, seeded and chopped
1 small zucchini, diced
1 green bell pepper, diced
½ red onion, diced
Handful of Moroccan/oil-cured black olives, chopped
Handful of fresh basil, chopped
Directions
Cook the couscous according to the manufacturer’s instructions. When it’s finished cooking, drain it into a fine mesh colander, run cold water over it and then place it in a large mixing bowl.
In a separate bowl whisk together the garlic, vinegar, olive
oil, salt and black pepper. Pour it over the couscous.
Add the cucumber, zucchini, bell pepper, onion, olives and basil. Toss to combine. Serve the salad either at room temperature or slightly chilled.
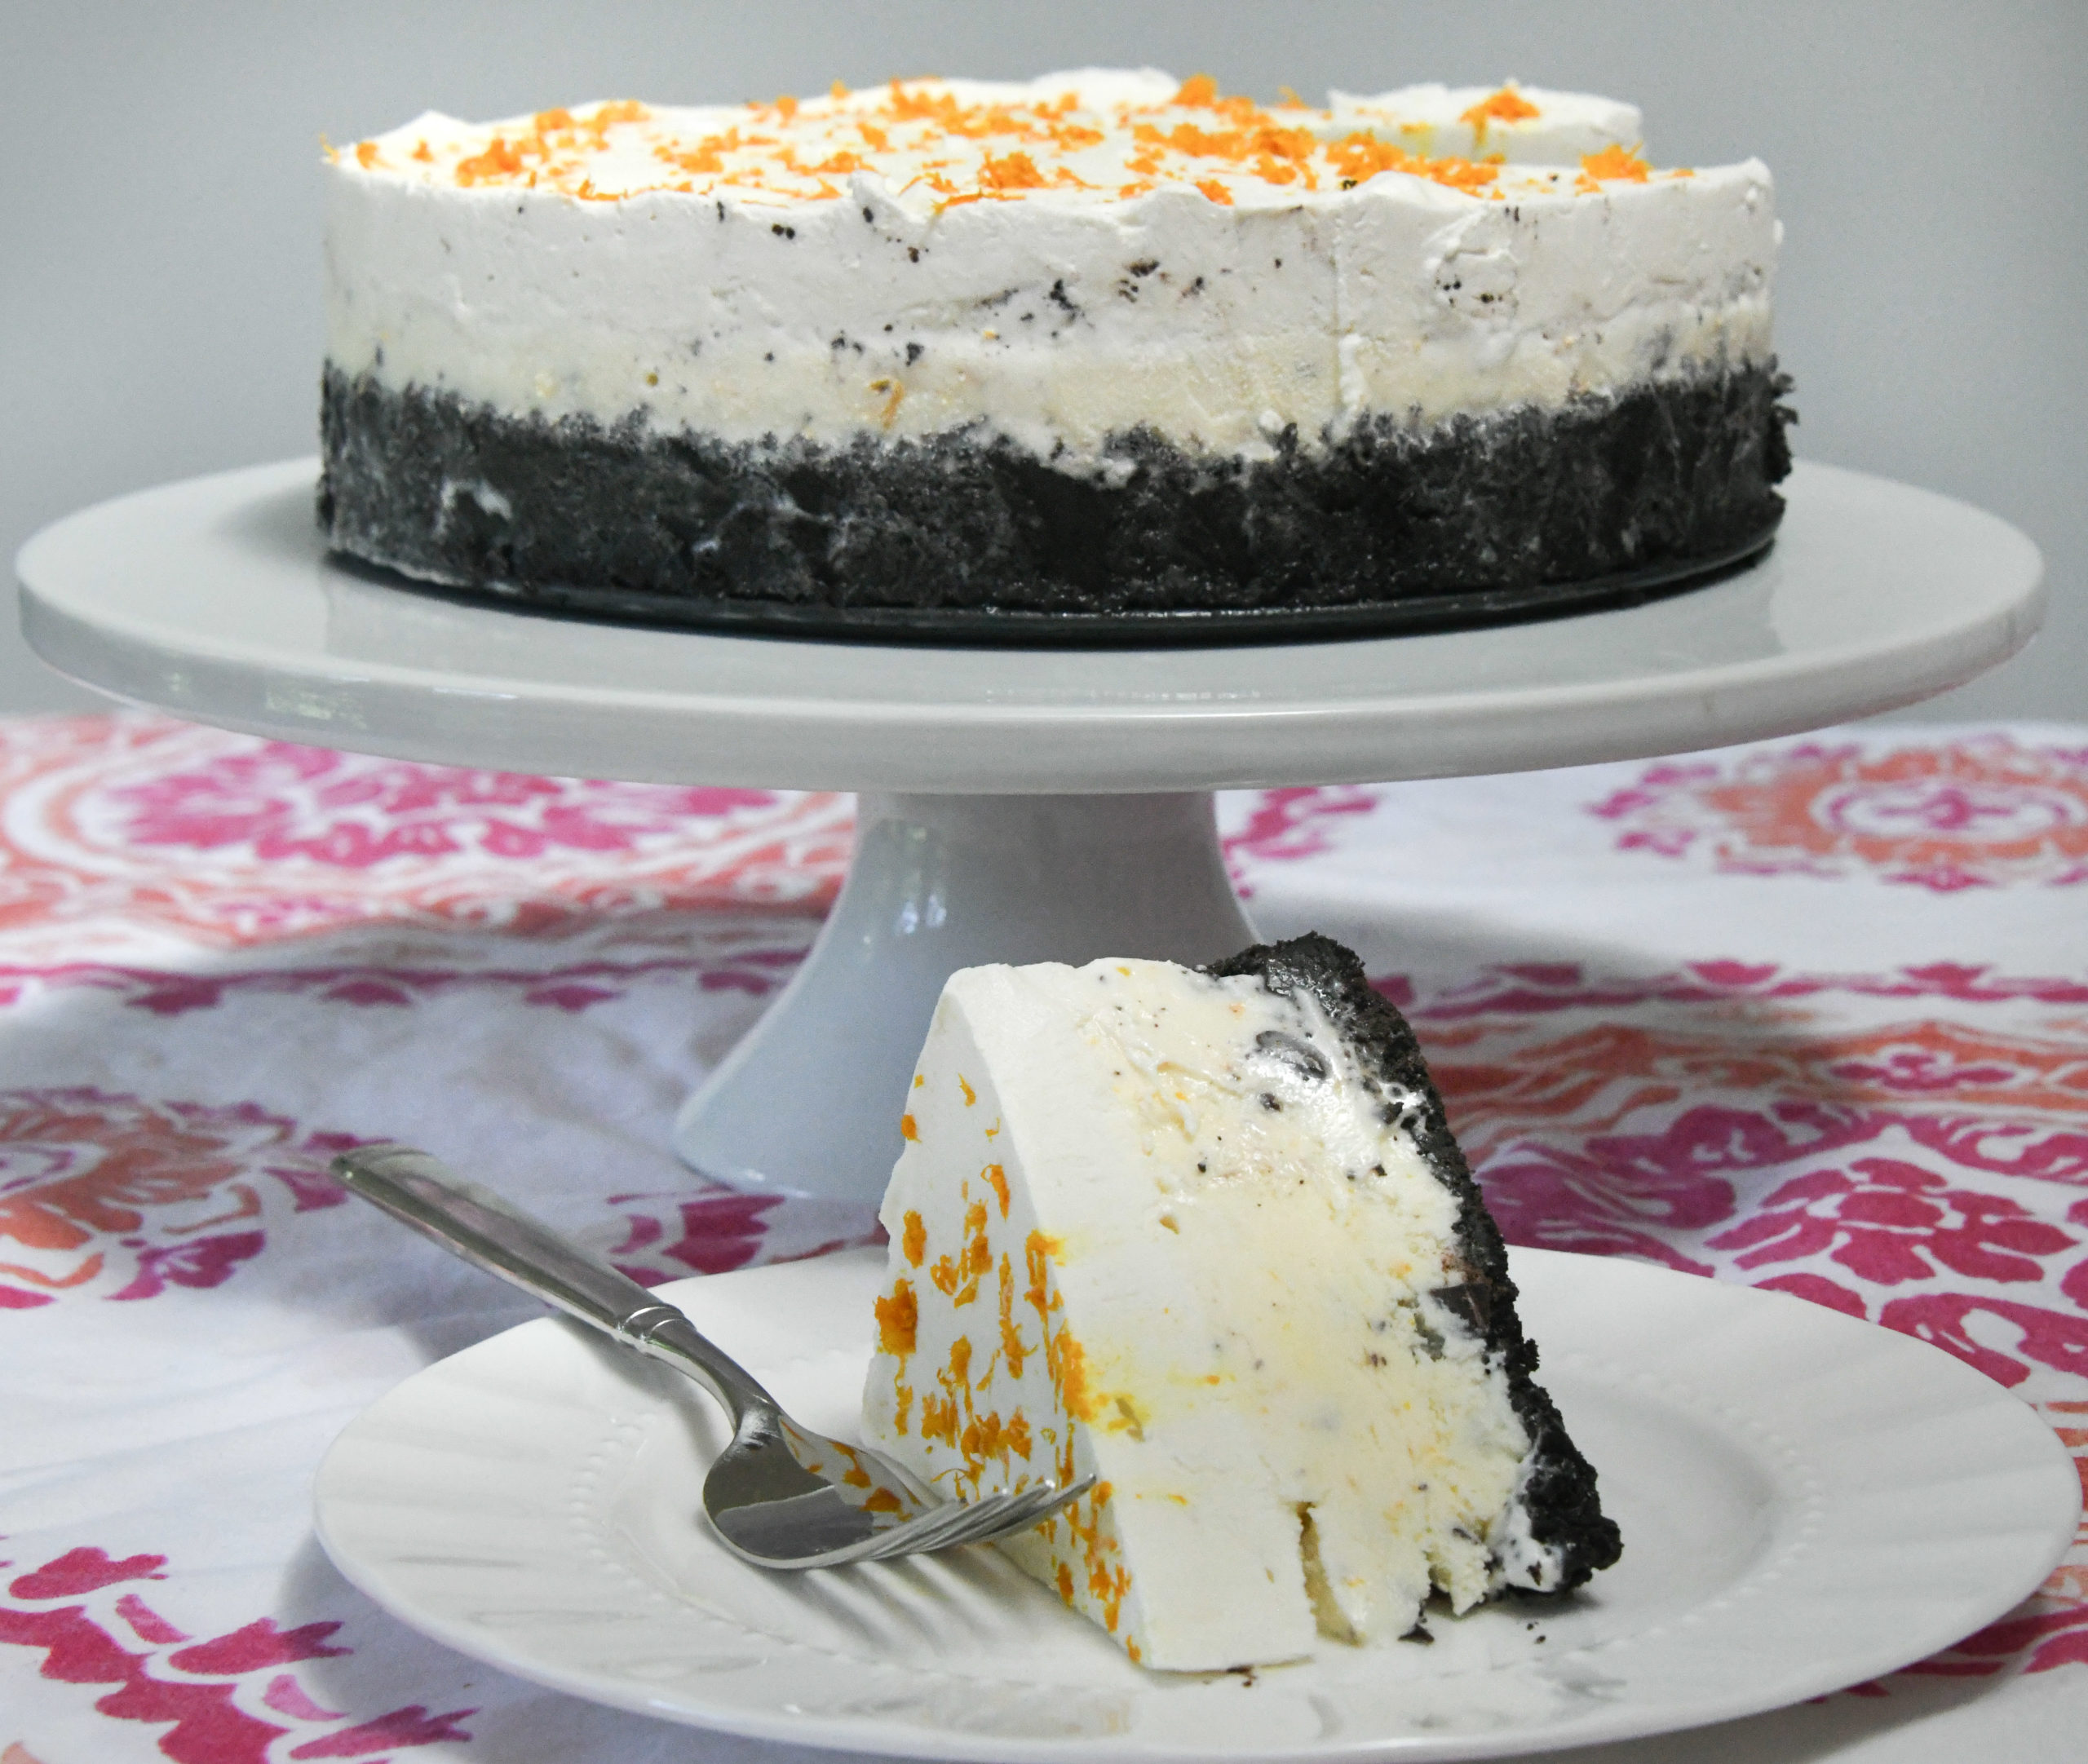
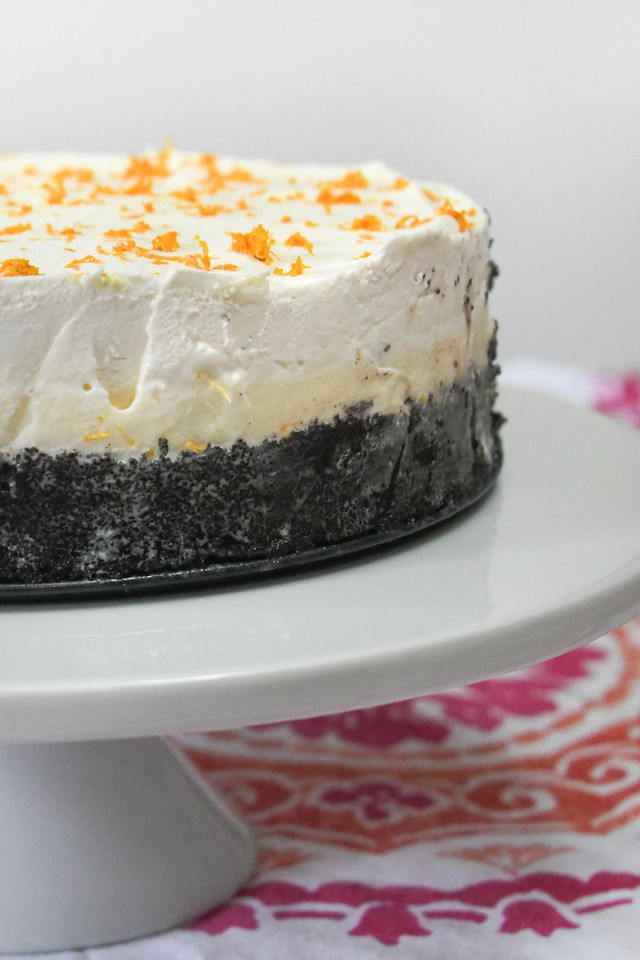
I make cakes from scratch. I make ice cream from scratch. Yet, until this summer, I’d never made an ice cream cake. That all changed when I had a Saturday afternoon to kill, an excess of oranges, heavy cream and bittersweet chocolate in my kitchen, and the bowl of an ice cream maker taking up valuable space in my freezer. Perfect time to try my hand at an Orange-Bittersweet Chocolate ice cream cake.
Origins of icebox desserts
People have enjoyed some version of an ice cream cake since at least the 19th century. It was during this period that iceboxes became more commonplace. Filled with blocks of ice, these wooden cabinets were used to store perishable foods. Along with extending freshness and preventing spoilage, iceboxes inspired an array of frozen desserts, including a precursor to the ice cream cake, the bombe. This Victorian era treat featured a fruity custard encased in layers of ice cream and, occasionally, cookies or cake. Frozen in a spherical mold, the bombe was sliced and served with a sweet sauce.
Orange & chocolate, the perfect pair
Because this was my first attempt at an ice cream cake, I kept things simple. No custards. No elaborate molds. No fancy layers. The only complex aspect is flavor. In my concoction rich, luscious bittersweet chocolate balances out the tart sweetness of fresh orange juice. It’s a classic pairing and one that works well in the following recipe.
Can’t track down chocolate cookies or wafers for the crumbs in your crust? You can always open a package of Oreos, scrape out and discard the filling and then blitz the cookies in the bowl of food processor or blender. For two cups of cookie crumbs, you will need almost the entire 14.3-ounce package. Just find a friend who loves the center of these sandwich cookies and a bread knife and get to work.
Orange-Bittersweet Chocolate Ice Cream Cake
If you’re using an electric ice cream maker, be sure to freeze the bowl overnight before making the ice cream portion of this recipe.
Serves 8 to 10
Ingredients
for the crust:
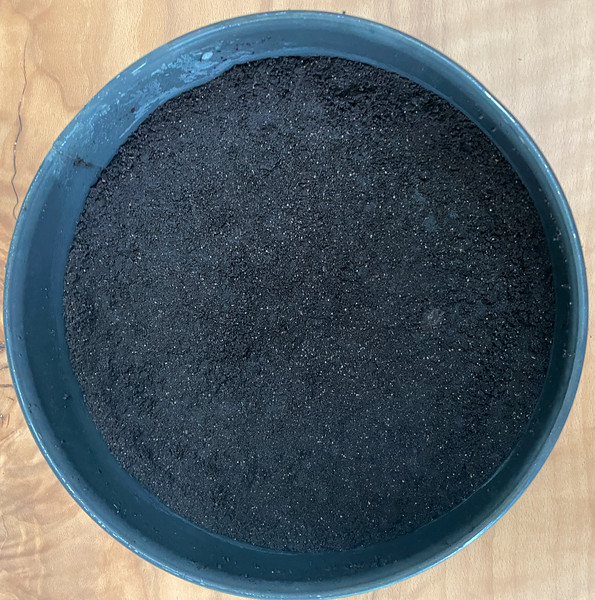
2 cups chocolate cookie crumbs (see entry above for cookie
info)
5 tablespoons unsalted butter, melted
¼ cup granulated sugar
for the ice cream:
2 cups heavy cream
3 cups whole milk
1 cup granulated sugar
Grated zest of 1 orange
¾ cup freshly squeezed orange juice (from 2 large oranges)
½ teaspoon vanilla extract
1 ½ ounces bittersweet chocolate, chopped
for the topping:
1 1/3 cup heavy whipping cream
1 teaspoon vanilla
1/3 cup granulated sugar
Grated zest of 1 orange
Directions
Lightly grease an 8-inch springform pan.
To make the crust, stir the cookie crumbs, melted butter and
sugar in a medium bowl until the crumbs are coated in butter. Spoon the crumbs
into the springform pan and pat into place. You want the crust to extend up
1-inch from the base of the pan but not reach the top of it.
Cookie crust extending 1-inch up the sides of the pan
Place the crust in the freezer for a minimum of 45 minutes.
While the crust is setting, make the ice cream. In a large bowl mix the heavy cream, whole milk, sugar, orange zest and juice, and vanilla. Stir the ingredients together until the sugar has melted.
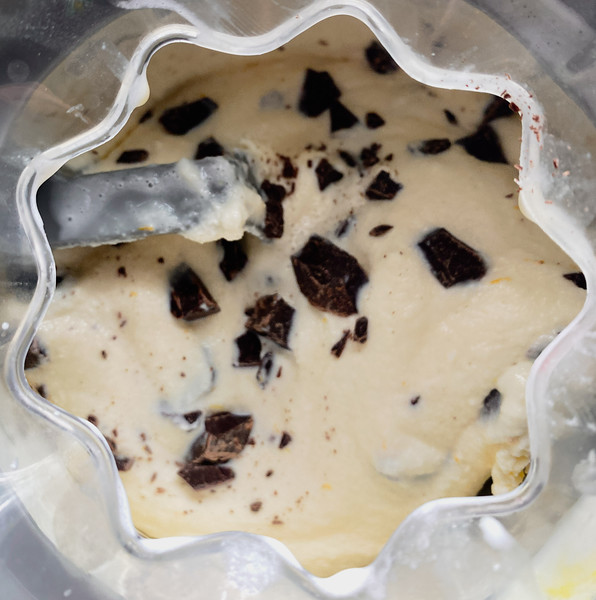
If you’re using an ice cream maker, pour the ingredients into the frozen bowl, turn on the machine, and churn the ingredients until a fairly thick ice cream forms. Depending on your ice cream maker, this could take as little as 25 minutes or much longer. Once you’ve achieved this consistency, add the bittersweet chocolate and stir or churn to combine.
Adding the chocolate to the ice cream
If you are making the ice cream by hand, pour the ingredients into a large, shallow pan. Put the pan in your freezer for 35 minutes. After 35 minutes stir the ingredients together and return the pan to the freezer. Repeat this process until you have a fairly thick, but not completely frozen, ice cream. At that point, add the bittersweet chocolate and stir to combined.
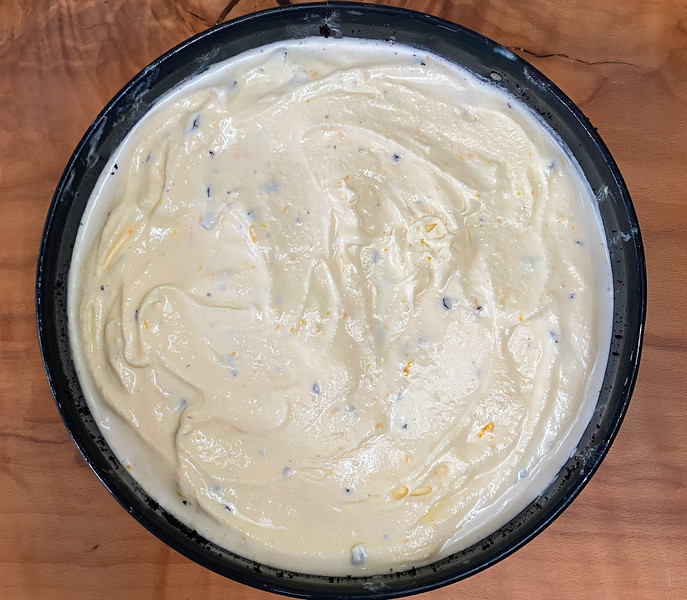
Remove the crust and ice cream from the freezer. Using a spatula, evenly spread the ice cream over the crust. Cover the ice cream with a sheet of plastic wrap and place the cake back in the freezer for 30 to 60 minutes.
Orange-chocolate ice cream ready to be covered by plastic wrap
Once the ice cream has frozen, make the top layer of the cake. In a large bowl beat the cream, vanilla and sugar together until stiff peaks form.
Using a spatula or icing knife, evenly spread the whipped cream over the ice cream. Sprinkle orange zest over the top of the whipped cream and return the cake to the freezer for at least 60 minutes.
To loosen the cake from the pan, soak a dish towel with hot water and then wrap it around the outside of the pan. Using a thin-bladed knife, gently cut around the edge of the cake to loosen it from the pan. Unlatch and remove the top of the springform pan. Slice and serve.
Polenta tends to get a bad rap. People say it takes too much effort and too long to make. I disagree. Stirring up a batch of polenta is as easy as putting ingredients into a saucepan, bringing them to a boil and stirring them together. How hard is that?
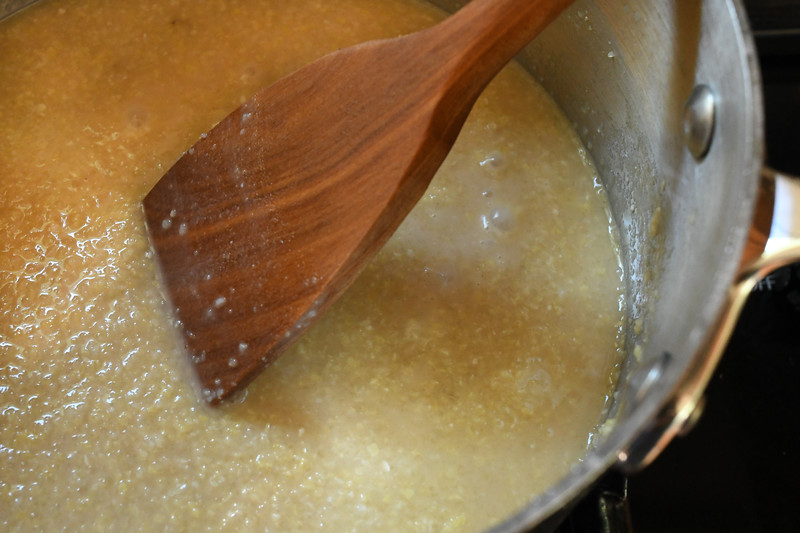
The tricks to smooth, creamy polenta are to stir often and watch your saucepan. Don’t walk away from the bubbling pot and expect to come back 20 minutes later to the perfect dish. (That holds true for many foods.) More than likely, you’ll return to find a scorched mess.
Keep stirring that polenta!
A quick refresher on polenta
A staple of Northern Italian cuisine, polenta has been consumed since Roman times. Made from cornmeal, it is reminiscent of hominy grits in its texture and consistency. While grits are made from ground white corn, oats or rice, polenta is comprised of coarsely ground yellow corn. Hence the yellow color of the dish.
To cook polenta, you need a heavy bottomed pan, water or stock, ground cornmeal, a touch of cream and grated Parmesan cheese. You simmer the cornmeal until softened, add the cream and then continue cooking until thick and creamy. Stir in the cheese and simmer until the ingredients have melded together and the polenta is fairly dense.
At that point you have three options: Put the polenta on plates or in a large bowl and serve hot; pour into a greased baking dish and bake until firm; pour into a baking dish, refrigerate until firm, cut the polenta into small rectangles and fry them in olive oil. For the following recipe you’ll go with option two.
Polenta and Eggs with Spring Onions
Serves 2
Ingredients
1/2 teaspoon olive oil
2 ¾ cup chicken stock or water
1/2 teaspoon sea salt
½ cup ground cornmeal
¼ cup light cream
½ cup frozen corn (optional)
2/3 cup grated Parmesan cheese
2 to 4 large eggs
1/3 cup crumbled feta cheese
Ground black pepper, to taste
2 to 3 spring onions, whites and 1-inch of greens sliced
Handful of fresh flat-leaf parsley, roughly chopped
Directions
Preheat the oven to 400° F. Grease a high-sided, oven-safe
sauté pan with 1/2 teaspoon olive oil.
Place the stock or water and salt in a medium, heavy bottomed saucepan and bring it to a boil over medium-high heat. Whisk in the cornmeal and reduce the heat to medium low. Simmer for 10 minutes, stirring frequently with a large spoon or spatula. After 10 minutes add the cream and stir to combine.
Cook, stirring continually, for 10 to 12 minutes or until the cornmeal has softened and thickened. Add the optional frozen corn and cook for 2 to 3 minutes.
Remove the pan from the heat and add the Parmesan cheese. Whisk the
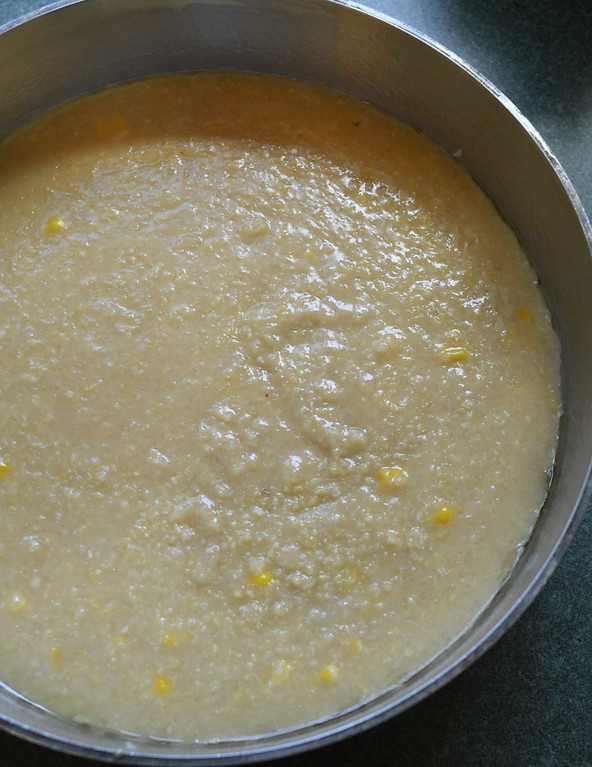
ingredients together until blended and then evenly spread the polenta in the prepared
pan.
Polenta in a pan and ready to be baked.
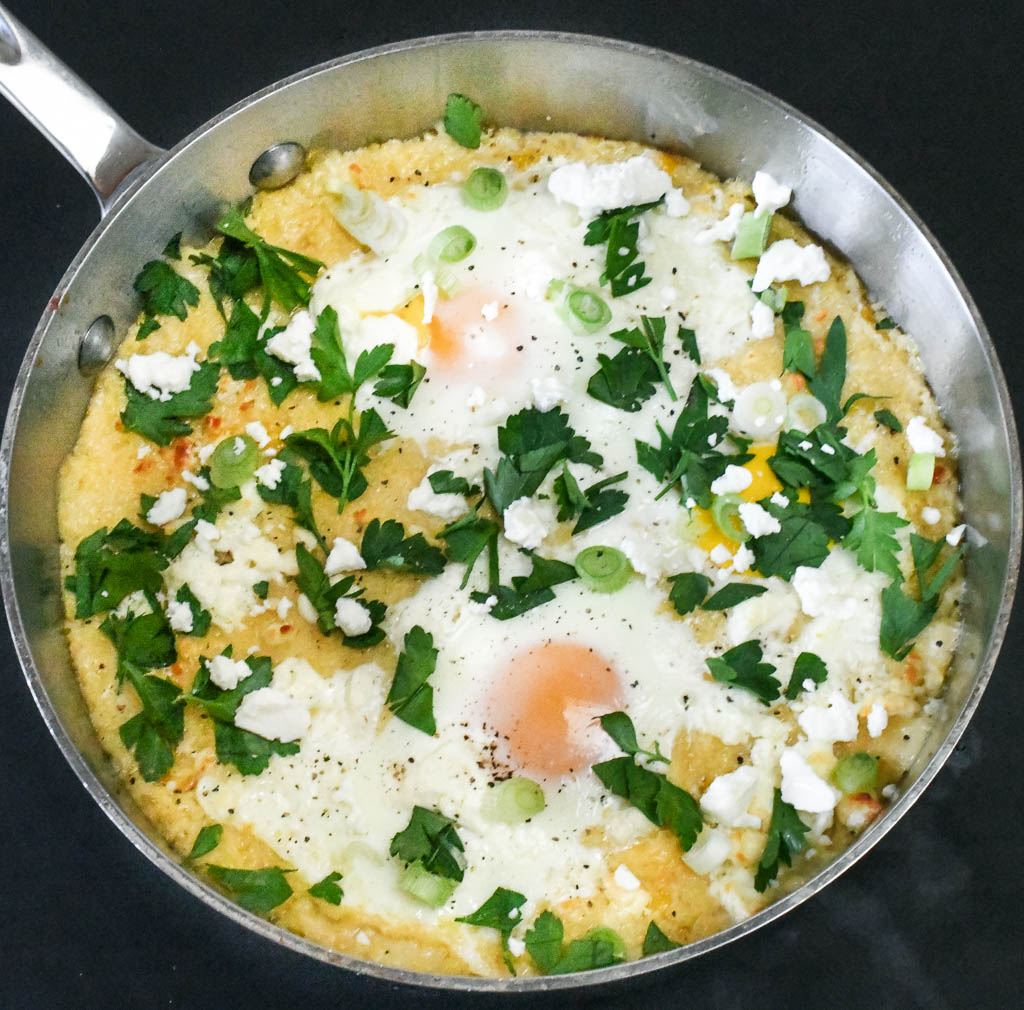
Bake for 10 to 15 minutes, until the polenta has begun to firm up. Remove the pan from the oven and, using the back of a spoon, make 2 to 4 wells in the polenta. Crack an egg into each well and return the pan to the oven.
Bake for 10 minutes. Remove the pan from the oven and sprinkle the feta over the top. Return the pan to the oven for another 3 to 5 minutes, until the egg whites have cooked, the yolks have set, and the feta has melted slightly.
Remove the polenta from the oven. Spread the green onions, parsley
and black pepper over the top. Serve hot.
Rhubarb and I have a troubled past. I was in college when I first saw it in stalk form and thought that it was celery gone bad. Then I tried this vegetable in a slice of strawberry-rhubarb pie. The strawberry part of the pie was tasty, but, once I took a bite of a stringy and hard pinkish-green chunk of rhubarb, I was repulsed. Rhubarb fail number one.
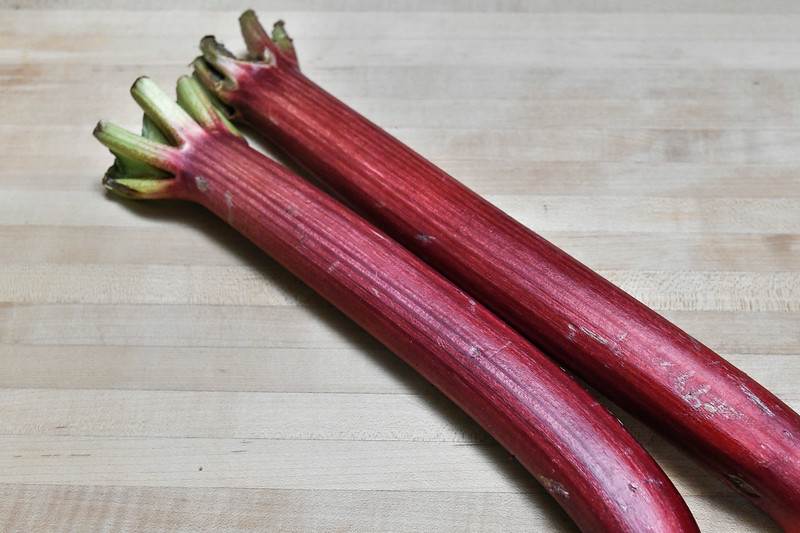
Fast forward several years and I’m in Southeastern Pennsylvania, with neighbors who grow a variety of uncommon produce. One late spring evening my next-door-neighbor Frank drops off a grocery bag filled with jagged stalks of what appear to be pink celery. Ah, yes. My old nemesis. After instructing me to wash and chop the rhubarb before putting it in a casserole with some water and baking it until soft, he sets off. I do exactly as instructed and create a mouth-puckering sour, mushy dish that even our dog won’t touch. What Frank failed to mention was that I should have added a liberal amount of sugar to the dish. Rhubarb fail number two.
Fresh rhubarb
From “Yuck!” to “Yum!”
Eventually, I learned how to make rhubarb not only edible but also delicious. First, bake or simmer it until it’s soft or “fork tender.” Generally, baking time ranges from 15 to 25 minutes. If you’re cooking it on your stovetop, let it simmer for 10 minutes. If you plan on pureeing it, simmer it for an additional 5 to 10 minutes.
Second, add sugar and a splash of water to your baking dish or saucepan. Sugar will cut the tartness and make this vegetable more pleasing. Along with sugar, rhubarb pairs nicely with vanilla, ginger, lemon and orange.
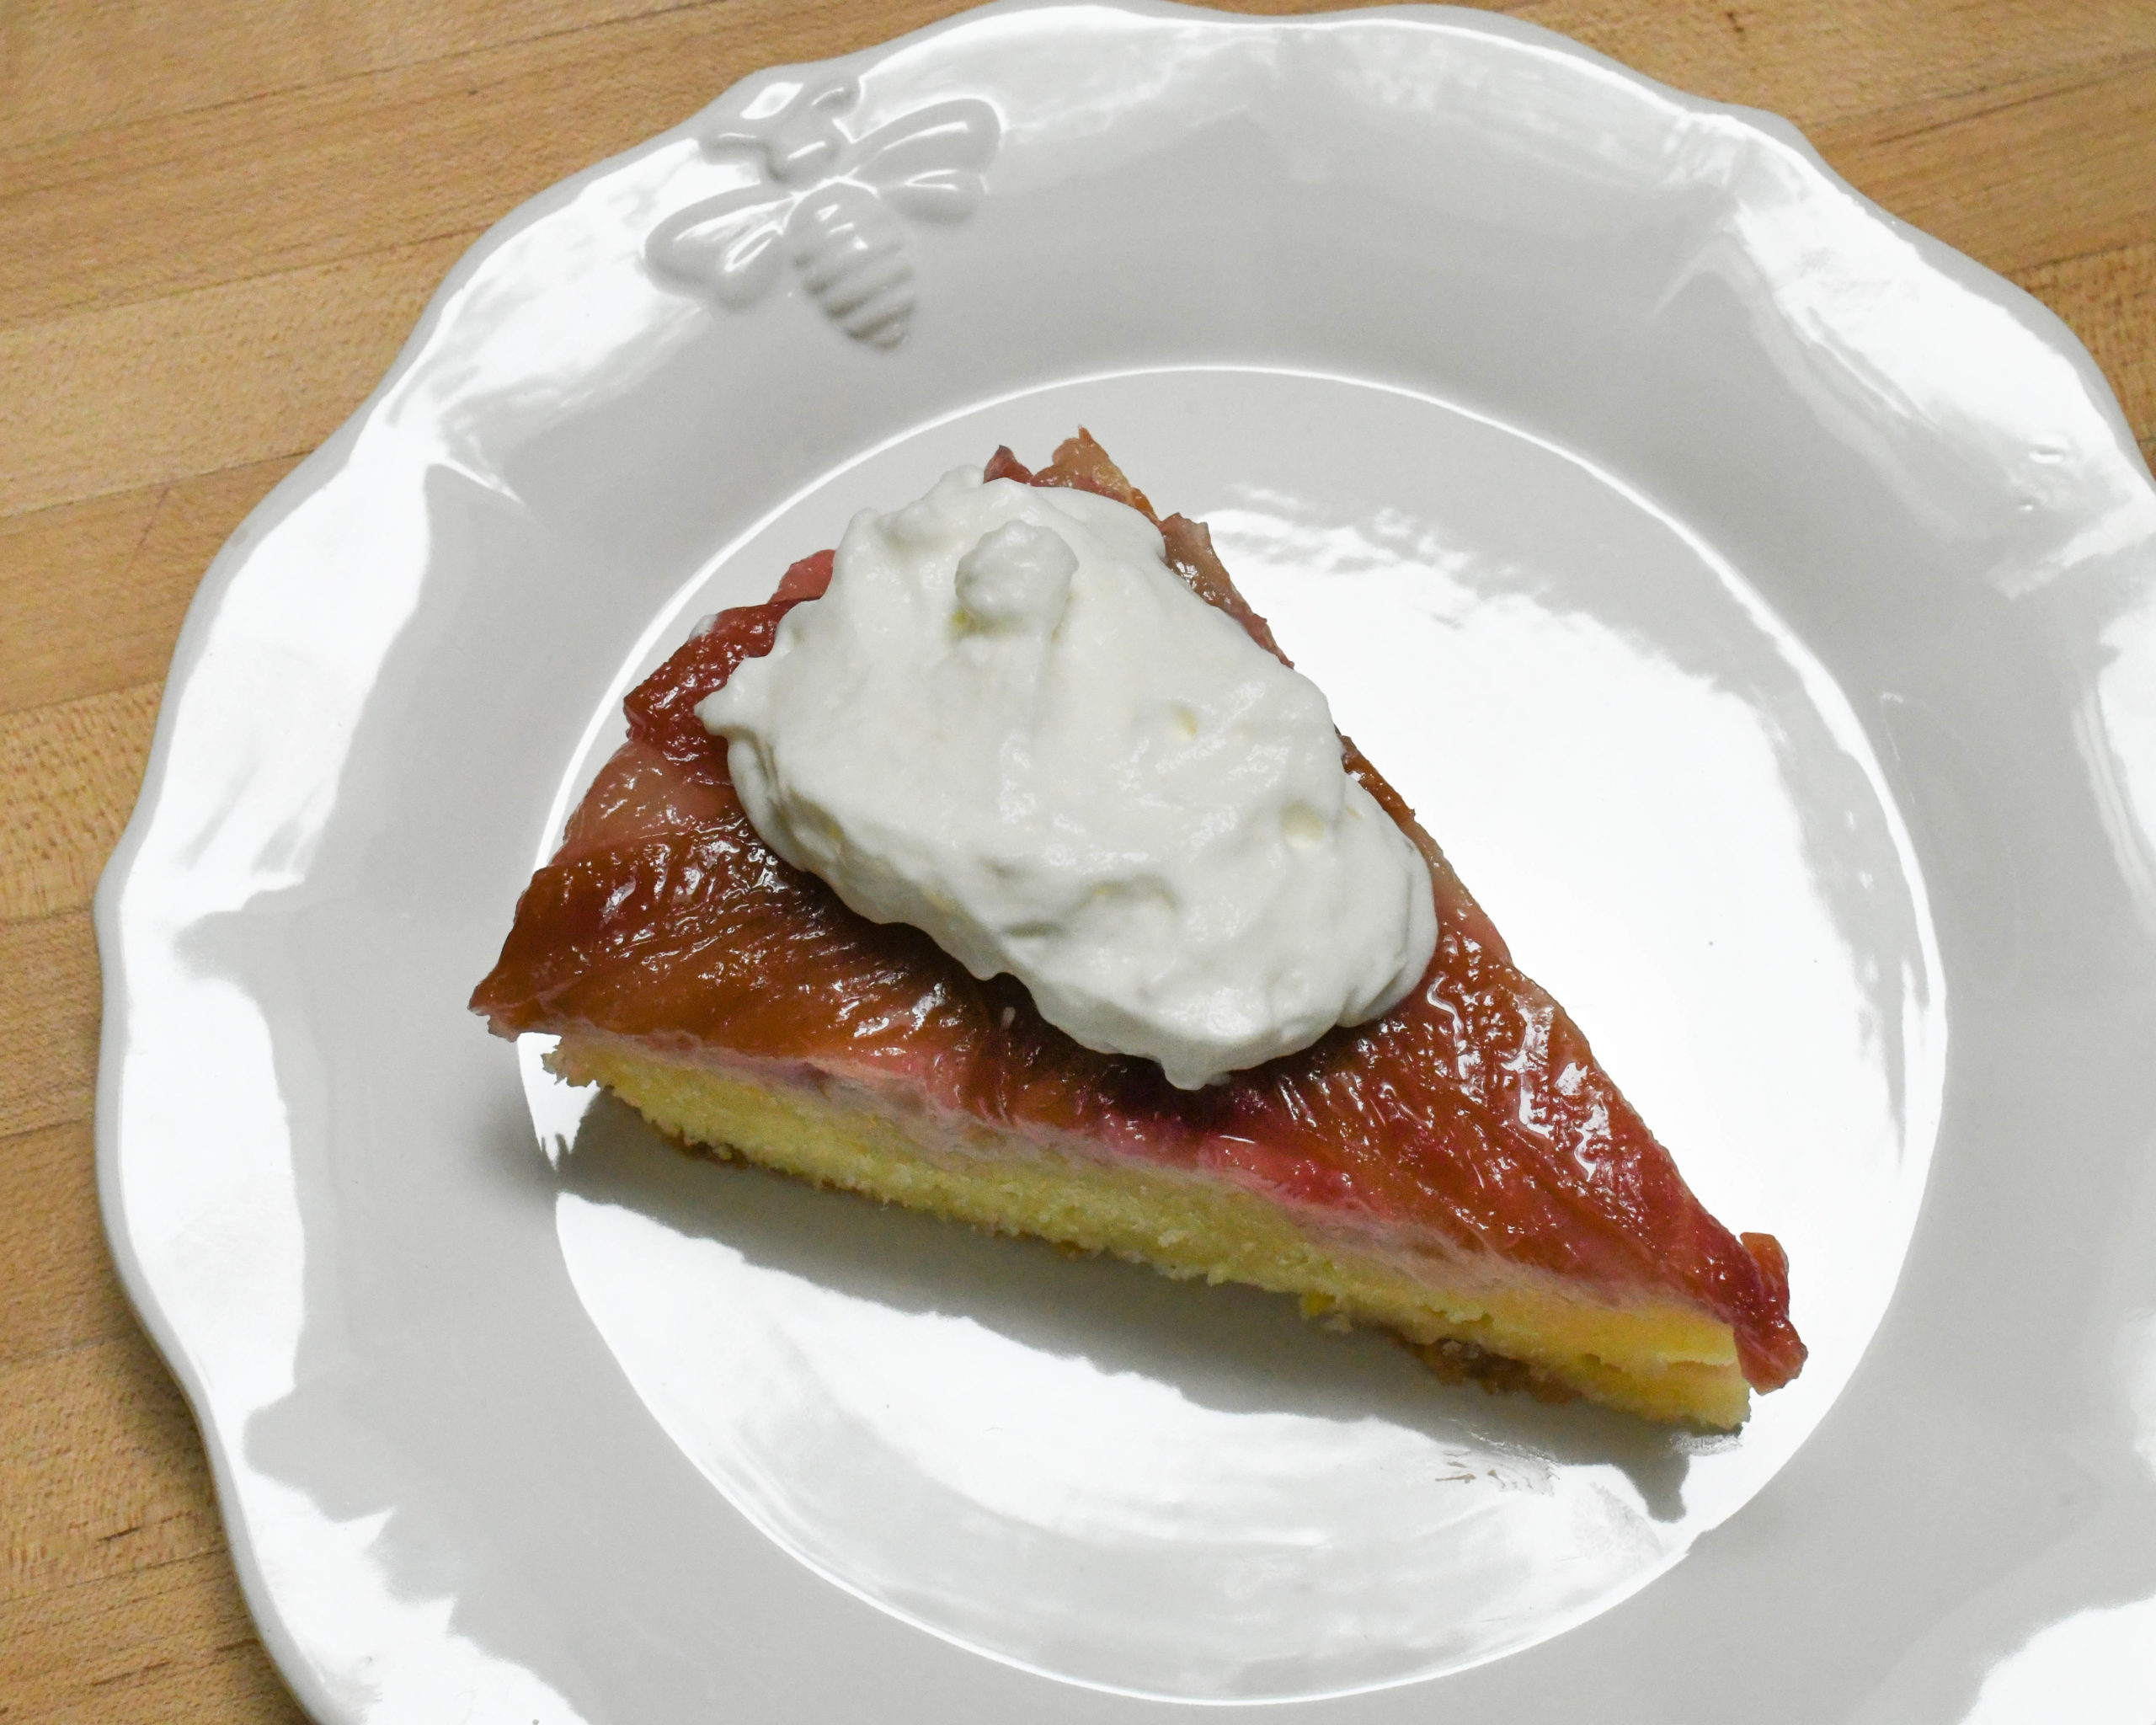
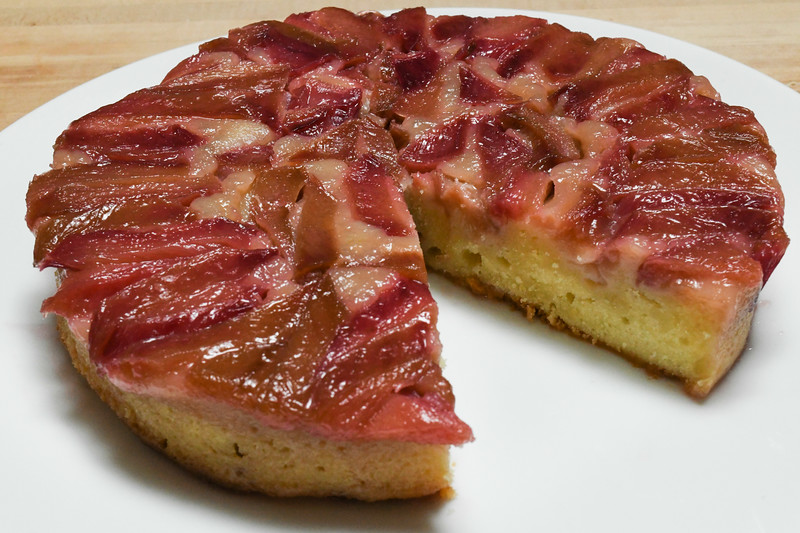
Most often you’ll see rhubarb partnered off with strawberry in a pie. Yet, it makes a colorful, flavorful topping for not only ice cream but also the following upside down cake.
Moist and dense rhubarb-lemon upside down cake
Rhubarb-Lemon Upside Down Cake
Serves 8 to 10
Ingredients
1 cup (2 sticks) unsalted butter, at room temperature
1 pound rhubarb, sliced into 1-inch long diagonal pieces
2 cups sugar, divided
1 1/2 cups all-purpose flour
1 1/2 teaspoons baking powder
1 teaspoon salt
Grated zest of 1 lemon
1 tablespoon lemon juice
2 large eggs, at room temperature
1 cup sour cream, at room temperature
Directions
Preheat the oven to 350 degrees F. Grease a 9-inch baking pan with butter.
Slice one stick of butter in half; you’ll have four tablespoons. Dice the four tablespoons of butter and scatter the butter pieces over the bottom of the baking pan.
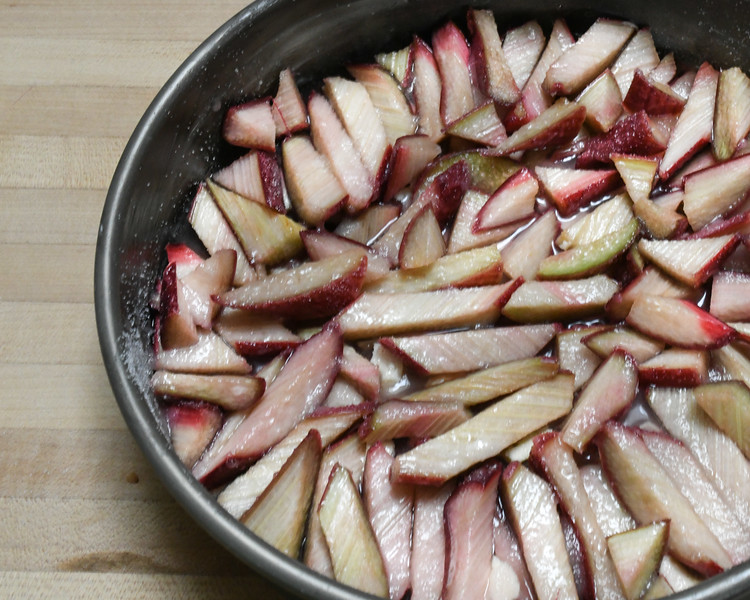
In a medium bowl toss the rhubarb and 1 cup sugar together. Allow the rhubarb to macerate as you prepare the batter.
In a large bowl stir together the flour, baking powder and salt.
Using an electric hand or stand mixer, beat the remaining 1 1/2 sticks of butter until soft, 1 to 2 minutes. Scrape down the sides of the bowl, add the remaining sugar and beat until fluffy, 3 to 5 minutes.
Scrape down the sides of the bowl and then add the lemon zest and juice. Beat until incorporated and then beat in the eggs, one at a time, scraping down the bowl between the addition.
Add a third of the flour and beat to combine. Scrape down the sides of the bowl and then add half of the sour cream, beating to combine. Repeat until all of the flour and sour cream have been added and the batter is smooth.
Rhubarb spread across the bottom of the pan
Spread the rhubarb over the bottom of the baking dish. Spoon the batter over the rhubarb and smooth out the top.
Bake for 60 minutes or until a toothpick inserted in the center comes out clean.
Cool on a wire rack for 10 minutes before inverting the cake onto a plate. Allow the cake to cool completely before slicing and serving.
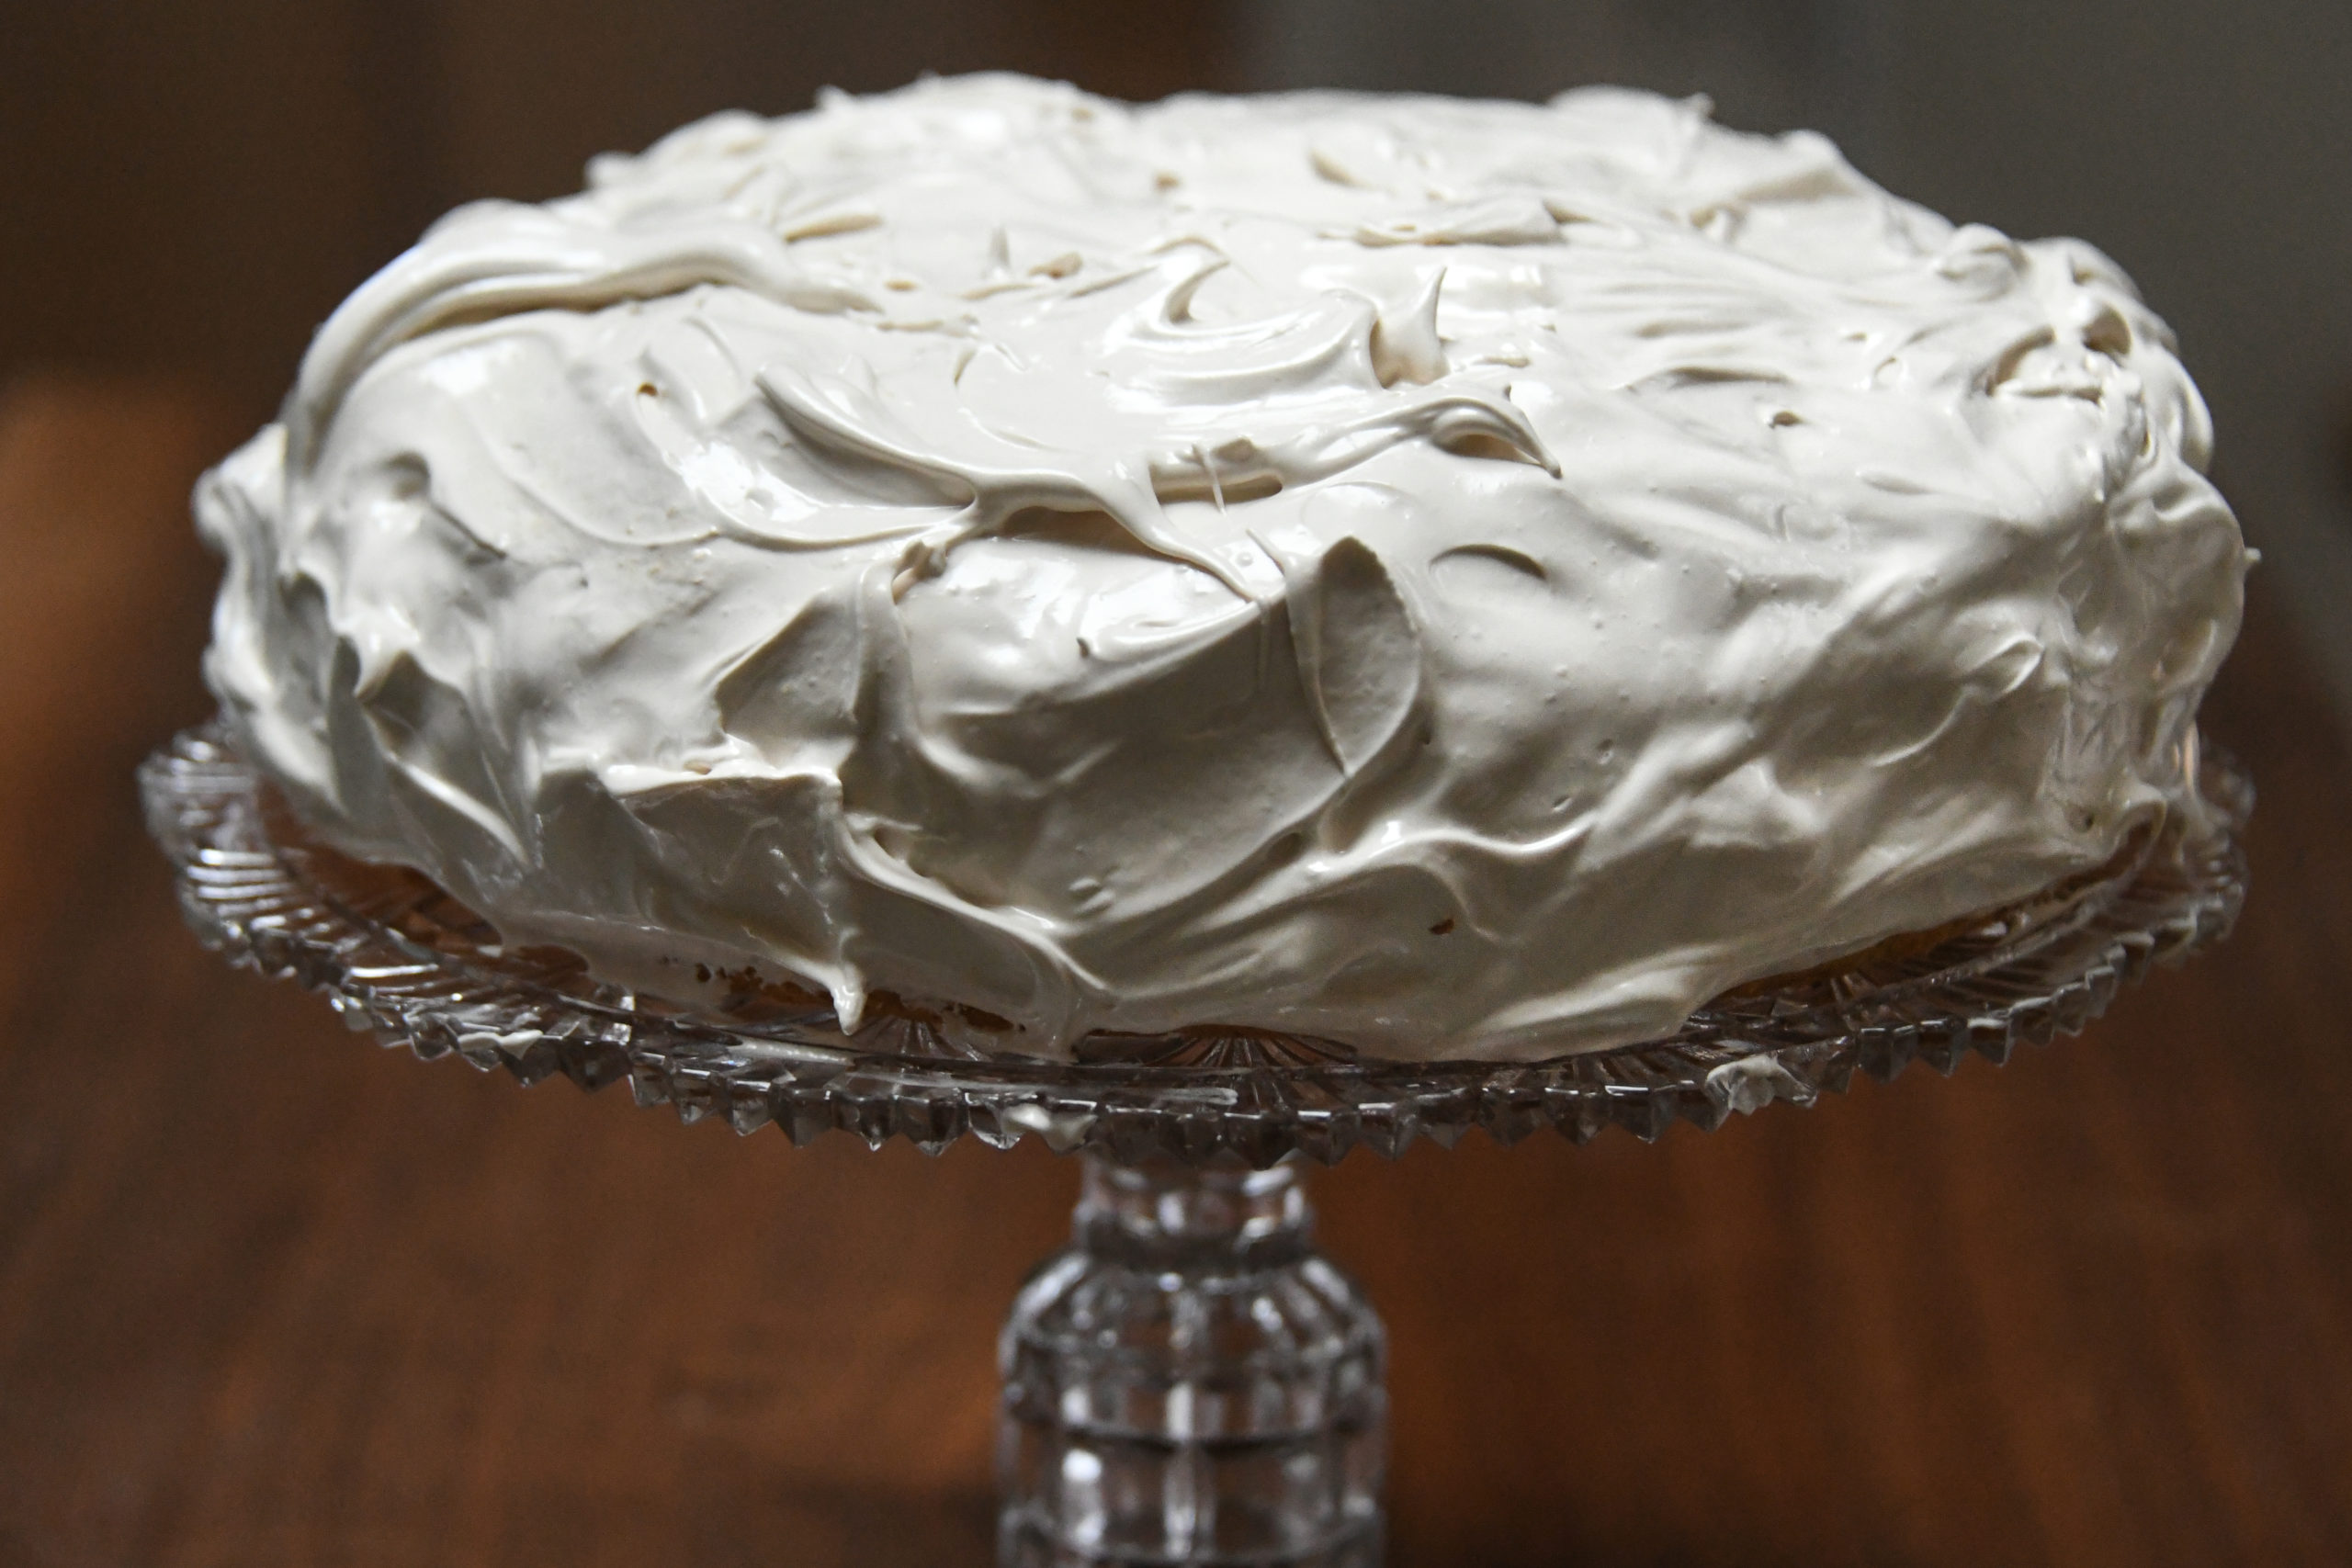
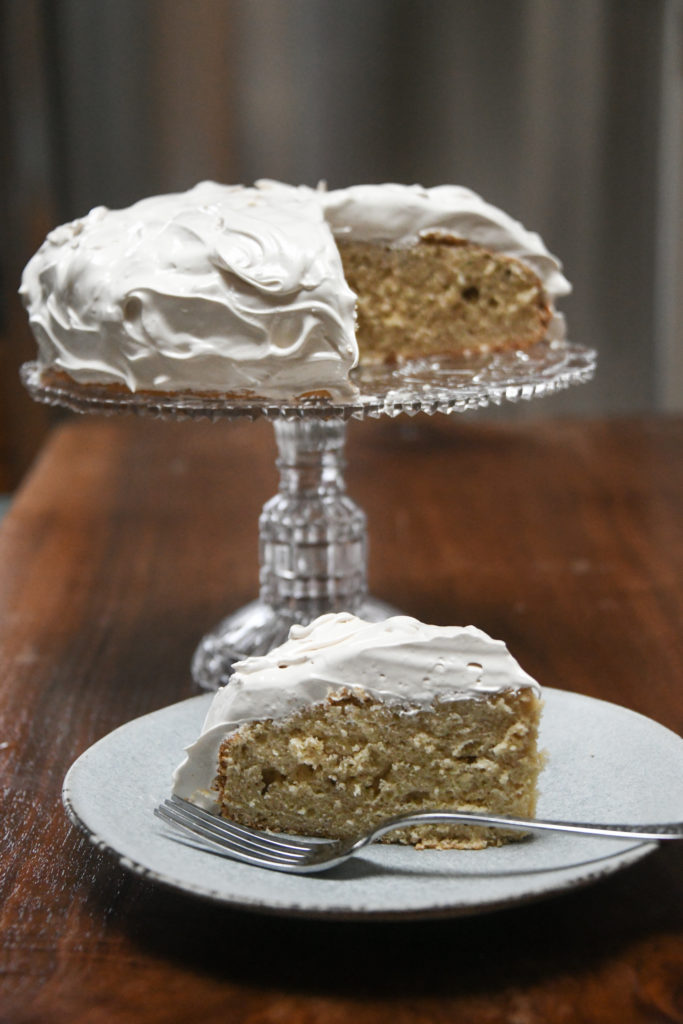
Seafoam Frosted banana cake showcases that shiny, fluffy frosting known as —yep, you guessed it—seafoam. Made from brown sugar and egg whites, the icing is, more or less, a meringue that you slather over a cake. Unlike the traditional meringues for pavlovas and pies, this one is boiled instead of baked. Because it generally cooks for seven minutes, seafoam is sometimes referred to as “seven minute frosting.”
Frosting or candy?
If the name seafoam sounds familiar, but you don’t remember it as an icing, you might be thinking of a candy that bears the same name. A type of divinity candy, it differs from seafoam frosting in that it is boiled until it reaches hard-ball stage on a candy thermometer. Rock hard and riddled with air bubbles, the finished sweet may be coated in chocolate or eaten as is. The origin of the candy’s and icing’s name is unknown.
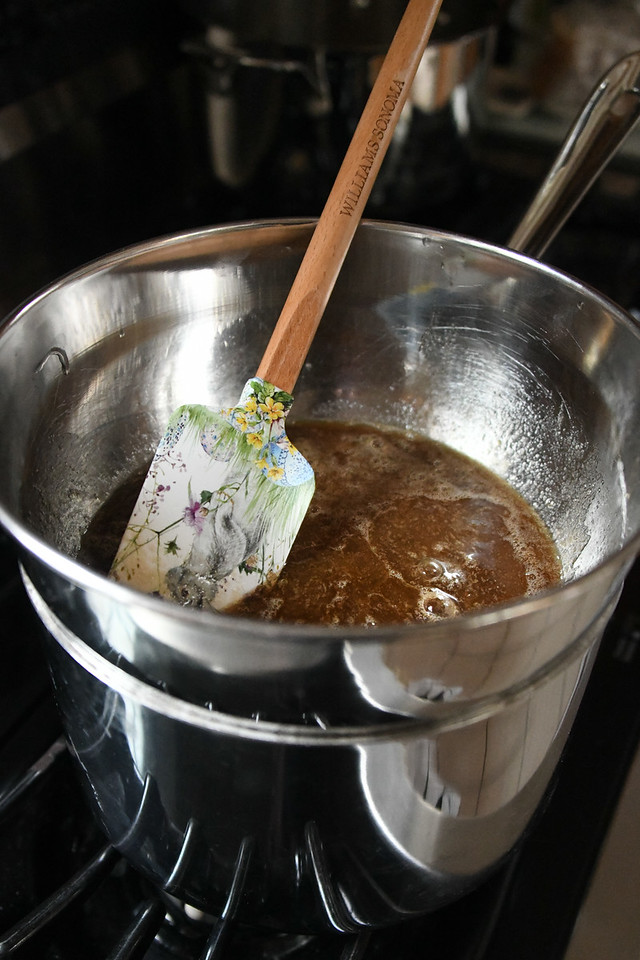
Ingredients for seafoam in a homemade double boiler
Make your own double boiler
To make the seafoam icing, you will need a double boiler. Don’t own this cookware? Don’t worry. You can easily cobble one together with a 2- or 3-quart saucepan and a mixing bowl. Fill the saucepan with two inches of water, set it on a burner and turn that on medium-high. Place a mixing bowl on/in the pan. Make sure that it fits comfortably and doesn’t sit in the bubbling water. Add your ingredients and start beating/whisking. That’s all you need to do to make a double boiler and all you need to do to make seafoam frosting.
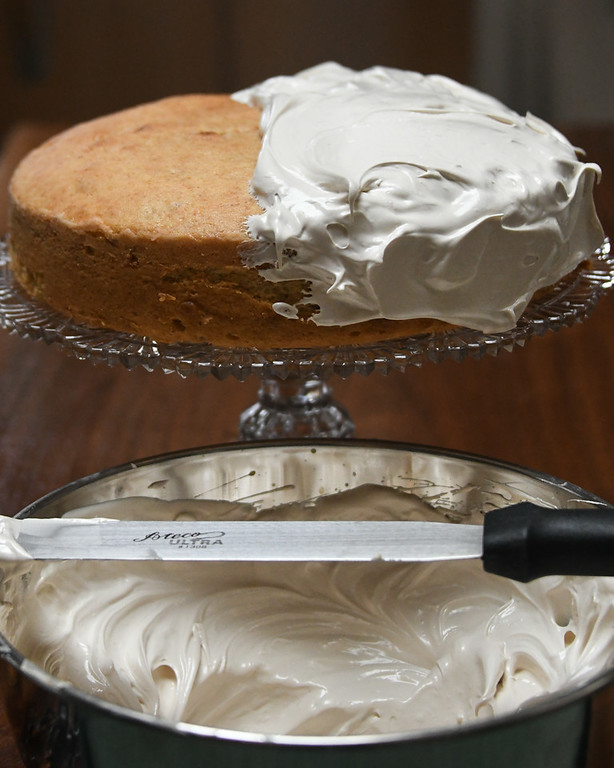
Icing the cake
Seafoam Frosted Banana Cake
Serves 8 to 10
For the cake:
1 stick unsalted butter, at room temperature
3/4 cup firmly packed light brown sugar
3/4 cup granulated sugar
2 large eggs, at room temperature
1 teaspoon vanilla extract
2 ripe bananas, mashed
2 cups cake flour
1 tsp baking powder
1/2 tsp salt
1/2 cup sour cream
For the frosting:
1 1/2 cups firmly packed light brown sugar
1/3 cup cold water
1/4 teaspoon cream of tartar
2 egg whites
1 teaspoon vanilla extract
Preheat the oven to 350 degrees F. Grease
and flour a 9-inch round baking
pan and set aside.
Using an electric hand or stand mixer, beat the butter until
creamy, 2 to 3 minutes. Add the two sugars and beat again until well-combined.
Add the eggs and vanilla and beat until creamy, about 1
minute. Scrape down the sides of the bowl and add the bananas. Beat again until
incorporated, 1 minute.
Sift together the flour, baking powder and salt.
Scrape down the sides of the mixing bowl and add 1/3 of the
flour, beating until incorporated. Scrape down the sides and add 1/2 of the sour
cream. Continue alternating between adding and mixing in the two ingredients
until fully incorporated.
Evenly spread the batter in the prepared pan. Bake for 45 minutes or until a toothpick inserted in the center comes out clean. Remove the cake from the oven and place it on a wire rack. Allow it to cool for 10 minutes before inverting and removing the cake from the pan. Cool completely before icing.
To make the frosting, pour 2 inches of water into the bottom of a double boiler and place the pan over medium-high heat. Place the brown sugar, water, cream of tartar and egg whites in the top of the double boiler and insert the top into the pan. Stir the ingredients together.
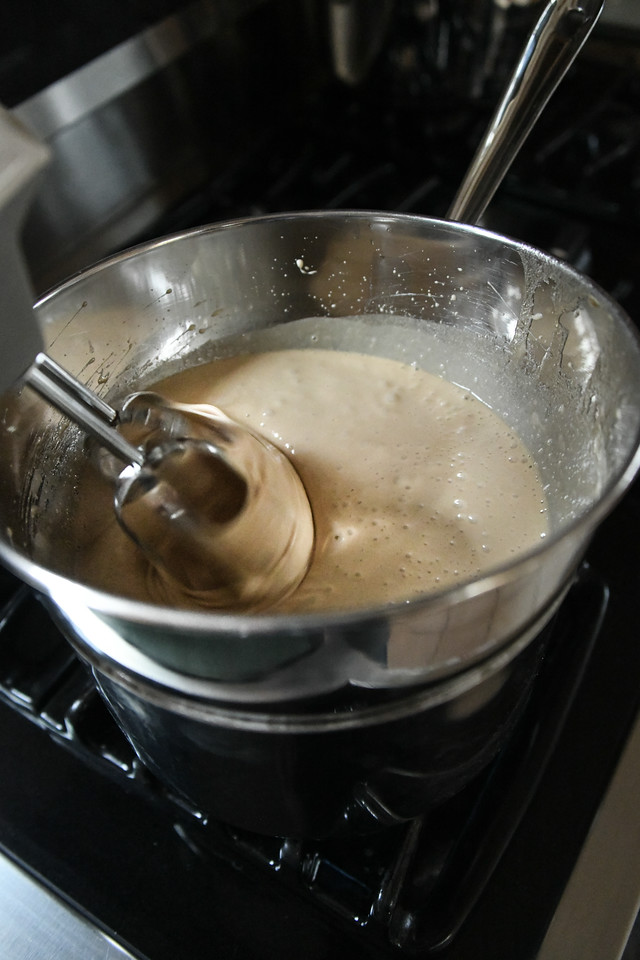
Beating the ingredients in a double boiler
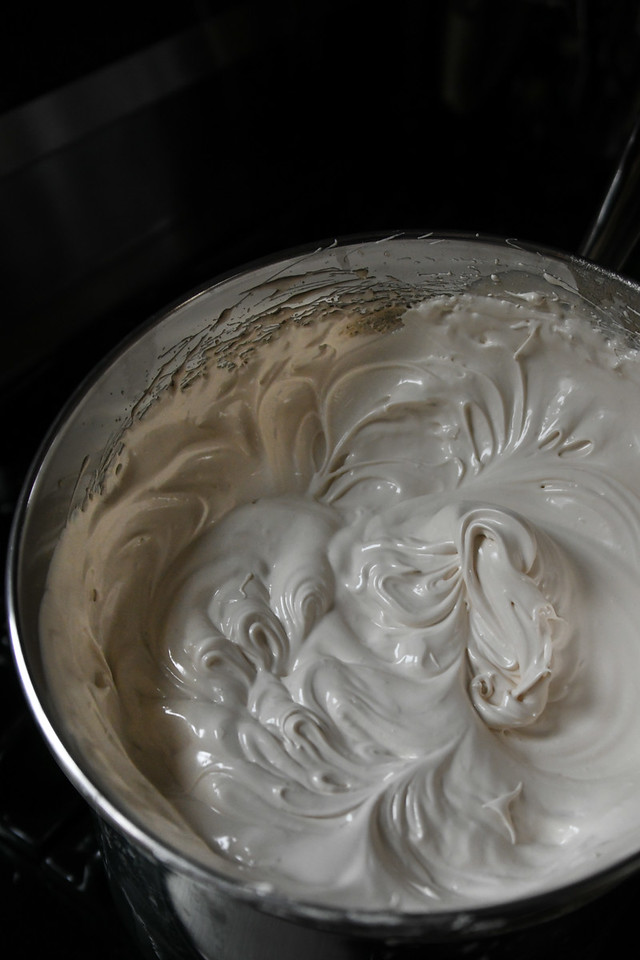
Using an electric hand mixer or whisk, beat the ingredients together until glossy and firm peaks form, 7 to 8 minutes. Remove the top pan containing the frosting from the bottom and place on a heat-proof surface. Add the vanilla extract and beat until incorporated. The frosting should be fairly firm but still spreadable.
Seafoam ready for icing the cake
With an icing knife, liberally spread the frosting over the cake. After the cake has been iced, you can slice and serve it.
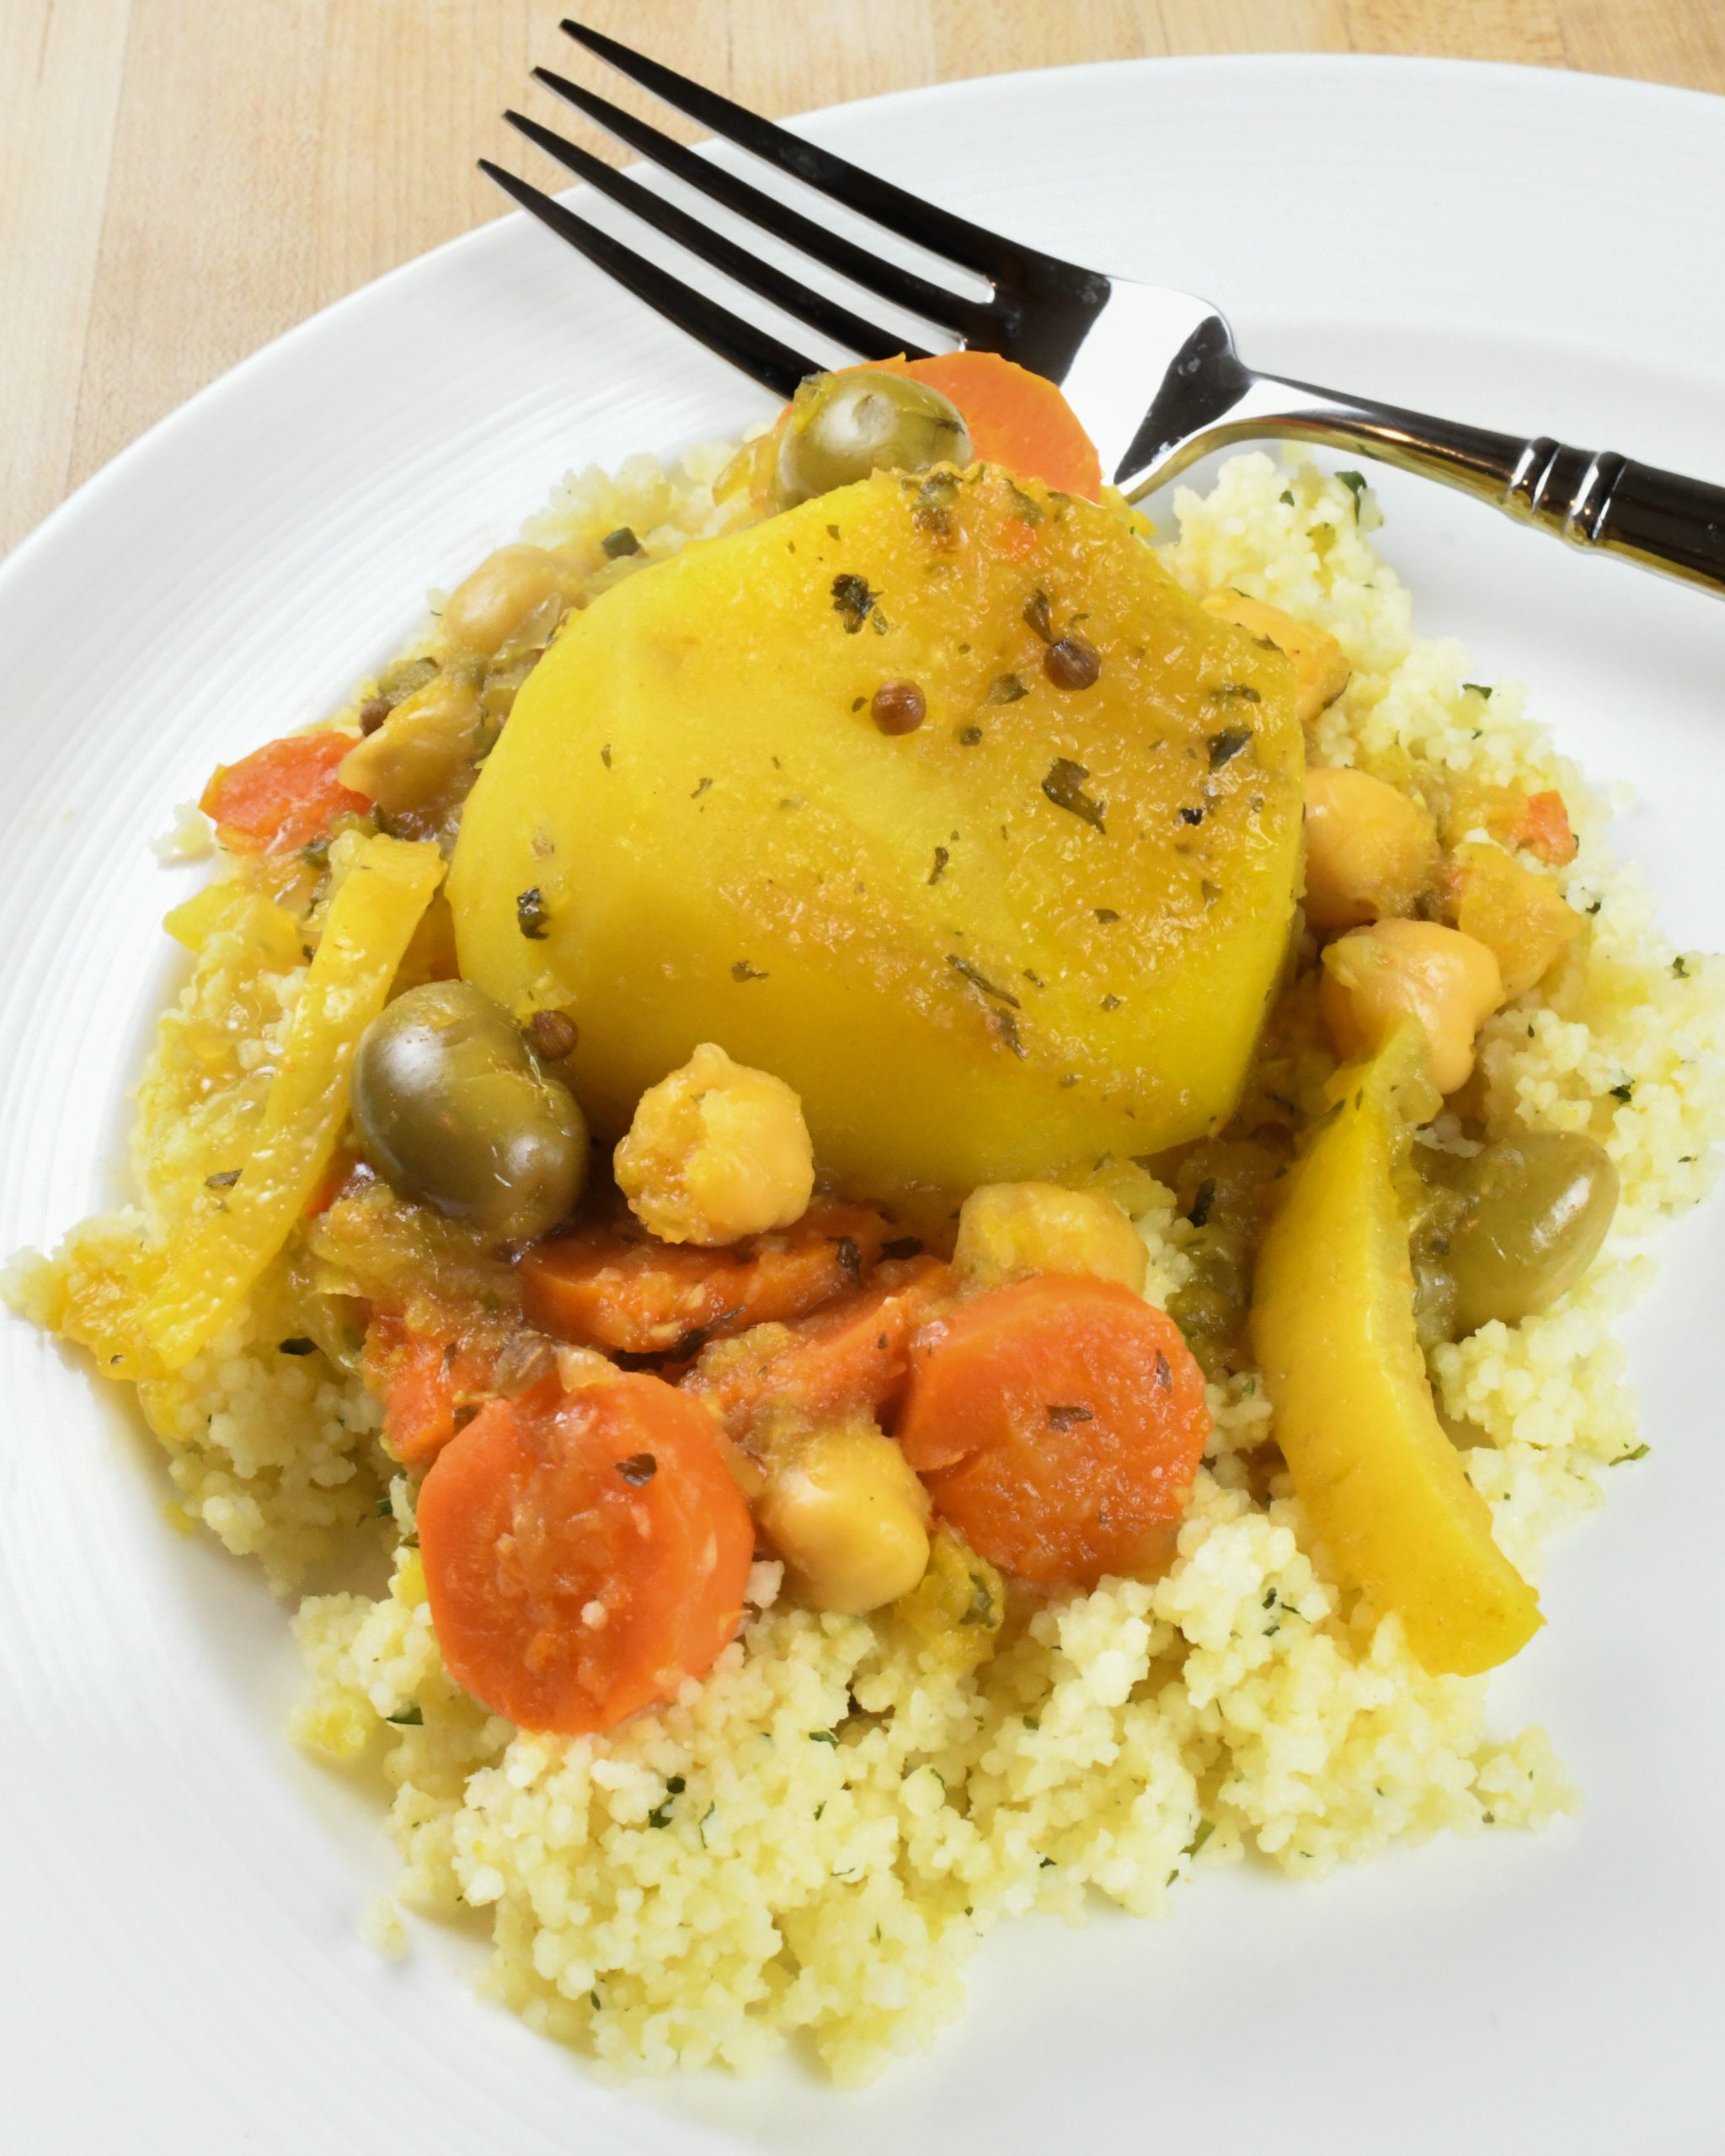
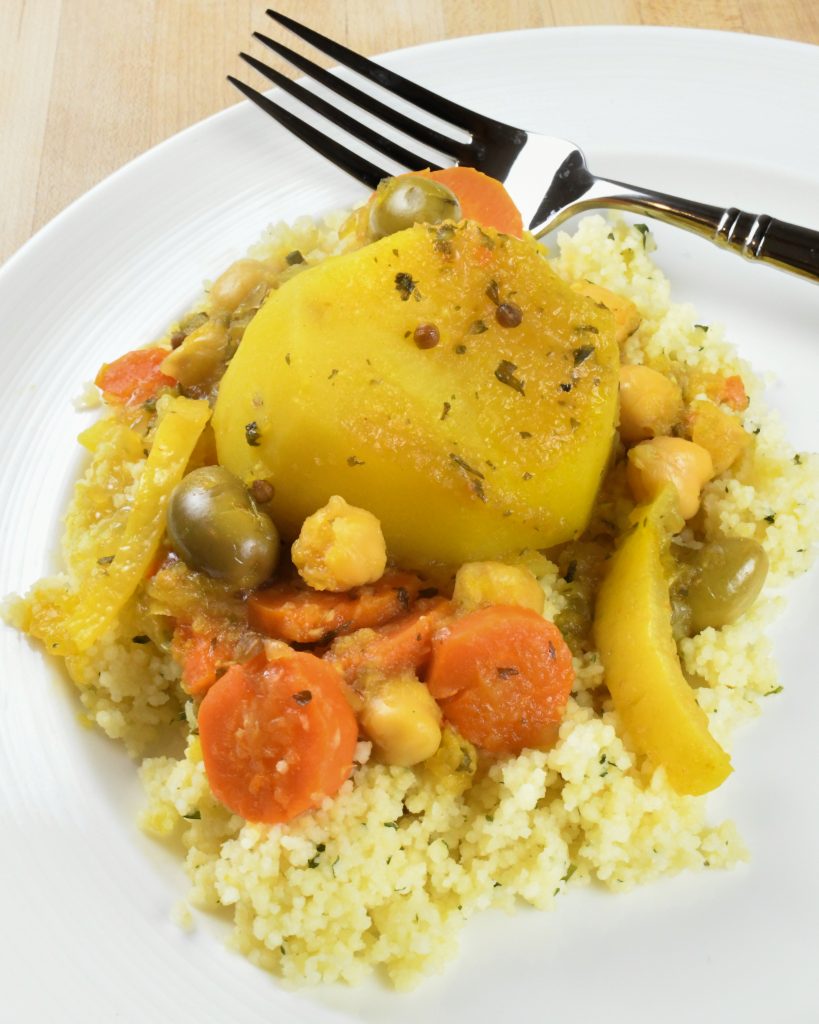
With travel on the back burner indefinitely and my wanderlust still intact, the number of international flavors and recipes coming from my kitchen has soared. If I can’t poke around a souk, bazaar or mercado, at least I can cook as though I’ve been shopping in one. That’s how Potato, Preserved Lemon and Picholine Tagine came to be. Featuring North African ingredients and cooked in a tagine from Essaouira, this dish evokes warm days spent wandering the labyrinthine, cobbled lanes of ancient medinas and dining on aromatic couscous, basteeya and, of course, tagines.
My terra cotta tagine from Essaouira, Morocco
How tagines work
My favorite and most useful souvenir from Morocco is a terra cotta tagine. An engineering wonder, it consists of two parts: a circular, shallow pan and the large, conical-topped cover that fits inside the base. The cone shape allows condensation to cascade back down to the casserole, creating a rich, reduced sauce. The lid has a small knob on the top, providing cooks with something to grasp when removing the cover to check on the bubbling contents within. How clever is that!
Traditionally comprised of glazed terra cotta, today’s tagines come in materials familiar to the modern cook. Combinations range from stainless steel and aluminum core, courtesy of All-Clad, to cast iron and earthenware from Le Creuset. Unlike the classic clay construction, the new, pricier versions can be placed directly on a burner without the use of a heat diffuser. I must slide a cast iron skillet of comparable size beneath my old-fashioned pot before firing up the stove top.
Tagine simmering on the stove
Don’t have and don’t want to buy a tagine? You can make this in a Dutch oven that possesses a tight fitting lid. The keys to success are in keeping the heat at a low simmer, covering the dish while cooking and making sure the sauce doesn’t bubble away completely.
Potato, Preserved Lemon & Picholine Tagine
I serve Potato, Preserved Lemon & Picholine Tagine over plain couscous. Made from crushed durum wheat, couscous is a staple dish throughout North Africa and an increasingly common item in North American markets.
Serves 4
1 white onion, cut into chunks
3 cloves garlic
2 teaspoon ground ginger
1 1/2 teaspoon dried parsley
1 teaspoon coriander seeds, crushed
1/2 teaspoon salt
1/2 teaspoon ground black pepper
2 medium carrots, peeled and sliced into 1/2-inch rounds
1 3/4 pounds potatoes, peeled and cut into large chunks
Juice of 1 lemon
1 1/2 cups chicken or vegetable stock, plus more as needed
1/4 cup picholine olives
1/2 teaspoon saffron threads
1/2 preserved lemon, rinsed and sliced
1 cup chickpeas
Steamed couscous, for serving
Using either a food processor or blender, purée the onion and garlic together.
Place the puréed onion and garlic, ginger, dried parsley, coriander seeds, salt, pepper, potatoes and carrots in the bottom of the tagine. Put the tagine on the stove top.
Pour in the lemon juice and stock. Sprinkle the olives and saffron over the top. Bring the ingredients to a boil over medium-high heat.
Once the liquid has come to a boil, place the lid on the base and reduce the temperature to medium-low. Simmer for 25 minutes, adding more stock as needed. You’ll want to end up with a fairly thick sauce.
After 25 minutes, add the preserved lemons and chickpeas. Cover and simmer for an additional 10 minutes or until the vegetables are tender.
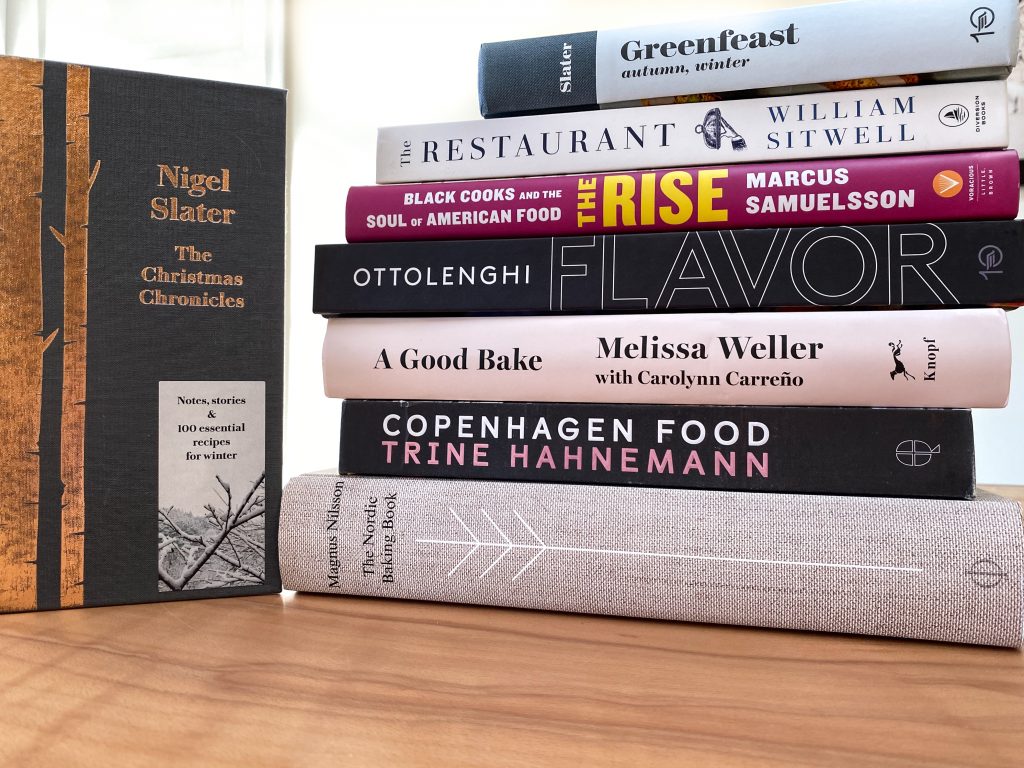
Most of us have done a lot more cooking and baking in 2020. I know that I have and not just because I’ve been testing recipes for my cookbook Luscious/Tender/Juicy (Countryman, 2021). More time at home has meant more time spent in the kitchen, working through some fascinating food titles. Among the books in which I’ve found comfort and inspiration are two baking and two vegetable-focused cookbooks, a celebration of contemporary Black cooking, food narratives with recipes for fall, winter and Christmas, a restaurant history, and the foods and traditions of one of my favorite cities, Copenhagen.
If you have cooks, bakers and/or readers on your holiday shopping list, the following titles will delight them. Arranged in alphabetical order, they comprise this holiday season’s cookbook review.
2020 Cookbook Review
Copenhagen Food – Trine Hahnemann (Quadrille, 2018) In Copenhagen FoodTrine Hahnemann takes readers on a culinary tour of Copenhagen, her home of 40+ years. Each chapter highlights a different neighborhood and its specialties. With stories and photos of the city, famed restaurants, public markets and lush foods, her book would satisfy the travelers on your list. With 70 recipes for such Danish specialties as rye-crust tart with feta and leeks and chocolate marzipan bars, it makes a lovely gift for any cook.
The Nordic Baking Book – Magnus Nilsson (Phaidon Press, 2018) I’ve yet to find more a more comprehensive book on Nordic baking than Nilsson’s impressive cookbook. It offers 450 recipes and techniques for sweet and savory baked goods from Sweden, Norway, Denmark, Iceland, Finland and the Faroe Islands. Almond and toffee buns, gooey chocolate cake, potato flatbread, and salmon pasty are just a few of the stellar treats. Whether you exchange gifts with fans of Nordic lands or bakers in search of new recipes, The Nordic Baking Book is sure to please.
Flavor – Yotam Ottolenghi (Ten Speed Press, 2020) Ottolenghi’s lush cookbooks consistently deliver fresh flavors, wholesome dishes and easy-to-follow recipes. His latest is no exception. In Flavor the London chef focuses on how to prepare and pair produce with complementary ingredients. With detailed sections on such methods as charring and infusing and over 100 recipes for such plant-focused dishes as One-Pan Orecchiette Puttanesca and Curried Carrot Mash with Brown Butter, it serves up platefuls of delicious food.
The Rise – Marcus Samuelsson (Voracious, 2020) Subtitled “Black cooks and the soul of American Food,” The Rise presents a long overdue celebration of modern Black cooking. Samuelsson’s lush cookbook covers the culinary influences, histories, techniques and ingredients originating in the African diaspora. It profiles an array of Black culinary professionals, including authors, academics, activists, chefs, and restauranteurs. It also contains 150 recipes for such delectable dishes as Flaky Andouille and Callaloo Hand Pies, Teff and Brown Butter Biscuits, and Saffron Tapioca Pudding. A must-have for any serious cook.
The Restaurant – William Sitwell (Diversion, 2020) Sitwell’s illustrated history of restaurants begins in 79 CE Pompeii with ancient Romans eating in taverns and snack bars. It travels through the Ottoman Empire and Medieval England, all the way to contemporary farm-to-table, vegan and molecular gastronomy restaurants. As a voracious reader and fan of dining out, I couldn’t resist this 2,000-year history of restaurants. The readers and food lovers in your life won’t be able to, either.
Greenfeast: Autumn, Winter – Nigel Slater (Ten Speed Press, 2020) Greenfeast is one of two vegetable-themed suggestions and one of two books on this list by National Book Award and James Beard Award winner Nigel Slater. He arranges the chapters according to preparation—in a pan, on toast, with a ladle, etc.—and provides 100 straightforward recipes. Among the tasty dishes are Brussels Sprouts, Smoked Mozzarella, Dill and Mushrooms, Spinach, Rice. A delight for anyone interested in enjoying vegetables or a plant-based diet to the fullest.
The Christmas Chronicles – Nigel Slater (4th Estate, 2017) Not feeling all that festive this Christmas season? Need a little dose of well-crafted holiday tales and recipes to make your spirit bright? Gift yourself The Christmas Chronicles. Equal parts cultural history, holiday guide, memoir and cookbook, it features the beautiful writing for which Slater is known. Additionally, it has 100 recipes for such seasonal dishes as Apricot and Tomato Chutney, Cranberry Butterscotch Pudding, and Roast Goose, Apple Sauce, Lemon Potato Stuffing and Marsala Gravy.
A Good Bake – Melissa Weller (Knopf, 2020) An excellent choice for both new and skilled bakers, A Good Bake covers both the science and art of baking. Readers receive step-by-step instructions for making trickier baked goods, such as laminated pastries and yeasted breads. They also learn about familiar favorites such as layer cakes, frostings, pies, tarts and cookies. Strawberry Jam and Hazelnut Rugelach and Chestnut Honey Walnut Tart are among the 120 recipes in the book.
Every time I bake a soft, honeyed sweet potato, I think, “Boy, I don’t eat enough of these!” As the name indicates, this root vegetable possesses a pleasing sweet flavor, one that goes well with a variety of foods and preparations. It also has a deep orange hue that enlivens any dinner or dessert plate. Its gorgeous color comes from the large amount of beta carotene that it contains. An antioxidant, beta carotene converts into Vitamin A. Pretty, delicious and nutritious!
Selecting the right root
In the U.S. we use the terms “sweet potato” and “yam” interchangeably. They are not the same vegetable. They aren’t even from the same plant family. Although they both come from Southern America and are root vegetables, yams have a woodier, more root-like appearance. Their skins range from off-white to dark brown. Their slightly mealy flesh runs from off-white to pink. Unlike sweet potatoes, they must be cooked before eaten. If you’re not shopping at a specialty/international market and you spot a mound of potatoes labeled “yams,” chances are you’re buying sweet potatoes.
Cooked and sliced sweet potatoes
Southern Specialty Reinvented
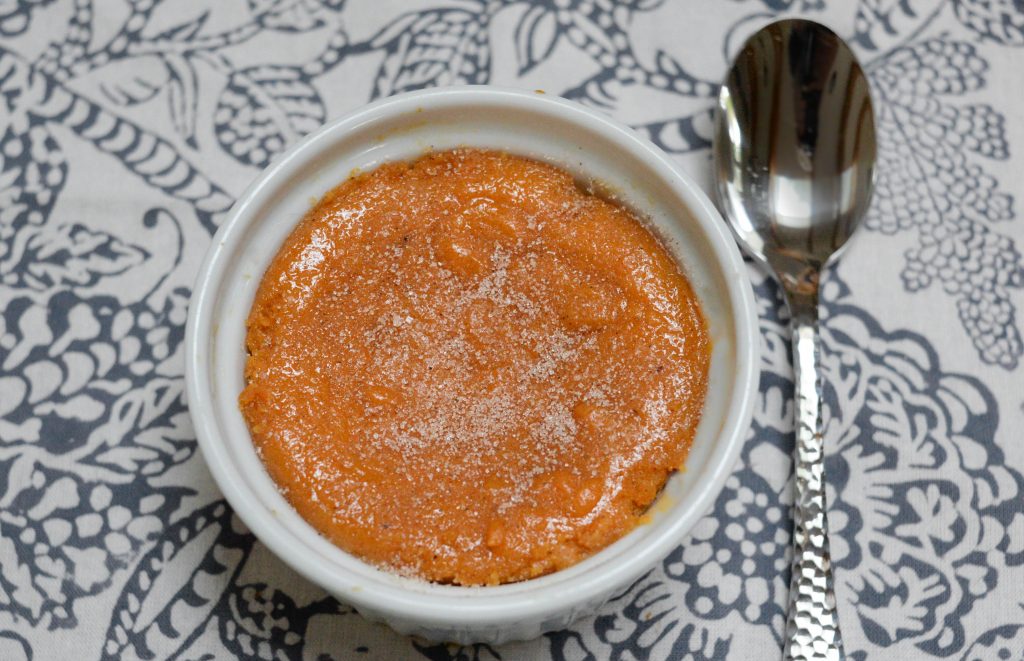
Okay, I didn’t really reinvent a thing. I was just too pressed for time to make a homemade crust for a sweet potato pie. Instead, I altered a few ingredients, poured the filling into buttered and floured ramekins and baked the puddings until set.
Like the Southern specialty from which it originated, Sweet Potato Pudding has a rich, warm flavor and sumptuous texture. Unlike that dessert, it also has a bit of a crunch. A dusting of cinnamon sugar gives each pudding that extra bite.
Sweet Potato Pudding
Serves 6 to 8
1 1/2 pounds sweet potatoes, washed
2 tablespoons unsalted butter, melted
¾ cup firmly packed light brown
sugar
2 large eggs, whisked
1 teaspoon vanilla
1 cup milk
1 teaspoon cinnamon
½ teaspoon salt
¼ teaspoon nutmeg
Cinnamon sugar, for dusting
Whipped cream, optional, for serving
Bring a large saucepan or small
stockpot filled with salted water to a boil. Add the sweet potatoes. Cook until
very tender, 20 to 25 minutes.
Drain the potatoes and allow them
to cool slightly.
Preheat the oven to 400˚ Fahrenheit. Butter and flour the 6 to 8 ramekins. Place them on a baking sheet and set aside.
Sweet potato pudding ready to be poured into ramekins
Once the sweet potatoes have cooled, peel off and discard their skins. Cut the potatoes into chunks and place them in the bowl of a blender or food processor. Puree until smooth and creamy, 1 minute. Whisk together the butter, light brown sugar, eggs, vanilla, milk, cinnamon, salt and nutmeg. Add to the potatoes and pulse to combine.
Pour equal amounts of the sweet potato pudding into the ramekins. Bake until the puddings’s edges are firm but their centers wiggle slightly when the baking sheet is jiggled, 25 to 30 minutes.
Remove the baking sheet from the oven and place the ramekins on a wire cooling rack. Dust the tops with cinnamon sugar. Serve warm with optional whipped cream.