Latest Posts

For The Raspberry Lovers: Double Raspberry Bars

Last summer, I went on hiatus from food writing. I hadn’t intended nor had I particularly wanted to take a break, but, I’d started a full-time editorial job while continuing to write long-form freelance articles — see clippings.me for samples from my other writing life — and do occasional book events. What free time I had, I used to complain about the lack of free time. Over a year later, I complain a little less and dabble a little more at some of the things I love — writing, cooking and taking photographs. What changed? My pandemic garden and its prolific raspberry bush.

Planted in the summer of 2020 alongside tomatoes, cucumbers and a few herbs, the raspberry bush was a bit of a lark. I love raspberries so, although I was a first-time gardener, I decided to take a chance. I didn’t expect the plant to yield fruit that first year, if ever. By October 2020, my expectations had been met. The next two summers, the bush surprised me by producing a handful of bright, button-sized raspberries, a small, flavorful treat that I could eat while pulling garden weeds.

Clusters of ripe and unripe raspberries

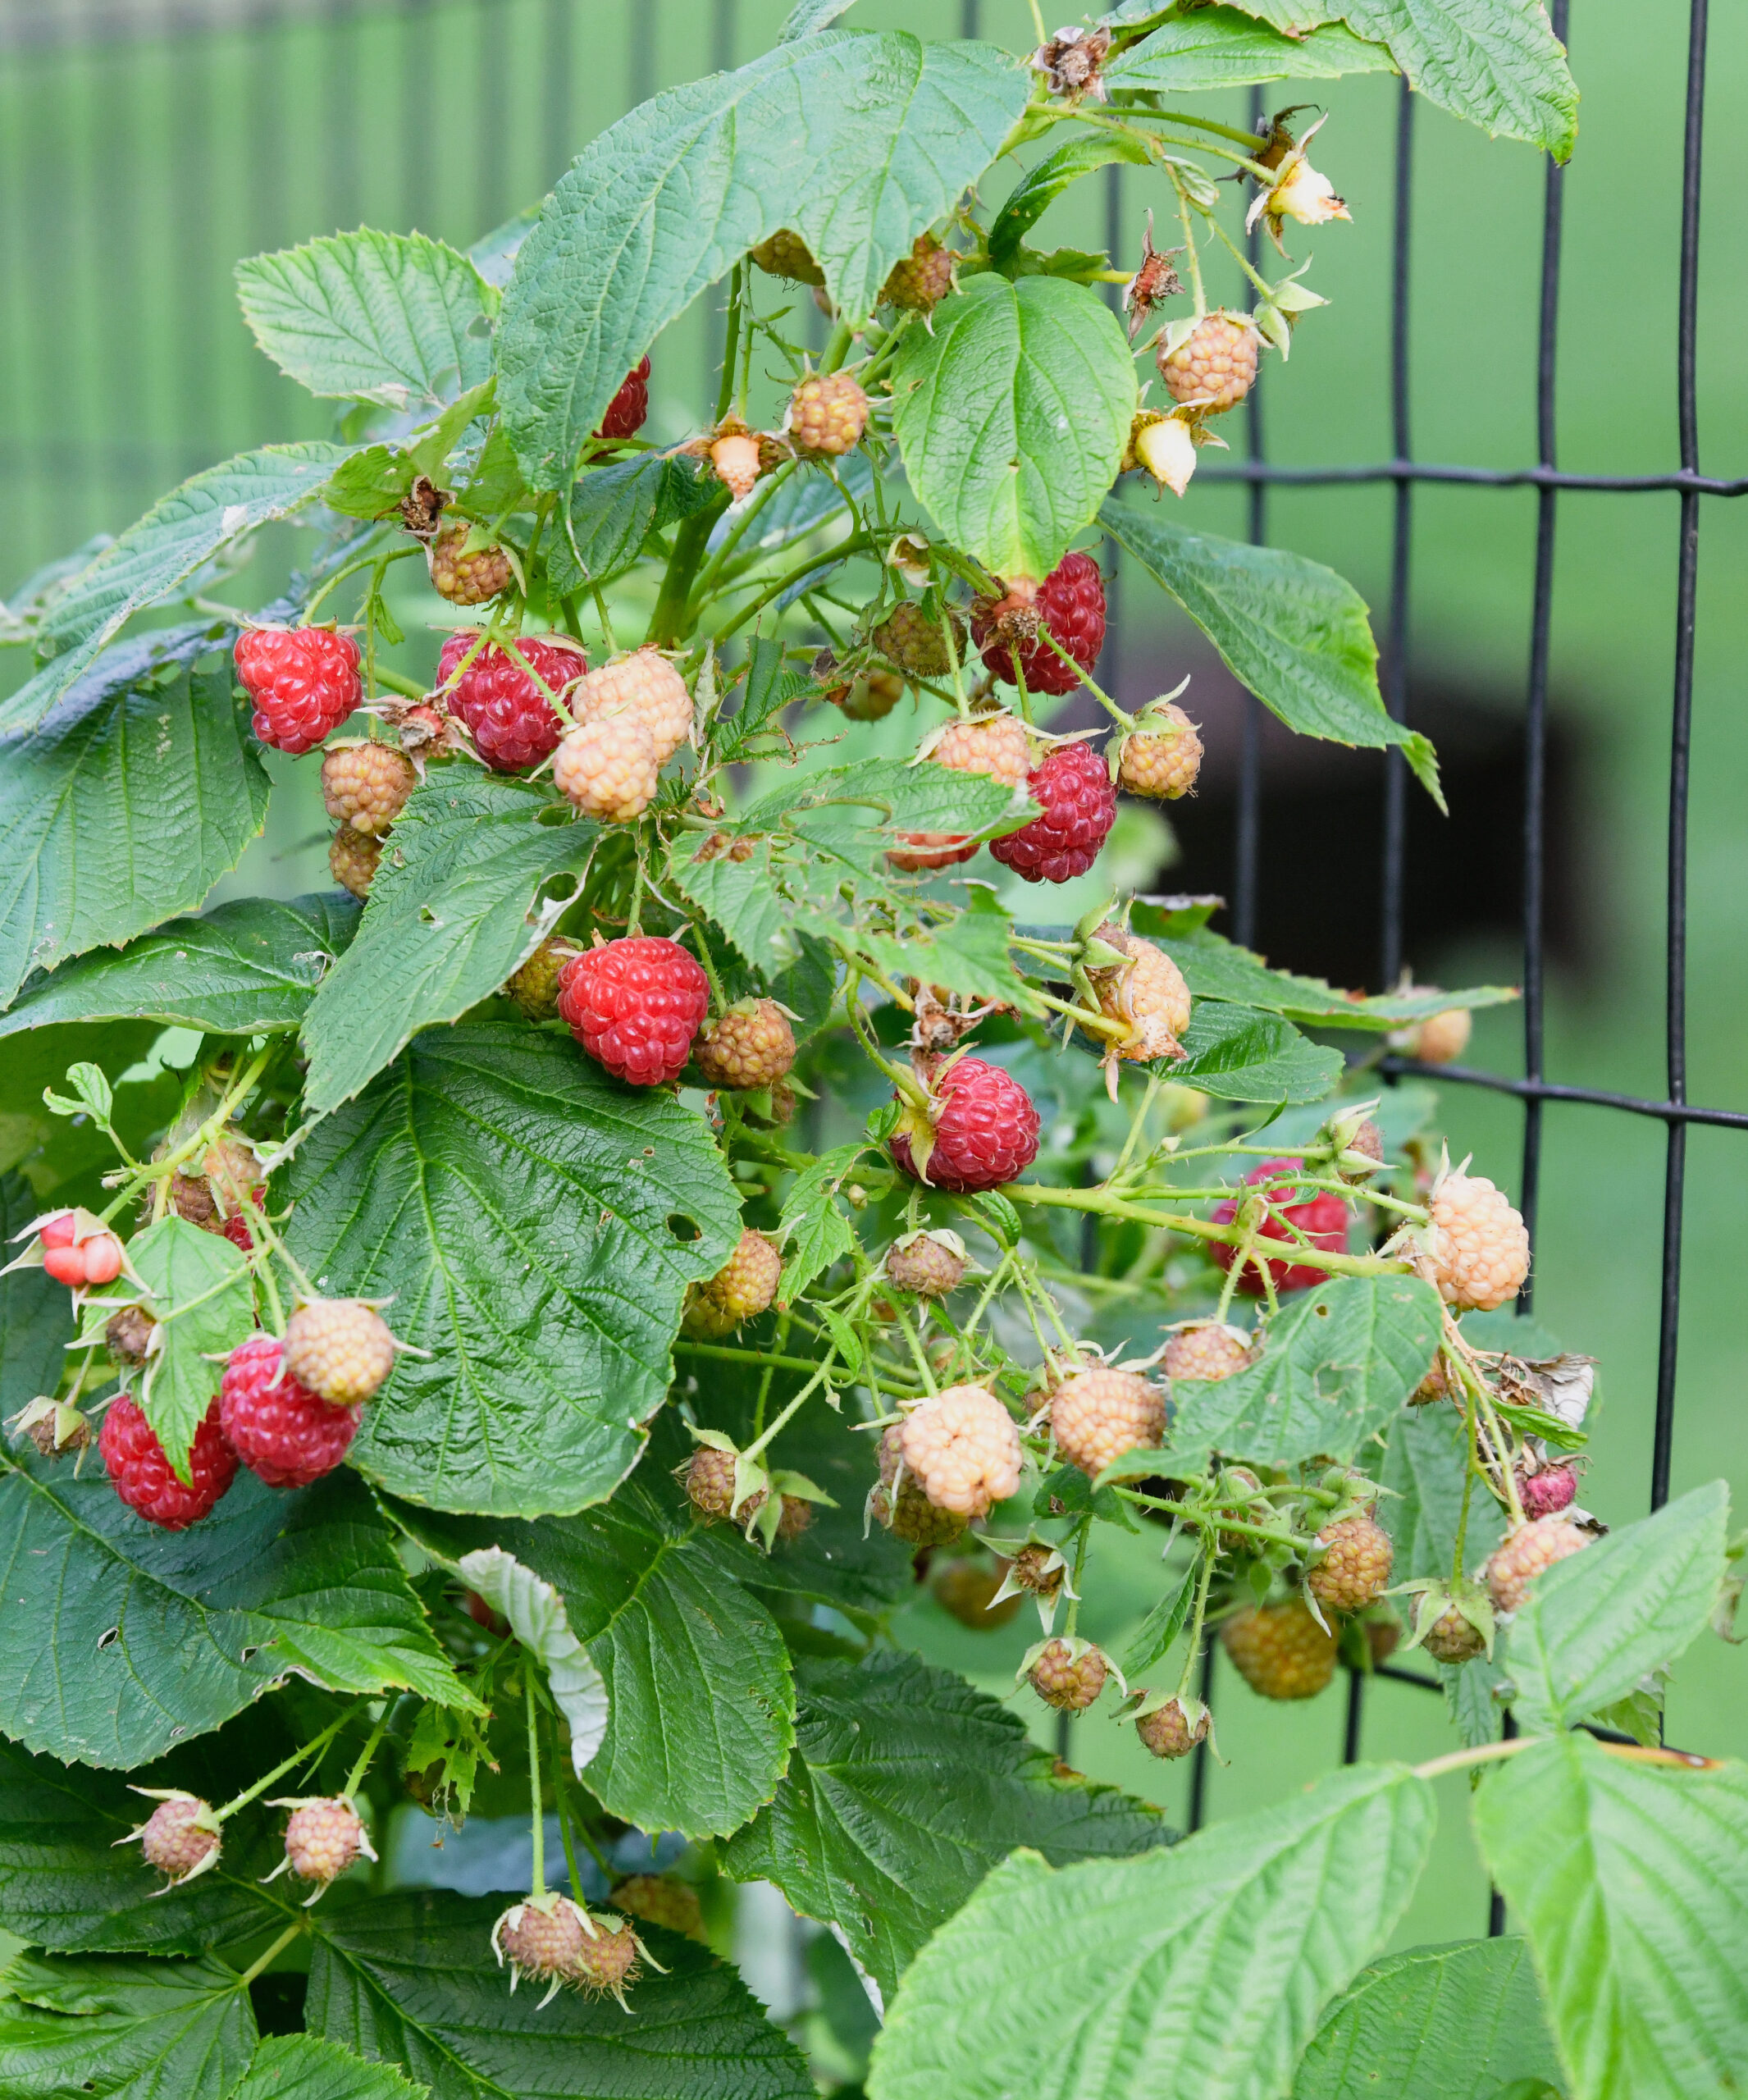
This year promised much of the same. By late July, I had gobbled a few in the garden and collected a handful more to toss into plain Greek yogurt for lunch. Then, three weeks ago, I noticed the branches on the bush begin to droop. At first, I feared it was dying from neglect, but it was quite the opposite. The plant was weighted down by dozens of plump, organic, scarlet red or pinkish-beige raspberries. Success!

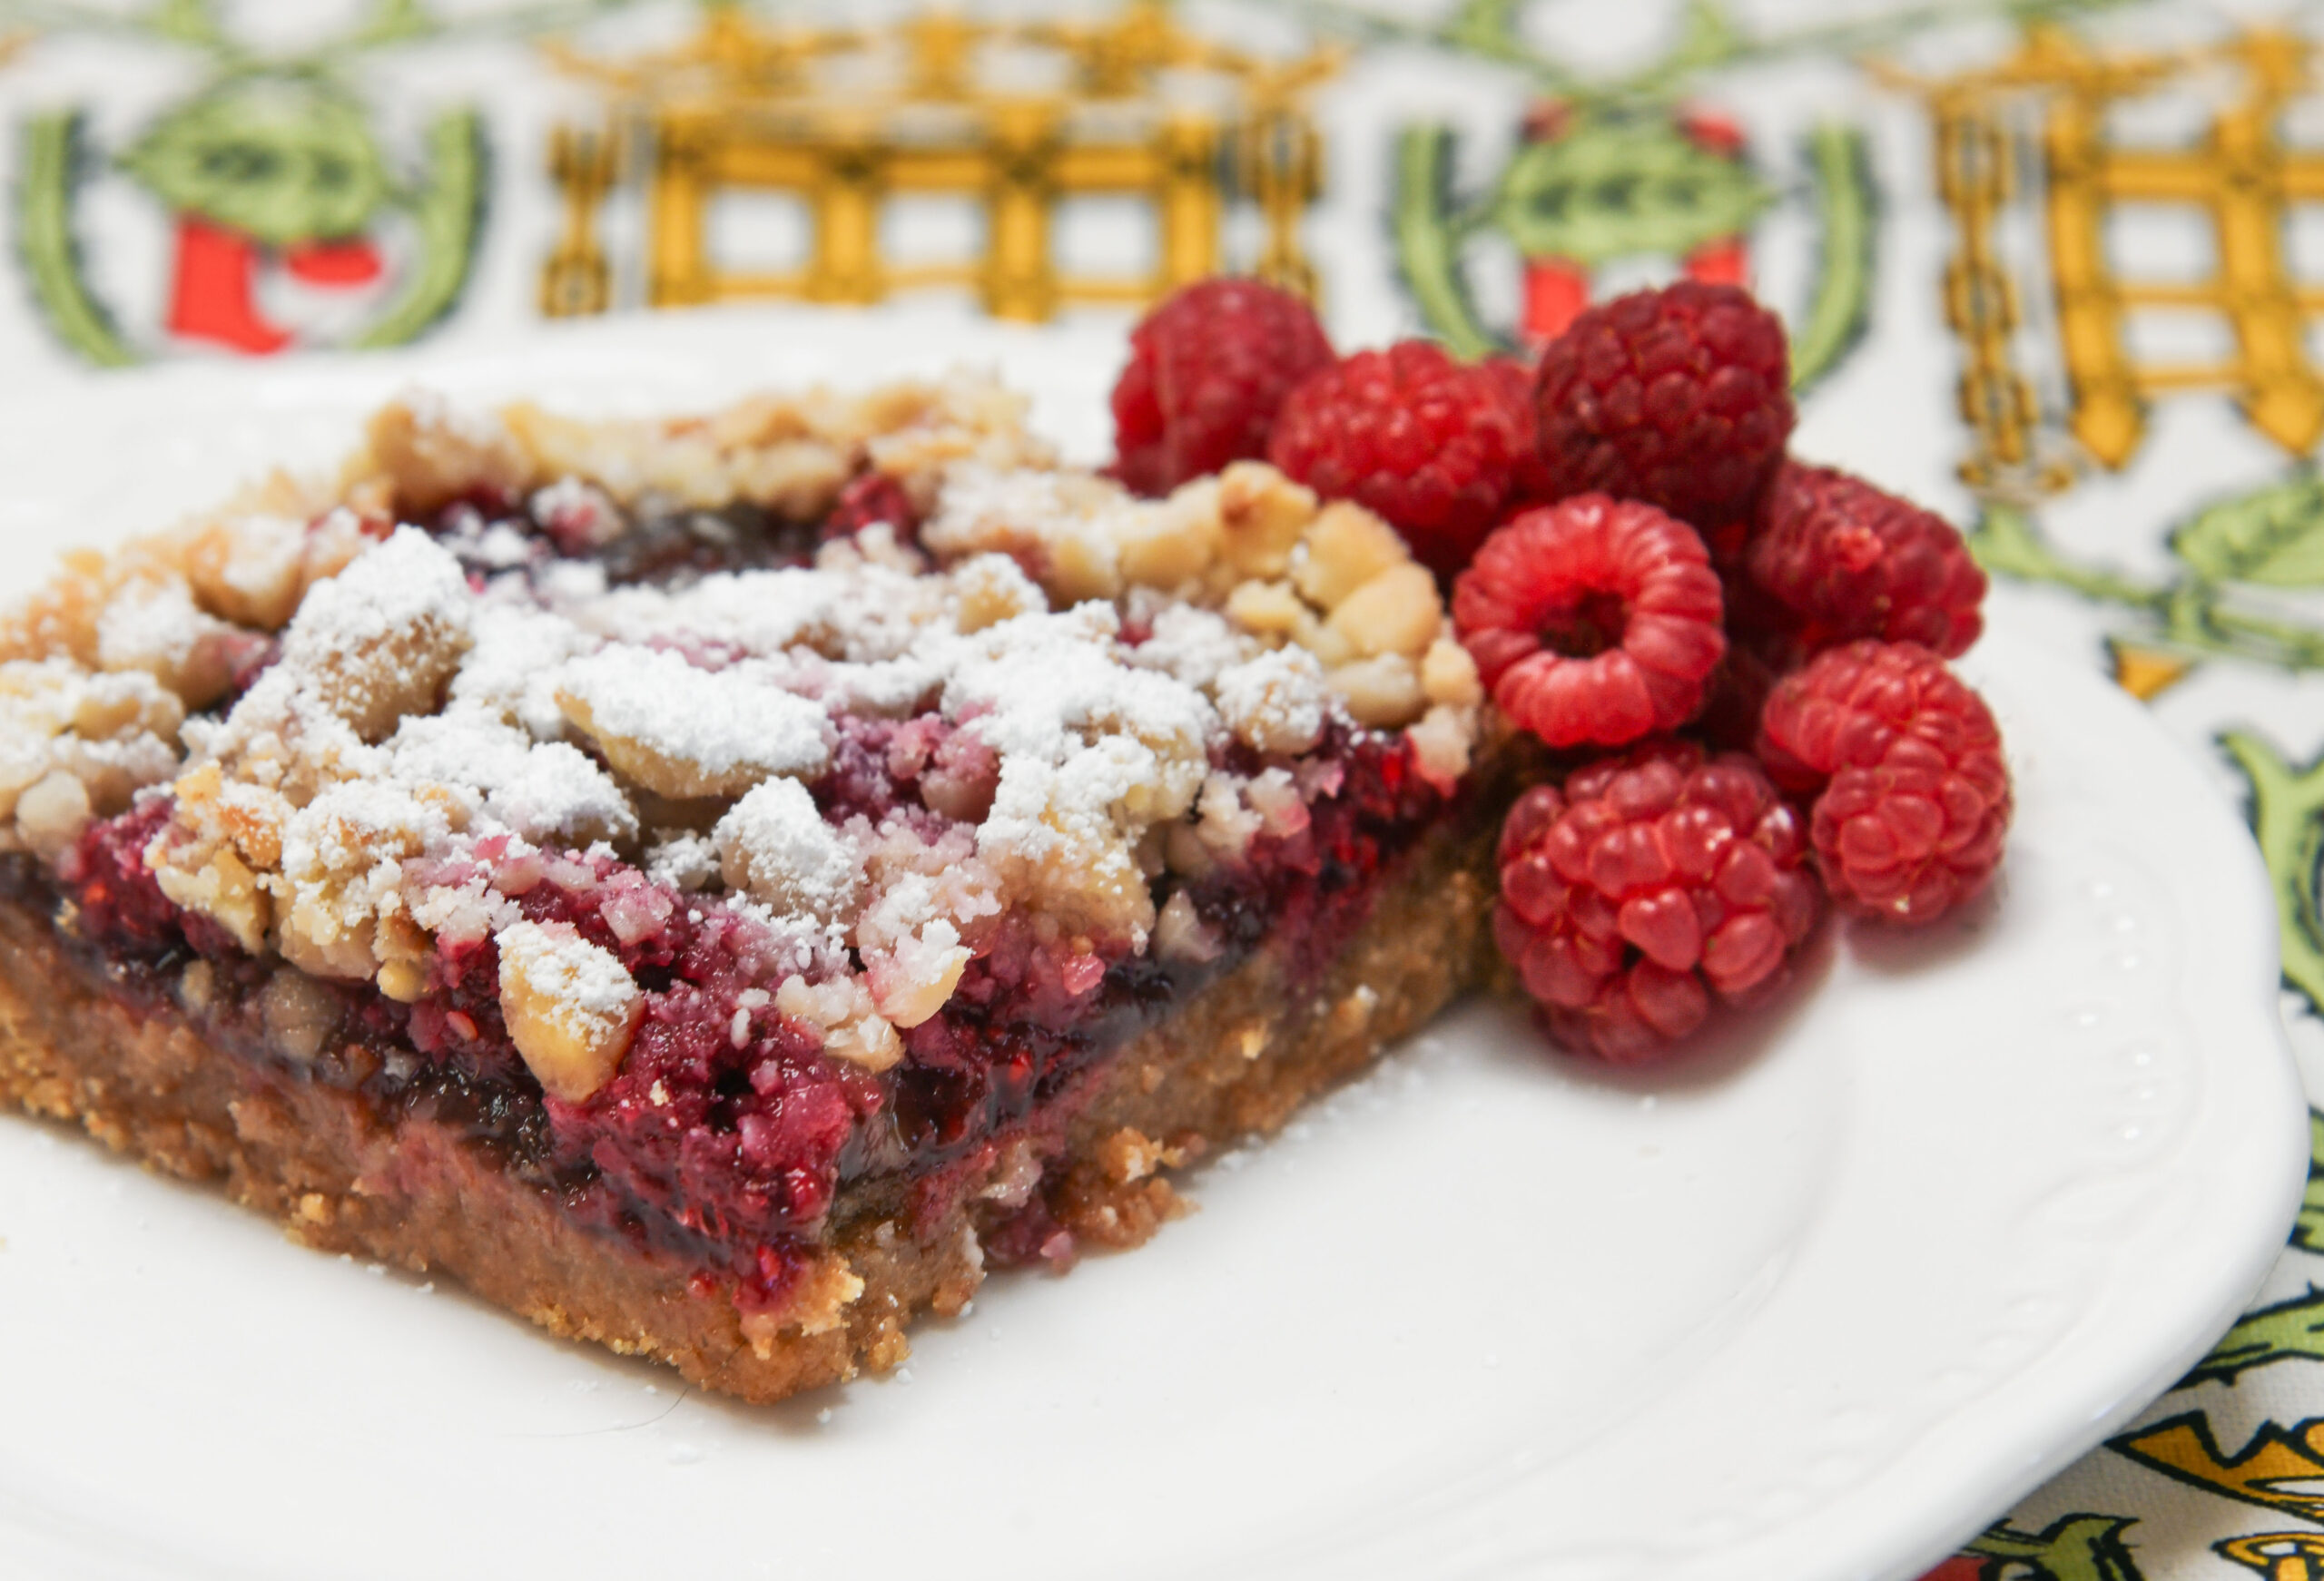
Since that day, I have collected pint upon pint of this sweet, earthy, juicy fruit, eating it on its own or in quick breads and sorbet. Inspired by this abundance of berries, I wrote the following simple recipe, Double Raspberry Bars. Enjoy!

Double Raspberry Bars

You will need an 8-inch x 8-inch baking dish for this recipe.

Makes 9 bars

Ingredients

1 1/3 cup graham cracker crumbs (from 11 to 12 sheets of graham crackers, crushed)

1/3 cup granulated sugar

Pinch salt

5 1/3 tablespoons unsalted butter, melted

1 cup plus 2 tablespoons good-quality raspberry preserves, at room temperature

1 1/3 cup fresh rasberries

3/4 cup blanched almonds, roughly chopped

2 to 3 teaspoons confectioner’s sugar

Directions

Preheat the oven to 350 degrees Fahrenheit.

In a medium bowl, toss together the graham cracker crumbs, sugar and salt. Pour in the butter and stir until combined.

Using an angled spatula, a spoon or your fingers, evenly spread the buttered graham cracker crumbs over the bottom of an 8-inch x 8-inch baking dish, patting them into place.

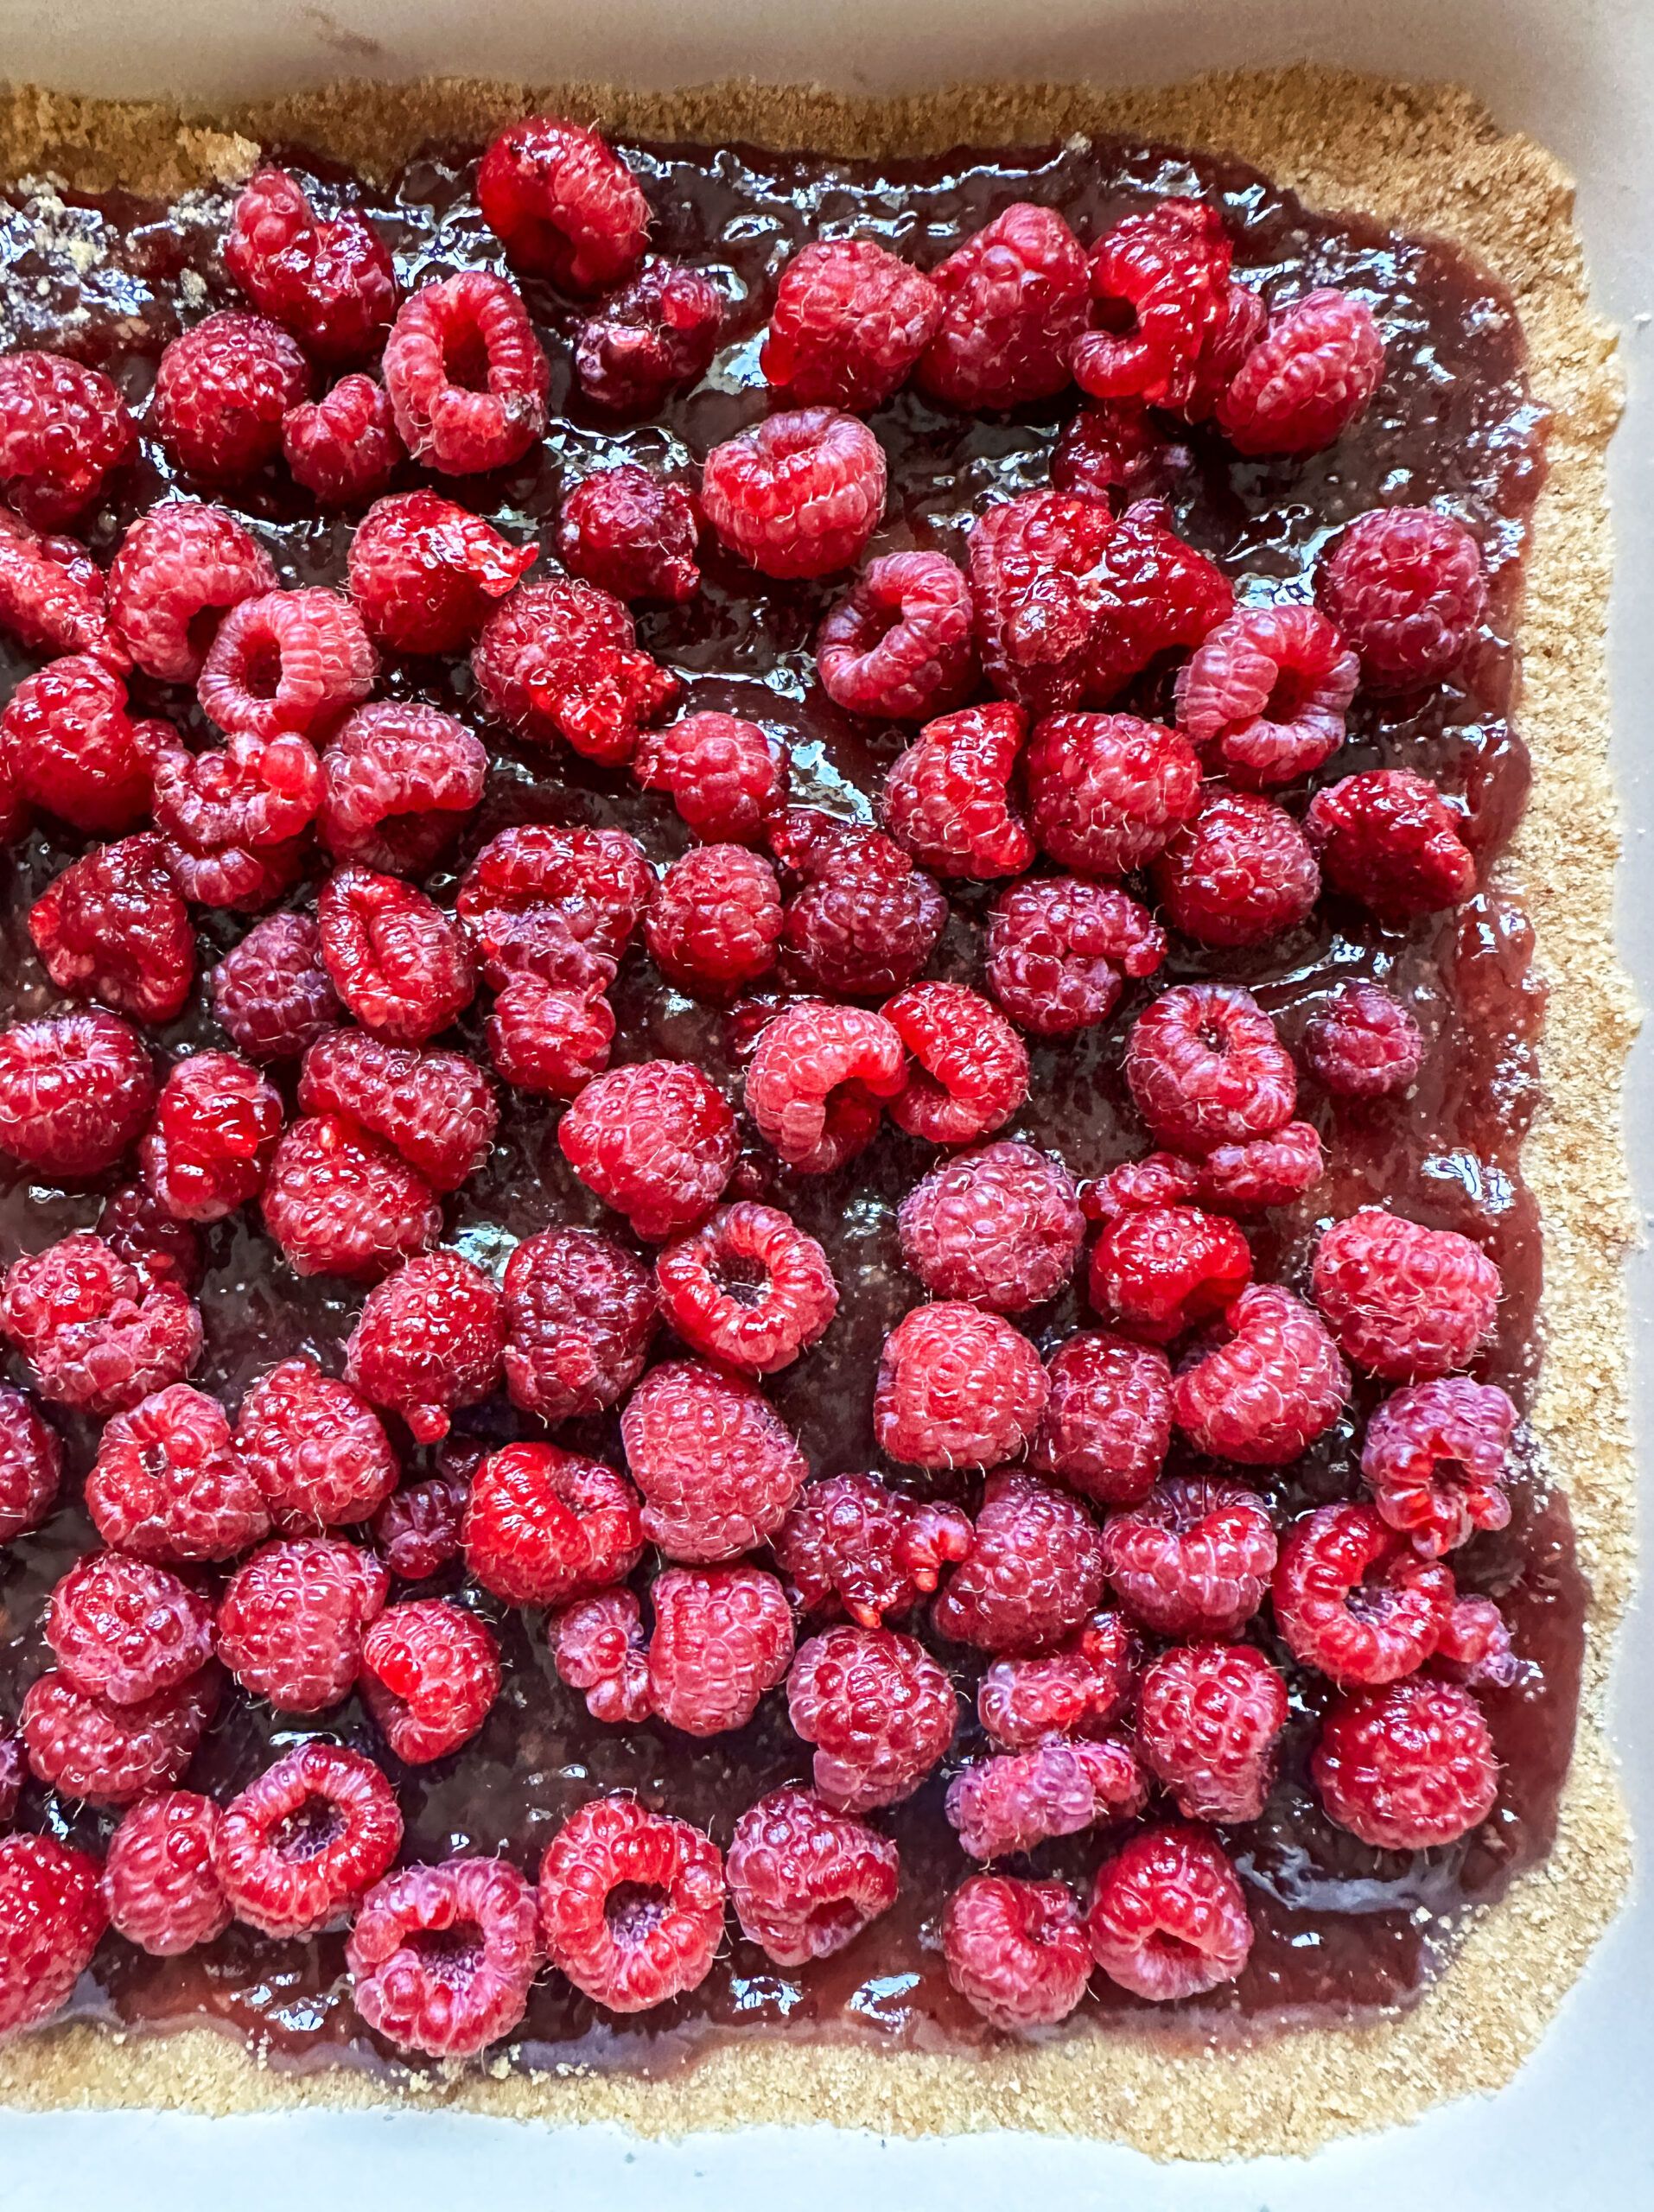
With a knife or angled spatula, spread the raspberry preserves over the graham cracker crust, leaving less than 1/4-inch of the crust without jam. Sprinkle the raspberries over top and then sprinkle the chopped almonds over the raspberries.

Raspberries and raspberry preserves on top of the graham cracker crust

Bake for 10 minutes. If you prefer a lightly browned top, place the baked bars under the oven’s broiler on the highest setting and broil for 30 seconds to 1 minute, until the nuts become a golden brown.

Remove the dish from the oven and place it on a wire rack. Dust the top with 2 to 3 teaspoons of confectioner’s sugar and allow the dish to cool to room temperature.

Using a sharp, slender-bladed knife, slice into 9 bars and serve.

Sliced lemon curd cake on plate and cake stand. Both are on a lemon-decorated tablecloth

Luscious Lemon Curd Cake

Sliced lemon curd cake on plate and cake stand. Both are on a lemon-decorated tablecloth

For such a delicious topping, lemon curd has been cursed with a rather unappetizing name. By definition, curd is the semi-solid created when acid is added to milk. True curds possess a rubbery and sometimes grainy texture. Lemon curd has a smooth, thick and creamy feel and sweetly tart taste. So, how did this British creation end up with such a misleading name?

The curd in “lemon curd”

In its earliest form lemon curd was the result of mixing lemon juice with cream. The watery part of this mixture, the whey, was drained off. What remained was lemon-flavored curds or lemon curds. By the late 1800s modern lemon curd had entered the kitchen. This new version consisted of eggs, lemon juice, sugar and butter and had a velvety texture. Although the ingredients had changed, the name remained the same.

A travel-inspired dessert

Similar to most of my recipes, this cake originated from a trip. Earlier this month I returned to Canterbury, England; high school students and English majors might recognize as the pilgrims’ destination in Geoffrey Chaucer’s The Canterbury Tales. While there, I stopped at Garage Coffee for a late afternoon coffee and sweet. Facing the choice of Victoria Sponge, which I feature in Luscious, Tender, Juicy, and Lemon Curd Cake, which I’ve never made, I went with the latter. Moist, flavorful and sweetly tart, Lemon Curd Cake was everything that I craved in a treat. That was how this recipe came to be.

slice of golden lemon curd cake with buttercream frosting
Slice of lemon curd cake from Garage Coffee, Canterbury, England

Lemon Curd Cake

You can purchase lemon curd in the jam/preserves aisle of most grocery stores or make you own.

Serves 8 to 10

Ingredients:

for the cake:

1 1/2 sticks (3/4 cup) unsalted butter, at room temperature

3/4 cup granulated sugar

3 large eggs

3 tablespoons lemon curd (homemade or store-bought)

Grated zest of 1 lemon

2 cups plus 2 tablespoons all-purpose flour

1 teaspoon baking powder

Pinch salt

for the frosting:

1 1/2 sticks (3/4 cup) unsalted butter, at room temperature

1/2 teaspoon vanilla extract

1/8 teaspoon lemon oil/lemon extract

1 1/2 pounds confectioner’s sugar, sifted

2 to 3 tablespoons lemon curd

Directions:

To make the cake:

Preheat the oven to 350 degrees Fahrenheit. Line the bottom of an 8-inch, round baking pan with parchment paper. Butter and then flour the pan. Set aside.

Using an electric hand or stand mixer, beat the butter and sugar until light and creamy, 1 to 2 minutes.

Scrape down the sides of the bowl with a spatula. Add the eggs, one at a time, to the butter mixture. Beat to incorporate and then scrape down the sides of the bowl after each addition.

Add the vanilla and grated lemon zest. Beat to combine

In a separate bowl whisk together the flour, baking powder and salt.

Add half of the flour mixture and beat the ingredients together until combined, less than 1 minute. Scrape down the sides of the bowl and add the remaining flour. Beat until combined.

Batter spread evenly in the baking pan.

Spread the batter evenly in the prepared baking pan. Bake for 35 to 45 minutes, until the cake is golden on top and separating from the sides of the pan and a toothpick inserted in the center comes out clean.

Allow the cake to cool on a wire rack for 15 minutes. Invert the pan and place the cake on the cooling rack where it will remain until completely cooled.

To make the lemon frosting:

Once the cake has cooled completely, make the frosting. Place the butter, vanilla extract and lemon oil/lemon extract in a large bowl. Using an electric hand or stand mixer, beat the ingredients together until smooth, roughly 2 minutes.

Sift half of the confectioner’s sugar into the butter. Beat the two together until smooth, 1 to 2 minutes. Scrape down the sides of the bowl and sift in the remaining sugar. Beat until smooth, 1 to 2 minutes.

To assemble the cake:
Holding the cake with my left hand, I slice the cake horizontally using a serrated knife.
Slicing the cake horizontally.

Put your cake on a clean, dry work surface. Place a long, serrated knife horizontally against the center of the cake. (See image above). Evenly slice the cake horizontally. Set half of the cake on the center of a cake stand or round platter. Leave the other half on your work surface. This will serve as the top layer of your cake and will be iced after the bottom layer.

The two halves of the cake. The bottom half on the plate is the first to be frosted.

Using either an icing spatula or flat, wide knife, spread a thin layer of frosting over the cut side of bottom half of the cake. (You don’t really need to do a crumb layer, but I find it easier to frost the cake with it there.) You can then slather 2 to 3 tablespoons of frosting over it, followed by 2 to 3 tablespoons of lemon curd.

Place the top half of the cake onto the bottom, making sure that the two layers are even. Spread the remaining frosting over the top and sides of the cake. Slice and serve.

icing the espresso cake

White Chocolate Espresso Cake

icing the espresso cake

A cake made for, and with, coffee

Sometimes you need a quick, comforting cake, one that goes well with any meal and at any time of day. White chocolate espresso cake is that kind of treat. Laced with espresso, it goes well with an afternoon coffee and is, in the literal sense, a delicious coffee cake.

Traditionally, coffee cakes were dense, sweet, yeasted baked goods. Consumed at breakfast or brunch, they often featured cinnamon, fruits and/or nuts. They’re similar to British teacakes but served with coffee. White chocolate espresso cake is not your typical coffee cake, but that doesn’t stop me from nibbling on a square at breakfast.

Coffee as a flavoring

Coffee has long been used as flavoring in cakes, ice cream and other desserts. Often it appears alongside chocolate in these confections. The two partner so well together that their pairing has its own name, “mocha.”

Usually, recipes call for “coffee” or “strong coffee.” Because I like the boldness of espresso and I take any excuse to fire up my espresso maker, I make this cake with a single shot (about two tablespoons) of espresso. If you don’t have an espresso maker or moka pot, brew a cup of very strong coffee instead.

White Chocolate Espresso Cake

Makes approximately 26 2-inch squares

Ingredients

for the cake:

1 3/4 cup all-purpose flour

2 teaspoons baking powder

1/8 teaspoon salt

1 tablespoon cocoa powder

2 sticks unsalted butter, at room temperature

1 cup granulated sugar

4 large eggs, at room temperature

1/2 teaspoon vanilla extract

1 shot (roughly 2 tablespoons) brewed espresso, at room temperature

for the frosting:

10 ounces white chocolate chips

2 tablespoons unsalted butter

2 tablespoons milk

1 1/4 cup confectioner’s sugar

Directions:

Preheat the oven to 350 degrees Fahrenheit. Grease a 9″ x 13″ baking pan.

Sift the flour, baking powder, cocoa and salt together into a large bowl. Set aside.

Using an electric hand or stand mixer, beat the butter until light and creamy, 1 to 2 minutes. With a spatula scrape down the sides of the bowl. Add the sugar and beat until blended, about 1 minute.

Scrape down the sides of the bowl. Add the eggs, one at a time, beating until each is incorporated.

After scraping down the sides of the bowl, beat in the vanilla and espresso. Add the flour mixture and beat until well combined.

Spoon the batter into the prepared pan, making sure that it’s evenly distributed. Bake for 35 to 40 minutes, until a toothpick inserted in the center comes out clean. Place the baking pan on a wire rack and cool completely before slicing and frosting.

Once the cake has cooled completely, slice it into 24 small or 12 large squares. You’re now ready to make the icing and frost the cake.

Using either a double boiler or microwave, heat the butter, white chocolate and milk, stirring periodically until the chocolate has melted completely and the ingredients are blended. Add the confectioner’s sugar and stir together until a smooth icing has formed.

Using an icing knife or small spatula, spread even amounts of icing over each square of espresso cake. Serve with coffee or another beverage.

pavlova with berries and custard

Pavlova with Berries and Crème Anglaise

pavlova with custard and berries

I have this thing about pavlova. I love it! This meringue-based dessert possesses a crisp exterior, slightly chewy but soft interior, and an ethereal lightness and sweetness that never disappoints. When topped with macerated fruit and whipped cream, that crisp meringue transforms into a luscious and juicy treat.

During a stay on New Zealand’s South Island I tried countless takes on this dessert. Pavlovas with fresh mango, passion fruit, or kiwi tumbled over top. Pavlovas with cooked or macerated berries or cherries cascading down the sides. Pavlovas hollowed out and filled with almond custard or vanilla créme anglaise. The variations seemed never ending.

New Zealand or Australia? The debate goes on.

For almost a century debate has raged over whether New Zealand or Australia invented the pavlova or pav, as it’s often called. Australians claim that Perth chef Herbert Sachse made the first at the Esplanade Hotel in 1935. New Zealanders point to its inclusion in a 1927, NZ cookbook. The cookbook came out a year after the dessert’s namesake, Russian ballerina Anna Pavlova, visited New Zealand. Even so, historians continue to wrangle over which country holds claim. Because I encountered far more pavlovas in New Zealand than I did in Eastern Australia, I may have to side with the Kiwis on this one.

With a nod to the various versions of pavlovas that I’ve tried and baked, here’s a slightly decadent Pavlova with Berries and Créme Anglaise. (A more traditional, quicker-to-make pavlova is featured in my latest cookbook “Luscious, Tender, Juicy.”)

Bowl of pavlova with berries and créme anglaise

Pavlova with Berries and Crème Anglaise

Note that the addition of lemon juice helps the meringue to achieve its chewiness. So, too, does low, slow baking.

Serves 8

Ingredients

for the pavlova:

4 egg whites

3/4 cup granulated sugar

1 teaspoon vanilla extract

1/2 teaspoon lemon juice

Fresh berries, for topping

for the creme anglaise:

2 large egg yolks

1/4 cup granulated sugar

1 teaspoon almond extract

3/4 cup plus 1 tablespoon heavy cream

Pint of fresh berries, washed and dried

Confectioner’s sugar, optional, for serving

Directions

To make the pavlova:

Preheat the oven to 350 degrees Fahrenheit. Line a baking sheet with parchment paper and set aside.

Place the egg whites in a large bowl. Using an electric mixer, beat the egg whites until soft peaks form. See the photo directly below for an example of soft peaks.

Pillowy soft peaks

Add the vanilla extract and lemon juice and beat to incorporate. Add the sugar a spoonful at a time, continuing to beat the egg whites until stiff, glossy peaks form. See the photo below for an example of stiff, glossy peaks.

Beat the egg whites a bit longer and you get stiff, glossy peaks.

Taking a spatula, spoon the meringue onto the prepared baking sheet and shape it into an even circle, leaving a well in the center of the circle for the créme anglaise and fruit. If, like me, your circles tend to come out lopsided, feel free to recreate my small cheat and mound the meringue onto a parchment round that you’ve placed on top of the original parchment sheet. Perfect circles every time!

Pavlova with well in the center, ready to be baked.

Place the baking sheet in the oven, lower the temperature to 225 degrees Fahrenheit and bake for 1 hour. After 1 hour turn off the oven and allow the meringue to cool for at least 1 hour or overnight.

To make the créme anglaise:

Use an electric hand mixer or whisk to beat the egg yolks and sugar together for 2 to 3 minutes, until the mixture has thickened and turned pale yellow.

Add the vanilla extract and whisk to combine.

In a small saucepan bring the cream to a boil. Remove the pan from the heat. Add a few drops of hot cream to the egg mixture, whisk to combine and then repeat until the egg mixture begins to warm. Slowly beat in the remaining cream.

Pour the custard into a heavy-bottomed saucepan. Stirring constantly with a spatula or wooden spoon, cook the custard over medium heat for 6 to 10 minutes. When finished, the créme anglaise will coat the back of a spoon and read 165 degrees Fahrenheit on a candy/deep-fry or digital thermometer. Remove the pan from the heat and set aside to cool.

Once the créme anglaise can coat the spatula, it’s finished cooking.

To assemble the pavlova, pour the cooled créme anglaise into the well in the center of the pavlova. Top it with the berries and optional confectioner’s sugar. Slice and serve.

caramelizing sugar with a torch

Caramelized Banana Crème Brulée

Crème brulée. It sounds so fancy, so complicated. Yet, its name means something so simple, “burned cream,” and sums up this custard perfectly. Crème brulée consists of cream, egg yolks and sugar. Dusted with a layer of sugar, the dessert is placed under a broiler or butane kitchen torch. Once the sugar caramelizes and forms a crisp, shiny, golden glaze, the dish transforms from boring, old custard into crunchy, velvety crème brulée.

Crème brulée, then and now

Historians differ on the exact origins of crème brulée. Some attribute it to 17th century France while others point to 15th century England. In the 19th century it became a favorite dessert at Trinity College, Cambridge, England. From there its popularity spread. It eventually fell out of fashion until the 1980s when upscale restaurants began serving it as a decadent final course.

This dessert has not lost its hold on diners’ palates. Stop by an ice cream or gelato shop or your local market’s ice cream case and you’ll likely see crème brulée as a featured flavor. The same holds true at chocolate and doughnut shops. You’ll likewise still find this dessert offered in countless restaurants.

A fruit-filled twist on this classic dessert

Although traditional crème brulée tastes divine, I sometimes crave a bit more complexity from this custard. That’s when I turn to one of my favorite fruits, the banana. I add a smidgen of banana extract to the custard. Then I spread a layer of thinly sliced banana over top and dust it with white or brown sugar. After that I fire up that kitchen torch and – voila!- I’ve made a heavenly caramelized banana crème brulée.

caramelizing sugar with a torch
Caramelizing the sugar and bananas with a butane torch.

Caramelized Banana Crème Brulée

Makes 2 to 4

Ingredients

4 large egg yolks

1/2 cup granulated sugar

1 3/4 cup heavy cream

1 teaspoon banana extract

2 ripe bananas, thinly sliced

2 tablespoons white or brown sugar, plus more as needed

Directions

Using an electric mixer, slowly beat the sugar into the egg yolks. Beat for 2 to 3 minutes, until the mixture has thickened, has become pale yellow in color and forms a slowly dissolving ribbon when the beaters are lifted. (See image below) Do not beat beyond this point.

a ribbon of custard dripping from the beater
Ribbon of egg-sugar mixture forming on the top before dissolving back into the mixture.

In a small saucepan bring the cream to a boil. Remove the pan from the heat. Add a few drops of hot cream to the egg mixture, whisk to combine and then repeat until the egg mixture begins to warm. Slowly beat in the remaining cream.

Pour the custard into a heavy-bottomed saucepan. Stirring constantly with a spatula or wooden spoon, cook the custard over medium heat for 6 to 10 minutes. When finished, the custard will coat the back of the spoon and read 165 degrees Fahrenheit on a candy/deep-fry or digital thermometer. Don’t cook it beyond this temperature or the custard will start to curdle.

Remove the pan from the heat.

After placing a fine mesh strainer or chinois over a pitcher or bowl, pour the custard through the strainer. Once the custard has been strained, place even amounts of custard in 2 to 4 oven-safe ramekins. Smooth out the tops and cover each with plastic wrap. Refrigerate for a minimum of three hours.

When you’re ready to serve them, remove the crème brulées from the refrigerator and discard the plastic wrap. Cover the top of each with a layer of thinly sliced banana. Sprinkle 1 to 2 teaspoons brown or white sugar over the bananas.

Holding a kitchen torch 2-inches above the crème brulée, slowly heat the sugar until it melts and begins to darken. Repeat with the remaining crème brulée(s). Serve immediately.

chocolate raspberry cake

Chocolate Raspberry Cake

With its luscious berry frosting and moist, decadent chocolate interior, chocolate raspberry cake is a delightful dessert for any occasion. Yet, thanks to its rosy pink and red appearance, it is especially fitting for Valentine’s Day. Employ a little imagination and those fresh raspberries topping the cake begin to resemble tiny, beaded hearts. What could beat this colorful sweet?

Along with its festive appearance, chocolate raspberry cake offers a delightful marriage of flavors. Bold, bittersweet ground cocoa comes together with sweet, tangy raspberries to create a balanced treat.

Slice of luscious chocolate raspberry cake

Using oil for a velvety texture

In addition to that pleasing partnership of flavors, chocolate raspberry cake possesses a velvet-like feel not only in its icing but also in its cake. This soft texture results from the use of oil in the batter. While butter will add flavor to baked goods, oil bumps up the moisture content and produces a more tender cake.

Cooling the moist cake on a wire rack

Want more baking tips?

If you’re looking for more baking tips or a fun way to celebrate Valentine’s Day, join me on Sunday February 13 at 4 PM. I’ll be teaching a virtual cooking class through Main Point Books and demonstrating how to make an easy tarte tatin. Advance registration is required.

chocolate raspberry cake

Chocolate Raspberry Cake

Serves 8 to 10

Ingredients

for the cake:

1 cup all-purpose flour

3/4 cup unsweetened cocoa powder

1 teaspoon baking soda

1/2 teaspoon baking powder

1/2 teaspoon salt

1 1/3 cups granulated sugar

2/3 cup milk

1/3 cup vegetable oil

2 large eggs

1 teaspoon vanilla extract

1/4 cup hot water

for the icing:

9 tablespoons unsalted butter, at room temperature

3/4 pound confectioner’s sugar, sifted

1 teaspoon vanilla

2 tablespoons milk, divided, at room temperature

1/3 cup good quality raspberry preserves, at room temperature

Fresh raspberries, washed and dried, for decorating

Directions

Preheat the oven to 350 degrees Fahrenheit. Line the bottom of an 8-inch, round cake pan with parchment paper. Grease and lightly flour the bottom and sides of the pan. Set aside.

Sift the flour, cocoa, baking soda, baking powder, salt and sugar into a large mixing bowl.

In a separate bowl whisk together the milk, oil, eggs and vanilla. Pour the liquids into the dry ingredients.

Using an electric hand or stand mixer, mix the ingredients until incorporated. Scrape down the sides of the bowl and add the hot water. Beat the ingredients together until you have a smooth batter.

Pour the batter into the prepared pan and bake for 45 minutes or until a toothpick inserted in the center comes out clean. Place the cake on a wire rack to cool for 15 minutes. After 15 minutes remove the cake from the pan and allow it to cool completely before icing.

To make the frosting:

Beat the butter until creamy, about 1 to 2 minutes. Scrape down the sides of the bowl and add half of the confectioner’s sugar and beat until smooth. Add the vanilla, 1 tablespoon milk and remaining confectioner’s sugar and beat until creamy and smooth.

Raspberry frosting ready to be spread

Add the raspberry preserves and beat until you have a fairly thick but spreadable frosting. If the frosting seems clumpy or too thick to spread, add a half tablespoon of milk and beat again. You can add up to 2 tablespoons of milk without the frosting becoming too loose.

Using an icing spatula or knife, spread the frosting evenly over the cake. Mound a layer of fresh raspberries in the center of the cake. Serve with hot coffee or tea.

Vegetable Puff Pie

Blustery, East Coast winters make me crave warm, saucy and filling vegetable puff pies. My take on the traditional dinner or pot pie features an interchangeable combination of vegetables. Potatoes, parsnips, carrots, mushrooms, peas, pearl onions, garlic, and corn have all found their way into the pie’s filling. Blanketed with puff pastry, the vegetable pie is baked until golden brown on top and moist and tender inside.

Ingredients for Vegetable Puff Pie

A brief history of dinner pies

Indigenous to Northern Europe, dinner pies have been a popular since at least the 14th century. It’s no wonder. To make this easy dish, I begin with a gravy that I’ve made using a roux. I simmer the vegetables in this light gravy for 3 to 5 minutes, until warmed. I then spoon the ingredients into a pie pan or casserole, top them with puff pastry and the pan into into the oven. In less than an hour, I have a hearty dinner.

The term “pie” supposedly earned its name from its range of diverse ingredients. The late British historian Alan Davidson and others have suggested that “pie” came from “magpie.” Just as this bird collects various knickknacks to stuff into its nest, cooks gather a wide assortment of foods and sauces to load into their crusts.

Roux-based gravy for the vegetable pie

When making the gravy for my vegetable pie, I first prepare a roux. Although it sounds fancy, roux is merely equal parts fat–often butter–and flour cooked together. Roux is used to thicken and flavor sauces, soups and gravies. Because I cook the butter and flour mixture for a short period of time, 3 to 5 minutes, I make something known as a blond or light roux. Lighter in color and flavor, it complements as the vegetables in the following vegetable puff pie.

Vegetable Puff Pie

If you can’t find pearl onions, substitute 1/2 cup diced yellow onion.

Makes 6 servings

Ingredients:

4 tablespoons unsalted butter

1/4 cup all-purpose flour

2 1/2 cups vegetable or chicken stock

1 pound Russet potatoes, peeled and cut into bite-sized chunks

8 ounces cremini mushrooms, cleaned, trimmed and chopped

1 small parsnip, peeled and chopped

1 carrot, peeled and chopped

1/2 cup frozen or fresh peas

1/2 cup pearl onions, halved

1/2 teaspoon salt

1/2 teaspoon dried parsley

1/4 teaspoon granulated garlic (or garlic powder)

1/4 teaspoon ground black pepper

1/4 teaspoon dried marjoram

1 sheet puff pastry, defrosted

Directions:

Preheat the oven to 350 degrees Fahrenheit. Lightly butter the bottom and sides of a 1 1/2-quart casserole or deep-dish pie pan. Defrost 1 sheet of frozen puff pastry.

Melt the butter in a large saucepan over medium heat. Once the butter has begun to bubble, whisk in the flour. Stirring often, cook the ingredients for 3 to 5 minutes. When finished, the roux will have thickened and turned a dark gold in color.

Roux finished and ready for the stock to be added.

Slowly add the stock, whisking continually to remove any lumps. Once the stock is fully incorporated, add the vegetables and seasonings and stir to combine. Allow the ingredients to simmer together for 5 to 10 minutes, until the vegetables have softened slightly.

Spoon the vegetable pie filling into the prepared pan. Cover the top with puff pastry.

Placing the puff pastry over the vegetable filling.

Using a sharp knife, trim off and discard any excess pastry.

Bake for 25 to 35 minutes or until the pastry has puffed up and turned golden brown. Remove the pan from the oven and serve immediately.

smoked salmon on cucumber rounds from Luscious Tender Juicy

Succulent Smoked Salmon Cucumber Rounds from “Luscious, Tender, Juicy”

smoked salmon on cucumber rounds from Luscious Tender Juicy


My latest cookbook Luscious, Tender, Juicy” (Countryman Press, 2021) began with one word, one texture, one mouthfeel — moist. My goal was to change the perception of moist from cringeworthy expression to valued culinary term. Think about it. If the food that you eat isn’t crisp, crunchy, gooey, or runny, chances are that it is one thing and one thing only. It is moist. The luscious mashed potatoes served at holidays. The tender fried chicken eaten at a summer picnic. The melt-in-your-mouth tiramisu topping off an evening out. They all possess that same luxurious characteristic that comes from including the proper amount of moisture in a dish.

How to make food luscious, tender, juicy

How do you make food luscious, tender, juicy or, to use that dreaded word, moist? You do it through cooking techniques, temperatures, and times, and moisture-rich ingredients. Because “Luscious, Tender, Juicy” discusses all of this and more, I won’t delve into the tips and tricks here. Instead, I’ll offer a recipe that illustrates how easily you can attain that lovely texture.

Succulent Smoked Salmon Cucumber Rounds bring together velvety smoked salmon, cream cheese, sour cream, cucumbers, and lemon. Together these ingredients create a savory, silken appetizer that offers complex flavors and pleasing texture with each bite. I recently featured smoked salmon cucumber rounds in an easy holiday appetizers class and the results were spectacular! You can see one of the beautiful student creations below.

Succulent smoked salmon cucumber rounds made by Michael Riley-Hill.

Succulent Smoked Salmon Cucumber Rounds

From Luscious, Tender, Juicy” (Countryman Press, 2021)

Makes approximately 36 rounds

Ingredients

2 large, un-waxed cucumbers, washed and dried

8 ounces smoked salmon, divided

1 (8-ounce) container light cream cheese, softened

4 ounces light sour cream

1 small shallot, diced

Grated zest of 1 lemon

Juice of 1/2 lemon, seeds and pulp removed

1/4 teaspoon sea salt

¼ teaspoon white ground pepper

Sprigs of fresh dill, for serving

Directions

Cut off ends of cucumber and slice into 1/2-inch rounds. Using a spoon or your knife, gently remove most of the seeds from each slice, leaving about a third of the center intact. Set the slices aside.

Place half (4-ounces) of the smoked salmon on a cutting board. Using a sharp knife, dice the salmon and place the small pieces into a bowl.

With the same knife, cut the remaining portion of smoked salmon into 1-inch strips. Place them on a platter or other clean, flat surface.

In a medium bowl, using either a heavy spoon or a hand mixer, beat together the cream cheese and sour cream until all lumps are gone. Add the diced salmon, shallots, lemon zest and juice, salt and pepper, stirring until well combined.  

Using a spoon, place equal amounts of filling in the center of each cucumber round. Top the filling with a slice of smoked salmon and sprig of dill. Refrigerate until ready to serve.

cranberry quick bread

Quick Cranberry-Orange-Pecan Bread

cranberry quick bread

In a season when we’re all bustling about, struggling to keep up with work, home, and holiday demands, there is no better bread to bake than a soft, sweet quick bread. The name says it all. Because you don’t have to knead the dough or wait for it to rise, a quick bread takes very little effort or time to make.

The ease of this bread has everything to do with leavening. In a quick bread, baking powder or baking soda acts as a leavening agent. When either one comes into contact with moisture, it causes the ingredients with which it’s been combined—flour, salt, sugar, butter, eggs—to rise. Unlike with yeast breads, such as whole wheat or Frisian sugar bread, you don’t have to wait for this process to kick in. It begins immediately.

cranberry quick bread

Because I love tart, vivid cranberries and this is the height of cranberry season, I couldn’t resist baking a cranberry-studded quick bread. If you don’t have pecans on hand, you can substitute chopped walnuts in the following recipe.

Cranberry-Orange-Pecan Quick Bread

Makes 1 8-inch-long loaf

Ingredients

1 1/2 cups all-purpose flour

1 teaspoon baking powder

1 teaspoon salt

5 tablespoons unsalted butter, melted

1 cup granulated sugar

2 large eggs

Juice and grated zest of 1/2 orange

1/2 teaspoon vanilla extract

1/2 cup milk, at room temperature

1 cup plus two tablespoons fresh cranberries

1/2 cup pecans, chopped

Directions

Preheat the oven to 350 degrees Fahrenheit. Grease an 8-inch loaf pan and set aside.

In a large bowl whisk together the flour, baking powder and salt. Set aside.

In a different bowl and using an electric mixer, beat together the butter and sugar until blended. Add the eggs, orange juice and zest and extract and beat until well combined, 1 to 2 minutes.

After scraping down the sides of the bowl, add half of the flour. Mix until incorporated, about 30 seconds. Scrape down the sides of the bowl, add half of the milk and mix the ingredients together. Repeat theses steps for the remaining flour and milk. When finished, you will have a fairly thick batter.

Stir in the cranberries and pecans.

Spoon the batter into the prepared pan. Bake for 55 to 60 minutes, until a toothpick inserted in the center of the loaf comes out clean. Cool for 10 minutes before removing the bread from the pan. Cool completely before cutting and serving.

wild rice pilaf with swordfish

Wild Rice and Mushroom Pilaf

wild rice pilaf with swordfish

When the nights grow colder and daylight begins to wane, I start to crave heartier dishes. One of my favorites is Wild Rice and Mushroom Pilaf. Warm and earthy, this pilaf tastes lovely on its own or when paired with a moist, firm, meaty protein such as swordfish.

A technique and a dish

The name of the Middle Eastern cooking technique and the dish it creates, pilaf consists of rice cooked in a meat or vegetable stock. You might think, “Big deal. I cook my rice in stock all the time. It gives it more flavor.” Fair enough. However, it’s not only in what the rice cooks but also how it’s prepared that makes this dish special.

To make pilaf, you first thoroughly rinse and/or soak the rice in cold water. This initial step removes the starch from the rice’s surface. Robbed of exterior starch, each grain remains separate from the others; the rice won’t clump together in your pan.

To remove the surface starch, rinse the rice in a strainer with a bowl beneath it and then leave it there to soak.

Boiling and then steaming rice

Once you’ve washed the rice, tumble it into a saucepan with a heavy, fitted lid and pour in the stock. Bring the ingredients to a boil over medium-high heat. Once you see the bubbling liquid beginning to reduce, cover the pan with the lid and reduce the heat to low.

At this point you can walk away from the stove, leaving the rice to cook for anywhere from 35 to 45 minutes. Once the rice has absorbed all of the stock, you remove the pan from the heat and allow the rice to steam in the covered pot for a minimum of 15 minutes.

Note that, traditionally, cooks will add such ingredients as meat, nuts, legumes or vegetables to the stock and cook them alongside the rice. In the case of Wild Rice and Mushroom Pilaf, I want the mushrooms to remain firm and the parsley vividly green so I prepare them separately and put them in the dish right before serving.

Wild Rice and Mushroom Pilaf makes a delicious and filling side dish.

Wild Rice and Mushroom Pilaf

Although this pilaf goes well with a range of proteins, I often pair it with pan-seared swordfish steaks. Steps for cooking the optional swordfish are included in this recipe.

Serves 2 to 4

Ingredients

for the pilaf:

3 cups chicken stock

2 tablespoons unsalted butter, divided

1 cup wild rice, rinsed and soaked for 10 minutes and then drained

1 tablespoon olive oil

6 ounces cremini mushrooms, cleaned and chopped

1 garlic clove, minced

1 teaspoon dried thyme

1/2 teaspoon salt

Ground black pepper, to taste

Handful of fresh flat-leaf parsley, stems removed, washed and chopped

for the optional swordfish steaks:

1 tablespoon olive oil

2 to 4 (4- to 6-ounce) swordfish steaks

Salt, to taste

Ground black pepper, to taste

1 tablespoon lemon juice

Handful of sliced Kalamata olives and capers, optional, for serving

Directions

Place the stock, 1 tablespoon butter and the rice in a medium saucepan with a firm fitting lid. Bring the ingredients to a boil over medium-high heat. Once you see the liquid begin to reduce, somewhere between 5 and 10 minutes, turn the heat down to low and cover the pan with the lid. Allow the rice to cook for 35 to 45 minutes or until all of the liquid has been absorbed and the rice has a slightly chewy texture. Remove the pan from the heat and, leaving the lid on the pan, allow the rice to steam for at least 15 minutes.

Sautéed mushrooms with garlic and thyme

While the rice is cooking, heat the remaining butter and olive oil in a small frying pan over medium heat. Once the butter has melted, add the mushrooms and minced garlic. Sauté until the mushrooms have released their liquid and are slightly brown, 5 to 7 minutes. Stir in the dried thyme, salt and ground black pepper. Remove the pan from the heat and set aside.

Directions for the optional swordfish steaks

If you’re using this as a side for swordfish, 5 to 10 minutes before the rice has finished steaming you will cook the fish. Begin by heating 1 tablespoon olive oil in a frying pan over medium-high heat. Season the swordfish steaks with salt, black pepper and a splash of lemon juice. Place the fish in the pan and cook on one side until golden in color, 4 to 6 minutes. Turn the steaks over and allow them to cook for an additional 4 minutes or until a digital probe thermometer inserted into the center of each steak reads 135 degrees Fahrenheit. Remove the pan from the heat, cover the fish, and move on to the next step for the rice.

Once the rice has finished cooking, fluff it with a fork and then stir in the mushroom mixture. Add the chopped parsley and toss together with the fork.

Place equal amounts of rice pilaf in the center of four dinner plates. If you’ve made the swordfish, rest the swordfish on top of the rice. Place optional Kalamata olives and capers on each swordfish steak. Serve hot.